Tuesday, 30 April 2019

Red Balloon Birthday Card

Hello my crafty friends

I had fun making this card - I just pulled out a few items and played and this is what I came up with. These Waffle Flower kid stamps just make me happy. I coloured this little gal with Chameleon Color Tone markers.


Using a Versamark ink pad, I stamped a few stars around the greeting on the red balloon for a tone on tone look.


Here is a picture of the inside. Once again I coloured the child image with Chameleon Color Tone markers. I waited a long time to purchase the Stampin' Up Balloon punch, but now that I finally have it I am sure getting a lot of use out of it!

I think just the inside would make a cute (and easy!) Birthday Card for our grandkids to bring to Birthday Parties so I will have to remember to make up a few of them.


Supplies:
Blueprints #26 - MFT Stamps
Patterned paper - Echo Park
Kid stamps - Waffle Flower
Chameleon Color Tone markers
Sakura white gel pen
Red, green and white card stocks
1006 Nature Edges - Karen Burniston
Balloon punch - Stampin' Up
Birthday - MFT Stamps
Fishtail banner die - MFT Stamps
Inside words - Papertrey Ink
Rounded rectangle die - Hero Arts

Thanks for stopping by today

Sunday, 28 April 2019

Your Next Stamp Farewell Blog Post - Ahoy!

Hello my crafty friends

I have been a Guest Designer this month at Your Next Stamp, but the month is drawing to a close and sadly this is my 'Farewell' post on the YNS Blog. I had  picked up this clearance patterned paper, so that was my inspiration for today's card. I chose to make a 4 x 6" card instead of an A2, and used the fun 'Ahoy' Journal Card from the paper stack.

I have had the YNS Porthole and Anchor die set for awhile, so I pulled it out as it was perfect to use with the theme. The porthole also is perfect to use for a shaker element! I have linked all the YNS products in the Supply List at the end of my post.


The fun dog and cat are from the new Photo Booth Thumbs Up. I coloured them with Chameleon Color Tone markers, cut the image into a circle and continued with my shaker assembly.


I didn't have any card stock that matched perfectly, so I flipped through the paper stack and found a glossy printed sheet with a large border design. The centre of the sheet didn't have any printing so that is what I used to die cut an Anchor and Porthole from. I also cut two more Anchors from cream card stock and adhered the three together with the navy one on top. This gave me a nice sturdy embellishment, which I tied Bakers Twine onto then adhered it to the card.

The patterned paper is glossy and the designs are clear embossed so it was hard to take the photos with all the glare!


I stamped the words from the Sea Creature Sentiments on a strip of cream card stock and adhered it over the AHOY with foam tape.

Here is a peek at the inside ...


Both the Happy Birthday and greeting are from the All Aboard Bunch of Happiness set. Even though it's a Spring stamp set - the words are generic and can be used all through the year!


I have really enjoyed playing along with the Your Next Stamp team this month, and I'll continue to participate in their Fun Friday Challenges. I hope you will check out the Your Next Stamp Blog!

Supples:
Black Olive Ink - Your Next Stamp
Photo Booth Thumbs Up, stamps - Your Next Stamp
Photo Booth Thumbs Up, dies - Your Next Stamp
Porthole and Anchor die set - Your Next Stamp
Stone Grey Ink  - Your Next Stamp 
Sea Creature Sentiments  - Your Next Stamp
All Aboard Bunch of Happiness (words inside)  - Your Next Stamp
Stitched Fishtail Banners  - Your Next Stamp

MISTI
Patterned paper and Cut-Apart - DCWV
Cream card stock
Chameleon Color Tone Markers
Circle dies - Hero Arts
Sakura black glaze pen
Stitched Rectangle dies - Honey Bee
Shaker filler - stash
Card size - 4 x 6"

Thanks for stopping by today

Trio of Birthday Bunny Cards

Hello my crafty friends

Last month I picked up this fun stamp set by Waffle Flower, and I shared the two Birthday cards made with lambs already. You can see that post HERE. The set also came with this cute group of bunnies and I used that one for my card share today.


I had used this cute Doodlebug patterned paper for a card a few weeks ago and I wanted to use up the rest of the piece so that is on two of the cards. The speech balloon die is from Taylored Expressions and it works so well for these bunnies I couldn't resist using it.


The bunnies and balloons were coloured in with Chameleon Color Tone markers and their Color Tone pencils as well.


Looks like I neglected to photograph the inside of the cards which have a stamped birthday greeting.

Supplies:
Bunnies - We Herd, Waffle Flower
Bee paper company - marker paper
Chameleon Color Tones markers
Chameleon Color tone pencils
Patterned paper - Doodlebug
Blue, white, green card stocks
Let's Talk Edger 1 - Taylored Expressions
Stitched rectangle dies - Elizabeth Craft Designs
1006 Nature Edges - Karen Burniston
Sakura white gel pen
Sequins
Spectrum Noir glitter pen
Blue Happy Birthday - Cutting Edge Balloons, Taylored Expressions
Thinking of you - Scrapbook.com
Orange & Pink Happy Birthday and the words inside - The Inside Scoop, Birthday - Taylored Expressions  (oops - no photograph!)

Thanks for stopping by today

Saturday, 27 April 2019

C4C481 Birthday Cards with Foil

Hello my crafty friends

It's Saturday and that means a new challenge at the Crazy4Challenges Blogour Apri hostess is Rebecca Ednie and please welcome our Guest Designer Cindy Lawrence.


This is Rebecca's challenge: Back to metallics for the end of the month. Use foiling on your project. If you don’t do your own foil, look for foiled patterned or mirror papers or embellishments like chipboard or stickers in your stash.

I don't have any foils, but since I love metallics I pulled out a really pretty pink toned Shimmer Sheetz for my card today. I haven't used Shimmer Sheetz in a long time, and I was so happy with how well it worked. It's SUPER shiny and catches the light brilliantly.


I have had these printed embellishments for several years and I'm trying to use up some of this older stash for my Nursing Home donation cards. Since there were two printed pieces in the package, I made two identical cards. I also added some glitter to the blooms for more shimmer and shine. I die cut a little heart from a scrap of the Shimmer Sheetz and added it to the lower right corner, which is hard to see in the photos.


After stamping the verse inside on a wonky stitched panel, I die cut a small heart shape from the left and backed it with another piece of Shimmer Sheetz. It's the same pretty pink/coral colour as I used on the front, but it was impossible to get a good photo. I liked that the foil carried through to the inside when the card is opened.


Since I had everything out anyhow, I chose a couple more printed embellishments from the package and made two identical masculine cards to donate as well. These ones didn't get any Shimmer Sheets, but I did add glossy accents to the dangling time-pieces on the printed element.


Here are the cards all grouped together, before I popped them into the donation bags I have on the go.


Check out the C4C blog to see how the Crazies have been inspired by the challenge. We'd  love to see your take on it, so be sure to stop by the Crazy 4 Challenges blog and link up your creations. If you are uploading to an online gallery, please use the keyword C4C481.

Supplies:
Printed embellishments - Stampin' Up 
Coloured A2 cards (white inside) - DCWV
1076 Celebrate - Karen Burniston
Shimmer Sheets - Elizabeth Craft Designs
Fun foam
1046 Circle Charm Pop-Up (butterfly) - Karen Burniston
Stickles
1019 Gift Card Label (heart) - Karen Burniston
Wonky Stitched Rectangle dies - MFT Stamps
Stamps - Papertrey Ink and MFT Stamps
Bakers Twine
Nuvo Crystal Drops

Thanks for stopping by today

Friday, 26 April 2019

Four Panel Monster Pop-Up Card

Hello my crafty friends

It's Fun Fold Friday here on my blog and I have a fun card to share today. I have had this idea in my head for awhile, and since the Fun Friday Challenge #112 at Your Next Stamp is 'Clean and Simple', I thought I'd finally get it made and enter it in the challenge. Below is the card front:


I am liking black card bases more and more these days so that is what I used for my card today.  The Silly Trash Monsters are such fun stamps. I bought them back when they were released at Your Next Stamp, because having 3 grandsons I figured they would get a good work-out on birthday cards. Especially as they get older and don't like 'cutesie' anymore. Your Next Stamp has several popular monster stamp sets that I also have my eye on.

The Trash Can was die cut from black card stock, then I fussy cut a small scrap of glossy black card stock to glue behind it. The glossy black shows through the cut-away strips on the can and give the card a little interest. Black glossy card stock is also something I am using a lot these days.


 This '4 Panel Pop-Up' is one I have done a couple of times before. It makes a quick and easy pop-up that is fun for all ages. I die cut the YNS scalloped border four times, once from each colour of card stock. Then I adhered the borders inside the card. After adhering the four panel pop-up strip, I added a monster to each of four matted & coloured circles. Two of the monsters were added to the centre of the pop-up strip and the other two were adhered right to the card base over the strip ends. I staggered their height for a fun look.


The monsters were fun to colour with Chameleon Color Tone markers. I used the markers and also Color Tops to get the blends between blue and green.  I simply added a green Color Top to the blue Color Tone marker for about 5 seconds then coloured. Instant blend! Same for the orange and yellow color blend.


I white embossed the greeting on a black stitched fishtail banner and adhered that below the four panel pop-up strip.


I think this will make a fun Birthday card for the grandkids to take to a birthday party.

Supplies:
Fancy Double Scalloped Edge border die - Your Next Stamp
Stitched Fishtail Banner dies - Your Next Stamp
Stitched Rectangle Dies - Your Next Stamp
Tropical Paradise Gumdrops - Your Next Stamp
Silly Trash Monster stamps - Your Next Stamp 
Trash Can die set - Your Next Stamp
Black, yellow, orange, green, blue and white card stock
Circle dies - Hero Arts
Chameleon Color Tones and Colour Top markers
Sakura white gel pen
White embossing powder
Black glossy card stock - recycled scrap
Sakura black glaze pen

Thanks for stopping by today

Thursday, 25 April 2019

Six Floral & Butterfly Birthday Cards

Hello my crafty friends

I really enjoy working 'assembly line' style and this older patterned paper from my stash inspired me to make a set of Birthday cards for my Mom's nursing home.


I mistakenly ordered a box of envelopes for 4 x 6" cards but they are a good size for my donation cards so these cards are all 4 x 6". This was also a good opportunity to use up some of this patterned paper that has been hanging around for so long I don't even like it anymore. But it's bright and cheery and I'm sure the residents won't even notice that the paper is not 'new and trendy'.


I added some punched and layered butterflies with a Nuvo Drop in the centre for shine.


I  don't like to give the nursing home too many similar cards in a month as I want the residents too feel special. So these ones are divided up into the 4 bags I have on the go at any given time. Once there are 25 cards in a bag each month, it's ready to be delivered.

Supplies:
Patterned paper - Diane Kappa, g.c.d.
White and red card stocks
Rectangle dies - Waffle Flower
MISTI - My Sweet Petunia
Word stamps - Taylored Expressions
Stitched Fishtail Banner die - Elizabeth Craft Designs
Butterfly punches - Stampin' Up
Nuvo Crystal Drops

Card size - 4 x 6"

Thanks for stopping by today

Tuesday, 23 April 2019

Magical Pony Birthday Card

Hello my crafty friends

I'm on the Your Next Stamp Blog today with a cute birthday card using several different YNS products. All the Your Next Stamp products are linked in the Supply List at the end of my post.

This Confetti Panel die is perfect for any celebration, and I die cut it here from white card stock. Before adhering it to a slightly smaller piece of the bright green card stock, I cut small squares of white glitter paper and adhered them on the back side over each of the star shaped openings. It's very subtle in the photos, but gives a lot of extra sparkle to the card in real life.


The stamped and cut out party pony was adhered to a Stitched Wavy Circle with foam tape, then the wavy circle was attached to the card front with an Action Wobble. I love how it bobs and wobbles around on the card. I white embossed the sentiment from a different YNS set onto one of the new Stitched Fishtail Banners and added that to the card with foam tape. Finally, I added a few sparkly Gumdrops!


Of course I also decorated the inside of the card. Another greeting was stamped onto the fishtail banner, I added a sweet pink Gumdrop and added a smaller stitched wavy circle as a place to write a message and sign.


I hope you will check out the Your Next Stamp Blog, and while you are there check out the latest challenge and play along.

Supplies:
Confetti Panel die - Your Next Stamp
Stitched Wavy Circle die - Your Next Stamp
Magical Ponies stamp set - Your Next Stamp
Photo Booth Stamps (It's Your Birthday) - Your Next Stamp
Stitched Fishtail Banner dies - Your Next Stamp
Ice Ice Baby Sparkly Gumdrops - Your Next Stamp
Winter Wonderland Sparkly Gumdrops - Your Next Stamp
Stitched Rectangle Dies - Your Next Stamp
Whatnot Sentiments Set Thirteen - Your Next Stamp
Sakura white gel pen
Copic markers
Spectrum Noir Glitter pen
Glitter card stock - Stampin' Up
White charcoal pencil
Action Wobble
White and green card stocks
White embossing powder

Thanks for stopping by today

Sending Love and Hugs, Cactus Trifold Card

Hello my crafty friends

A few weeks ago, Jennifer McGuire posted a video showing tri-fold window cards. This card was inspired by that video and I am inspired to make more of this type of card too.

The Cactus window card is one I've had in my stash for many years. I added a stamped banner and silhouette die cuts, then stamped the rest of the greeting right on the card. This is what the card looks like when it comes out of the envelope. You can see a couple of cactus peeking through the window.


When you open the card, you get the full view of those cactus, and see that they are in a pot.


Open the cactus panel to reveal where I can write my note. I used pretty patterned paper by Lynda Kanase and added another die cut cactus in the bottom right corner of the centre panel.


This one went into my stash, but as I said I look forward to make some more of these.

Supplies:
Cactus die cut window card - VERY old, from my stash
Patterned paper - Succulent Serenity, Lynda Kanase
Stitched Rectangle dies - Elizabeth Craft Designs
Black and white car stocks
Silhouette die and small cactus die - Craftin' Desert Diva's
Cactus & pot dies - Concord & 9th
Fishtail banner die - MFT Stamps
'Sending and Wishing' - Simon Says Stamps
Chameleon Fineliners

Thanks for stopping by today

Monday, 22 April 2019

Spring Shaker Cards

Hello my crafty friends

Today I'm sharing a trio of cards I made using the Queen and Company "Bring on Spring" Shaker card kit. I love this kit so much!


The shaker cards are actually for the two of our Grands who are celebrating Passover. I didn't have any appropriate Passover images for them so thought Spring would work. They love shaker cards, so it's a win win. This first one is for two year old Alma, and I made hers with the tulip shaker.  The 'hello sunshine' was trimmed from a piece of Doodlebug patterned paper, and I added it because I call her my Sunshine. Whenever I see her, I say "Hello Sunshine" :-)


Ilai (age 4) is getting the carrot shaker card and I know he will get a big kick out of it.


Since I had everything out anyhow, and a scrap of the rainbow striped paper sitting on my stamping area I decided to see what the basket looked like cut from the rainbow paper. I didn't want to make a shaker and I was happy with it so cut a couple more carrots and some eggs and made a third card. This one is for Easter, rather than Passover.


I like the stamps that come with the Bring On Spring Shaker card kit, so used the words on the inside and added a stamped Peep too.


By the time I got the Shaker Card kit, my Easter cards for 2019 were already done. I will probably make a few more of these cute Easter Shaker cards and put them away for next year because I still want to play with the kit!

Supplies:
Stitched Rectangle dies - Your Next Stamp
Patterned paper - Doodlebug Designs and Queen & Company
Rainbow striped paper - Echo Park
'Bring On Spring' Shaker Card Kit - Queen and Company
Green, white and blue card stocks
Sakura white gel pen
Fishtail banner dies - Your Next Stamp
White Peel-off border sticker - Stamp On It
Black marker
Tombow Markers
Cloud stencil - MFT Stamps
Stitched mini scalloped rectangle - MFT Stamps
Peep stamps - Simon Says Stamp
Winter Wonderland Sparkly Gumdrops - Your Next Stamp

Thanks for stopping by today

Sunday, 21 April 2019

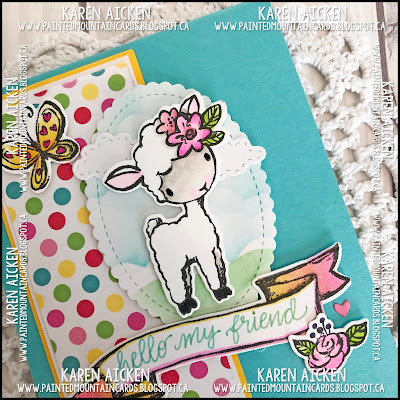
Spring Lamb Card

Hello my crafty friends

When this sweet stamp set was released by Pink and Main awhile ago, it jumped right onto my Wish List. While it's a great set for Easter, I loved it because it can work well beyond Easter and Spring. I also loved it because my Mom loves lambs and I was thinking of her.


See that tiny pink heart below the banner? It is the fallaway piece from Karen Burniston's heart glasses in the Tiny Accessories die set. It was the perfect size! I did all the colouring with Chameleon markers - both the Color Tones and the Color Tops. I am really enjoying these alcohol markers!

Notice the handwritten greeting on the banner ... how it goes from blue to green. That was done with a SINGLE fineline marker, by swapping the top of the green marker with a blue one for a few seconds. These are COMING SOON water based fine line markers by Chameleon that are just brilliant. I was lucky enough to get to put them through their paces, and I just adored using them. I will share more information on when these will be available as soon as I get word from Chameleon.


I used the same markers to write the note inside. A single marker did this multi-coloured writing, without having to switch colours or tops. You can add up to FOUR different tops to your marker to infuse the tip with the colour - then you just start writing and watch the magic as the colour blends and changes.


The colours in this card just make me happy.

Supplies:
Stamps - Sketched Easter, Pink & Main
Neenah white card stock
Chameleon Color Tone Markers
Chameleon Color Tops
Chameleon Fineliners
Spectrum Noir glitter pen
Sakura gel pen
Blue, white and yellow card stocks
Stitched mini scallop oval die - MFT Stamps
1045 Outdoor Scene - Karen Burniston
Sakura black glaze pen
Stitched mini scallop rectangle die - MFT Stamps
Patterned paper - Doodlebug Design
1076 Tiny Accessories (heart glasses) - Karen Burniston

Thanks for stopping by today


Saturday, 20 April 2019

C4C480 Sketch Card Duo

Hello my crafty friends

It's Saturday and that means a new challenge at the Crazy4Challenges Blogour April hostess is Rebecca Ednie and please welcome our Guest Designer  Cindy Lawrence. Rebecca has a sketch for us this week:


Such a pretty sketch! I used the Sunburst Panel Die by Your Next Stamp, die cutting it from a floral printed card stock. I saved all the fall-away pieces to use on a second card, then popped this one up on a white card base with foam tape.


I really like Lynda Kanase's Spring Things die set, so used it again here. I stamped a greeting from Your Next Stamp onto the label in the Spring Things die set. The green card stock was a gift from a friend, it has a lovely pearlized finish. I added some black Nuvo Drops around as well.


Inside I added a floral panel mat and a black border peel-off. This card is one I sent to my Mom, and i wrote her a note on the white panel.


Below you can see the second card I made with the fall-away pieces from the Sunburst Panel Die.


I cut the Sunburst panel again from white card stock and added the floral pieces to that. Then the whole panel was added to a white card with fun foam. I added punched butterflies, black Nuvo Drops, and the stamped greeting with the die cut 'MAGICAL', which is from Pink and Main.


Check out the C4C blog to see how the Crazies have been inspired by the challenge. We'd  love to see your take on it, so be sure to stop by the Crazy 4 Challenges blog and link up your creations. If you are uploading to an online gallery, please use the keyword C4C480.

Supplies:
Sunburst Panel Die - Your Next Stamp
Patterned A2 card - the Paper Studio
Spring Things - Lynda Kanase
Whatnot Sentiments 4 - Your Next Stamp
White, pink card stocks
Black glossy card stock - recycled packaging
Green pearl card stock - Papertrey Ink
Dashing rectangle dies - Elizabeth Craft Designs
Magical stamps and dies - Pink and Main
Butterfly punches - Stampin' Up
Fun foam
Inside stamp - Papertrey Ink
Peel-Off's - Stamp On It

Thanks for stopping by today