Showing posts with label Action Wobbles & Springs. Show all posts

Sunday, 16 June 2024

Ice Cream Shaker Card


Every July (on a certain day) my Grandpa would take my Mom to the Soda Shop in their little town for an Ice Cream Sundae. She continued the tradition with my brother and I even once we were living on our own!  When my Dad could no longer drive, we would make sure my Mom got her ice cream sundae on that day. Now that she is in heaven, we keep that tradition going with our children and grandchildren. It's a happy way to honour her memory!  I also send them an ice-cream themed card.


Today I'm sharing the first ice cream card that I'll be sending this year and I couldn't resist making this one a shaker card. Or Faux Shaker.  Or Edge to Edge Shaker.  Or one of the other names these go by 😂.  

I cut the patterned paper to 4 x 5.25" and cut a piece of transparency 5 x 6.25" (1" bigger all around). Scoring the transparency to fit around the decorated piece of patterned paper, I mitred the corners and attached it to the back of the patterned paper on 3 sides. After pouring in the sequins on the front side, I attached that one transparency edge on the back and my 'faux shaker was finished. The ice cream element, gem stickers & word die were added on top of the transparency and the whole piece was adhered to the front of my card.


Inside I added some scalloped circles, die cut phrase and gem stickers - which were attached with a folded paper spring.


Supplies used:
Patterned paper - Neapolitan, Dear Lizzy (old)
Transparency
Peel Off gem stickers - Dazzles
Sequins - Stash
Scallop Stitched Nesting Circle dies - Tutti Designs
Blending Brushes - Taylored Expessions
Washi Tape - possibility Doodlebug Designs
Big Scripty Words - Lawn Fawn
Rainbow patterned paper - JJ's Rainbows, Waffle Flower
YAY die - the Stamps of Life
Mini Alpha & Numbers - Karen Burniston

Wednesday, 13 December 2023

Snowman Slimline Card

There was a leftover piece of this holiday paper from a different card, and it work perfectly for a Slimline card! I fussy cut the snowman from a different sheet in the package and added it to the front with a folded paper 'spring'. I also added some Stickles for some holiday sparkle and stamped the sentiment on a fishtail banner to add near the top of the card.


Here is a look at the inside ...


Having been asked how many cards I make I thought it would be fun to keep track this year. Many of my posts include more than a single card or project and below is my tally. 

Card Tally for 2023
January - 53 cards
February - 56 cards
March - 55 cards
April - 32 cards
May - 43 cards
June - 34 cards
July - 56 cards
August - 106 cards
September - 61 cards
October - 51 cards & 5 Tags
November - 46 cards
December so far - 13 cards (& 16 simple tags)

I decided to cancel the subscription that provided linked thumbnails to what products I used on my cards. It was costing me out of pocket each month, so I’m back to listing what I used.

Supplies:
Patterned paper - Say Freeze, Recollections
Washi tape - Lawn Fawn
Slim lacy layer dies - Waffle Flower
Narrow gold tape - Amazon
Words - Joy to You, Stampin' Up
Stickles

Sunday, 24 May 2020

Pop Up Floral Slimline Card with Butterflies


Hello crafty friends ...

Below is my YouTube video with some details on how I created the card. You can always find my YouTube videos HERE on my YouTube Channel. I'd love to have you subscribe!


I'm excited to share this Slimline card with you today, because it's also a pop up card. I am really liking the Slimline format, but since I also like to make interactive cards I was really happy with how well this worked out!


I used sparkly patterned paper from K & Company, adding extra sparkle and shine with Glitter Dots. Gold Peel Off Corners, and gold Stickles on the pretty YNS Butterflies.


In the photo below you get a better idea of how sparkly the paper is!


Finally, here is a peek at the inside. To make it easier (I don't like math), I cut the patterned paper inside to the same dimensions as the Slimline Card (7 x 8.5") and did all my scoring & added the extra folds and cuts to make it dimensional. When I was happy with that, I simply trimmed off each side and a bit off the top so it would fit inside the card with an even border all the way around. Otherwise, I would have had to figure out the measurements for each scoreline as well as the perimeter.


As I mentioned in the video - this is something I've done before with an A2 card die that I have, and because people have asked how I did that I expect they will also want to know more on how to make it work for a Slimline Card too.

You can see my photo tutorial on how to add the additional folds & cuts HERE,  
and HERE is the link to the Paper Springs video I used. 

The patterned paper I used for my card today is double sided, so I did the markings on the back side (the pattern I wasn't going to have show). In the photo below, you can see the centre fold is on the left  so I'm making the two cuts from the fold up to the vertical line I drew parallel to the inside folds and cutting through both layers at the same time. This is the area that becomes inverted when you attach this piece inside your folded card! NOTE: If you click on the photo it will open up larger in a separate window.


Supplies:
Patterned paper - K & Company
Pink and awhile card stocks
Stamp on back - Riley & Company
Bristol Smooth Card Stock
Gold embossing powder
Zig Clean Color Markers
Water Brush
Nuvo Glitter Pen
Gold Stickles
Simple Strips Background - Taylored Expressions
Simple Strips die - Taylored Expressions
Beautiful Butterflies - Your Next Stamp
Beautiful Butterflies Die Set - Your Next Stamp
Peel Off Photo Corners
Glitter Dots - Elizabeth Craft Designs
White pearl card stock
Hello & There dies - MFT Stamps
Pink vellum
Stitched Scalloped oval die - MFT Stamps
Paper Spring
Butterfly punch - Martha Stewart

Card size - 3.25 x 8.5", fits in a standard #10 Business Envelope

Thanks for stopping by today

Thursday, 12 December 2019

Snowglobe Wobble Christmas Card

Hello my crafty friends

I had a big OOPS while making this card. It started out as a Circle Charm Pop Up, but things jammed in my die cutting machine and ... well there was a mess. But I already had the patterned paper attached to the inside and I was committed. 


I didn't want to just toss the card, so I carefully snipped away the front circle and the mangled bits, and peeled up the snow globe sticker. After adhering the sticker to cream card stock and fussy cutting it, I attached it through what is now a circular aperature/window on the card front. To make the card a little more interactive, I attached the snow globe with a hand made wobble!


There is a signing block below the snow globe.


All in all, the card turned out just fine, which was a relief.


Note - I made my own Action Wobble inspired by Anne at Constantly Carding's YouTube Video, which you can see HERE.  I tweaked her directions a little to make it work better for me but they are surprisingly easy to make!

Supplies:

Confetti, red and white card stocks
Patterned paper, stickers and elements - Comfort and Joy, My Minds Eye
Hand made wobble
Snowflake punch - Martha Stewart
Stitched rectangle dies - Your Next Stamp
1046 Circle Charm Pop Up - Karen Burniston
Circle dies - Hero Arts
Wink of Stella
1113 Love Charms (Stitched heart) - Karen Burnsiton

Card size - standard A2 (4.25 x 5.5")


Thanks for stopping by today


Friday, 25 October 2019

SPOOKY! Spinner Square Pop Up Halloween Card

Hello my crafty friends

It's Fun Fold Friday here on my blog, and I have a fun Halloween Card to share. I had actually been tidying up and putting away my Halloween papers when I spied the package of Doodlebug printed elements. I just had to make another Halloween card and chose to use Karen Burniston's Spinner Square Pop Up for the inside.

There were some smaller scraps in the package which worked perfectly for this oval grid die, and the SPOOKY is one of those Doodlebug printed elements.


Here is quick YouTube video so you can see the card in action:


I added a couple of the YNS Gumdrops and my card front was done.


Inside I stencilled a spider web onto both sides of the card inside, then assembled and adhered the Spinner Square Mechanism. I decorated the inside with a few more printed Doodlebug elements and some stickers too!


As you could see in the YouTube video, I adhered the spider with a hand made wobble spring for some more spooky fun.


The front of the card is nice and sturdy because of the grid & mat layer, so I also added a white panel to the back of my card for balance.

Note - I made my own Action Wobble inspired by Anne at Constantly Carding's YouTube Video, which you can see HERE.  I tweaked her directions a little to make it work better for me but they are surprisingly easy to make!

Supplies:
Die Grid 4 (oval) the Stamps of Life
Black, Green and white card stocks
Stickers, Elements and patterned paper - Doodlebug Designs
1042 Spinner Square Pop Up - Karen Burniston
Spider Web Stencil - Mixed Media, Stamperi
Makeup Brushes
Stitched Rectangle dies - Your Next Stamp
Home Made Wobble Spring
Wink of Stella
Spellbound Gumdrops - Your Next Stamp
Card size:  wide A2 (5.5 x 4.25")


Thanks for stopping by today

Tuesday, 8 October 2019

Halloween Wobble Cards

Hello my crafty friends

If you follow my blog, you know that I am a Big Fan of Your Next Stamp and I'm SO happy to be Guest Designing for them this month. They have released two new stamp sets which are filled with fun images and I used both sets for my cards today.

I started with the Stitched Stripe Panel Insert die ... and the key word here is INSERT.  I cut a scalloped rectangle from black glossy card stock, then cut the Stitched Stripe Panel Insert from the centre. I repeated the process with a Stitched Rectangle die cut from orange glitter paper. The die cuts just the stripes!! The fallaway stripes have a wonderful stitched detail so I added the black stitched stripes into the glittered orange rectangle, and the orange glitter stripes into the black glossy one. Note, you can't see the stitched detail on the glittered paper so it gives the illusion that the orange stripes are wider than the black ones. Cool!


The Spooky Fun stamps really are fun for Halloween, with a variety of critters ready to celebrate. The Way Cool Monsters comes with a bunch of different sentiments that also fit in the sign that one monster is holding. This set can be used all year long!  I immediately had several ideas, so you will be seeing more of these stamps as I create our Halloween cards this month.

Below are both cards I created with the sparkly and glossy backgrounds ...


The first card has a kitty sitting in a pumpkin, with candy around him. While there are coordinating dies available for both new stamp sets, I don't have them (yet) so the images are cut by hand.


Once the kitty was coloured and fussy cut I adhered it to the kraft circle with a mini Action Wobble. It bobs and wobbles around on the card, which is always fun.


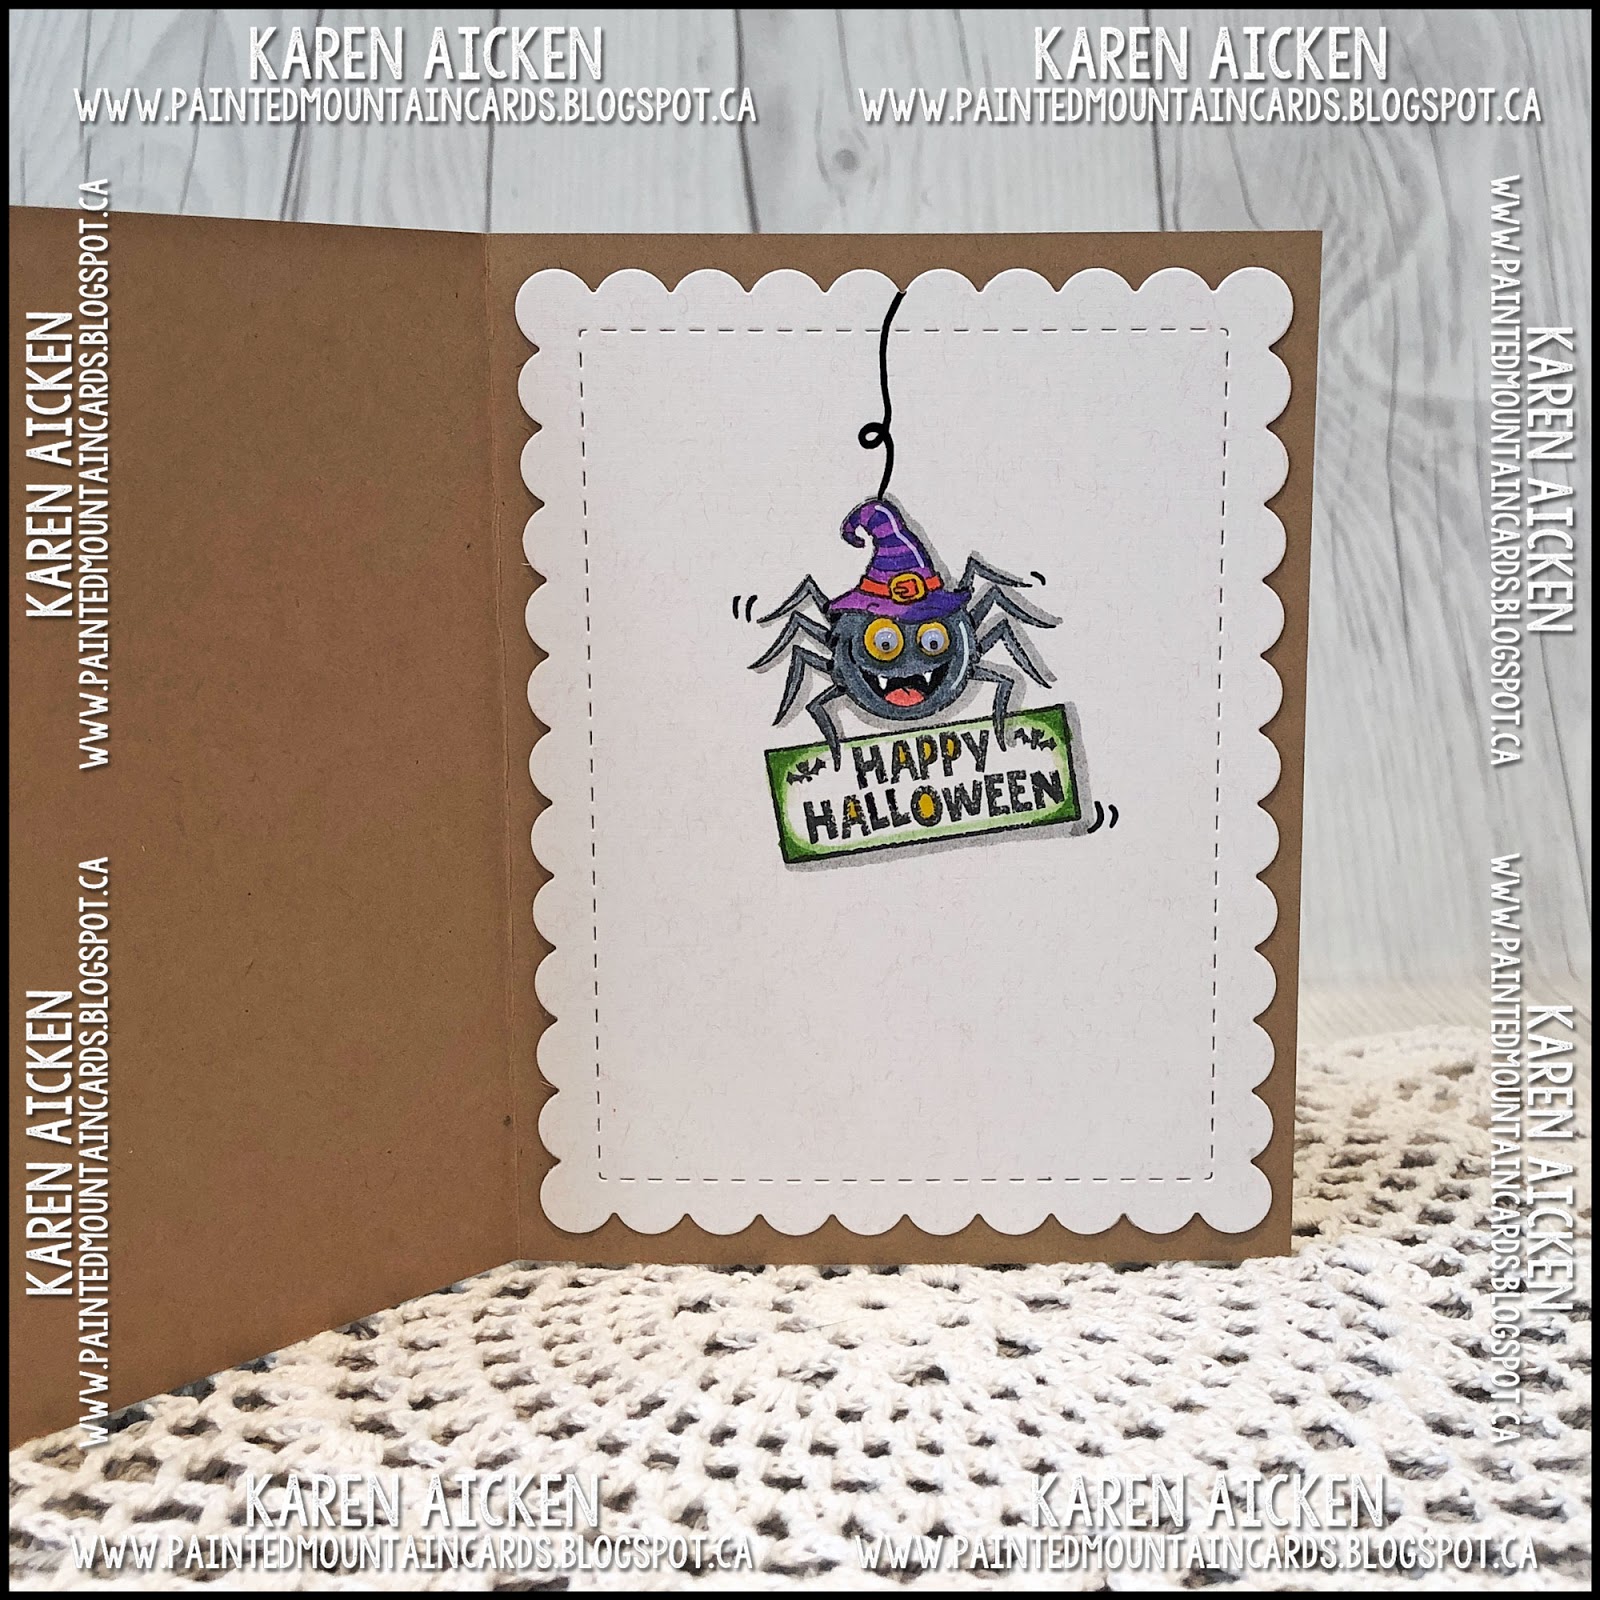
Inside I added the cute spider image fro the Spooky Cute stamp set, colouring it in and adding a black glaze pen line for the spider to hang on. I also added movement marks with a black pen.


For a little additional fun, I added wiggly eyes to the spider!


The second card has this fun monster holding a sign from the Way Cool Monsters and I stamped Happy Halloween from the same set on the sign. I'm looking forward to making some cute Birthday Cards with this set too.


Once again, the image is adhered to the card with a mini Action Wobble and I added some YNS Gumdrops for additional colour & shine.


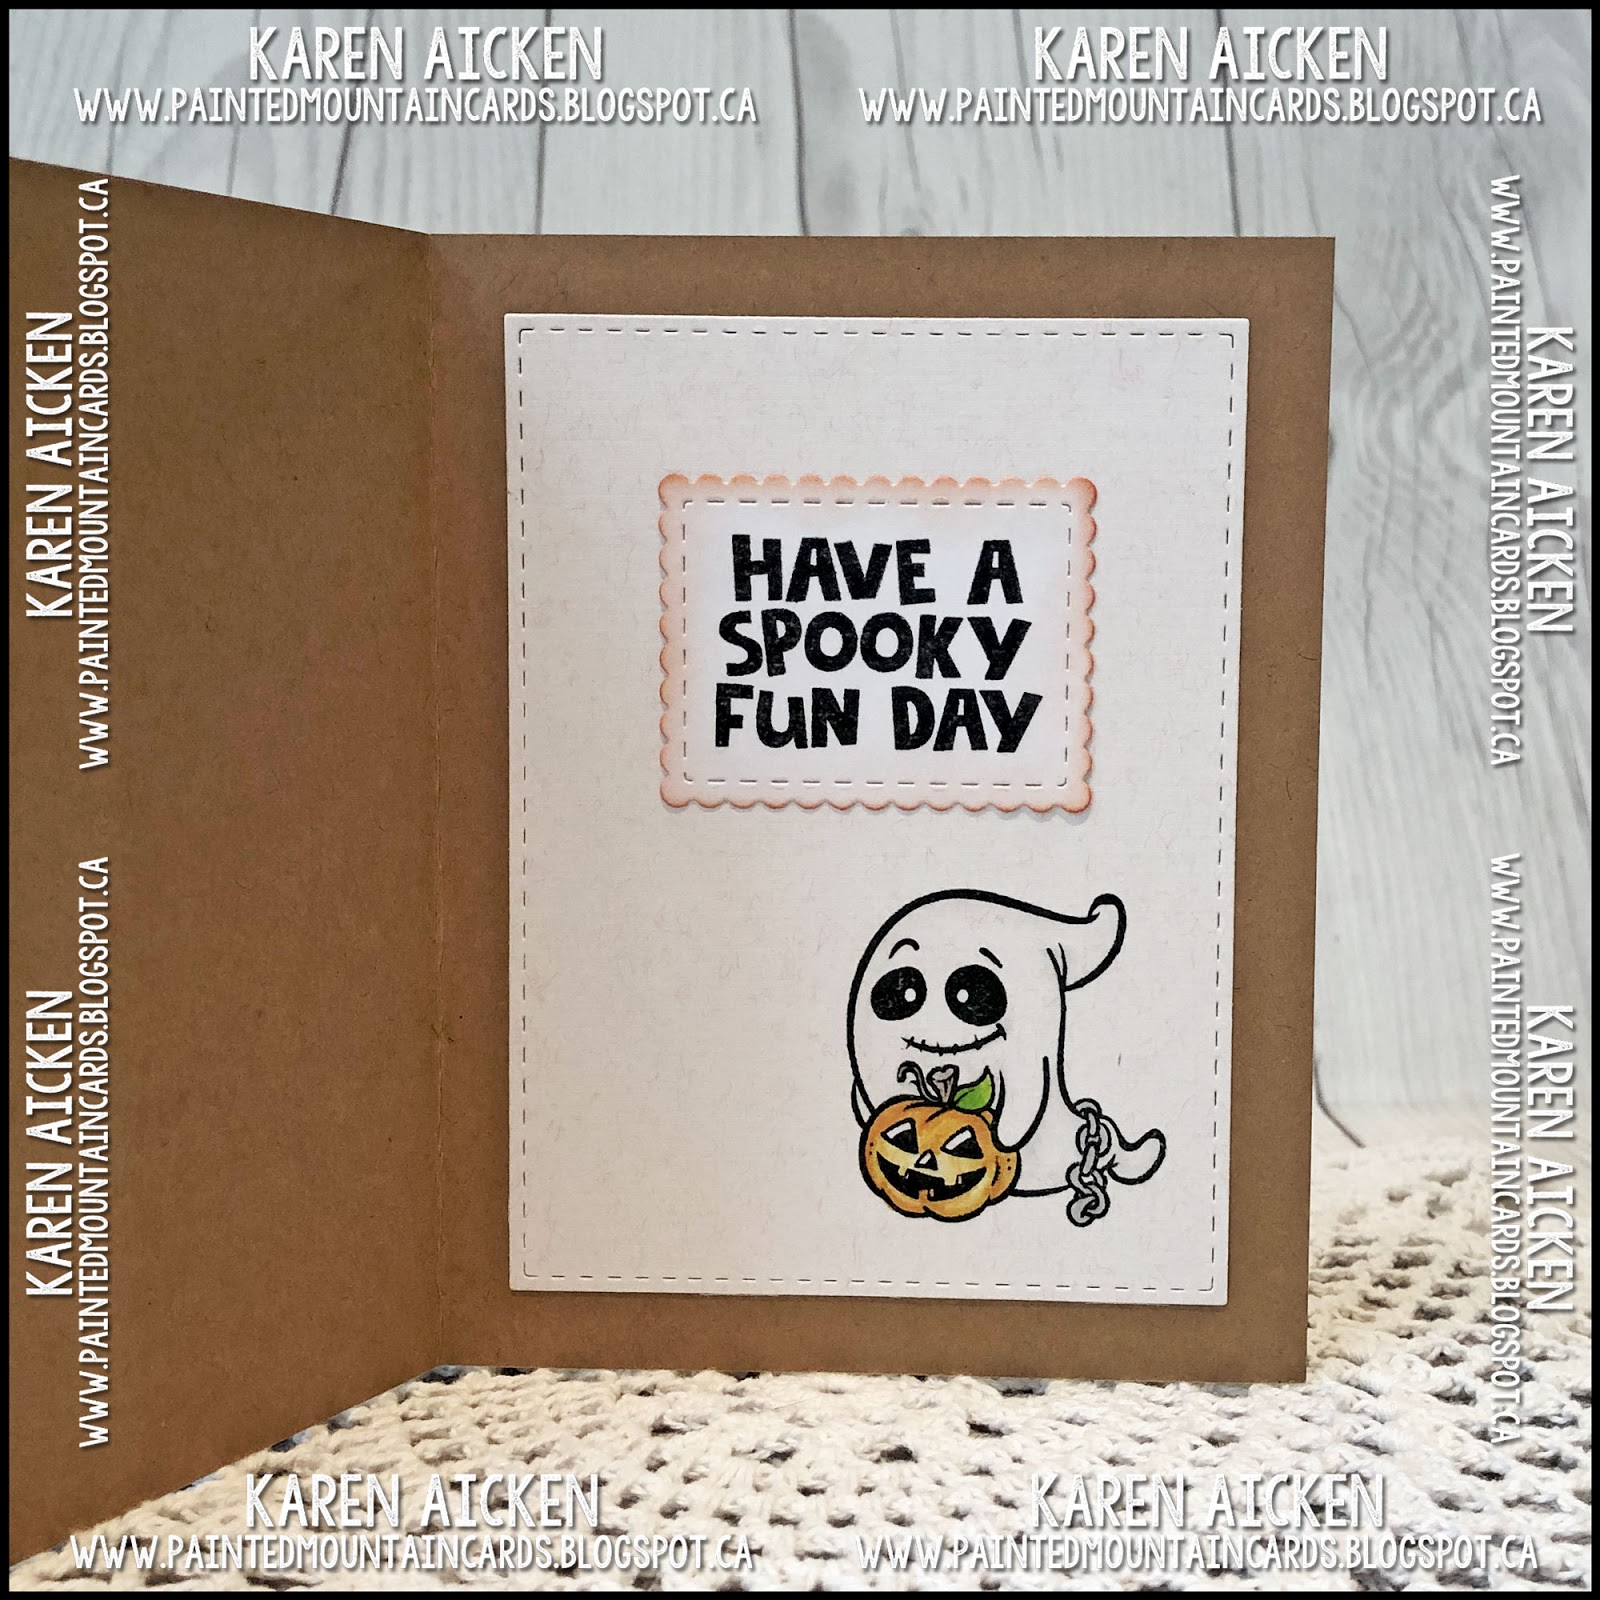
Here is a peek at the inside using images from the Spooky Fun stamp set. Both new stamp sets work well together.


I hope you enjoyed what I've made with these two new stamp sets from Your Next Stamp ... I'll be sharing additional Halloween cards using them soon.


Supplies:
Stitched Stripe Panel Insert die - Your Next Stamp
Stitched Scalloped Rectangle die set - Your Next Stamp
Stitched Rectangle die set - Your Next Stamp
Scrapworks - Large Sunburst die set (stitched circle) - Your Next Stamp
Spooky Fun stamp set - Your Next Stamp
Way Cool Monsters stamp set - Your Next Stamp
Rainbow Sparkle Gumdrops - Your Next Stamp
Black Olive Ink - Your Next Stamp

Kraft, light peach, white card stocks
Black glossy card stock - Stampin' Up
Orange glitter card stock - Stampin' Up
Circle die - Hero Arts
Bristol Smooth Card Stock
Zig Clean Color markers
Water Brush
Chameleon Color Tone Markers
Chameleon Color Top Markers
Chameleon Coloured Pencils
Small Action Wobbles
Sakura black and yellow glaze pens, and white gel pen
Wiggly Eyes

Card sizes - standard A2 (4.25 x 5.5")

Thanks for stopping by today

Wednesday, 28 August 2019

Seahorse Card Duo

Hello my crafty friends

One day last week I worked all morning on a card that I had in my head - and it was just a comedy of errors. It took three times longer than it should have - everything I did was an oops. Finally I decided to just toss it, something that rarely happens. I can usually work through the issue and get something I like but not this time! I did pull off a Distress Oxide inked panel to use on another project but then I had to come up with a card to redeem myself. If for no other reason than I needed to know I could do it! I ended up making two and they went quite quickly so I have no idea what was going on with the one that ended up in the trash. Sheesh.

This is the first card I came up with. It started with a leftover piece of turquoise card stock from the tossed card, and I inked it with dye inks and a splash stencil. Since I'm enjoying using both black card stock and acetate in my card making these days I pulled out those two as well.


What gives this simple card some oomph is that I layered a piece of acetate over the seahorse and splash panel, covering the edges with the black stitched frame. The seahorse is raised up with foam tape which gives the acetate a bit of a curve - it looks really cool in real life. Something else I will definitely try again! Think 'Shaker Card without any filler or foam tape for depth'.

Below you can see the shine from the acetate, which is missing in the photo above. I added sparkly Gumdrops on TOP of the acetate to resemble bubbles. I had tried white but they were very distracting and these ones pick up the blue/green ink used in the splashes.


Here is a peek at the inside:


As I went to tidy up and clean the splash stencil, I decided to use a slightly damp cloth wiping the stencil onto a white card stock panel and ended up with a 'free' background to use for a second card!

I cut the Wavy Panel Die from teal card stock. As I was about to put the fall away pieces into recycling I realized that I could use them at some point so adhered them to a white card stock panel and will use that later on.


The seahorse was adhered to the card with a paper spring for a little 'action', and I added some die cut seaweed and black sequins. I love how the black makes the colours pop.


Finally, here is a look at both cards together.


Here is a link to the YouTube video I use to create the Paper Spring: MayMay Made It Crafts

Supplies:

Seahorse dies - Elizabeth Craft Designs
Black, turquoise and white card stocks
Splash stencil - Taylored Expressions
Makeup Brushes
Acetate
Frame - Lawn Fawn
Pixie Dust Gumdrops - Your Next Stamp
Chameleon Color Tone marker
Seahorse inside - Hero Arts Monthly Club kit for March 2019
Black pen


Wave Panel Die - Your Next Stamp
Splash panel from cleaning the stencil with a damp brush :-)
White, teal and black card stocks
Seahorse die - Elizabeth Craft Designs
Paper Spring
Seaweed dies - Elizabeth Craft Designs
Word Stamps - LJD Birthday Greetings - MFT Stamps
Circle die - Hero Arts
MISTI - My Sweet Petunia
Sakura white gel pen
Seahorse stamp - Hero Arts Monthly Club kit for March 2019
Sequins

Thanks for stopping by today

Wednesday, 21 August 2019

Sparkling Seahorse Card Duo

Hello my crafty friends

I had it in my head to try a Clean and Simple card. Which is funny, because I usually don't like making them. I started with some matt coated card stock as I like how crisp the images are on it. By the time I was done, I was surprised by how much longer it takes to make a CAS card than you would expect.

Once I was done with the waves stencil, I grabbed the fish stencil and added some small schools of fish. I first saw that stencil in April and had to wait for it to come back in stock so I could finally get it. I don't know why I like it so much, but I do!


The seahorse (which I've had for a couple of years) comes in two parts, the detail layer and the base layer. For these cards I cut the base layer from a dark blue foil card stock and I love the shine you get when it catches the light. The detail layer was cut from some green glitter paper. 


As shown below, I adhered the seahorse with a paper spring. I really like the dimension this gives!


Here is a peek at the inside, with the stamped words and 'a few' more fish. Ha!


Supplies:
Sea Horse die set - Elizabeth Craft Designs
Green glitter paper - my stash
Dark blue foil card stock - Stampin' Up
Matte Gloss Card stock
Wave Stencil - Simon Says Stamp
Makeup brushes
Fish Stencil - Echo Park
Paper Spring
Cool Tag Banner Sentiments - Your Next Stamp
Stitched Fishtail Banners - Your Next Stamp
White and teal card stocks
Words inside - Make a Fish, Waffle Flower

Thanks for stopping by today

Saturday, 17 August 2019

Rocket Flip Card

Hello my crafty friends

Today I'm sharing the Birthday Card I made for our nephew's little guy who lives in Arizona. I adore Karen Burniston's Rocket Pop Up and I used it here with my Triple Flip adaptation and a vertical orientation. I am so happy with how it turned out!

When I shared my first card using the Rocket Pop Up, people noticed the background and wondered how I did it. Well I had used wide washi tape and could take no credit for creating such a pretty background. Since the washi tape can be a bit slick and I had trouble getting adhesives to stick to it, I decided to make my own galaxy background panels using Pan Pastels on white card stock. There are  some 'in progress photos' below the finished card ones if you are interested.

They turned out SOOOO good! I rarely post things in the same order I create them, so the backgrounds were actually for the Designer Challenge card in September. I had one leftover panel which I used for this card. I used Stampin' Up's Shimmer Paint to spatter the background after I was finished with the Pan Pastels. On this one I also added some diluted white acrylic paint. For the DC card, I had spatters EVERYWHERE. I think I accidentally spattered a 2 foot radius - it was crazy. So for this one I spread out scrap letter sized paper, thinking that would give me enough room to keep the spatters contained. It didn't - so I think I am going to have to get a box to do any spattering in. I had a lot of cleaning up to do after I was done with these backgrounds! I also tried using a small dot stencil and my finger to rub a little shimmer paint onto the background panel.  NOTE: between the chalk from the Pan Pastels and the hairspray I used to seal these galaxy panels - they were even slicker than the Washi Tape! Ha.


When you pull the tab, the rocket flips to the left and reveals a sentiment and a stitched star. That star was strategically placed to hide the slot that cuts with the Triple Flip - remember it is designed to have three paddles to flip and I only used one here.


Here is a look at the inside. The cute astronaut is on a paper spring for some additional fun.


I have had several requests to do a full YouTube video tutorial but at this point it's beyond my skill level. Instead I took a few photos to show you how I did the Triple Flip adaptation.

Below you can see how I die cut the main Triple Flip die - lining up the far right edge of the die with the panel which was cut to 4-1/4" wide - same as the width of the navy card.


I also added extra foam tape bits above and below the flipper arm to keep it from sagging ...


The small rectangle comes with the Triple Flip die set, and I cut two from navy card stock and sandwiched the paddle in between them. Below is the flipper as it would be in the closed position. It was the perfect base to adhere the rocket too! I cut two identical rockets and sandwiched them with this rectangle in between so it looks good from the front and also when you flip it over.


This is what it looks like when you pull the arm. And you can see the slot that die cuts and needed to be hidden with the stitched star.


I have a little YouTube video to show you the card in action:


Supplies:
Pan Pastels
Hair spray
White, navy, red and off white card stocks
White pearl paint - Stampin' Up
1104 Twist Panel Pop-Up - Karen Burniston
White acrylic paint
1105 Rocket Pop-Up - Karen Burniston
W3 Copic, and W1 Copic
Paper Spring
Astronaut - Space Explorer, MFT Stamps
Clear embossing powder
Sakura white gel pen
Sakura black glaze pen
Nuvo Drops

Thanks for stopping by today