Hello my crafty friends. As I said in an earlier post, I haven't done much in the way of crafty shopping the past few months. Last month though, I picked up a few Funny Bones sentiments and these CUTE images from Divinity Designs. They are a Cut & Die Duo and since I have used the floral ones so much I couldn't resist these adorable images. There is this reindeer, a Santa and a Snowman in the set I chose but they also have a set with smaller images that include elves. It was a hard choice, but in the end it was the size of these ones that won me over.
The images are all pre coloured and on heavyweight cardstock. You die cut them with the included die (it cuts all three at once) and presto - almost instant embellishments. For this card I paired them with some older patterned paper and the Lever Card Die Set (also from Divinity Designs). That is one I have used a fair bit over the years. In fact, I just checked the Lever Card label on the right side of my blog, and I have made over 25 cards using it!
I fussy cut a few flowers from a scrap of the floral patterned paper, and added Pops of Colour to the reindeer nose and the blooms.
The sentiment is an older one from Lawn Fawn ... another set I use a lot.
Additional Supplies:
White cardstock
Card size - Standard A2 (4.25 x 5.5")
This blog uses affiliate links whenever possible. This means, if you make a purchase through one of my affiliate links that you pay the same amount but I may receive a small commission from your purchase. I only link products that I own, love and use for my card making and not every link below is an affiliate one! 😊
Hello my crafty friends. Today I'm sharing another card using the Magic of Winter collection by Echo Park. Scrap 'n Stamp Canada sent it to me for our December 3 Blog Hop and I have been having lots of fun creating with it. Click HERE to see my video, that includes links to the rest of the hop for inspiration!
This card uses a die set from Divinity Designs - the Lever Card. I have had this for several years and always enjoy using it. One of the cut aparts was used for the centre front, with that adorable owl on the front. The snowflake on the cut apart was cut twice ... once from a scrap of patterned paper and once from fun foam. Then I adhered them together before attaching them onto the card. These sweet snowflakes were a 'free with purchase' gift a year or so ago and I couldn't find them on the website to link in the supplies.
Usually, you would use one of the dies to cut the inside panel from coordinating card stock then cut the layering dies from the patterned paper. For my card I cut the inside panel from patterned paper and didn't use the layering dies except for the far right edge.
Cutting that panel from white card stock, I was able to add one of the stickers from the collection, some bling and a stamped die cut sentiment. There was lots of room leftover for our personal greeting & signature.
Additional Supplies: White cardstock Snowflake Mini dies - Divinity Designs Fun Foam
This blog uses affiliate links whenever possible. This means, if you make a purchase through one of my affiliate links that you pay the same amount but I may receive a small commission from your purchase. I only link products that I own, love and use for my card making and not every link below is an affiliate one! 😊
Hello! Today I'm sharing my fifth card using the April 2021 Blessings Box from Divinity Designs. In fact, all of the stamps, dies and pretty patterned papers are by Divinity Designs and they are linked below. I chose their Lever Card With Layers for the fun fold card base - this is a die set I have used a LOT over the years. On the right side of my blog I have labels, and under the label Lever Cards you can see twenty plus cards made using this die set!
Below is what the card looks like when it comes out of the envelope. I added the beautiful roses from Paper/Die Duo Set 2, and a sentiment from Sweet Friend ... both were in the Blessings Box.
All the times I have made a Lever Card, and I rarely make them 'two toned' by using a different coloured card stocks for the outside and inside. But I really like the look, so you will see me doing that again for sure.
The die cut sentiment comes from the Celebration Words die set ... lots of single words you can combine to customize your card.
For your convenience I have linked many of the products used below. Some may be affiliate links which means if you use these links to purchase I may earn a small commission at NO extra cost to you.
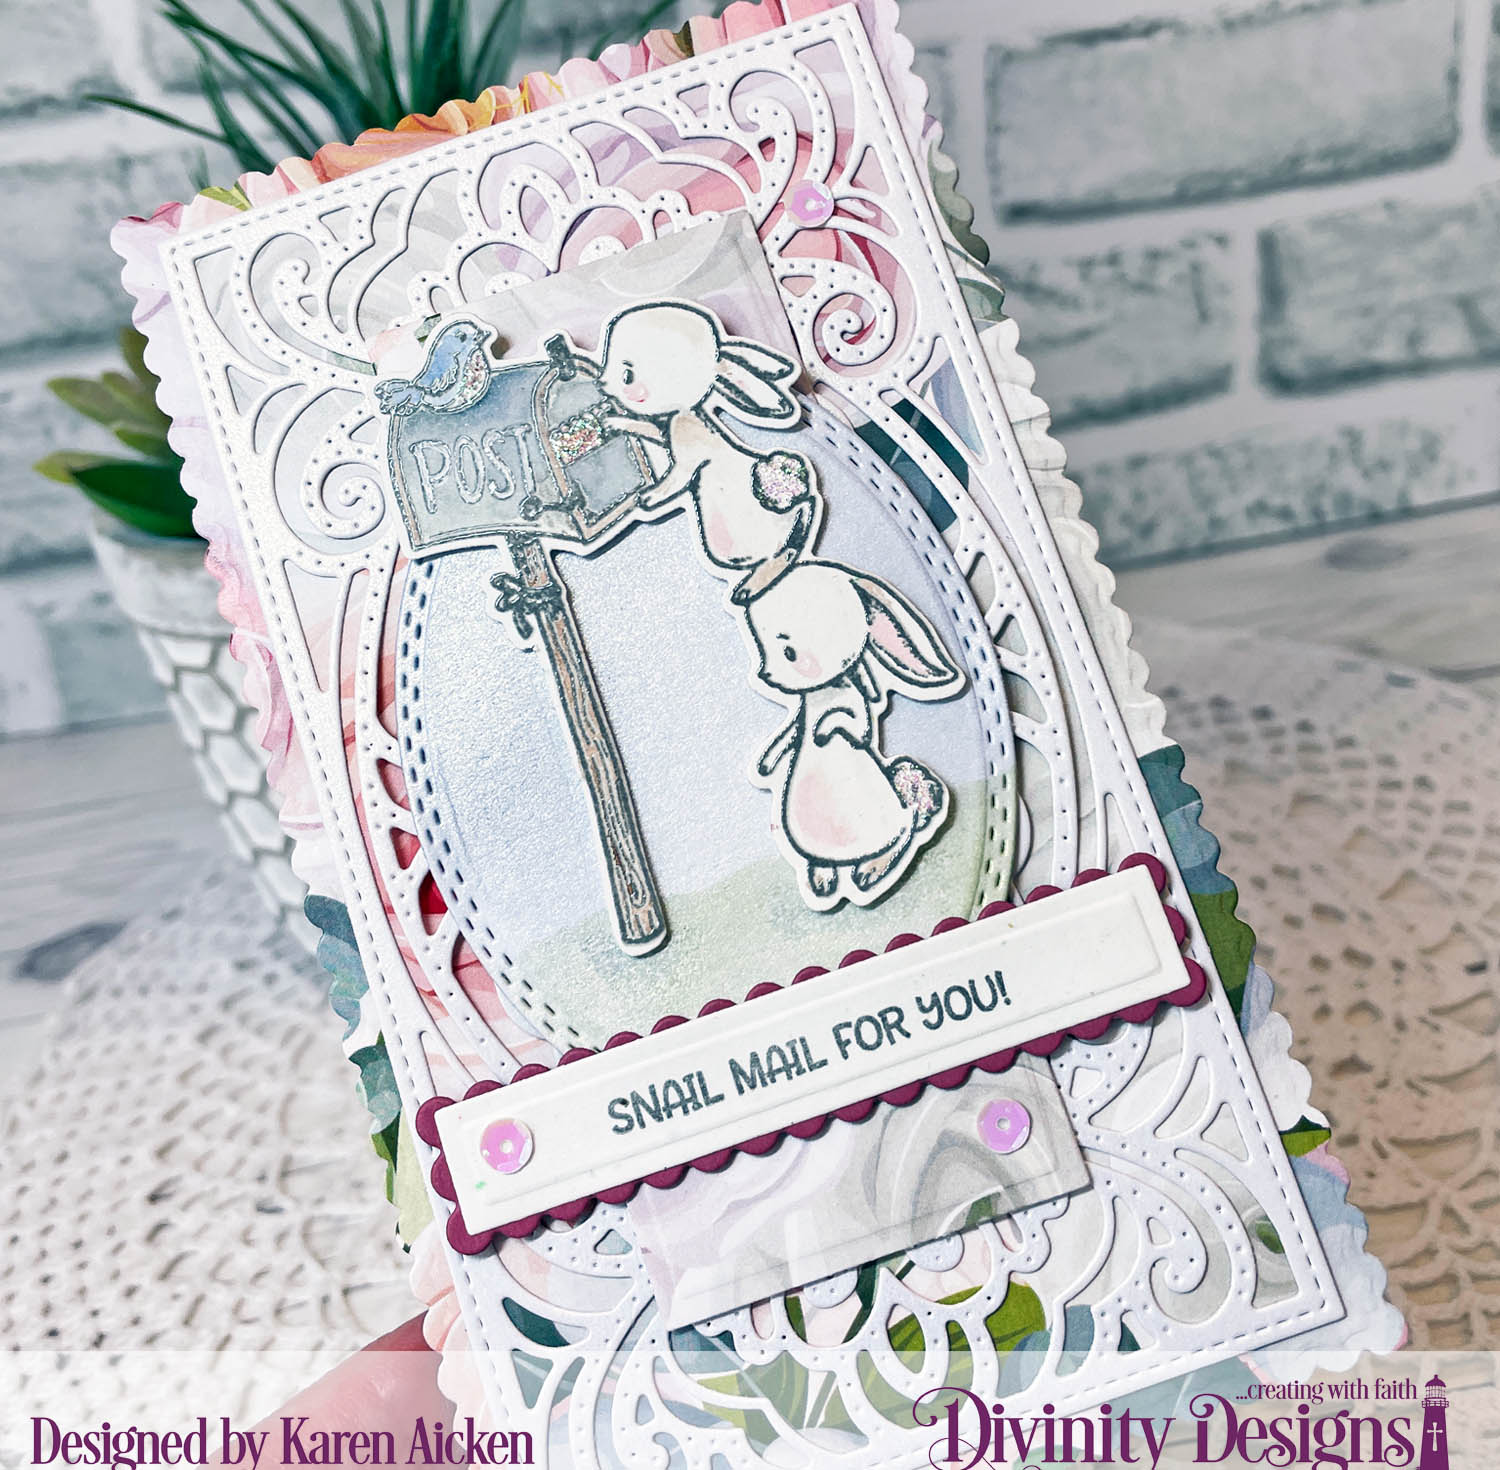
Hello! I'm on the Divinity Designs Blog today with these two cards ... a Mini Slimline Card and a Lever Card.
First up is the Mini Slimline card using Mini Slimline dies including the Mini Slimline Flourished Background die. I layered it over beautiful patterned paper from the Floral Favorites Slimline Sized paper package that was die cut with the Mini Slimline Scalloped Rectangle dies. I also used the Mini Slimline Card Base** and Mini Slimline Rectangles and Layering Rectangles as well.
This sweet Happy Mail stamp set is part of the May release and it's a stamp & die duo.
I cut an oval with the Oval Stitched Rows and lightly inked them before adding the stamped, embossed and die cut Happy Mail image. The bunnies have Wink of Stella on their tummies and Stickles on their tails.
Here is a peek at the inside ...
Next up is the Lever Card, and I have a walkthrough on YouTube:
This card uses the Beautiful Blooms patterned paper which is also Slimline Sized but you can see how well it works for A2 sized cards as well! It comes with some solid colours that make coordination so easy! I also used the new Party Time stamp and die duo.
Here is the card fully open where you can see more of those cute bunnies and a signing block created with the Double Stitched Rectangles.
** Requires a larger die cut machine.
The list below contains some affiliate links. If you use these links to purchase I may earn a small commission at NO extra cost to you.
Additional Supplies: Confetti card stock Other card stocks - stash White pearl card stock Copic markers Card sizes - Mini Slimline card is 3.5 x 6", fits in a #8 envelope. Lever Card - Standard A2, 4.25 x 5.5".
Hello! It's Fun Fold Friday here on my blog and I have two more March Paper Pumpkin Alternate cards to share. These have been done since the week I got my Paper Pumpkin kit, but I've had lots of Design Team projects to share so I'm just getting them posted now. These are my alternate cards #3 & 4 but I did finish the kit and have four more cards to share in the coming weeks. I have also been working on the April Paper Pumpkin Kit!
The tree stamps & dies I used are from the In The Pines stamp set, which is a holiday set but I love the tree images all year round!
This first card uses the Lever Card with Layers die set by Divinity Designs. I've had this die set for a couple of years and as soon as I saw the square design on the peach printed cards in the kit I knew it would work for a Lever Card!
I also used one of the larger printed panels from the kit to decorate the inside by splitting it in two.
My next card is also interactive - it's a Pop Up!
I debossed the ECD Sprigs embossing folder and popped up the Happy Birthday die cut.
Inside is the pop up made using my Simple Box Pop Up tutorial, which is linked in my YouTube video above.
The patterned paper is one of the separate envelope liners that was included in the kit.
I'll be back in a couple of days with another March Paper Pumpkin share.
Supplies: March 2021 Paper Pumpkin Kit Lever Card With Layers - Divinity Designs Card stocks In the Pines - Stampin' Up Tasteful Label dies - Stampin' Up Wink of Stella Grey Copic Marker 1054 Rectangles Crosshatch - Karen Burniston Sprig embossing folder - Elizabeth Craft Designs Happy Birthday Die - Penny Black Perennial Birthday (sentiment inside) - Stampin' Up White Gel Pen - Sakura Card sizes - both, standard A2 (4-1/4 x 5-1/2")
Hello! I am starting off the New Year with a card for Fun Fold Friday here on my blog and I'm sharing a Dog Themed Birthday Lever Card. I have been making a set of dog themed Birthday Cards for a gift, and this is one of them.
I used both the Lever Card die set and the Layering Die set for the fun fold card base, and the patterned paper is from Stampin' Up.
The cute dog (and the ball) were fussy cut from one of the patterned papers in the set.
I have a couple more of these dog themed Birthday Cards to share this month as well.
Supplies: Various card stocks from my stash Lever Card and Lever Card Layering Dies - Divinity Designs Patterned paper - Playful Pets, Stampin' Up Happy Birthday - Penny Black Sakura black glaze and white gel pens Small dog bone - Treats4Cookie, the Stamps of Life Circle - leftover piece from another project Black marker Nuvo Drops Wink of Stella Card size - Standard A2 (4.25 x 5.5")
It's Fun Fold Friday here on my blog, and today I'm sharing a Lever Card.I have a walkthrough of my card on a YouTube video for you, since it's always more fun to see an interactive card 'in action'. (If you are on a device and can't see the video, click HERE).
I have had this double sided patterned paper for many years and normally would have chosen the reverse side to work with. But this day, the aqua & cream with bird print really appealed to me! I chose not to use any of the layering dies for the inside of my card so the patterned paper could shine.
I do enjoy using this Lever Card die set, and how sturdy the cards stand for display.
Supplies:
Various card stocks
Lever Card and Lever Card Layering Dies - Divinity Designs
Patterned paper - K & Company
Stitched Square die - Your Next Stamp
Tasteful Label Dies - Stampin' Up
Mini MISTI - My Sweet Petunia
Jar of Flowers stamps - Stampin' Up
Stickles
Rustic 'ribbon' - Stampin' Up
Sprig Punch - Stampin' Up
Hammie Happy Birthday (Happy Birthday) - Your Next Stamp
Today I'm sharing a masculine card created with the Lever Card die set from Divinity Designs. When I am crafting, I often watch something on my iPad Mini ... either Netflix or YouTube. Well something popped up in my YouTube feed that looked interesting on Breaking Down a 12 x 12" Paper Pad. I watched it for a bit until I realized it was more for creating page kits for scrapbooking. (Also, I thought I had saved it so I could share it here, but apparently I did not). The video got me thinking though and I pulled out this older Dear Lizzy paper pad and took all the pages out of the binding to have a look at them.
There were a few I knew I'd never use for my cards so I added some 4 x 6" self adhesive magnet sheets to them to use for die storage. Easy Peasy and those papers were no longer glaring at me when I flipped through the pad.
Then I just started pulling papers and cutting them down. I wasn't trying to get as many cards as possible, more to use the papers until they were gone. It doesn't sound that different, but it was a completely different mind set for me.
I created about 75 card fronts from those papers!!! I will add them to card bases probably in May when I'm needing more cards to donate to my Mom's old nursing home and will start to share those ones as they are completed. They have their embellishments added, words are stamped and layered on the panels - all I need to do is use my MISTI to stamp the greetings inside the card bases and adhere the panels to the front.
If you follow my blog you know how much I love to use things up, so this project - which took me about 5 days off and on - was right up my alley. Both in the 'assembly line' way of working that I enjoy so much and the using up an entire paper pad.
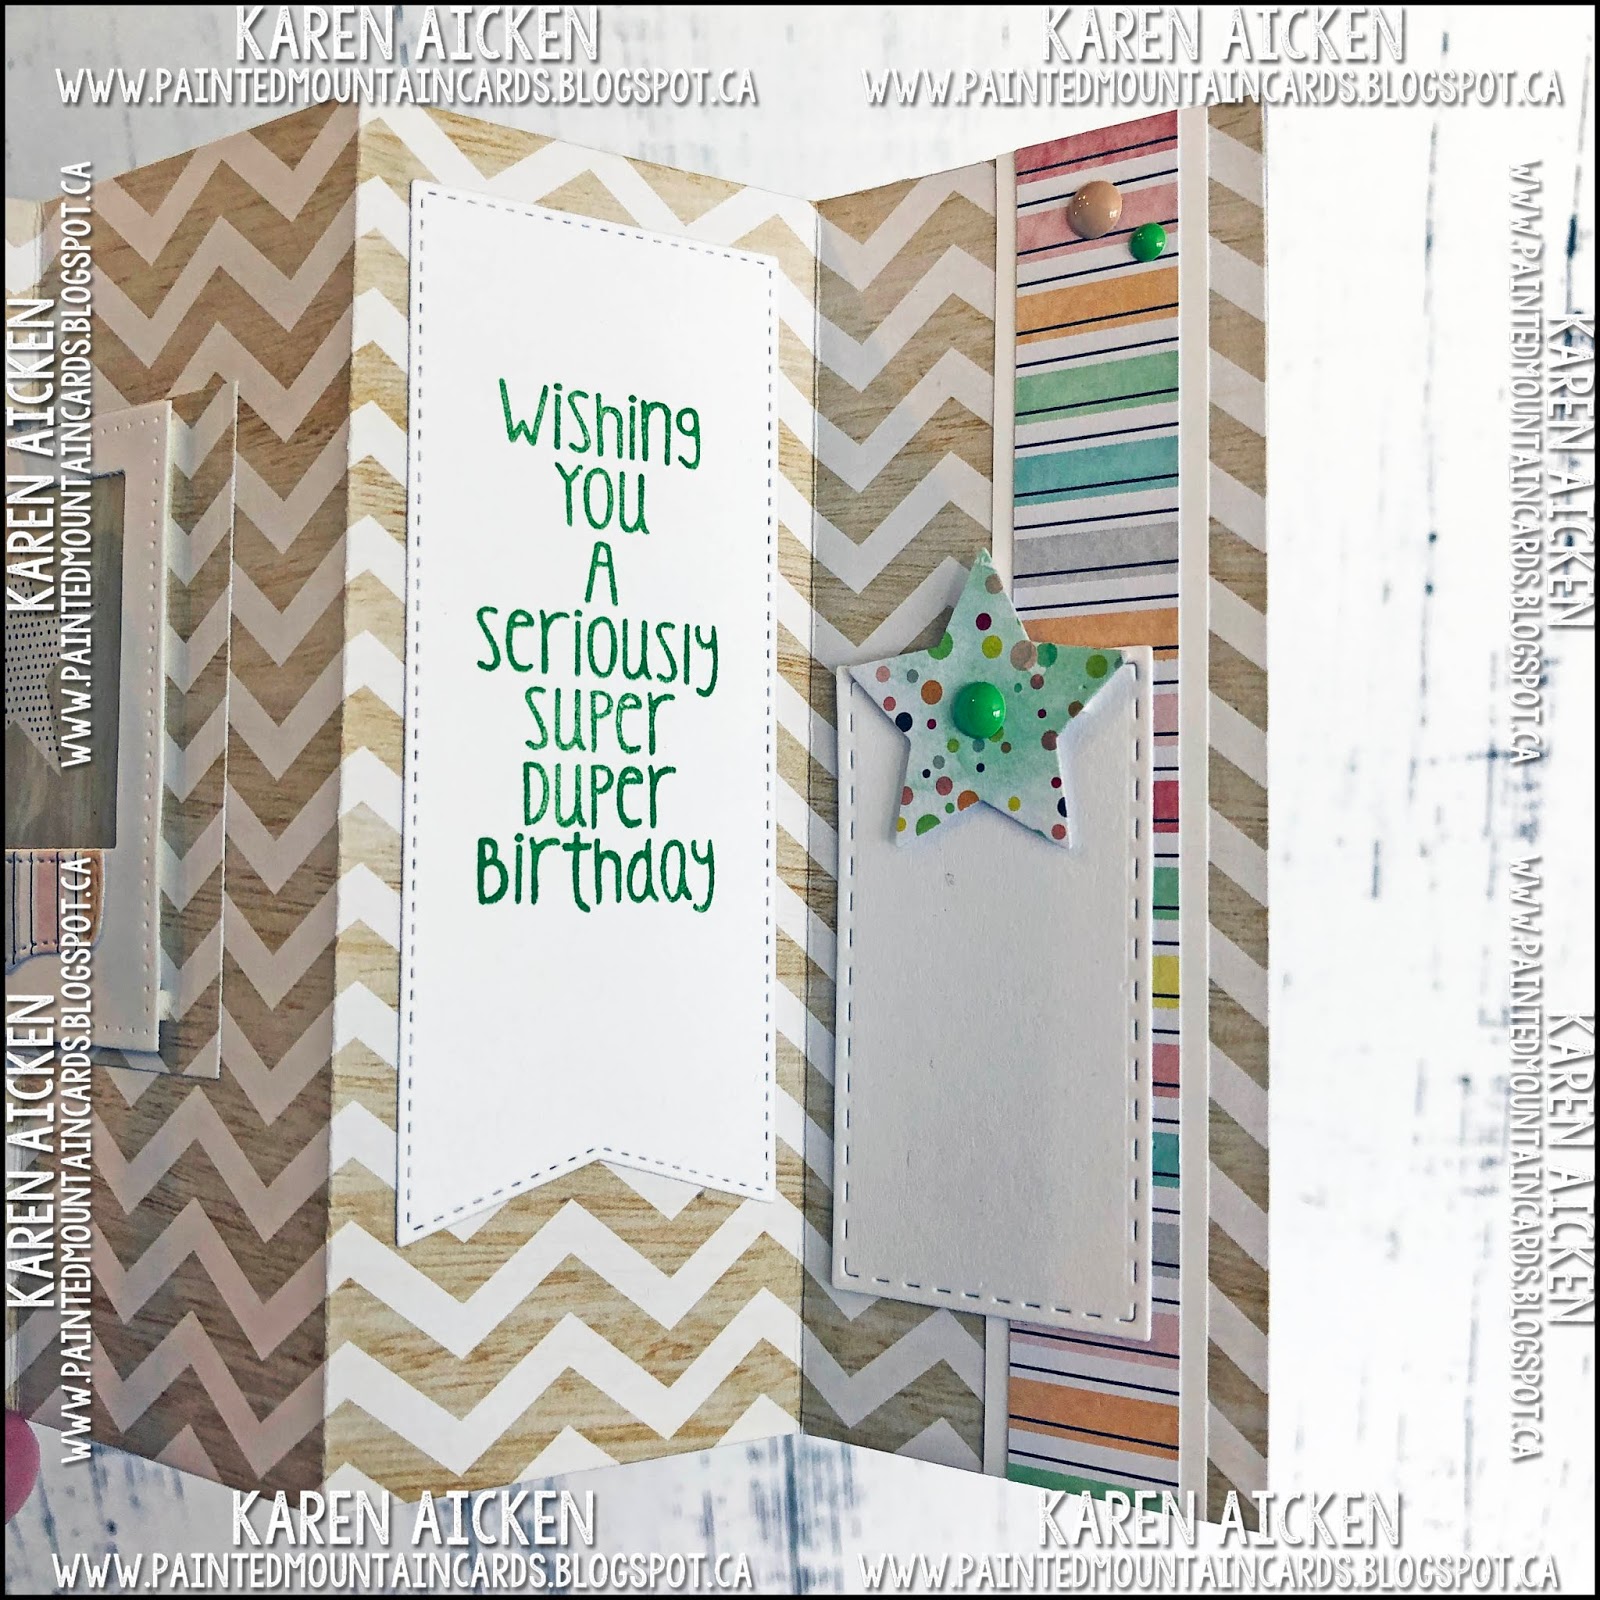
The final sheets were this woodgrain chevron pattern and I thought I could use them for a masculine birthday card. When this card was done I used the leftover chevron pieces to make a few more card fronts for the nursing home and called it done.
Remember you can see all of my card videos on my YouTube Channel HERE:
I chose not to use the Lever Card Layering Dies this time, as I didn't want to break up the chevron pattern on each panel.
The striped paper was perfect to add a pop of colour. In fact, I used it a fair bit on all of the other card panels too. There were lots of cut aparts in the paper pad too, some with sort of a wonky polaroid print. I cut those apart and used the patterned centres to die cut embellishments from such as the star shown below. The colours matched the papers perfectly but the words printed below the prints didn't appeal to me.
I loved the look of the polaroid pieces, but not their wonky edges. Your Next Stamp has this fun Polaroid Frame with Piercing Marks as part of their February Release, and I used it with almost all of those polaroid cut aparts. I thought it was a great way to use these smaller pieces on card fronts!
For this woodgrain and polka dot star one, I added acetate behind the YNS Polaroid Frame for some additional detail on the card.
I am afraid to search for it, but I think I probably have another identical paper pad in my stash. I absolutely loved it when I found it and it was such a screaming deal at the time I'm pretty sure I picked up a second one. But for now, I'm going to pretend this paper is all used up. Ha!
Supplies:
Lever Card die - Divinity Designs
Patterned paper and Cut parts - Dear Lizzy Neapolitan, American Crafts
Acetate
Polaroid Frame with Piercing Marks - Your Next Stamp
You know it's been a rough couple of weeks when you use up your entire supply of sympathy cards. I need to make more pronto, because when I need a sympathy card I certainly don't feel like being creative.
I pulled out some older patterned paper from K & Company and this pretty pearlized rose paper seemed perfect to use for a Lever Card.
It's so hard to pick up the shimmer from the paper in photos. I added this pretty metal butterfly embellishment in the centre. I've had them in my stash for years - and since I like butterflies on a sympathy card it was a good time to use one of them.
I like how sturdily these Lever Cards stand for display.
White and cream card stocks were just too harsh for the signing block, so I used this pretty pink polka dot paper instead and will just sign with a thick black pen.
I was going to add this to my stash and then found out I would need to send it off to friends of the family. Enough already.
Supplies: Dark Green and white card stocks Patterned paper - K & Company Metal butterfly - Recollections Lever Card Die set - Divinity Designs Lever Card Layering Die set - Divinity Designs Word stamp - Kindness and Compassion, Stampin' Up Fish Tail Banner - MFT Stamps Circle dies - Hero Arts Stitched Rectangle dies - Your Next Stamp Butterfly punch - Martha Stewart Card size - Standard A2 (4.25 x 5.5")
Since I have a HUGE stack of holiday themed patterned papers that I never seem to get through, this year I chose three packages to work with for my Christmas cards. Instead of hopping from paper stack to paper stack, I was hoping that by narrowing down my choices I would be able to make a dent in these three at least.
Today's card is a Lever Card, made using the Comfort & Joy paper package which also came with coordinating stickers and printed elements.
I stamped the words onto one of the glittered label stickers, and popped up the snow globe element with foam tape.
I added a couple more of the sparkly elements, and stamped a greeting to finish the card.
I'm happy to say that there is not much left of this paper package! I have some scraps that I can use and a full 12 x 12" sheet of buffalo plaid. I LOVE to use things up and it's looking like I'll be able to do that with this paper package this year.
Supplies:
Red card stock
Lever Card and Lever Card Layering Dies - Divinity Designs
Patterned paper and elements - Comfort & Joy, My Minds Eye