Saturday 29 February 2020

Ice Cream Cone Shaker Card

Hello crafty friends ...

Today I'm sharing the birthday card I made for our nephew's littlest, who was turning two. I decided to use the 'Sweet Shop Shaker Kit' from Queen & Company and went through my notebook to see if there was a sketch that would work.

Not only did I find a sketch (Viva la Verve May 2018), when I was done I decided I LOVED it and will definitely use it again. I was waiting for this kit to be released as it is chock full of great treat dies ... ice cream cone, ice cream sundae, donut, popsicle and even an ice cream truck!!! While the dies are intended for shaker cards, you can use them for non shakers too. I am always looking for supplies that will work for me for a long time, I just don't have the 'once and done' kind of budget or space. So when I'm finished making shaker cards with this kit, I can use the dies again and again for the birthday cards I donate to my Mom's old nursing home each month.


The patterned paper is included in the Sweet Shop kit, and I am just crazy about the cheerful colours and prints. I'm very proud of myself for actually cutting into not just one, but 4 different sheets in the package. The kit comes with a large stamp set with lots of fun sentiments but for this card I used a YNS greeting from the Waddles Brr-thday stamp set. It works so well with the ice cream cone!

When I was finished, I realized I could have probably added more filler and will do that the next time.


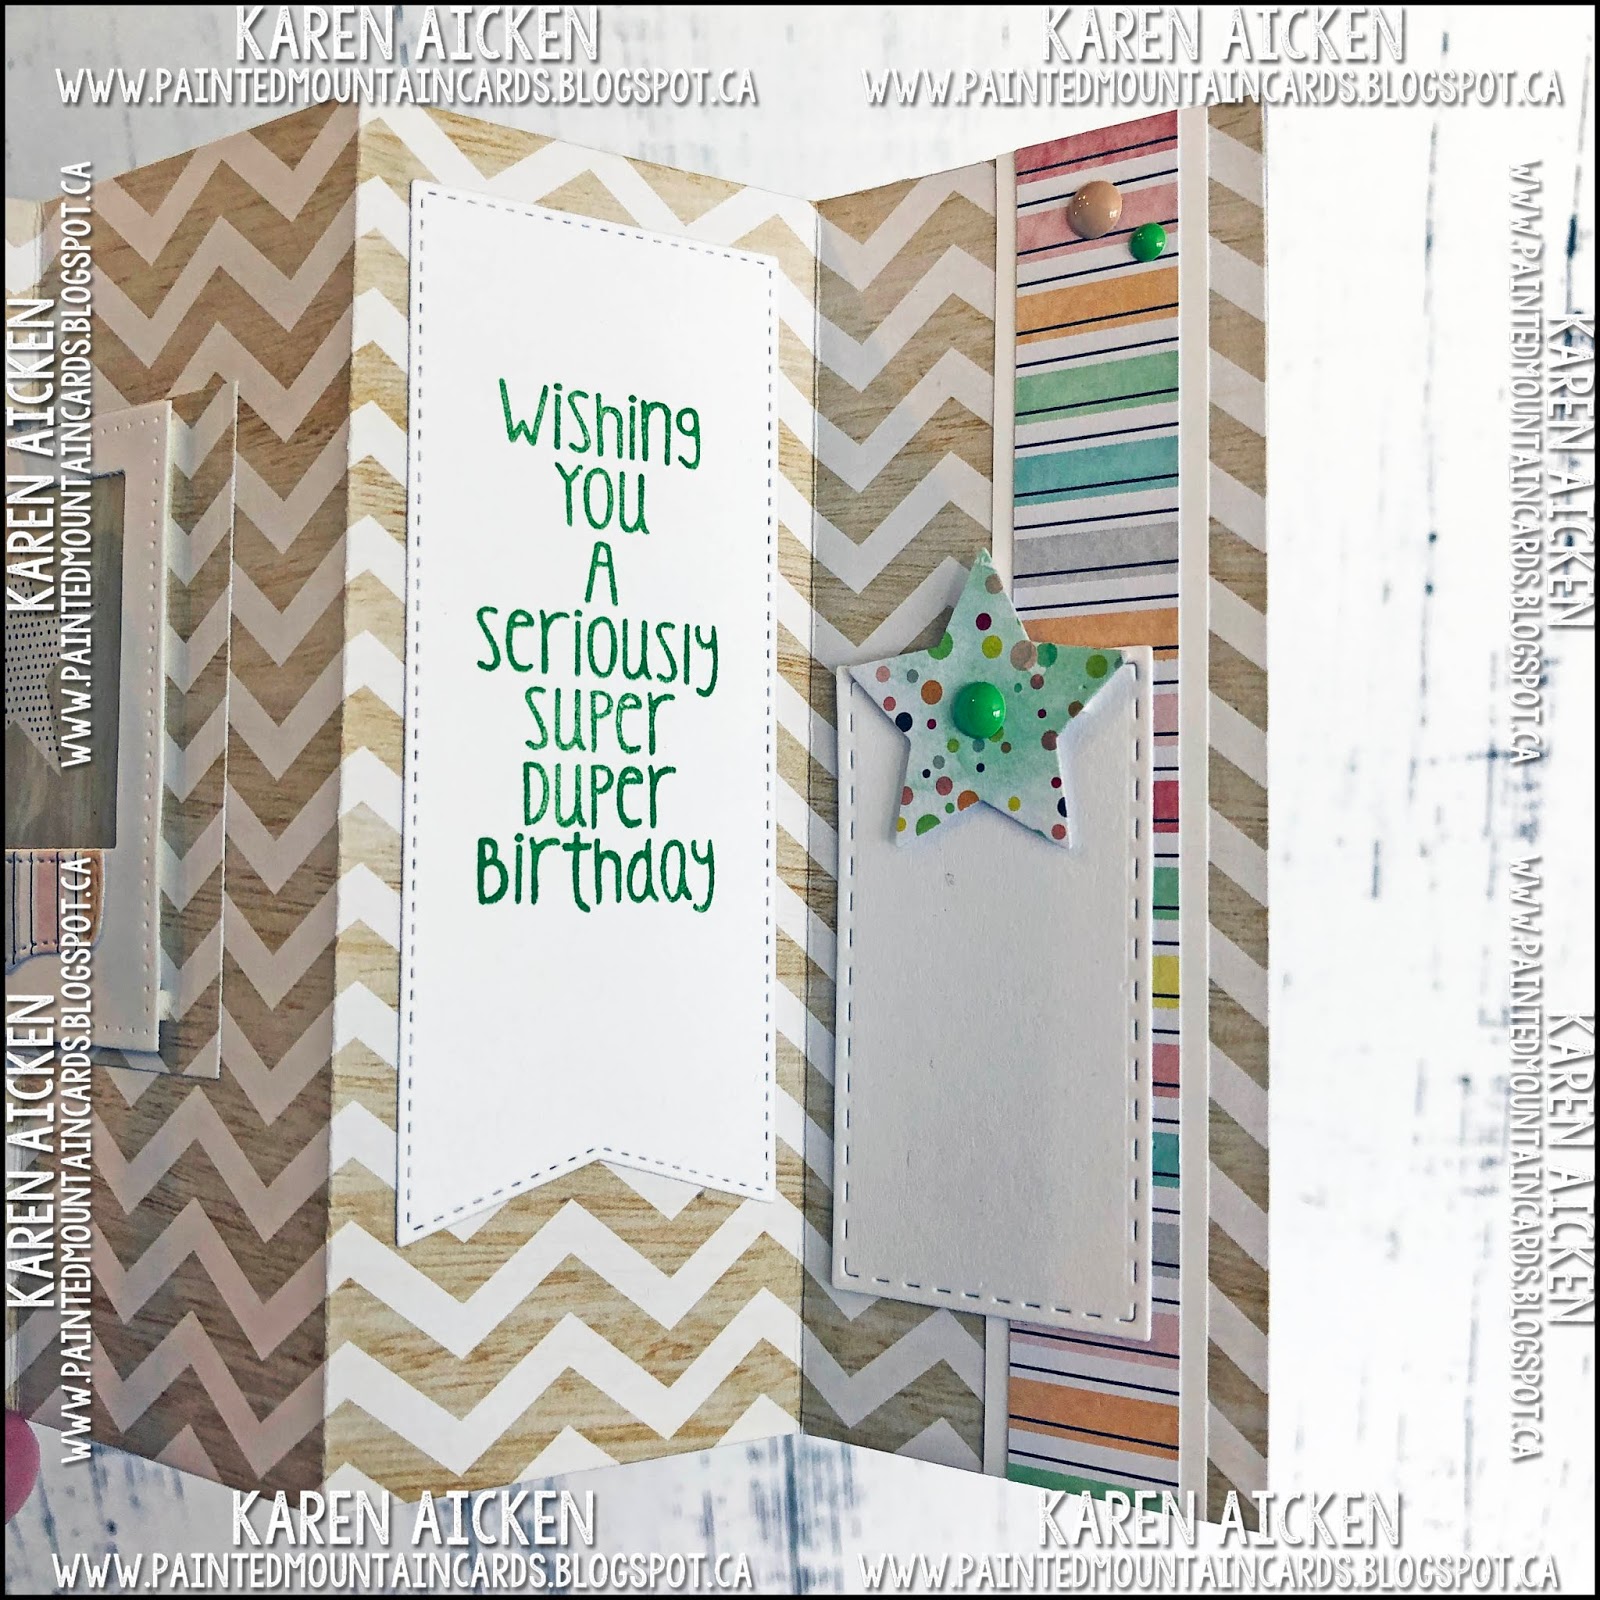
Finally, here is a peek at the inside with a stamped YNS birthday verse and a stapled fishtail flag, which is something I'm doing a lot these days.


Supplies:
Sweet Shop Shaker Kit - Queen & Company, unless specified below
Kraft, green pink and white card stocks
Makeup brushes
Sweet Shop Outline dies - Queen & Company
Additional filler from my stash
Stitched circle dies - MFT Stamps
Sketch - Viva La Verve, May 2018
Cool Birthday - Waddles -  Happy Brr-thday, Your Next Stamp
Catherine Pooler Inks
Stitched Scalloped Rectangle die set - Your Next Stamp
MISTI - My Sweet Petunia
Whatnot Sentiments 12 - Your Next Stamp
Mini Stapler - Tim Holtz

Card size: Standard A2 (4.25 x 5.5")

Thanks for stopping by today

Friday 28 February 2020

Moon Rose Diagonal Trifold Card

Hello crafty friends ...

I have a love affair with patterned paper. I do.

I try to use what I have, I really do. And I tell myself I am not buying any more paper pads. Then I see a 'Buy One get TWO FREE' and it stops me in my tracks. I flip through them, hoping none appeal to me. Yeah, right. Three more 12 x 12" paper pads came home with me that day.

This card uses one of them, along with the Z Fold Die with Layers from Divinity Designs for Fun Fold Friday here on my Blog.


The video's on Blogger are quite small, so if you'd like to see it larger head over to my YouTube Channel which you can find HERE.


I really like how nicely these cards stand for display.


I added lots of Stickles for additional sparkle and shine.


Below is the view of the card from the back, where I added one more of the sparkly cut-parts from the paper pad.


Supplies:
Purple Soft Finish Card Stock - Elizabeth Craft Designs
Z Fold Card with Layering Dies - Divinity Designs
Patterned paper and cut parts, Moonflower Magic - CraftSmart (Michaels Hot Buy)
Oval dies - Queen & Company
Seam binding
Stamp - Birthday Blow Out, Poppy Stamps
Makeup Brushes
Stickles
White card stock

Card size - 4 x 5.5", fits in a standard A2 envelope

Thanks for stopping by today

Thursday 27 February 2020

Roses & Butterflies Sympathy Pop Up Card

Hello crafty friends ...

I need to add some sympathy cards to my almost depleted stash so went poking around in my patterned paper. I came across a partial sheet of this older double sided patterned paper and managed to use it up for my card today. Here is a look at the front.


Remember you can always see the video's larger by going to my YouTube Channel HERE.  


I love butterfly imagery and these ones were perfect to use with my technique of turning Karen Burniston's Train Pivot Panel vertically and decorating the platforms.


Once I had my top butterfly placed so it didn't stick out beyond the bottom edge of the closed card, I  trimmed the top of engine area flush with the butterfly.


One more for the stash!

Supplies:
Pink, white and black card stocks
Patterned paper - Cottage Rose, Kaisercraft
1106 Train Pivot Panels - Karen Burniston
Foundation dies - Queen & Company
Butterfly dies - Lawn Fawn
Wink of Stella
Stitched Mini Scalloped Rectangle - Honey Bee
Words stamps - Sympathy2Stamp, the Stamps of Life
Catherine Pooler Inks
Nuvo Drops
Card size - Standard A2 (4.25 x 5.5")

Thanks for stopping by today

Wednesday 26 February 2020

Stars & Chevron Lever Card

Hello crafty friends

Today I'm sharing a masculine card created with the Lever Card die set from Divinity Designs. When I am crafting, I often watch something on my iPad Mini ... either Netflix or YouTube. Well something popped up in my YouTube feed that looked interesting on Breaking Down a 12 x 12" Paper Pad.  I watched it for a bit until I realized it was more for creating page kits for scrapbooking. (Also, I thought I had saved it so I could share it here, but apparently I did not). The video got me thinking though and I pulled out this older Dear Lizzy paper pad and took all the pages out of the binding to have a look at them.

There were a few I knew I'd never use for my cards so I added some 4 x 6" self adhesive magnet sheets to them to use for die storage. Easy Peasy and those papers were no longer glaring at me when I flipped through the pad.

Then I just started pulling papers and cutting them down. I wasn't trying to get as many cards as possible, more to use the papers until they were gone. It doesn't sound that different, but it was a completely different mind set for me.

I created about 75 card fronts from those papers!!!  I will add them to card bases probably in May when I'm needing more cards to donate to my Mom's old nursing home and will start to share those ones as they are completed. They have their embellishments added, words are stamped and layered on the panels - all I need to do is use my MISTI to stamp the greetings inside the card bases and adhere the panels to the front.

If you follow my blog you know how much I love to use things up, so this project - which took me about 5 days off and on - was right up my alley. Both in the 'assembly line' way of working that I enjoy so much and the using up an entire paper pad.

The final sheets were this woodgrain chevron pattern and I thought I could use them for a masculine birthday card. When this card was done I used the leftover chevron pieces to make a few more card fronts for the nursing home and called it done.


Remember you can see all of my card videos on my YouTube Channel HERE:  


I chose not to use the Lever Card Layering Dies this time, as I didn't want to break up the chevron pattern on each panel.


The striped paper was perfect to add a pop of colour. In fact, I used it a fair bit on all of the other card panels too. There were lots of cut aparts in the paper pad too, some with sort of a wonky polaroid print. I cut those apart and used the patterned centres to die cut embellishments from such as the star shown below. The colours matched the papers perfectly but the words printed below the prints didn't appeal to me.


I loved the look of the polaroid pieces, but not their wonky edges. Your Next Stamp has this fun Polaroid Frame with Piercing Marks as part of their February Release, and I used it with almost all of those polaroid cut aparts. I thought it was a great way to use these smaller pieces on card fronts!

For this woodgrain and polka dot star one, I added acetate behind the YNS Polaroid Frame for some additional detail on the card.


I am afraid to search for it, but I think I probably have another identical paper pad in my stash. I absolutely loved it when I found it and it was such a screaming deal at the time I'm pretty sure I picked up a second one. But for now, I'm going to pretend this paper is all used up. Ha!

Supplies:
Lever Card die - Divinity Designs
Patterned paper and Cut parts - Dear Lizzy Neapolitan, American Crafts
Acetate
Polaroid Frame with Piercing Marks - Your Next Stamp
White card stock
Stitched rectangle die set - Your Next Stamp
Banner dies - Queen & Co
Silly Monsters (Happy Birthday) - Your Next Stamp
Stacking Star dies - Honey Bee Stamps
Carrot Cake Gumdrops - Your Next Stamp
MISTI - My Sweet Petunia
Lots of Birthday 2 Stamp - the Stamps of Life
Catherine Pooler Inks

Card size: Standard A2, 4.25 x 5.5"

Thanks for stopping by today

Tuesday 25 February 2020

Lets Celebrate Birthday Card

Hello crafty friends ...

When I was finished with the Pop Up Anniversary Card (see HERE for that card), I looked at the scraps and decided to use them to create a card background. Grid dies are perfect for this and for today's card I used the Photo Booth die from Your Next Stamp.


The 3-d Floral embellishments have been in my stash for several years, and had yellow faceted gems attached to the centres. So they never really went with anything I was making. Once the gems were peeled off (carefully!) the flowers became far more useful. I added these pretty & sparkly YNS Gumdrops to the flower centres instead and loved the look. I'll be doing that with the remainder of these pretty embellishments too.


Finally, here is a peek at the inside. Remember you can click on any of the photos to open them up larger and see the details. The web versions can be slightly blurry.


Supplies:
Photo Booth Panel Die - Your Next Stamp
Patterned paper - K & Company
Green and white card stocks
3D flower sticker - K & Company
Cool Tag Banner Sentiments - Your Next Stamp
White Sugar & Sparkle Gumdrops - Your Next Stamp
Stitched rectangle dies - Your Next Stamp
Whatnot Sentiments Four - Your Next Stamp
MISTI
Small Stapler - Tim Holtz

Thanks for stopping by today

Monday 24 February 2020

Woodland Birthday Book Card

Hello crafty friends ...

I have always liked the look of Book Cards ... which is why I used the (retired) Lorna Label die as a double so often. The measuring and cutting with a craft knife to make a Book Card did not appeal to to me at all.  Recently Divinity Designs came out with a Book Card die set with Layers and I was SO happy! This is the first card I made with the die set:


I used some cute Cut Parts from the paper pack, some small puffy stickers from my stash and the sentiment stamp and die is from Your Next Stamp.


Here is a peek at the inside ...


I added a few YNS word stamps and more puffy stickers to decorate the inside as well.


Yep - the fun fold and dimension this die set creates just make me happy and I can't wait to make another one.


Supplies:
Blue and white card stocks
Book card die and layers - Divinity Designs
Patterned paper & Cut apparatus - Happy Camper, Echo Park
Puffy stickers - Sticko
Washi Tape Sentiments, stamps and die set - Your Next Stamp
Foundation dies - Queen & Company
Word stamps - Photo Booth, Your Next Stamp
Happy Birthday stamp - Way Cool Monsters, Your Next Stamp

Card size - Standard A2 (4.25 x 5.5")

Thanks for stopping by today

Sunday 23 February 2020

Puffy Felt Sticker Birthday Cards

Hello crafty friends ...

Today's share is another set of Birthday Cards I made last year to donate to my Mom's old nursing home. I had the photos taken but never did get them posted so today is the day.


I was using up scraps of this patterned paper, and pulled out the puffy felt stickers since I don't have to worry about bulk for mailing. The cards are handed directly to the residents.


Here is a peek at the inside:


These cards were made so long ago I no longer have the supply list.

Thanks for stopping by today

Saturday 22 February 2020

Monster Kraft Gift Card Holders

Hello crafty friends ...

It's Fun Fold Friday here on my blog, and I have a pair of little gift card holders to share today.

I have been using a lot of kraft card stock for the past 6 months or so, and discovered I had lots of leftover pieces that were too small for regular card bases but too big to go in the scrap bin. So that is what started my cards today. I decided to make a pair of simple Gift Card Holders, using these fun monster stamps from Your Next Stamp and the Pop up Wiper Insert from i-crafter.


 The videos are quite small on Blogger, so if you'd like to see it larger, please check out my YouTube channel HERE.


I think they turned out so cute, with the little peeking monsters appearing as the card opens.


Now these cards are simple, but they were a little tricky. It's hard to position anything on the wiper arm when the card is this narrow ... but with trial and error, it can be done. I used acetate for the wiper arms, and scotch tape to adhere the monsters down until I was happy with their placement.


NOTE:  Be careful not to put adhesive on the bottom slot when you are adhering the wiper insert together. Otherwise you can't slide the Gift Card under it! I have yet to see the packaging for the Wiper Insert, so I'm not sure if there are directions for assembly on the package or not. But if you need help assembling, Lynda has a tutorial on i-crafter HERE:


Supplies:
222011 Pop Up Wiper Insert - i-crafter, Lynda Kanase
Kraft and white card stocks
Buffalo plaid patterned paper - Carta Bella
Stitched square die set - Your Next Stamp
Sakura black glaze and white gel pen
Copic markers
Chameleon Markers and Color Tops
MISTI - My Sweet Petunia
Silly Trash Monsters stamp set - Your Next Stamp
Acetate scraps and scotch tape
Silly Monsters stamp set - Your Next Stamp
Silly Monsters die set - Your Next Stamp
Word Bubble - Riley & Company
Peel Off Border Stickers - Elizabeth Craft Designs
Carrot Cake Gumdrops - Your Next Stamp

Card size - 3-5/8 x 4" (closed)

Thanks for stopping by today

Thursday 20 February 2020

Pop Up Mermaid Card

Hello crafty friends

Today I'm sharing the card I made for Your Next Stamp's Fun Friday Challenge #133 "In and Out - Decorate the inside of your card too." Since I always decorate the inside of my cards, the YNS team decided I was the inspiration for this challenge!


The Fun Friday challenges come with two chances win prizes!! Comment on the YNS Blog, Instagram or Facebook pages for a chance to win a free stamp set. Comment on all three to increase your chances, but comments must be left by February 26th. 

The winner will be announced on February 28th on the YNS Blog.
Scroll down to see more details about the prizes.

Let's start with the front of my card, where I used this pretty beach themed patterned paper, some sparkly Gumdrops, a stamped greeting and the adorable crab image from the Happy Days Mermaid Set.


I get so much use out of these Stitched Wavy Circle dies, and used them on the front and inside the card as well. 


Now there are lots of different ways to create a pop up inside your card, and I'm sharing one of the easiest with you today. I did a quick photo tutorial for you as well, in case you are unfamiliar with creating pop up's. I get new followers regularly, and I know people are at all different places on their card making journey. 

On the inside of my card, I have a popped up Mermaid and a few of her underwater friends from the same stamp set.


I've had this mermaid image for awhile - isn't she just the cutest? While I really wanted to colour her with rainbow hair, I decided to keep things more subtle and coordinate with the patterned paper I chose. The wavy line was cut with the YNS Double Pierced Hills die.

It's hard to see in the photos, but I added Wink of Stella to her hair and tail, and glitter pen accents throughout the card for some birthday shimmer & shine.


Before I get to the Pop Up 'how to', here are a few more details on the challenge:


The Fun Friday Challenge #133 runs through March 5th at midnight. One random participant will win a $15 gift certificate to the Your Next Stamp store.  If YNS stamps or dies are the focal point then the winner receives an additional $5 gift certificate for a total of $20.  The winner will be announced on the YNS Blog the Sunday after the challenge closes. Check it all out on the Your Next Stamp blog HERE.


Simple Pop Up Directions by Karen Aicken


Since I was using a 6 x 6" paper pad, I made my pop up insert to fit the centre of the card only, and used more patterned paper with a YNS border die to cover the top and bottom edges. You can see how the pop up fits inside my A2 card in the last photo. This insert can be as tall as your card, or even shorter than what I did - it's all up to you! Note: This is heavyweight patterned paper. Text weight paper is not sturdy enough.

1.  To start, I cut a 4 x 6" piece of the double sided patterned paper and scored it in the centre at 3". Then I folded it in half. Note:  To create the pop up box, we will be keeping the patterned paper FOLDED and working on the BACK SIDE of the insert.

2.  Now pencil a line about 3/4" up from the fold. This creates an additional fold line and the marks will be hidden inside the card so you don't have to worry about erasing any pencil marks. I used a black pen so it would show up better for you to see the lines.  

Note: You can make the pop up box as wide or as deep as you wish. If you have never made one before, make one following my measurements so you can see how it all goes together. That will make it easier to change up the sizes - because once you start making pop up's, it's hard to stop!

3.  Draw two vertical lines, from the fold up to the guide line created in step 2. I made mine centred and one inch apart. Again, these measurements can be changed up for the card you wish to create - and it's fun to move the pop up box to one side, or even cut more than one!

Your pop up insert should now look like the photo below.


4.  Cut on the two vertical lines you created in Step 3, from the fold up to the guide line and cutting through both layers. Remember we are keeping this pop up insert folded while we create the pop up box.    

5.  Now carefully fold on the guide line from Step 1, in both directions. See photos below.


6.  Flatten out the piece you folded and carefully open the card. Now gently push the box you've created to the other side. We've been working on the back side of the pop up insert so you are pushing the box to the front side in this step.


7. Turn your pop up insert over to the right side and admire your pop up piece!


8.  Adhere this inside your card base, nestling it tight into the fold.


9.  Decorate as desired!
I hope you've enjoyed my Pop Up Tutorial, and that you have a chance to play along with YNS's Fun Friday Challenge!

Supplies:

Patterned paper - Sea Maiden, Authentique (Double Sided)
Double Pierced Hills - Your Next Stamp
Black Olive Ink - Your Next Stamp
Happy Days Mermaid stamp set - Your Next Stamp
Winter Wonderland Sparkly Gumdrops - Your Next Stamp
Stitched Wavy Circle dies - Your Next Stamp
Whatnot Sentiments 4 - Your Next Stamp
Arteza Glitter Pens
Copic markers
Sakura white gel pen
Kraft and white card stocks
Neenah card stock (for the stamped images)
Queen & Company sketch
Catherine Pooler Inks

Card size - Standard A2 (4.25 x 5.5")


Thanks for stopping by today

Wednesday 19 February 2020

You're Awesome! Cookie Stack Shaker Card

Hello crafty friends ...

Today I'm sharing another card for the February release at Your Next Stamp. The images on the 'Hammie Sweetness Overload' set are just too cute and I couldn't wait to play with them.

I used masking to stamp my stack of 'macaron hamsters', colouring them with Copic markers. Then I decided it would be fun to make a shaker card so used the new Rounded Panel Shapes to cut the rectangular window. I like the stitched line this gives around the outside edge, and I saved the fallaway rectangle to use on another project.


The 'You're Awesome' stamp is from a different new release set - the Photo Booth All Smiles Set. I'm such a fan of YNS's Photo Booth line and these ones are going to be lots of fun to play with too! For today's card I added some different shaker filler from my stash and finished the card with some sparkly YNS Gumdrops.


Here is a peek at the inside, where I stamped one more of the 'macaron hamsters' on the inside and there is lots of room to write a message when I go to send the card.


Supplies:
Hammie Sweetness Overload - Your Next Stamp (February Release)
Hammie Sweetness Overload Die Set - Your Next Stamp (February Release)
Rounded Panel Shapes - Your Next Stamp (February Release)
Photo Booth All Smiles (You're Awesome) - Your Next Stamp (February Release)
Magical Pastel Gumdrops - Your Next Stamp
Cool Tag Three Die Set (Fishtail Banner) - Your Next Stamp
Stitched Fishtail Banners - Your Next Stamp
Stitched Rectangle Die Set - Your Next Stamp
Black Olive Ink - Your Next Stamp
White card stock
Neenah White card stock (for stamping)
Copic Markers
Post It Note (for masking)
Sakura Black Glaze and white gel pens
Patterned paper - Dear Lizzy Neapolitan, American Crafts
Acetate - Hero Arts
Various shaker filler - stash
Bakers Twine

Card Size - Standard A2 (4.25 x 5.5")

Thanks for stopping by today

Anniversary Wiper Pop Up Card

Hello crafty friends ...

Today I'm on the i-crafter Blog with my Inspiration Team project using i-crafter's February Release. Since I'm such a fan of the Wiper Inserts, that is what I went with again today, but also combined some additional January and February dies. 


The videos are quite small on Blogger, so if you'd like to see it larger, please check out my YouTube channel HERE.


I kept everything quite flat for ease of mailing, but it would look really nice with foam tape for dimension too. I die cut the heart from the Heart Hands Wiper Insert into the patterned paper, adhered all the pieces to some scraps of card stock then glued the heart back into the opening. You get just a hint of dimension from that extra card stock layer. The sweet greenery die is from the new Floral Garden die set.


Have you seen all the fun projects that the i-crafter Inspiration Team - and customers - are making with the Making Faces die set? So fun! Here I used them to resemble our middle daughter and hubby as this Anniversary card is for them.


I added another die cut heart and the love die, then adding some more of the greenery along the back of the card right at the fold. The banner under the signing block is from the new Pop Up Wiper Insert die set.


Supplies:
Green, pale pink, kraft, black and white card stocks
Patterned paper - K & Company
Rectangle dies - Hero Arts
Circle dies - Hero Arts
Acetate scraps
Black marker
Wink of Stella
Stickles
Nuvo Drops
Seam Binding
Sakura white gel pen

Thanks for stopping by today

Tuesday 18 February 2020

Gumball Shaker Card

Hello crafty friends ...

I have had my eye on this Gumball Shaker Card Kit from Queen & Company for a long time. Finally I justified it enough in my head to order it, and in one evening I made up all nine Gumball Shaker Elements. Ha ... and they are all red, too!

Of course I wanted to make a card with one of them right away, and this rainbow heart patterned paper scrap was sitting on my stamping area so I grabbed that and here is my finished card.


While you can choose to colour coordinate the 'gumballs' by colour, I added a little bit of each of the included shaker bits because who doesn't love a rainbow of gumballs?


Finally, here is a peek at the inside ...


I have eight Gumball Shaker elements ready to go onto other cards, and with the dies I can make more whenever I need to. I'm thinking without the shaker elements, they would make cute decorations on the nursing home donation cards.

Supplies:
Gumball Shaker kit - Queen & Company
Red, black and white card stock
Patterned paper - You are Loved, Bella Boulevard
Foundation dies - Queen & Company
Stitched Mini Scalloped Rectangle dies - MFT Stamps
Stitched rectangle dies - Your Next Stamp
Stamps inside - Birthday Blowout, Poppy Stamps
Retro Gumdrops - Your Next Stamp
Tropical Paradise Gumdrops - Your Next Stamp
Red dot patterned paper - Queen & Company
Black pearl card stock
White pearl card stock

Card size - Standard A2 (4.25 x 5.5")

Thanks for stopping by today