Showing posts with label Cricut. Show all posts

Wednesday, 24 November 2021

Slimline Card with Deer Trio


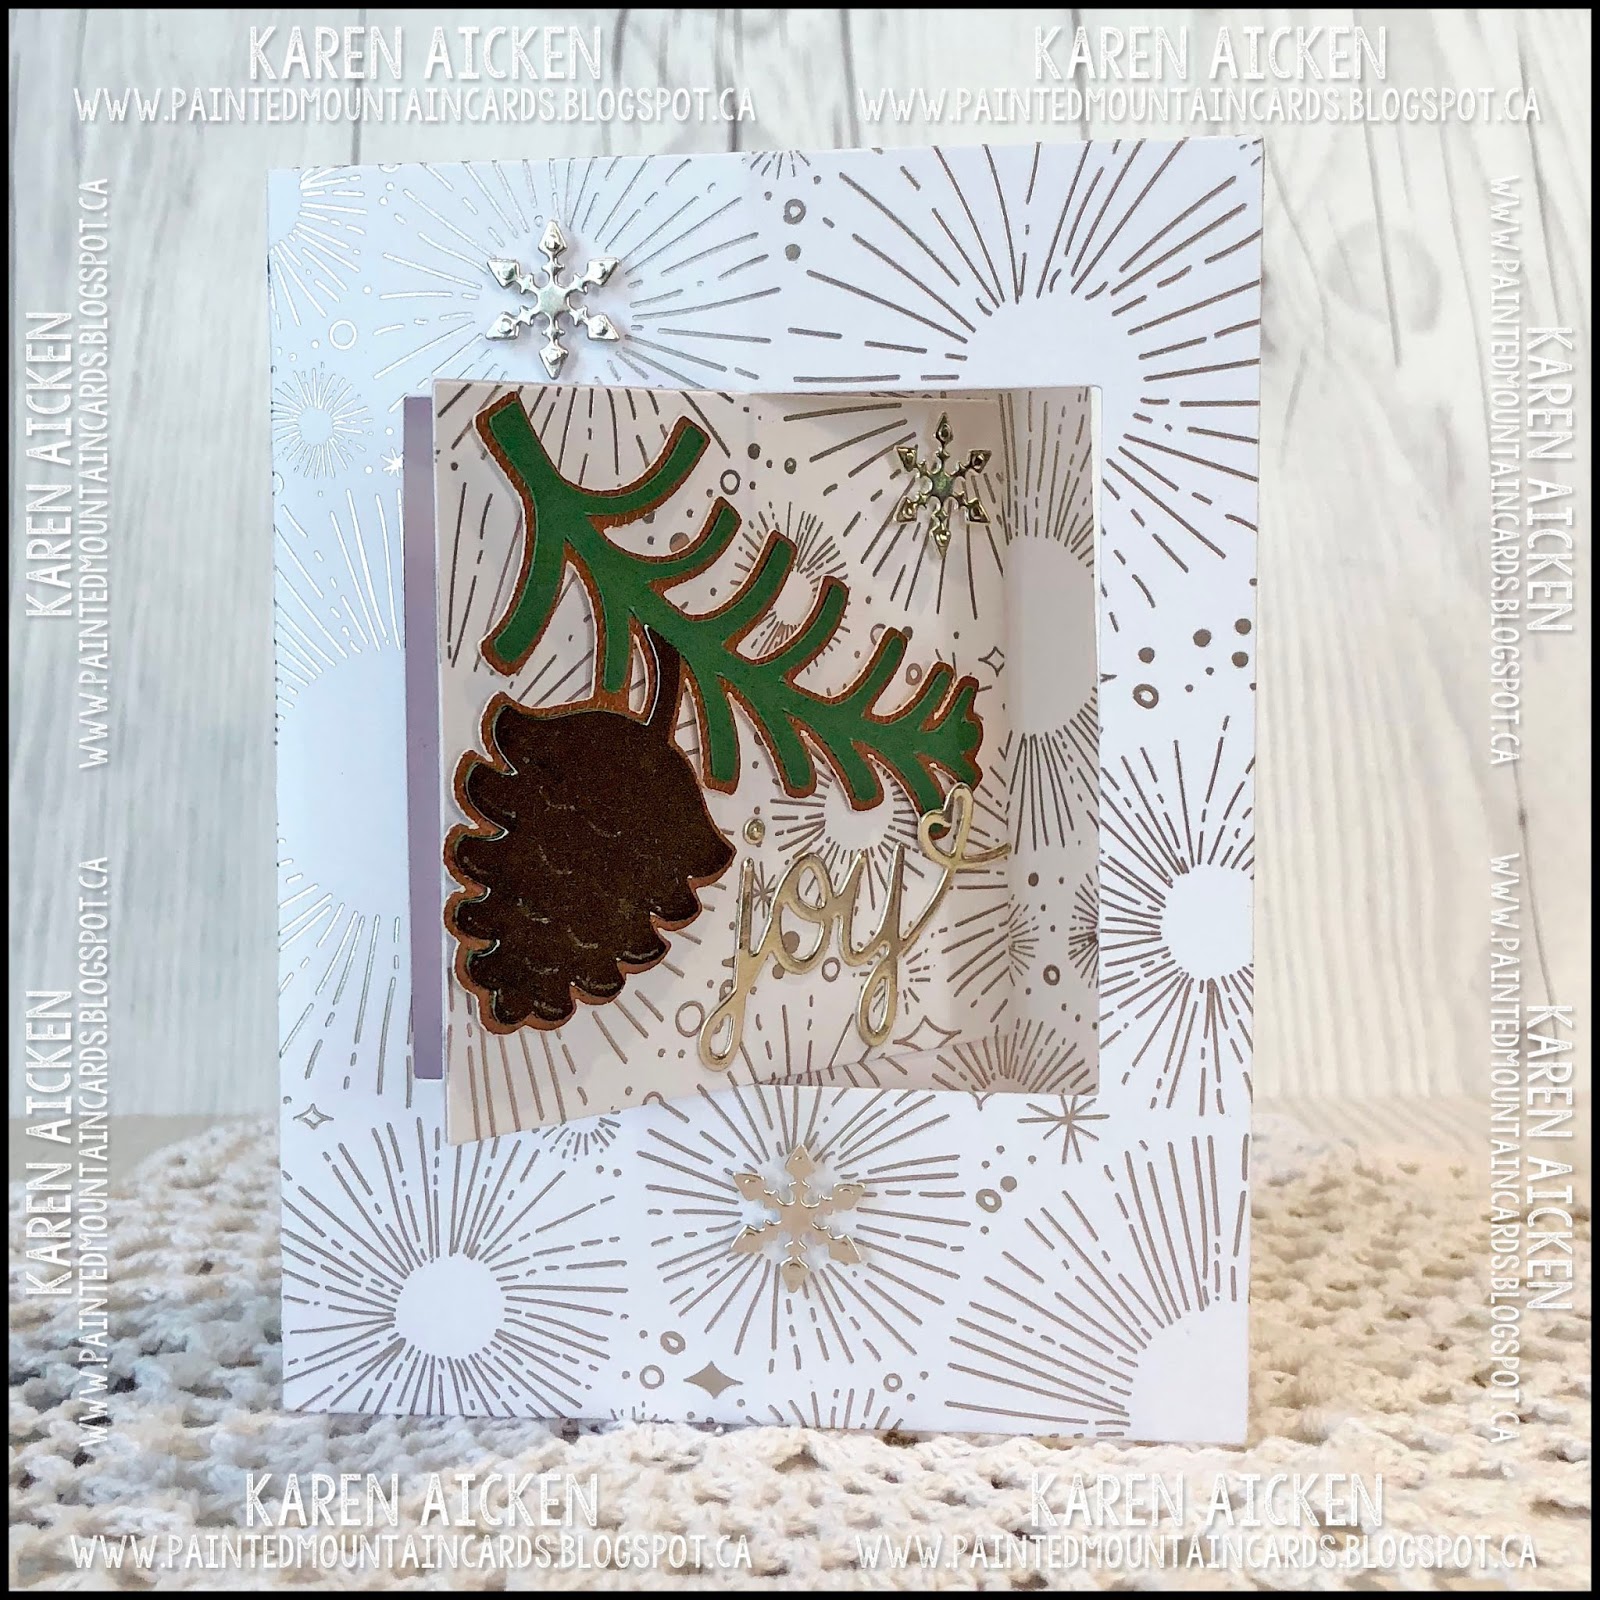
Hello!  Today I'm sharing the card I made using those older, Cricut cut deer I used on a Mini Slimline card HERE. As I said in that post, there were four card fronts sitting in my Christmas Bin that had been there for YEARS. Since my style (and supplies) have evolved over time, I decided to repurpose those deer for this years holiday cards. They came off of the card fronts easily, since the foam tape was so old it didn't have much sticky left. 

The patterned paper is also old - the date on it is 2003! I die cut it using the View From My Window Slimline die from Crafty Meraki, backed the window openings with vellum then added the patterned paper fallaway pieces back in but behind the vellum for a softer look. I also outlined just inside the window edge with a gold gel pen.

 
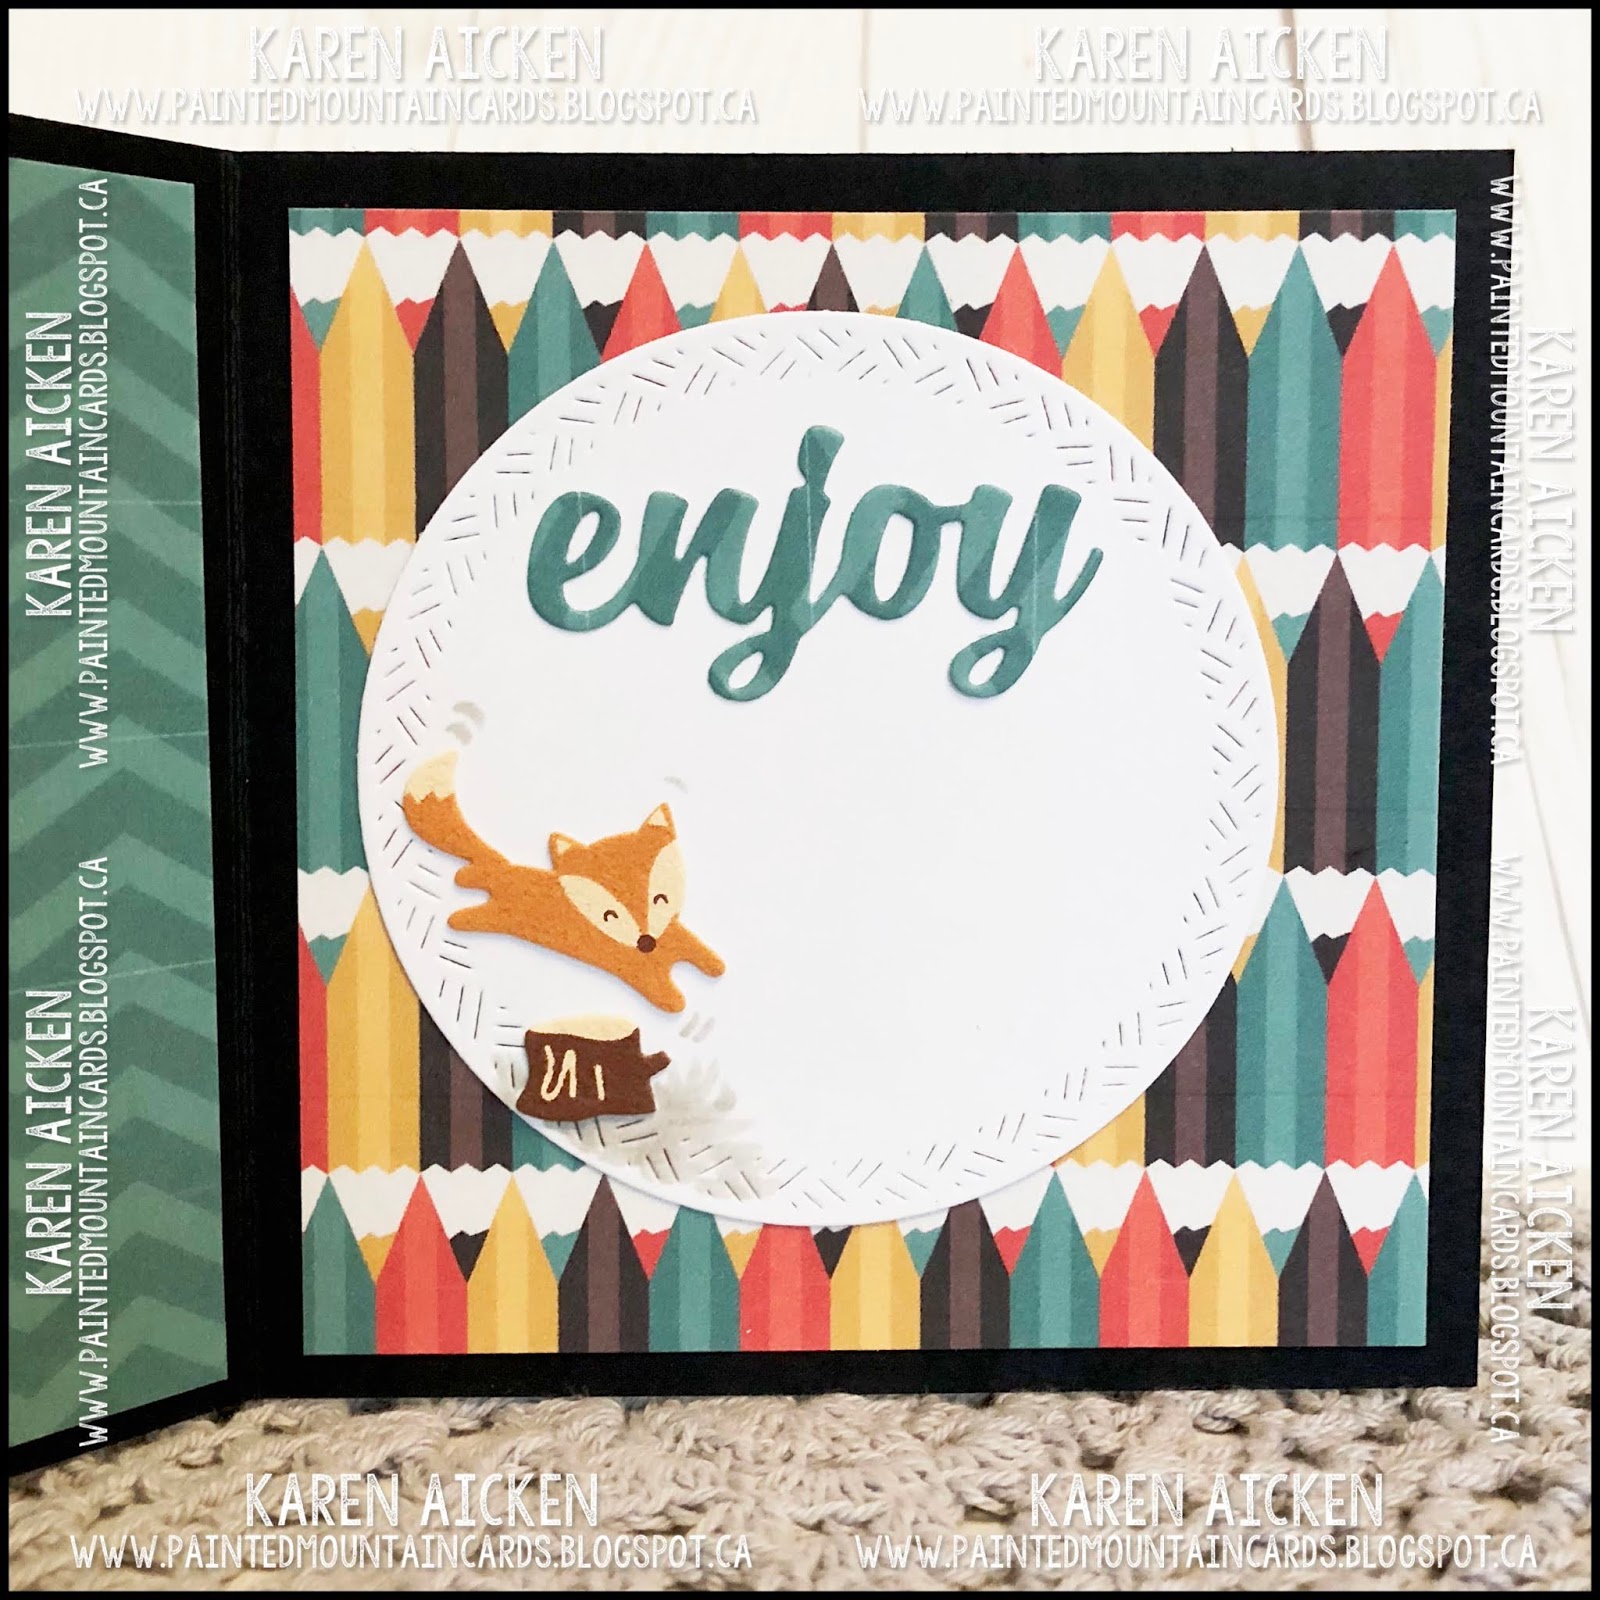
Here is a peek at the inside ...


This blog uses affiliate links whenever possible. This means, that at no cost to you, if you make a purchase through one of my affiliate links that I may receive a small commission from your purchase. I only link products that I own, love and use for my card making!

Any supplies I'm unable to link are listed at the very bottom of my post

Additional Supplies:
Patterned paper - Magenta (from 2003!)
Oatmeal card stock
Shimmer Spray
Reindeer - Circuit cut MANY years ago)
Stitched Scallop Nesting Slimline die - Kat Scrappiness

Tuesday, 9 November 2021

Mini Slimline with Deer


Hello! I have been working on holiday cards and also USING some of my stash that I've had hanging around for far too long. In fact, this patterned paper is by Magenta and the date on it is 2003. Yes ... I've had it that long. I don't even know what to say, ha ha.

The deer? It was cut with my Cricut the first year I had it. I haven't used a Cricut machine in about 10 years so ... yeah ... another oldie. In one of my Christmas bins, there were 4 cards I likely started when I finished cutting and assembling the deer. I looked them and thought UG - my style (and supplies) have certainly evolved since then. The deer pieces easily popped off the cards, since the foam adhesive I had used was so old and I tossed the ugly card fronts and decided to repurpose the deer. 😊  I created a Slimline card using three of the deer  (I'll be sharing that one soon) and with the single leftover deer I made this Mini Slimline card.


Just a quick and simple card but I still like the festive feel. Here is a peek at the inside...


This blog uses affiliate links whenever possible. This means, that at no cost to you, if you make a purchase through one of my affiliate links that I may receive a small commission from your purchase. I only link products that I own, love and use for my card making!

Obviously, I'm unable to ink those older supplies which are no longer available, and the oatmeal speckled card stock is from my stash and about as old as the paper. 

Thursday, 6 December 2018

Pine Sprig Lever Card

Good morning friends

OMGoodness, I love this card. I can't even tell you how many times I picked it up and looked (ok, admired) it before I got the photos taken and the card put in the Christmas Card bin. The patterned paper is very subtle looking in the photos, but in real life is is bright white with champagne foil printing. It catches and shines in the light - it's just beautiful stuff!


This Cricut cut embellishment was in my bin - I have had them done for years - the shadow layer is a pretty copper foil card stock, and I cut the JOY from champagne card stock for even more glam.


I used the Lever Card die set from Our Daily Bread Designs, but wanted to try it without the coordinating Layer die set. It could have gone either way, looking too plain or looking too busy, OR even been too 'wussy' without the layers. But this patterned paper was just perfect - it's nice and sturdy but not bulky. It also went together in record time!


In the photo below you get a hint of all the sparkle and shine in this pretty patterned paper.


I have the remaining piece of this patterned paper and I'm very tempted to whip up another identical holiday Lever Card. On the other hand, it might be perfect to use with Karen Burniston's House Pivot Panels as well. Ahhh the decisions a crafter must make. Ha!

Supplies:
Patterned paper - Stampin' Up
Foil card stock - Stampin' Up
Lever Card base die set - Our Daily Bread Designs
Joy die - Taylored Expressions
Merry Christmas stamp - Simon Says Stamp
White card stock
Label punch - Stampin' Up
1062 House Pivot Panel (snowflakes) - Karen Burniston
Pine Sprig - Cricut cut, from my stash

Thanks for stopping by today

Tuesday, 25 September 2018

School Fun Card

Good morning friends

Today's share is a Z-fold card that I created for a challenge on Split Coast Stampers to use a School Bus. When the challenge was issued, I remembered that I had a Cricut cut school bus in my 'in progress' bin. When I went to sell my Cricut, I wanted to be sure it still worked, so did a couple of test cuts and the school bus was one of them.

The patterned paper was also in the bin from a different card so I pulled that out as well as some fuzzy stickers from my stash so this card also counts as a stash buster! Win win win.


I tried the little fuzzy critters sticking out of the bus windows but they didn't look right, so instead I used foam tape to lift them up a little. The word 'FUN' was cut with Karen Burniston's Alpha die and I added white gel pen highlights to the letters. I had the road border die in my stash so pulled it out as it worked so well with the school bus!


Inside I added another crosshatch circle, a die cut 'enjoy' and a couple more of those cute fuzzy stickers.


Now I rarely make a card just to participate in a challenge, but I knew I could put this one away for the grands for next year. Ha, nothing like working ahead!

Supplies:
Yellow, black and white card stocks
Patterned paper - stash (Lettering Delights)
School bus - Cricut cut
1057 Circles Crosshatch - Karen Burniston
1053 Alpha - Karen Burniston
Road border die - Lawn Fawn
Sakura white gel pen
Stickers - Woody's
Copic marker
1052 Word Set 6 Summer - Karen Burniston
Black fine point marker
Card size - 4-1/4" Square Card, which fits perfectly into an A2 sized envelope

Thanks for stopping by today

Sunday, 5 August 2018

Christmas Card Trio

Good morning friends

Today's share is a trio of cards for my Holiday Stash.


First up is a card that uses a label punch from Stampin' Up. The patterned paper is also from SU and since I've had it for a number of years I thought it was time to use it. I like how well the patterns all work together and this type of card is one I've wanted to try since I got the punch.


The stamped greeting was punched from off white card stock and popped up over one of the patterned paper labels for a little dimension.


The next two cards are pretty much identical and use a Cricut cut pine cone & sprigs that I had in my Christmas Embellishment Bin. I probably cut a dozen of them years ago when I was using my Cricut and didn't get them all used up. I am finally getting them onto cards!


The pine cones were cut from a pretty copper pearlized card stock, and I used a Sweet Sunday Sketch for the layout.


Supplies for first card:
Label punch - Stampin' Up
Patterned paper - Stampin' Up
Cream card stock
Stamps - Kaisercraft
Stickles
Flower - from my stash

Supplies for Pine Cone cards:
Sunday Sketches SS007
Cream and red card stocks
Patterned paper - Stampin' Up
Banner punch - Stampin' Up
Pine Sprig - Cricut cut, from my stash
Fun foam
Merry Christmas stamp - Simon Says Stamps
Nuvo Crystal Drops
MISTI
Stamp inside - Kaisercraft

Thanks for stopping by today

Wednesday, 18 July 2018

A Birthday and a Thank You Card

Good morning friends

I'm sharing two totally unrelated cards today. I made them both months ago so I want to get the photos filed away and out of the To Post folder.

I really REALLY wanted a Brother Scan 'n Cut so when I had the opportunity to sell my old and not-used-for-a-couple-of-years Cricut I thought that would give me some $$ towards the SNC. Woot! However, I also didn't want to sell the machine and cartridges until I knew for sure it still worked. So I pulled out some really old patterned paper from my stash and made a couple of cuts. The cartridge was Joys of the Season.


I decided I actually quite liked the test cut, so rather than toss it I made it into a Birthday Card. I added a lot of glitter to the gift portion and a Nuvo Crystal Drop to the centre of the bow.


The gift was popped up on the front and I added more patterned paper and some handwriting inside to finish it off. This card went to my Mom to replenish her Birthday Card stash. I used up the whole sheet of patterned paper, which always feels good


My second card today uses more older patterned paper from my stash. It's beautiful stuff - a pale aqua colour and all the white flourishes are flocked with white. So it's a very textural card.


I had the 3-d sticker in my stash, and cut the 'thanks' from Verve stamp packaging. I always loved the Verve packaging and saved it to re-use whenever I ordered from them. Sadly, the owner has moved on to other things now and closed her on-line shop.


Here is a peek at the inside, with lots of room to write my note of thanks.


I wish I could show you how pretty the flocked paper is but you just couldn't capture it in a photo.


Supplies for Present Card:
White, green, turquoise and black card stocks
Patterned paper - Hallmark (years and years old)
Cricut cartridge - Joys of the Season
Nuvo Crystal Drops
Stickles
Black marker
Wonky stitched edges - MFT Stamps

Supplies for Flocked Thank You Card:
Patterned paper (flocked) - Me & My Big Ideas
White card stock
Scallop card insert - Sizzix
Wonky Stitched Rectangle die - MFT Stamps
Stickers - K & Company
Thanks die - Lawn Fawn
Seam Binding
Copic Markers

Thanks for stopping by today

Sunday, 25 February 2018

Three Pine Sprig Holiday Cards

Good morning friends

Today I'd like to share some Christmas cards as I plan on working on my holiday cards throughout the year.


These ones were inspired by the Cricut cut pinecone and sprig. I must have cut them at least 6 years ago and got them assembled with their shadow layer. Then they went into the Christmas 'embellishment' bin and for some reason I didn't get anything done with them until now. I have a few left for other cards another day.

Still loving red snowflakes!


This version happened because the pinecone sprigs were sitting on my stamping table while I was working on a different project and there was this strip of green holly foiled patterned paper on top of the scraps in the paper pad. The card practically made itself, ha ha.


All three of the pinecone sprigs have a copper metallic card stock shadow, which gives them some holiday shimmer.

Supplies for plaid cards:
White, green, brown, and copper metallic card stock
Patterned paper - Recollections
Pine Sprig - Cricut (Joys of the Season)
Sparkle gel pen - Sakura
Bakers Twine
Stitched Fishtail banner - Elizabeth Craft Designs
Be Merry die - Lawn Fawn
1012 Snowman Twist Circle Pop-Up (snowflakes)
Stitched Mini Scalloped Rectangles - MFT Stamps
Stitched rectangle die - Elizabeth Craft Designs
Words inside - Lawn Fawn

Supplies for Kraft card:
Pine Sprig - Cricut (Joys of the Season)
Patterned papers
Noel die - Lawn Fawn
Patterned paper - Recollections
Copper textured, green, brown, and red card stocks
Sakura glitter pens
Stitched rectangle die - Elizabeth Craft Designs
Nuvo Crystal Drops

Thanks for stopping by today

Tuesday, 26 December 2017

Three Pop-Up Christmas Cards

Good morning friends

For many MANY years, I worked ahead on my holiday cards. It started when I was on a roll one year and finished far more than I needed. I put them away for the following year, so when it was time to work on my holiday cards I could do so with no stress as I knew mine were done and I was working on the ones for next year. I loved working on my cards during the busy season as card making is my stress relief. I also loved not HAVING to work on them.

Things changed this past year though, when I decided to work on my holiday cards throughout the year. I have these three to share then I promise no more Christmas cards for a month or two. But I will be sharing holiday cards throughout the year because I love making Christmas cards! I also really like having them all done when it's time to get them ready to send out.

For these three, the card bases and inserts were in my I'n Progress bin', with the acetate embellishments ready to be attached. I added some word printed washi tape below the acetate pieces and the card fronts were finished.


The insides were also cut and in the 'In Progress bin', and I was poking around in the bin and found these Cricut cut embellishments as well. So I used them here and finished off the cards with die cut labels and stamped greetings.


Card #1:


I stamped a little pine tree from Wild Whisper on each bottom label.


Card #2 ...


And card #3 ...


There were glittery accents on all of the patterned paper used


Out of the bin and sent out this year. Woot! I certainly did well working out of that bin this year, and also using up a bunch of patterned paper packs that only had a little bit left. Hopefully there will be room in the drawer for a new paper stack next year because of it.

Supplies:
Patterned paper -old, from my stash
Acetate embellishments - K & Company
White card stock
Scallop card base die - Sizzix
Pop 'n Cut A2 Card with Wavy Label Insert - Karen Burniston (Sizzix)
Washi Tape - Recollections
Words on Pop-Up - Hero Arts
Words on Label - Verve
Wavy Label Thinlits - Karen Burniston (Sizzix)
Tree stamp - Wild Whisper Designs

Card size - 4-1/2 x 6"

Thanks for stopping by today

Monday, 16 January 2017

Baby Card for Alma


Good morning friends

Today's share is the baby card I made for our newest Grandbaby, Alma.


Inside I made it a Pop-Up card using the Lorna Label Pop-Up by Karen Burniston. The sweet little lamb was in my stash, cut eons ago and stored.


I sprinkled some Glitter Flower Peel-Off's ...


... and added some hand lettering to the label.


Here is a side view so you can see the Pop-Up portion a little better.


Note, you can find my cards from July 2011 - December 2016 on Alteredscrapbooking.blogspot.ca   I had a bunch of cards made ahead, which are already water marked with alteredscrapbooking and I'm choosing not to re-do all those photos with the Painted Mountain Cards watermark.

Supplies:
Lamb - Cricut cut
Lorna Label Pop-Up, Pop it Ups - Karen Burniston (Elizabeth Craft Designs)
Patterned paper - DCWV
Stitched puffy clouds die - MFT Stamps
White card stock
7048 Glitter Flower Peel-Off's - Elizabeth Craft Designs
Pink sheer ribbon - Creative Packaging
Labels and Circles, Pop it Ups - Karen Burniston (Elizabeth Craft Designs)
Glitter Dots
Alpha dies - Stampin' Up
Bic fine markers
Fine point black marker

Card size - 5 x 6"

Thanks for stopping by today