Sunday 30 September 2018

Hummingbird Shaker Card and MARY Banner

Good morning friends

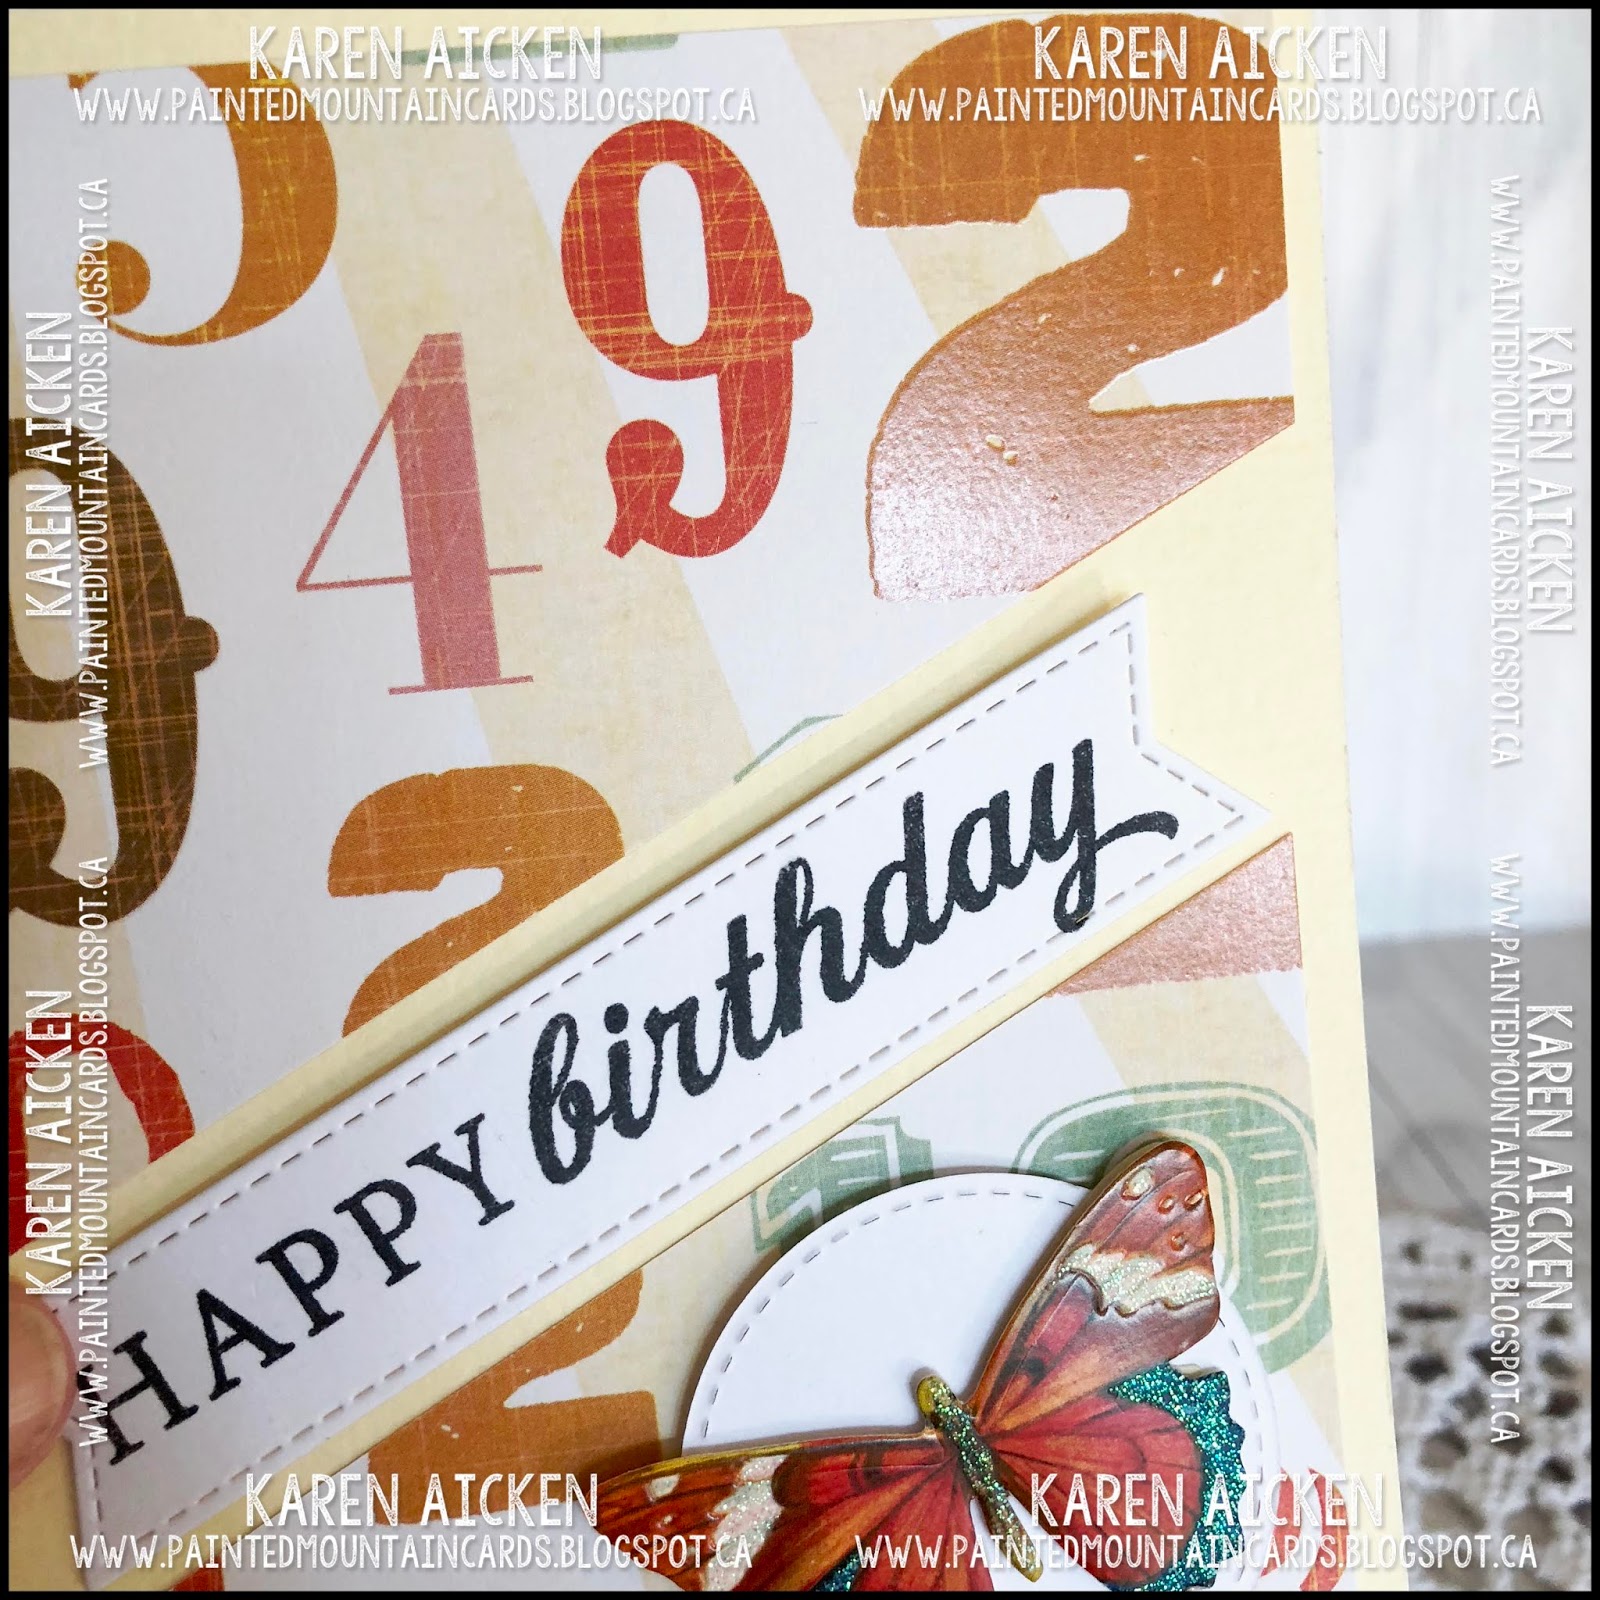
I have a shaker card today, that was made for a challenge over at Split Coast Stampers. The challenge was actually a 'tea party' for my Mom, and she has been receiving the most wonderful cards from all over. She is thrilled!! The challenge was to use repetition as well as flowers, hummingbirds or tea images.


For the repetition part of the challenge, the flowers in the lovely background die are repeated, the opening shape in the centre is repeated, I repeated the colours from the hummingbird with the floral background and also in the sequins. Oh, and I cut the word 'hello' twice and offset for a bit of a shadow.


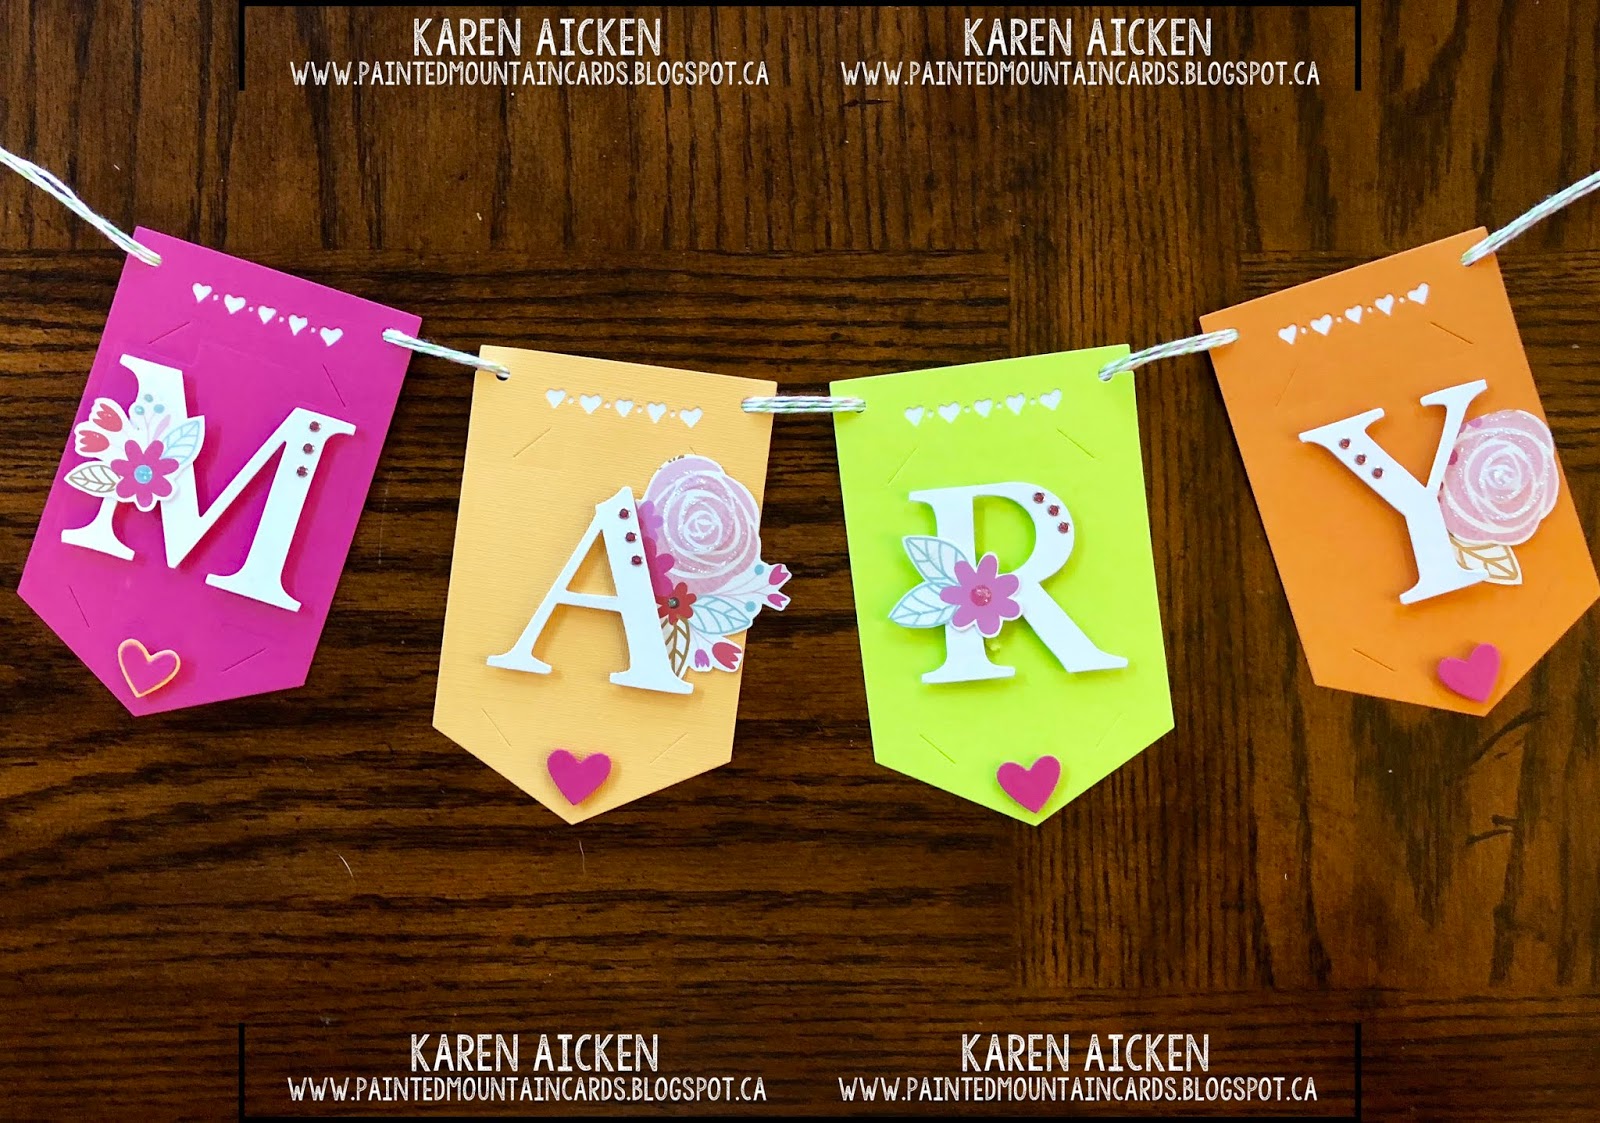
Speaking of my Mom, I wanted to share the little banner I made for her a few months ago. I had it hanging on her bulletin board when she arrived at the nursing home from the hospital so the room would look cheerful. I also had a new comforter with a bright pink throw, and a white mason jar with pink silk roses on her nightstand.

To make the banner I used the Photo Banner die by Lynda Kanase, letter dies by Sizzix and the flowers had been fussy cut from a scrap of patterned paper that was sitting on my stamping table.


Supplies for Hummingbird card:
Hummingbird stamp - Mostly Animals
Floral Frame cutting plate - Taylored Expressions
MISTI
Purple and white card stocks
Transparency scrap
Matte glossy card stock
Sequins
1060 Word Set 6 Summer (hello) - Karen Burniston
Dotted Scallop Rectangle dies - Elizabeth Craft Designs
Black brush marker
Sakura glaze pen


Supplies for Banner:
Photo banner die - Lynda Kanase (Sizzix)
Photo frame and borders - Lynda Kanase (Sizzix)
Pink, yellow, orange, green and white card stocks
Serif Essential Big Z dies - Sizzix
Bakers Twine
Stickles
Glitter Dots - Elizabeth Craft Designs
1011 Katherine Label Pop-Up (hearts) - Karen Burniston

Thanks for stopping by today

Saturday 29 September 2018

Happy Fall Shaker Card

Good morning friends

It's Saturday and that means a new challenge at the Crazy4Challenges Blog. Our September hostess is Raquel Mason, and our guest designer is the amazing Fran Sabad. You can see Fran's blog HERERaquel's challenge this week is:  It’s now fall and I know this because I see it on my calendar even though you wouldn’t know it in Florida. Let’s put leaves, or trees with beautiful fall colors, or anything that says fall to you on our cards this week.


I have so much fun making shaker cards that I decided to use a large fall themed sticker from my stash with a Blueprints die set for my card and make a shaker! Since the Canadian Thanksgiving is coming up fast, I also thought I'd make it a Thanksgiving card.


So many stamp sets just include 'Happy Thanksgiving', or 'Happy Fall', but rarely have sentiments for inside your card. Last year I was so happy to find this great set by Taylored Expressions that have great sentiments.


Check out the C4C blog to see how the Crazies have been inspired by the challenge. We'd  love to see your take on it, so be sure to stop by the Crazy 4 Challenges blog and link up your creations. If you are uploading to an online gallery, please use the keyword C4C454.

Supplies:
Blueprints #29 - MFT Stamps
Patterned paper - DCWV
Stickers - Chicaniddy Crafts
Transparency - Hero Arts
Fun Foam
Sequins
White card stock
Matte Glossy card stock
Spectrum Noir Glitter Pen
resin heart sprinkle - Doodlebug
Lets Get Stuffed stamp - Pink and Main
1047 Upsy Daisy Pop-Up (banner) - Karen Burniston
Inside stamp - Taylored Expressions

Thanks for stopping by today

Friday 28 September 2018

Boys Gift Card Holder

Good morning friends

Today's share is a Gift Card Holder I made for our grandson using Lynda Kanase's BigZ Slider Card Die. This time though, I only die cut the inside portion and added it inside a standard A2 side fold card.

I had a 12 x 12" sheet of these Cut Aparts so used a couple of them on this card. The dino on the front is so cute!


I added glossy accents to the dino egg and the confetti for some shine.


Below is the group pics of the inside ... the gift card slides out when the card is opened. I used another couple of the Cut Aparts, and a stamped fishtail banner.


Supplies:
Card, Slider - Lynda Kanase (Sizzix)
Blue card stock
Patterned paper - Dragon Tails, Doodlebug (Cut-parts)
1034 Word Set 5 Royalty (banner) - Karen Burniston
Sakura stardust pen
Gift card greeting stamps - MFT Stammps
Glossy accents
Cello bag
Bakers Twine

Thanks for stopping by today

Thursday 27 September 2018

Leaf Shaped Card

Good morning friends

My card share today has lots and lots of texture - from the sparkly embossed oak leaf patterned paper, to the stitching on the leaf dies to the heat embossing. There is also vellum with sparkly bits embedded!


I loves leaf dies, and trees - well most nature image images appeal to me. So when I saw the Tonic Studio Craft Kit #12 I knew I had to purchase it. It's actually from a monthly subscription, but while I enjoy most of the Tonic Craft Kits I see - they ship from England and the value is just not there for me. Especially if it ends up being a month that I'm not keen on the theme that month! I am thrilled that I could get this as a 'one time purchase' though and I will use everything that was included in the kit. And I LOVE everything that was included in the kit!

The leaf shaped dies are large - a lot larger than A2. But they are perfect for making shaped cards like this. Banners, gift bag decorations - all kinds of uses for these larger dies. This card still fit in a 5 x 7" envelope for mailing.

I nested two of the leaves together to get the gold leaf shaped frame, and die cut several of the tiny leaves to adhere under the vellum panel.


Inside I added a smaller die cut leaf to give me the white space for my stamped greeting and for signing.


To make it a folding card, I die cut the same pierced leaf from brown card stock and added a score line about 1-1/4" from the top point. Adhesive above the score line to attach the back to the front and the card is done. Oh, and I did trim off a little from the bottom edge at the back only - this allows the card to stand on it's own. with the curve of the leaf it rocks otherwise.


With all the shimmer and shine on this card, I'm saving it to send to my Mom for Thanksgiving as it will be pretty on the bulletin board in her room at the nursing home.

Supplies:
Leaf dies - Tonic Studios Craft Kit #12
Embossing Powder - Copper Blush - Tonic Studios Craft Kit #12
Hello Autumn stamp - Tonic Studios Craft Kit #12
Patterned paper - Recollections
Brown and white card stocks
Copper foil card stock  - Stampin' Up
Metallic flecked vellum - stash
Happy Thanksgiving - Simon Says Stamp
Card size - approx 5-1/2" 'square'.

Thanks for stopping by today

Wednesday 26 September 2018

Circle Background Die Card Duo For Fall

Good morning friends

I have a pair of fall cards to share today and they both started out with the Circle Panel die by Your Next Stamp. I get a lot of use out of this one and love playing with different ways to use it.


I had purchased a 12 x 12 sheet of fall themed stickers, and wanted to use it up on my cards this year and not store a half used sticker sheet until next year. I did good - only a few stickers remaining to use and I think I can put them on a birthday card to donate to my Mom's nursing home.

For the teal card, I used sweet patterned paper from Pink and Main and added a couple of the fallaway circles back onto the card front, raising some of them up with foam tape. Those circles also got a bit of shimmer with a Wink of Stella brush pen.


Inside I used the Karen Burniston's Katherine Label Pop-Up to animate this cute fox sticker and added an acorn for him to hold. The border dies (ECD) are ones I haven't used in awhile, so it was fun to pull them out again.


For my second card, I used a bunch more of the stickers from the sheet and added the Circle Panel die over one of my Colorburst panels.


Finally, for those of you who like to pin group shots to their Pinterest Boards:


Supplies:
Teal Card
Circle Background Panel die - Your Next Stamp
Teal and brown card stocks
Patterned paper - Pink and Main
Stickers - Echo Park
Wink of Stella
Enamel Dots
Crystal Nuvo Drops
Brown fine point marker
1011 Katherine Label Pop-Up - Karen Burniston
Border die - Jewels 1 - Elizabeth Craft Designs
Happy Thanksgiving - Simon Says Stamps
Our Table stamp - Taylored Expressions

Brown Card
Brown, orange and white card stocks
Circle Background Panel die - Your Next Stamp
Stickers - Echo Park
Stickles
Colorburst - Ken Oliver
Lindy's Magical Shakers - Lindy's Stamp Gang
Black glaze pen - Sakura
MISTI - My Sweet Petunia
Stamp inside - Neat & Tangled

Thanks for stopping by today

Tuesday 25 September 2018

School Fun Card

Good morning friends

Today's share is a Z-fold card that I created for a challenge on Split Coast Stampers to use a School Bus. When the challenge was issued, I remembered that I had a Cricut cut school bus in my 'in progress' bin. When I went to sell my Cricut, I wanted to be sure it still worked, so did a couple of test cuts and the school bus was one of them.

The patterned paper was also in the bin from a different card so I pulled that out as well as some fuzzy stickers from my stash so this card also counts as a stash buster! Win win win.


I tried the little fuzzy critters sticking out of the bus windows but they didn't look right, so instead I used foam tape to lift them up a little. The word 'FUN' was cut with Karen Burniston's Alpha die and I added white gel pen highlights to the letters. I had the road border die in my stash so pulled it out as it worked so well with the school bus!


Inside I added another crosshatch circle, a die cut 'enjoy' and a couple more of those cute fuzzy stickers.


Now I rarely make a card just to participate in a challenge, but I knew I could put this one away for the grands for next year. Ha, nothing like working ahead!

Supplies:
Yellow, black and white card stocks
Patterned paper - stash (Lettering Delights)
School bus - Cricut cut
1057 Circles Crosshatch - Karen Burniston
1053 Alpha - Karen Burniston
Road border die - Lawn Fawn
Sakura white gel pen
Stickers - Woody's
Copic marker
1052 Word Set 6 Summer - Karen Burniston
Black fine point marker
Card size - 4-1/4" Square Card, which fits perfectly into an A2 sized envelope

Thanks for stopping by today

Monday 24 September 2018

Wobbling Owl Card Duo for Thanksgiving

Good morning friends

I have a couple of simple cards to share today. I made them last fall when I was bound and determined to finally finish up a paper/sticker package that I'd had for years. Every fall I would make one or two cards using it but never used it UP. Last year I finally finished it (yay!) but by then it was time to start sharing Christmas cards and these ones never got posted. 

These two are for my Mom to give the Great Grands, so the owl embellishments are popped up with an Action Wobble for some fun. Everyone loves a card with an Action Wobble on it!


These cards are 4-1/4" square, and fit nicely in a standard A2 envelope.


The owl's were die cut from the scrap of patterned paper with a stitched circle die, then layered to a larger stitched circle for some contrast. Below you can see the wobble -- so fun!


The second card was made the same as above, including the wiggly eyes I adhered to each of the centre owls.


Supplies:
Confetti card stock
Patterned paper and stickers - Echo Park
Stitched circle die - MFT Stamps
Wiggly Eyes
Mini Action Wobble
Action Wobbles
Felt Embellishments
Stitched square - Elizabeth Craft Designs
Inside words - Hero Arts & Paper Smooches
Word bubble - Lawn Fawn

Thanks for stopping by today

Sunday 23 September 2018

Gatefold Christmas Card

Good morning friends

Today's share is a Christmas card using an older paper pad from my stash.


There were several sheets of these 'Cut Aparts' in the pad and I managed to use two of them on this card.


The gold Merry Christmas stickers I used on the right flap, jumped into my shopping cart when I was at Hobby Lobby for a quick visit in June. Oh how I wish we had a Hobby Lobby here in Canada.


The gold glittered embellishments were also in the stash and they pick up all the gold foiled bits in the patterned paper. I used my 'new' Pink and Main fishtail banners to stamp my greeting inside and added a fussy cut patterned paper strip across the top edge.


Supplies:
Hello Friend Gatefold die set - Sizzix
Patterned paper - DCWV
Clear Merry Christmas sticker - the Paper Studio
Glittered embellishments - K & Company
Metallic gem stickers - Stampendous
Large fishtail banner die - Pink and Main
Inside stamp - Lawn Fawn
Sakura gold gel pen

Thanks for stopping by today

Saturday 22 September 2018

Lotsa Birthday Cards!

Good morning friends


It's Saturday and that means a new challenge at the Crazy4Challenges Blog. Our September hostess is Raquel Mason, and our guest designer is the amazing Fran Sabad. You can see Fran's blog HERERaquel's challenge this week is: Make a birthday card and put numbers on it. For example -the recipients age, use background paper with numbers on it, or even a numbered candle die cut if you have one.

If you follow my blog, you will know that I am now donating Birthday cards to the nursing home where my Mom is and it works out to be 20 - 25 cards a month. While I want them to be special for the recipients, I also have to streamline somewhat. I haven't done 'assembly line' creating for many years and I forgot how much I enjoy it! For the C4C challenge this week I knew I had the perfect piece of 12 x 12" patterned paper somewhere in my stash and I had just seen this cool layout on several different Pinterest cards. Eureka!

One of my favourite card layouts uses a 4 x 4" square of patterned paper with a 2 x 4" strip below or above it. It's a great way to use 12 x 12" patterned paper efficiently. This layout though, could be my next favourite one and uses only a 4 x 4" square with a diagonal slash! You adhere one piece to the upper left and the other to the bottom right, leaving a diagonal area in between for your sentiment. So many variations on what you can add to the centre area too. 

You get NINE cards from a single piece of 12 x 12" paper! If you are counting, yes there are only eight in this photo because I was cutting the diagonal slash two pieces at a time and one of them was sideways. In hindsight I could have made a top fold card, but at the time I just growled at myself and the pieces went into the trash. 


The patterned paper has some glossy embossed areas, which catch the light - love that.


I used up some old pre-cut card bases in a couple of colours as well as white ones to round them out. Some of the cards have the greeting stamped right on the front card base while others have a raised stitched fishtail banner. A couple have a decoration in the centre with no greeting on the front at all. The insides are all the same, as shown below.


When I pulled out the patterned paper with the numbers on it, this sunburst sheet was behind it. So I decided to do all my cutting two at a time so ended up with seventeen cards! (Remember that one that ended up in the trash, or I would have had eighteen).


I used old punches to create the party hat - the Pennant Parade punch is many years old, and then I found these two sunburst type small punches in the drawer to use as well. I loved getting out an older punch for these cards and I will be using it often while I make the cards for donating. 


When I'm doing the cards, I'm trying to include a feminine one, a generic one, and a more masculine one. There are a lot of men at the nursing home too, and the recreational coordinator was happy that I was doing some masculine cards for them. I think this cute owl and the party hats would fall under the 'generic' card category.


Check out the C4C blog to see how the Crazies have been inspired by the challenge. We'd  love to see your take on it, so be sure to stop by the Crazy 4 Challenges blog and link up your creations. If you are uploading to an online gallery, please use the keyword C4C453.

For the most part, I'm not keeping track of the supplies I'm using for my nursing home donation cards. The goal is to use up items that have been hanging around my craft room for ages and ages and there isn't always packaging with the single leftover sticker etc. Plus, I can work faster if I'm not also making notes about everything I use. 


Thanks for stopping by today

Friday 21 September 2018

Scarecrow & Pumpkin Pull Card

Good morning friends

It's FUN FOLD FRIDAY here on my blog, and today's share uses a retired die by Karen Burniston - the Rectangle Pull Card. I always loved those Pull Card dies ... so still get them out to use now and again.


I created the background panel with Distress Oxide inks, then adhered the adorable scarecrow. This set was one of my early Lawn Fawn purchases, and I still just love it! The felt pumpkin sticker was in my stash, so I added it as well as a stamped and die cut pumpkin.


Here is a peek at the inside, with a greeting on the left and a space for us to sign our name on the right.


Supplies:
Rectangle Pull card - Karen Burniston (Retired)
Patterned paper - DCWV
Confetti card stock, off white
Felt pumpkin sticker - stash
Scarecrow, pumpkin and crow stamps - Lawn Fawn
Copic markers
Sakura white gel pen
Black and clear Sakura gel pens
Words inside - TAWS (no longer in business)
Distress Oxide inks

Thanks for stopping by today

Thursday 20 September 2018

Falling Leaves Square Card for Thanksgiving

Good morning friends

This 'Falling Leaves' was one of the Cut Aparts in the paper package I was working on using up, so I decided to add it to the front of my card with a strip of the coordinating patterned paper.


Since I always like a little dimension on my cards, I added two die cut leaves with a twine bow.


Inside is a stamped panel with another die cut leaf.


Supplies:
Patterned paper, stickers and journal card - Echo Park
Confetti off white card stock
Stitched square dies - Elizabeth Craft Designs
Plaid patterned paper - K & COmpany
Stitched leaf dies - Lawn Fawn
Blue recycled packaging
MISTI - My Sweet Petunia
Stamps inside - Echo Park
Twine
Card size - 5" square, fits in a 5 x 7" envelope

Thanks for stopping by today