Showing posts with label Marianne Designs. Show all posts

Monday, 5 August 2024

Game Controller Birthday Card

It's Masculine Card Monday here on my blog and today I'm sharing a birthday card for my stash. I've been working at using up this older 6x6" paper pad and was down two three 2x6" strips (and lots of small scraps). I used two of the strips for this card and saved the final one for a card to share another day.

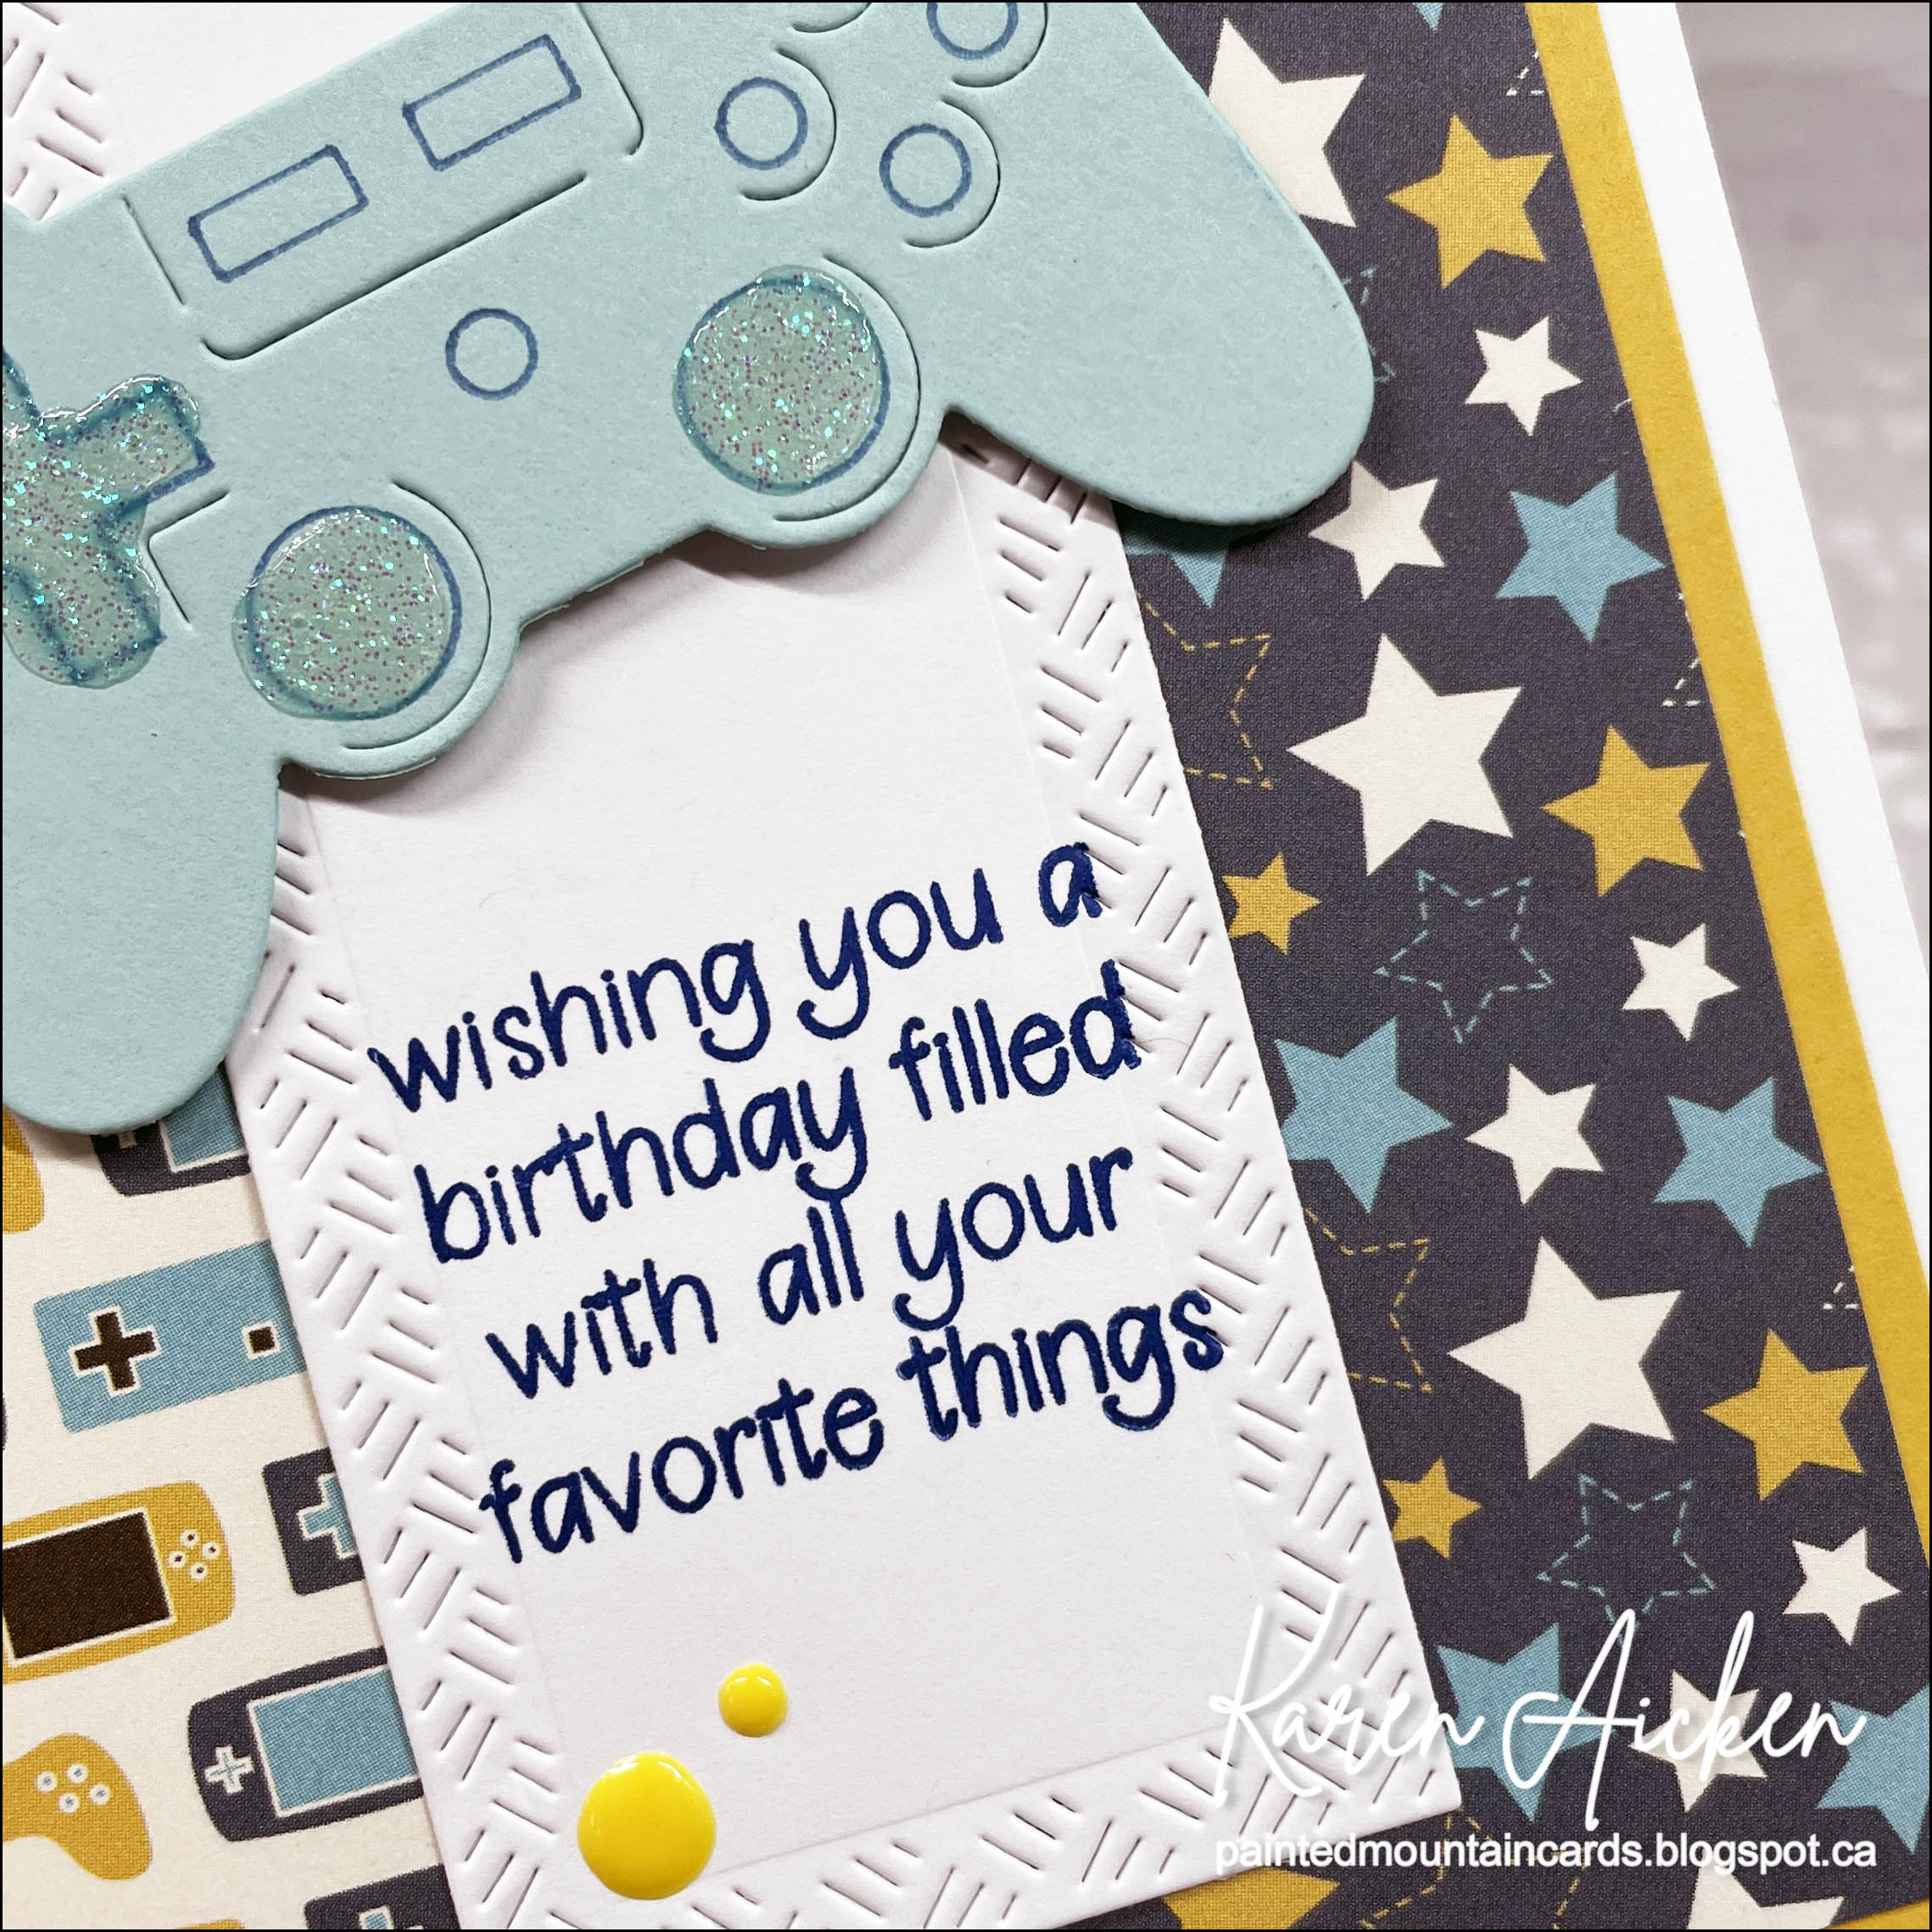
Once again I used the Game Controller die - it just worked so well with the patterned paper, how could I not?


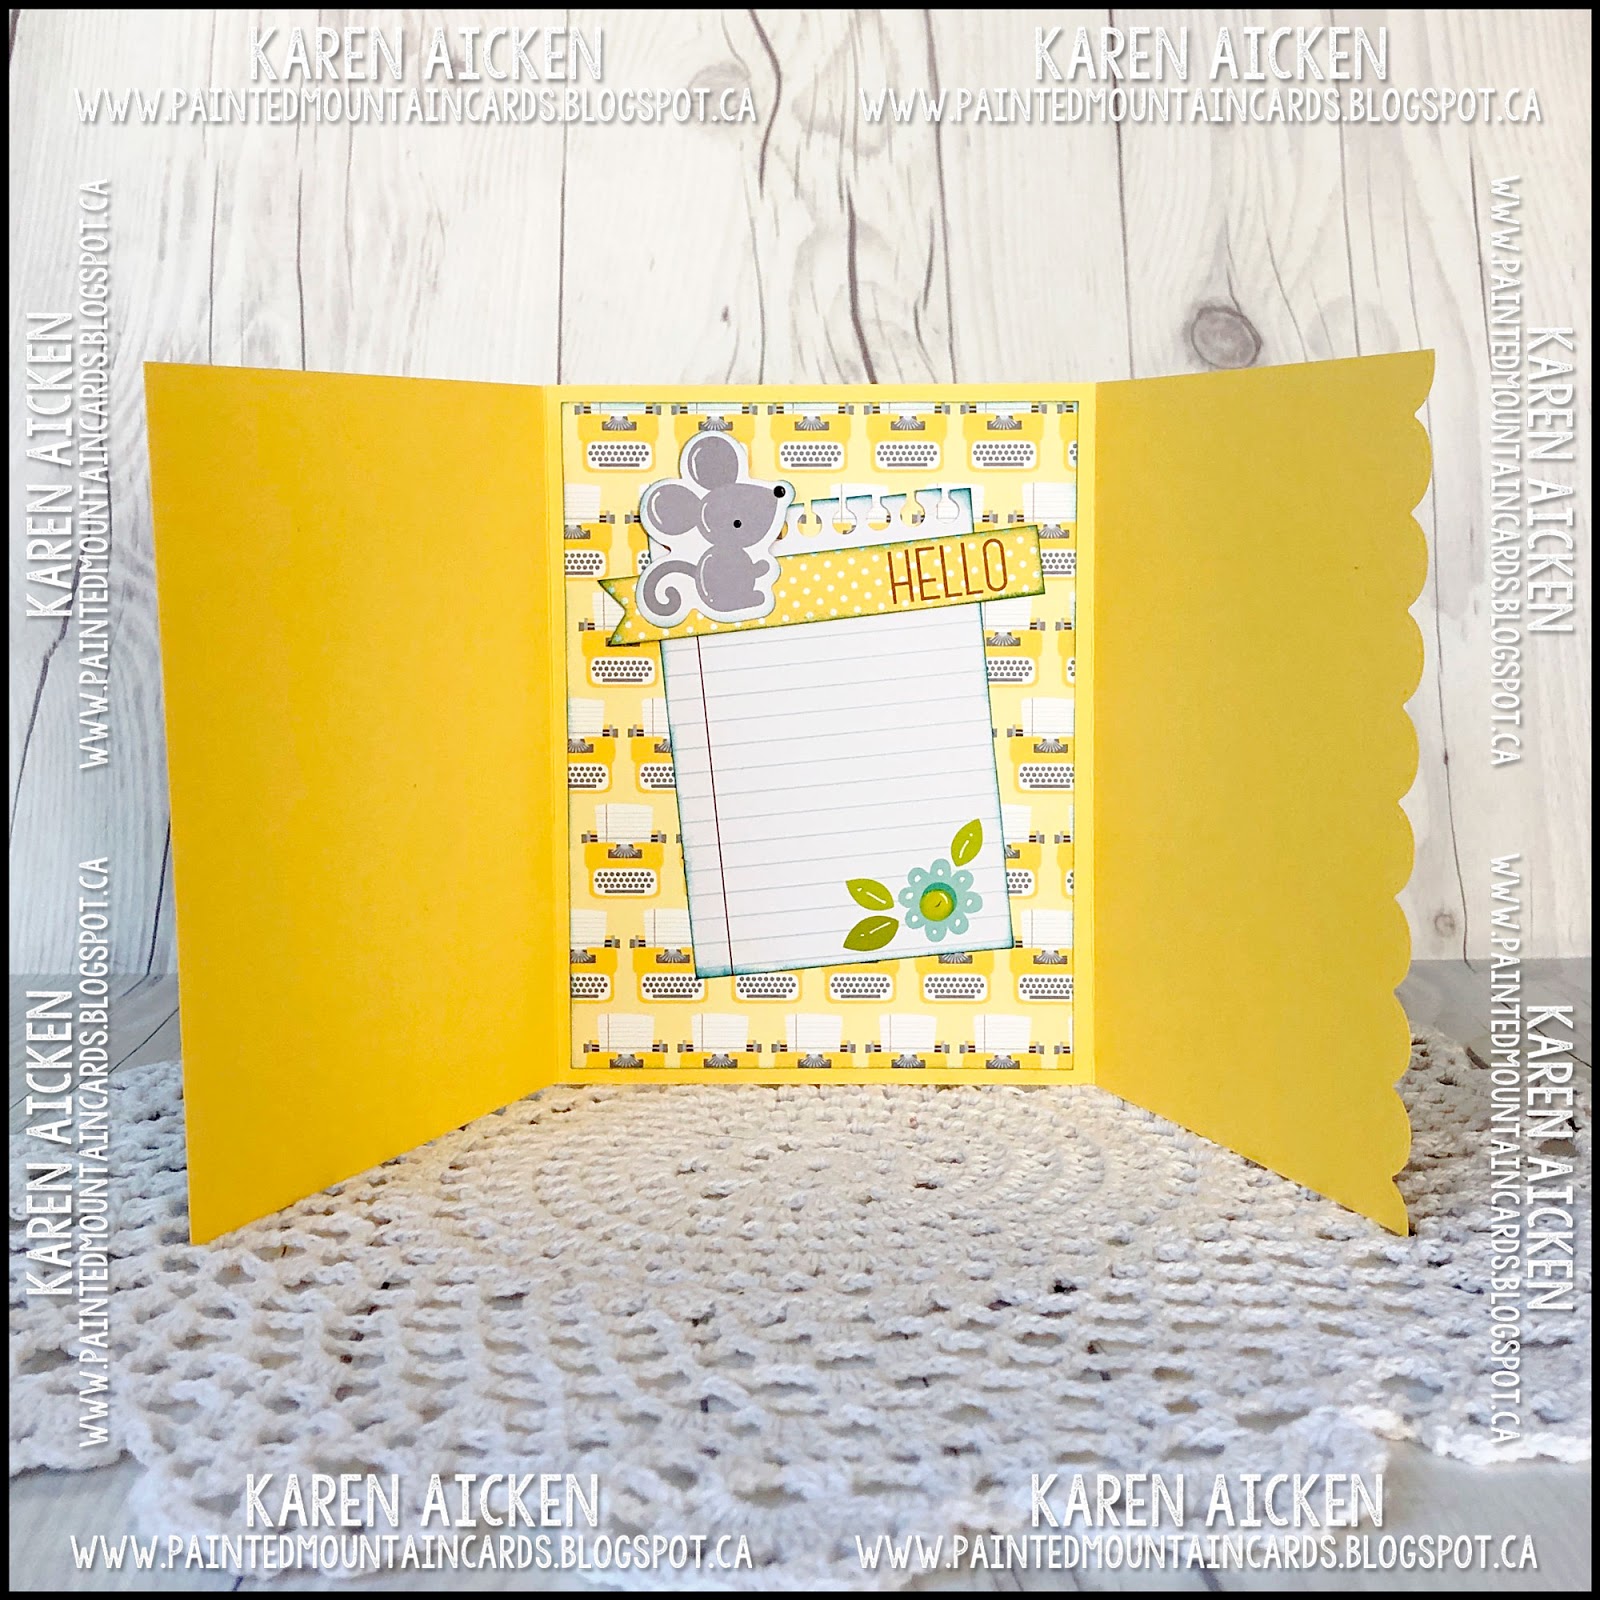
Here is a peek at the inside ...


Supplies used:
Patterned paper - Boy Oh Boy, Carta Bella (6x6")
Short Rectangle Crosshatch - Karen Burniston
Game Controller die - Marianne Designs
Happy Birthday 4HSN - the Stamps of Life
Everybody Say Happy - Catherine Pooler
Nuvo Drops
Pops of Color - Scrapbook .com

Monday, 29 July 2024

Four Boyish Birthday Cards


It's Masculine Card Monday here on my blog, and today I'm sharing four more cards using an older 6x6" paper pad I'm trying to use up. The two with the star paper will be donated to my Mom's old nursing home and I'm keeping the two with the game controllers for my stash.

I used the June 2021 Sheetload of cards for the sketch and cutting guide for these cards, and linked it below for you.


Supplies used:
Patterned paper - Boy Oh Boy, Carta Bella (6x6")
Stitched circle dies - MFT Stamps
Game Controller die - Marianne Designs
Scrap of blue patterned paper
Small Happy Birthday - March 2021 Paper Pumpkin 'Here's to You', Stampin' Up
Inside stamp - Happy Birthday4HSN, the Stamps of Life
Catherine Pooler coloured inks

Tuesday, 20 February 2024

Beehive Half Shutter Card


Last year I bought the Beehive Magic Iris Add-On dies (Lawn Fawn) because I knew I could use it for more than just a Magic Iris Card. Today created a Half Shutter Card and used the beehive as the focal point. I am so happy with how it turned out!


The bee patterned paper is too cute and I pulled out these bee dies from Marianne Designs to embellish the card.


I love that the Half Shutter Card die set (Divinity Designs) comes with the layering dies - it makes it so quick and easy to complete the card base and all that's left is my choice for decorating! I added a hexagon where I can write a personal greeting and the tiny daisy's are in Karen Burniston's Twist Flower Pop Up die set. 


Supplies used:
Patterned paper - Busy as a Bee, Echo Park
Bee dies - Elines Bees, Marianne Designs
White pearl cardstock
Magic Iris Beehive Add On - Lawn Fawn
Nested Hexagon dies - Pinkfresh Studios
Stitched circle - leftover from previous Magic Iris cards
Front sentiment - Thinking of You, Penny Black
Glitter Dots - Ecstasy Crafts
Daisy's - Twist Flower Pop Up, Karen Burniston
Alcohol markers
Stickles glitter glue

Monday, 1 May 2023

Mountain Scene Flip-Its Card


Welcome to Masculine Card Monday here on my blog! This is also the 5th edition to my monthly series 
Throwback Fun Folds and I'm using the Lively Flip-It's card that was from the Stamps of Life. While I have had the die set for many years, I checked and see that it is available again! This card is actually similar to a 5 x 7" Flip-It's card I made back in February, at least in the colour scheme. I used a different paper pad, this one is a 6 x 6" and I linked it below.


I always like it when a fun fold die set comes with the layering dies, and the Stamps of Life always make sure you get lots of bang for your buck. It makes it so easy to create a polished looking card when the layers are perfectly sized and have crisp lines. 😊 


I added some stamping, die cut birds and a moose and my card is ready to send off.


Having been asked how many cards I make I thought it would be fun to keep track this year. Many of my posts include more than a single card or project and below is my tally. 

Card Tally for 2023
January - 53 cards
February - 56 cards
March - 55 Cards
April so far - 32 Cards
May so far - 1 Card

Additional Supplies:
Navy cardstock
White cardstock
Moose Die - Marianne Designs
Lively Frame Stand Ups Die Set - the Stamps of Life (retired)
Lively Framelits die set - the Stamps of Life (retired)

This blog uses affiliate links whenever possible. This means, if you make a purchase through one of my affiliate links that you pay the same amount but I may receive a small commission from your purchase. I only link products that I own, love and use for my card making and not every link below is an affiliate one! 😊

Thursday, 15 October 2020

Dog Slimline Friendship Card


Hello crafty friends ...

I had fun making this card for a friend! The dog is part of a set by Marianne Designs that cuts different pieces that you can assemble to create many different dog breeds. I had wanted it for a long time and I'm thrilled that I was able to find it.

NOTE - this new Blogger format has caused a couple of issues, and I somehow hit PUBLISH on this post for September 15th instead of October 15th. As soon as I realized it I changed the date, but you may have seen this briefly on the 15th. Oops! 

The sentiment is from the Simple Strips Woof by Taylored Expressions.


The Slimline dies are from Trinity Stamps - another set that I waited a long time for!  I left lots of room inside the card to write a note in.


Supplies:
Dog die - Eline's Puppy, Marianne Designs
Card stocks - stash
The Great Outdoors Borders & Builders - Trinity Stamps
Slimline Stitched die - Trinity Stamps
Cloud mask - Heffy Doodle
Simple Strips Woof - Taylored Expressions
Simple Strips die - Taylored Expressions
Stitched Puffy Cloud die - Your Next Stamp
Wink of Stella
Sakura White Gel Pen
Alcohol marker, grey
Paw Prints - MFT Stamps
Patterned paper - Where the Heart Is, My Minds Eye (old, from my stash)

Card size -  8.5 x 3.5", fits in a #10 Business Envelope

Thanks for stopping by today

Saturday, 23 November 2019

Polar Bear Christmas Card

Hello my crafty friends

I'm back today with another card for the Fun Friday Challenge #127 at Your Next Stamp, which is Mad for Plaid. So fun, right? Plaid is VERY trendy right now and I'm in love with Buffalo Plaid at the moment. You can find all the details for the challenge HERE.

I don't like to waste pretty paper - and by that I mean hide an entire portion of pretty paper behind another layer. Which is what happened with the buffalo plaid panel for this card. I had needed a large plaid panel for another card, but realized that most of it would be hidden by the elements I was adding. So I used the YNS Stitched Rectangle die to cut the centre of the large panel and put it aside. I finished that card, and then had this lovely stitched plaid rectangle which was the inspiration for this card!


The stitched snowflake die set is one I added to my collection last year and I'm so glad I did. I have really been enjoying them for my holiday cards again this year.  I am still working on using up the Comfort & Joy patterned paper package, which also had stickers and elements - so I added the plaid label sticker to the top of my stitched buffalo plaid panel. I was going to stamp right on the label, but since I have these nifty Simple Strip stamp & dies from Taylored Expressions I added sentiment from the little bag of holiday sentiments I now have ready to go. More on that later.***


This bear - oh, how I adore this bear! I cut the head and front from the same white pearlized card stock as the snowflakes, and the back layer plus muzzle from plaid white card stock. I love the subtle shading this gives the bear. I managed to get this bear die set last year after the holidays, but now I don't know why it took me so long to use it. I guess I was waiting to use it for my holiday cards but I think he would make a cute black bear too which will be great for masculine cards!

Once I got this bear made though - I immediately put the card aside and made 5 more polar bears to have on hand.


Inside I stamped a greeting on a matted stitched rectangle (from YNS) and added one of the elements from the package.


One more holiday card for the stash!

***Taylored Expressions came out with this fun idea called Simple Strips. It is a sheet of red rubber sentiments for specific theme. I have the Birthday and the Christmas stamps. You stamp that single large stamp onto your choice of card stock using your choice of ink colours - or embossing ink if you are stamping on black card stock to emboss with white etc) and you have a whole sheet of different stamped sentiments with one shot! But to save you from having to trim each of those apart and keep the edges straight there is also a coordinating die. After you stamp (and emboss if desired) your sentiments, you line up the die and run it through your machine ... and you are left with a whole pile of perfectly stamped, perfectly cut sentiment strips! Now there is a little bit of a learning curve, which surprised me and with my machine I did have to use a shim to get the strips to cut cleanly but I am loving having a whole pile of sentiments ready to add to cards. When I run out it's easy peasy to stamp and die cut another bunch.

Supplies:
Patterned paper, stickers and elements - Comfort & Joy, My Minds Eye
Polar bear die - Marianne Designs
White shimmer card stock
Pink, black and white card stocks
Sketch - OWH #33
Holiday cheer - Mini Strips Christmas, stamp and die - Taylored Expressions
Sakura white gel pen
Stitched snowflake dies - Lawn Fawn
Nuvo Drops
Stitched Rectangle die - Your Next Stamp
Words inside - More Merry Messages, Stampin' Up

Card size - standard A2 (4.25 x 5.5")

Thanks for stopping by today

Tuesday, 17 September 2019

Hello Trifold Card

Hello my crafty friends

When I was making the Thanksgiving cards for our Grandkids, there was this typewriter/hello journal card on the sheet and I decided it would make a cute card for a friend. Since I like making trifold cards, that is what I decided on and the card went from there.


When you open the first panel you see a second panel and this one has a coordinating typewriter from the Doodlebug embellishment pack I had also pulled out for the Thanksgiving cards.


 I have a little typewriter die and stamp set in my stash, and I was happy to see that the words from the stamps fit so nicely on the papers in the typewriters! I also pulled out a script embossing folder and embossed the white panel.


When you open the second panel, a third decorated panel is revealed and this is where I wrote my message before popping the card in the mail.


This card is a standard A2 size, but is a little heavy because of all the layers. So I added a second stamp just to be safe.

Supplies:
Journal Card and Cut apart and embellishments - Flea Market, Doodlebug
W1 Copic Marker
Nuvo Drops
Sakura Stardust Pen, White gel pen and Black Glaze pen
Yellow and white card stocks
Scallop border - MFT Stamps
Script Texture embossing folder - Cuttlebug
Words - Marianne Designs Collectables (typewriter set)

Card size - A2 (4.25 x 5.5")

Thanks for stopping by today

Sunday, 24 February 2019

Christmas Bird Lever Card

Hello my crafty friends

Since Valentine's Day is behind us, and Easter is in the distance I decided to post a holiday card!


Once again I pulled out my Lever Card and Lever Card Layering dies by Divinity Designs. This is a paper stack I have had for several years and I never seem to make a dent in it. It has lovely gold foiled bits and I added gold peel off snowflake stickers for additional holiday shine.


Love the stitched snowflakes, which were a new addition to my collection last November.


Into the holiday card stash with this one!

Supplies:
Patterned paper - DCWV
Lever Card and Lever Card Layer dies - Divinity Designs
White card stock
Bird dies - Marianne Designs
Sakura white gel pen
Black Sharpie
Alcohol markers
Stitched Snowflake  dies- Lawn Fawn
Nuvo Crystal Drops
Stitched circles - MFT Stamps
Holiday Cheer Stamp - Your Next Stamp
Merry Christmas - Simon Says Stamp
Stickles
Gold Snowflake Peel-Off's - Elizabeth Craft Designs

Thanks for stopping by today

Wednesday, 5 September 2018

Hello There Deer

Good morning friends

I had SO much fun making this card!  First, I have wanted these deer dies for YEARS but was never able to find them. When I discovered that Ecstasy Crafts (a Canadian company!!) carried some of the Marianne Design Collectible dies, I was quick to order them. They are just as sweet as I was hoping, and quite easy to put together.


After making a bug themed card last month, I was left with a couple of pieces of leftover patterned paper which had clouds on the reverse side. I paired one here with a paper pad by Pink and Main, as well as the Reverse Scallop Window die by Your Next Stamp to create the little scene.


A stamped sentiment, a few stitched leaves and some grass and the card front was finished.


Inside the card I used the Large Fishtail Banner dies by Pink and Main. I didn't add a sentiment inside as I am not sure what I want to use this card for just yet. Sometimes it's good to have a couple of this type of card handy in the stash.

Supplies:
Cloud patterned paper - Bella Boulevard
Other patterned paper - Pink and Main
Enamel Dots
Stitched leaf dies - Lawn Fawn
Deer die - Marianne Designs
Kraft, black, cream and brown card stocks
Reverse Scallop with Optional Stripes die - Your Next Stamp
Green paper - Stash
1006 Nature Edges - Karen Burniston
Black glaze pen
Sakura white gel pen
Large fishtail banner dies - Pink and Main
Hello there - MFT Stamps
Fishtail benner - MFT Stamps

Thanks for stopping by today