Friday 31 July 2020

Garden Themed Slimline Waterfall Card


Hello crafty friends ...

It's Fun Fold Friday here on my blog and I'm sharing a garden themed Waterfall Card with both old and new products from Karen Burniston. I talk about the details in my YouTube video!


Since I am enjoying the Slimline card format but still like to make interactive cards I'm going through my dies finding out which ones work for a Slimline and which ones work but need to be adapted. This card uses Karen Burniston's Frame Pull Pop Up die adapted to be a Waterfall Card! This was a technique Karen Burniston came up with and you can see the videos for the Flip Frame Pop Up assembly AND the Waterfall version HERE

After making a couple of them, I started making a wider pull arm - so this one uses that technique. My arm is almost 2.5" wide and gives you lots more room for a sentiment that is revealed as the tab is pulled.


I did a photo collage showing each of the four decorated panels. As you pull the tab to the right each panel flips over to reveal the one below it. I used the new Backyard Charms along with the older Garden Charms to decorate the panels. I adore the fairy that is in the Backyard Charms ... so added her in a different colour to the back side of each of the panels.


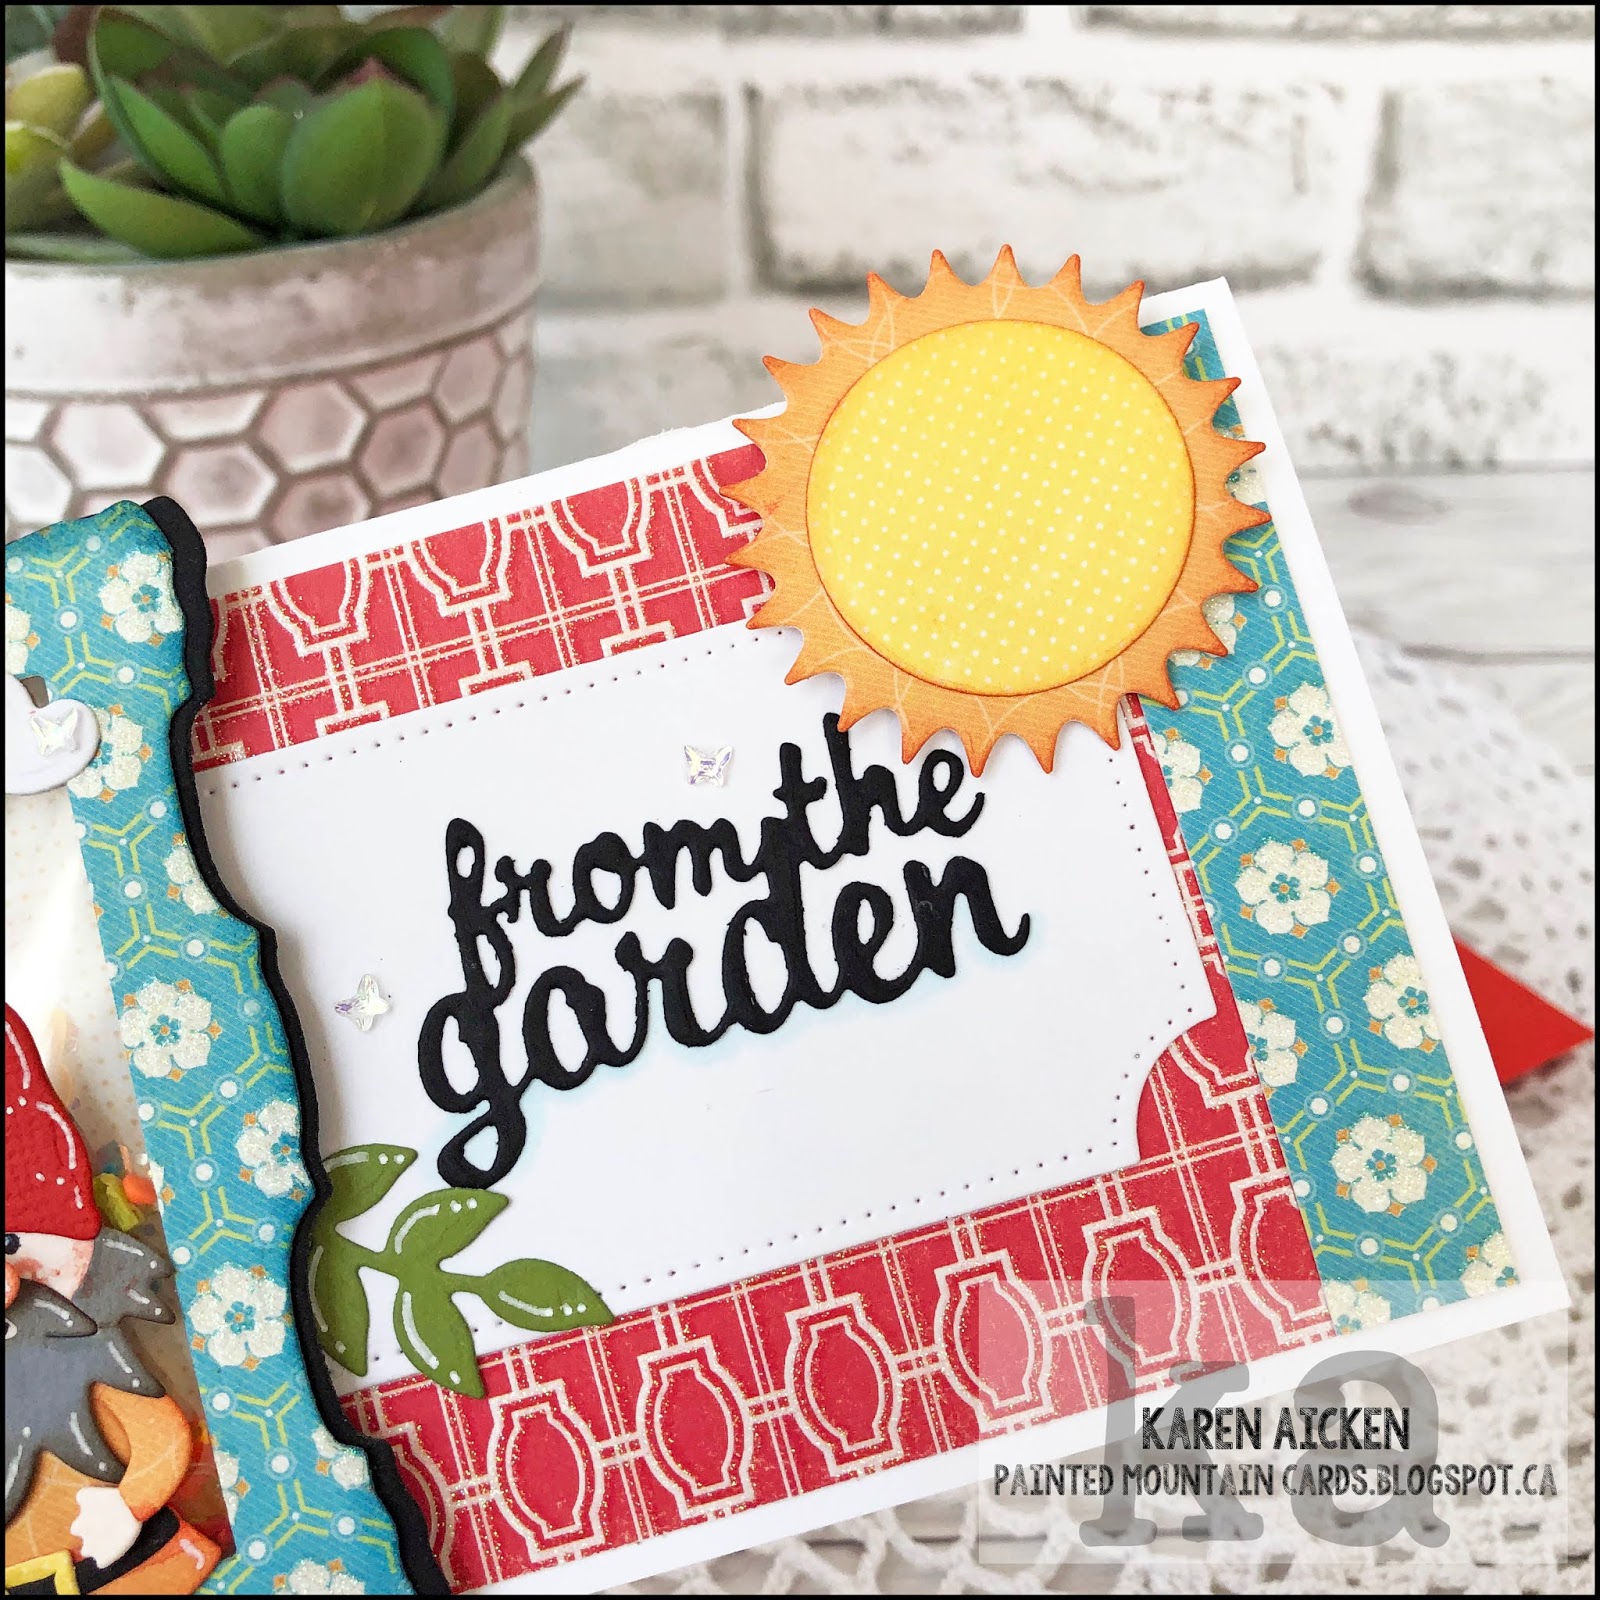
The final photo shows the stamped sentiment that is finally revealed when all the panels are flipped over from pulling the pull tab.


Inside I added some strips of the pretty sparkly paper, and a circle with sponged clouds and one more sweet fairy. Then I combined the Happy & Day from the new Word Set 12 Anniversary, with the My Friend from Word Set 1 Greetings.


**Karen Burniston's New Release was available for preorder on July 16th with shipping (in the order received) starting August 3rd. 

Supplies:
White, Kraft & green  card stocks
Patterned Paper - Citrus Stack, 8 x 8" DCWV
1070 Frame Pull Pop Up - Karen Burniston
Small stapler - Tim Holtz
1002 Word Set 1 Greetings - Karen Burniston
Group Hugs, Paper Smooches
Taylored Expressions Blending Brushes
1130 Backyard Charms - Karen Burniston (**New Release)
Sakura white gel pen
1085 Garden Charms - Karen Burniston
1141 Landscape Scene (clouds) - Karen Burniston (**New Release)
1127 Safari Animals (heart) - Karen Burniston (**New Release)
Distress Stickles
Satin Rainbow Confetti - Studio Katia
1137 Word Set 12 Happy Anniversary - Karen Burniston (**New Release)
Stickles

Card size - 8.5 x 3.5", fits in a #10 Envelope


Thanks for stopping by today

Thursday 30 July 2020

Thinking of You Pop Up Card


Hello crafty friends ...


Today I'm sharing a pop up card made with products from Karen Burniston and Studio Katia.  I noticed that I don't have many floral stamps or dies, so have purchased a couple of those ... this lovely tea cup & flowers is one of my new stamps from Studio Katia. 

I stamped it on Bristol Smooth card stock, embossing with gold embossing powder and coloured them with Zig markers. The textured background was die cut from pale green mirror card stock and I added the Thinking of You and some sparkle with gems & confetti.


Inside, I used the Katherine Label Pop Up with a fun stamped greeting on a matted scalloped circle. The floral portion of the teacup stamp was added to the inside bottom right corner of the white panel, and also on either side of the envelope front.


I love all the height you get from the Katherine Label Pop Up!


Into my stash with this one.

Supplies:

A Cup of Thanks (stamps and coordinating dies) - Studio Katia
Bristol Smooth card stock
Gold embossing powder
Zig Clean Color Markers
Water Brush
Stickles
Glossy Accents
Green Mirror Card Stock - Tonic Studios
Rectangular Dots Cover die - Studio Katia
White card and envelope - Michaels
1102 Word Set 10 - Thinking of you, Karen Burniston
Patterned paper - Pink Roses, Recollections
Bora Bora Pearls - Studio Katia
Pineapple Delight Crystals - Studio Katia
Pink Carnation Crystals - Studio Katia
Crystal Rainbow Confetti - Studio Katia
1011 Katherine Label Pop Up - Karen Burnkston
Scallop Stitched Nesting Circle dies - Tutti Designs
Circles - Hero Arts
Sparkle sentiment stamp - UpliftingWords2Hear, the Stamps of Life

Card size - 5 x 6.5"


Thanks for stopping by today

Wednesday 29 July 2020

Unicorn Flip Frame Pop Up Card

Hello crafty friends

Today I'm sharing another card made with Karen Burniston's COMING SOON new release and I talk about the details in my YouTube video here:  


I kept the front nice and simple, since all the fun is on the inside. I used some patterned paper and sparkly confetti, and trimmed the gold glittered CELEBRATE! from a sheet of patterned paper in the stack.


Inside I used the new Flip Frame Pop Up and a few other new dies to create this Unicorn! I'm really proud of this one and how well it worked out.


I used the Tutu from the Hippo in the new Safari animals for the eyelashes, trimming off one notch from each one. That gave me the perfect width to fit both inside the frame. The horn was created from gold glitter card stock and the fox tail from the new Animal Add On's One. There is more information on how I did the horn in my video. The ears were from the same set. 

The words were done on the computer - I penned the word Magical on my iPad and added text above and below it before printing. Then I due cut the greeting out using the sweet scalloped rectangle that is in the new Pop 'n Swap die set. In the bottom right corner, I added the crown and wand from the Princess & Mermaid die set.


The Go Wild is also one of the new dies and I'm having fun with that one!


The New Release was available for preorder on July 16th with shipping (in the order received) starting August 3rd. 

Supplies:
Patterned paper - Confetti, DCWV
1134 Flip Frame Pop Up - Karen Burniston (*New Release)
White card stock and other card stock scraps
1127 Safari Animals (hippo skirt for eyelashes) - Karen Burniston (*New Release)
White pearl card stock
1139 Animal Add Ons 1 (ears and horn) - Karen Burniston (*New Release)
Gold Glitter card stock - Tonic Studios
i-crafter blending brushes
Holographic circle stickers - Dazzels
Chalks & Q-tip for cheeks
1128 Go Wild - Karen Burniston (*New Release)
1133 Pop 'n Swap (Scalloped frame) - Karen Burniston (*New Release)
1036 Princess and Mermaid (crown & wand) - Karen Burniston
Crystal Rainbow Confetti - Studio Katia

Card size - Standard A2, 4.25 x 5.5"

Thanks for stopping by today

Tuesday 28 July 2020

'Blossoms in Bloom' Birthday Card Duo


Hello crafty friends


I absoultely love the 'Blossoms in Bloom' stamp & die bundle from Stampin' Up and today I have a pair of Birthday Cards using it. I made both a Slimline card, and a larger-than-A2 card. Let's go over the Slimline card first.


I created a black card base, then die cut the outline floral die from black card stock that had double sided adhesive applied to the back. That makes it easier to add this delicate die cut to the card. I added part of the die cut to the lower left corner first and carefully trimmed off the overhanging pieces so I could add them to the upper right corner. 

Then I pulled out my Twinkling H2O paints which I have not used in many years. These are little pots of almost pearlized water colour paint and this card has SO much shimmer in real life.  I die cut the Birthday and all the included layers from the Honey Bee set, stamped the word Happy then added a little Studio Katia bling.


Inside the card, I stamped the sentiment and also some of the floral stamps in the 'Blossoms In Bloom' bundle.


For my second card I pulled out a black card base & envelope. I have had these larger card sets from Michaels in my stash for years and I'm finally USING them again. 

This card was actually inspired because of the Slimline one above. Since I had used double sided adhesive, when I peeled up the outline border I was left with a nearly perfect black solid bouquet. I die cut the outline again from an orange patterned paper that had double sided adhesive on it. I adhered the outline to the green patterned paper panel, then peeled up all the black pieces and carefully inlay them into the outline. Yes, this took a long time and isn't something I will do often. But I had to try it at least once! 

The areas between the blooms remained sticky from the double sided adhesive, and I didn't want to add any black in there or I would have lost the detail of the separate blooms. So I pulled out my loose glitter from Elizabeth Craft Designs and burnished it over those areas.

And I remembered why I don't use loose glitter very often - it was everywhere.  Ha.


A simple white embossed sentiment and layered fishtail banners, and a few sparkly sequins finished off the card front.


The inside was done with more bloom/leaves stamps from the bundle and this lovely birthday sentiment from Studio Katia. I added a piece of the orange patterned paper to the envelope flap for a little pizazz.


I am really happy with how both of these cards turned out and they went into my stash.

Supplies:

Black and white card stocks
Sakura Stardust pen
Patterned paper - Nature, K & Company (Old, from my stash)
Blossoms in Bloom Bundle - Stampin' Up
Cool Diamond Glitter - Elizabeth Craft Designs
Black card and Envelope - Michaels
Simple Strips - Birthday, Taylored Expressions
Simple Strips Die - Taylored Expressions
Simple Strips Mat Die - Taylored Expressions
White Embossing Powder
Majestic Confetti - Studio Katia
MISTI- My Sweet Petunia
It's Your Birthday - Studio Katia
Stitched Mini Scalloped Rectangle die - MFT Stamps
Twinkling H20's
Happy Birthday - Honey Bee
Crystal Rainbow Confetti - Studio Katia
Thinking of You - In & Out Birthday, Taylored Expressions

Card sizes:  Slimline card - 8.5 x 3.5", fits in a #10 Business Envelope. 

     Larger Card - 5 x 6.5", card & envelope from Michaels.


Thanks for stopping by today

Monday 27 July 2020

Sunset, Gears & Car Slimline Card


Hello crafty friends ...

It's Masculine Card Monday here on my blog and I have a Slimline Father's Day card to share today. I couldn't wait to play with the Sending Sunshine stamp set from Stampin' Up, and once I had the sunset scene finished I pulled out the Geared Up Garage bundle to finish off the card. I used a matte coated card stock, so I had to be careful not to smear anything when I was stamping. 

The stitched rectangle was also cut from the same card stock and I used the i-crafter blending brushes to ink that up in coordinating colours. I thought about stamping & masking the car and blending the colours over the mask then removing the mask to colour the car. But in the end I liked the white car better. And of course I love the gears that come with the bundle - they work so well for a masculine card!


This started out as a masculine birthday card, but when I was working on the inside and saw the Happy Father's Day stamp in the Geared Up Garage stamp bundle I decided to add that and put this card away for next year.

Once again I pulled out an older, retired gear stencil by Karen Burniston and added the gear pattern in a grey ink to the inside panel. Then I added some stamping and the die cut gears.


Into my stash for next year!

Supplies:
Matte Glossy Card Stock
Slim Stitched Rectangle die - Pink Fresh Studio
Sending Sunshine stamp set - Stampin' Up
Stitched Rectangle Die Set - Your Next Stamp
Geared Up Garage Bundle - Stampin' Up
Gear Stencil - Karen Burniston/Elizabeath Crafta Designs (retired)
i-crafter Blending Brushes
Taylored Expressions Blending Brushes
Yellow fine point marker
White and black card stocks

Card size - 8.5 x 3.5", fits in a #10 Business Envelope

Thanks for stopping by today

Sunday 26 July 2020

Large Butterfly Shaker Card


Hello crafty friends ...

There is no talking in this YouTube video - just a quickie to show you the shaker card in action.


I had received this large Butterfly Shaker Card kit from Queen & Company with one of my orders last year, and with our recent summer weather (FINALLY!) I was in the mood to make something summery. I opened the kit and was pleased to see that it came with everything I needed to make two A2 sized Butterfly Shaker Cards! 

I pulled out the supplies to create one of them, and decided to make a larger than A2 card - this card and envelope is a set I picked up from Michaels a few years ago. I inked the butterfly cut out piece with my Taylored Expressions Blending Brushes then stamped a background image repeatedly to cover the front. After I assembled the shaker and adhered it to my glittery card front, I added some no-hole sequins from Studio Katia, a white embossed sentiment on a fish tail banner and the Hello die. Then I punched a few butterflies using an older Martha Stewart punch.

Once I was finished with the card, I decided to wrap the shaker foam with a double wrap of orange Bakers Twine to hide the foam a little. It's a solid piece of double sided foam so the edges were nice and neat anyhow - but I liked the finish and little detail the Bakers Twine gave it.

Here is a peek at the inside, where there is lots of room to write a note. I added three of the punched butterflies and a pretty no hole sequin on each one. I added a little stencilling on the envelope as well.


Supplies:
Butterfly Shaker Card Kit - Queen & Company
Taylored Expressions Blending Brushes
Catherine Pooler Inks
Playful Backgrounds - Stampin' Up
Various filler from my stash
Card and Envelope set - Michaels
Patterned paper - Citrus Stack (8 x 8") - DCWV
Hello die - MFT Stamps
Butterfly Punch - Martha Stewart
Crystal Rainbow Confetti - Studio Katia
Wink of Stella
Bakers Twine
Stencil - Elizabeth Craft Designs
Fishtail Banners - MFT Stamps
Hey You - More Essential Sentiments, MFT Stamps
Card size - 5 x 6.5" (fits in the included envelope)


Thanks for stoping by today

Saturday 25 July 2020

Gnome Shaker Slimline Card


Hello crafty friends ...

Even though this isn't a Pop Up card, I still did a YouTube video to talk about some of the details of this card and Karen Burniston COMING SOON release!


As soon as I saw the frame die in the new Flip Frame Pop Up, I thought ... Shaker Card! Haha - I wasn't alone, as so did teammate Kelly B. Kelly shared hers already as part of the New Release Blog Hop - and her blog is linked on the right if you want to go check it out.

No surprise that I chose to make a Slimline Card! I knew I wanted to try out the super cute Gnome & Santa die as well, so pulled out some bright and cheerful patterned paper from my stash and got to work. It's just a bonus that the paper is also embedded with glitter so it's super sparkly.


How CUTE is this new Gnome?  The mushroom also comes in the set, as well as a optional little die to turn the Gnome into a Santa for the holidays. 

Once I adhered the frame to the card front I didn't feel like there was enough contrast for me. So I cut the frame again from black card stock, snipping the sides off and adhering them behind the blue patterned one. This took a bit of fiddling, since there was foam tape to try to work around. But it worked out and I was happier with it in the end.


When I was thinking about this card, I intended to make it a portrait format, but as I laid out the frame and sprigs etc, I changed my mind and did a landscape card. Yes, the frame and sun hangs over the top edge, but I will be mailing this card in a #10 Business envelope which is designed to hold a card 4" wide. My Slimline card is 3.5" wide, so I have just over 1/2" of leeway in the envelope. I like the additional detail these overhanging elements give the card.

The sun is from the new Landscape Scene (LOVE the big size of it) and the from the garden is from the older Garden Charms. Easier to see in the video, but those tiny iridescent butterflies are SOOO pretty!


Finally, here is a peek at the inside.


***The New Release was available for preorder on July 16th with shipping (in the order received) starting August 3rd. 

Supplies:
1134 Flip Frame Pop Up - Karen Burniston***
Patterned paper - Citrus Stack, DCWV (8 x 8")
Acetate
Various shaker filler from my stash
Various card stock scraps
White card stock
Dotted Slimline Die Set 2 - Studio Katia
1085 Garden Charms - Karen Burniston
1002 Word Set 1 Greetings - Karen Burniston
1134 Flip Frame Pop Up (sprig, stitched rectangle) - Karen Burniston***
Sunshine stamp inside - Impression Obsession
1141 Landscape Scene (sun & clouds) - Karen Burniston***
Iridescent Butterfly embellishments - Studio Katia

Card size - 8.5 x 3.5", fits in a #10 Business Envelope

Thanks for stopping by today

Thursday 23 July 2020

Fun Friday Challenge 144 - Summer Days!


Hello crafty friends ...

It's time for a new Challenge at Your Next Stamp - 
the Fun Friday Challenge #144 has a theme of 'SUMMER DAYS'

The Fun Friday Challenges come with two chances to win prizes!!
Comment on the YNS BlogInstagram or Facebook pages for a chance to win a free stamp set. Comment on all three to increase your chances, but comments must be left by July 29th 2020. The winner will be announced on July 31st on the YNS Blog.

More details about the prizes at the end of my post.

I have to say, this is not the card I intended on making for this challenge. I was going to do a Mermaid card! When I was poking around in my patterned paper looking for something that would work for a mermaid, I saw this older paper package from Carta Bella and decided to use that instead. I liked the fun watermelon print, and when I saw a 2 x 3" Cut Apart in there that matched perfectly, I was off and running! 

I grabbed the Life Is Sweet set, and the Rectangle Scalloped Frames with Piercing Marks. I am really enjoying using frame dies these days, and these ones are SO sweet. The watermelon card JUST fit into the opening of the largest frame, so I held it in place with some clear tape on the back side. 


I love Z-Fold Cards, so that is what I went with today. I especially like how well it works with this larger card!


stamped the greeting on a Stitched Fishtail Banner & trimmed the right edge so it would be hidden behind the scalloped piece when the card was closed. Then I used my i-crafter Blending Brushes to add some ink in coordinating red and green. I couldn't resist adding one of the Fun Faces stamps below the sentiment, and then a few more of the sparkly Gumdrops that I used on the card front.


I had a leftover strip of the watermelon print paper that wasn't tall enough to add into the centre panel. Then I had the idea to cut the short edge of the scalloped frame from a scrap of the bright green paper and trim it to the same width as the scrap strip. It worked perfectly to fill up that centre panel.

Note, since you can see the back side of the frame piece if you turn the card over I wanted to hide my tape. I cut another scalloped frame from white card stock and adhered both it and the fallaway centre piece back into place on the back side the green one before I adhered it to the card front. Then it looked nice and tidy.


The Fun Friday Challenge #144 runs through August 6th 2020 at midnight EST. One random participant will win a $15 gift certificate to the Your Next Stamp store.  If YNS stamps or dies are the focal point then the winner receives an additional $5 gift certificate for a total of $20!!  The winner will be announced on the YNS Blog the Sunday after the challenge closes. Check it all out on the Your Next Stamp blog HERE. 


Supplies:
Card & Envelope - Michaels
Patterned paper & Cut Apart - Summer Lovin', Carta Bella
White and black card stocks
Bakers Twine
Sakura white gel pen
White embossing powder

Card size - 5 x 6.5"     

Thanks for stopping by today