Sunday 28 February 2021

St. Patrick's Day Slimline Card


Hello! I am excited to share my first card using the NEW RELEASE at Your Next Stamp! The Design Team is sharing sneak peaks until Thursday, when the release goes live in the Your Next Stamp online store. We will be celebrating on Thursday with an Instagram Hop. As usual with a YNS release, you have a chance to win a prize and I have more details at the end of my post.

My card today is a Slimline for St. Patrick's Day and I used the new 3D Alphabet and Numbers for the LUCKY on the card front. After white embossing the letters I used the coordinating dies to cut them out and added them to the smallest stitched rectangle in the new Slim Stitched Rectangle Dies. I also added lots of shimmer to the letters with a Wink of Stella pen.

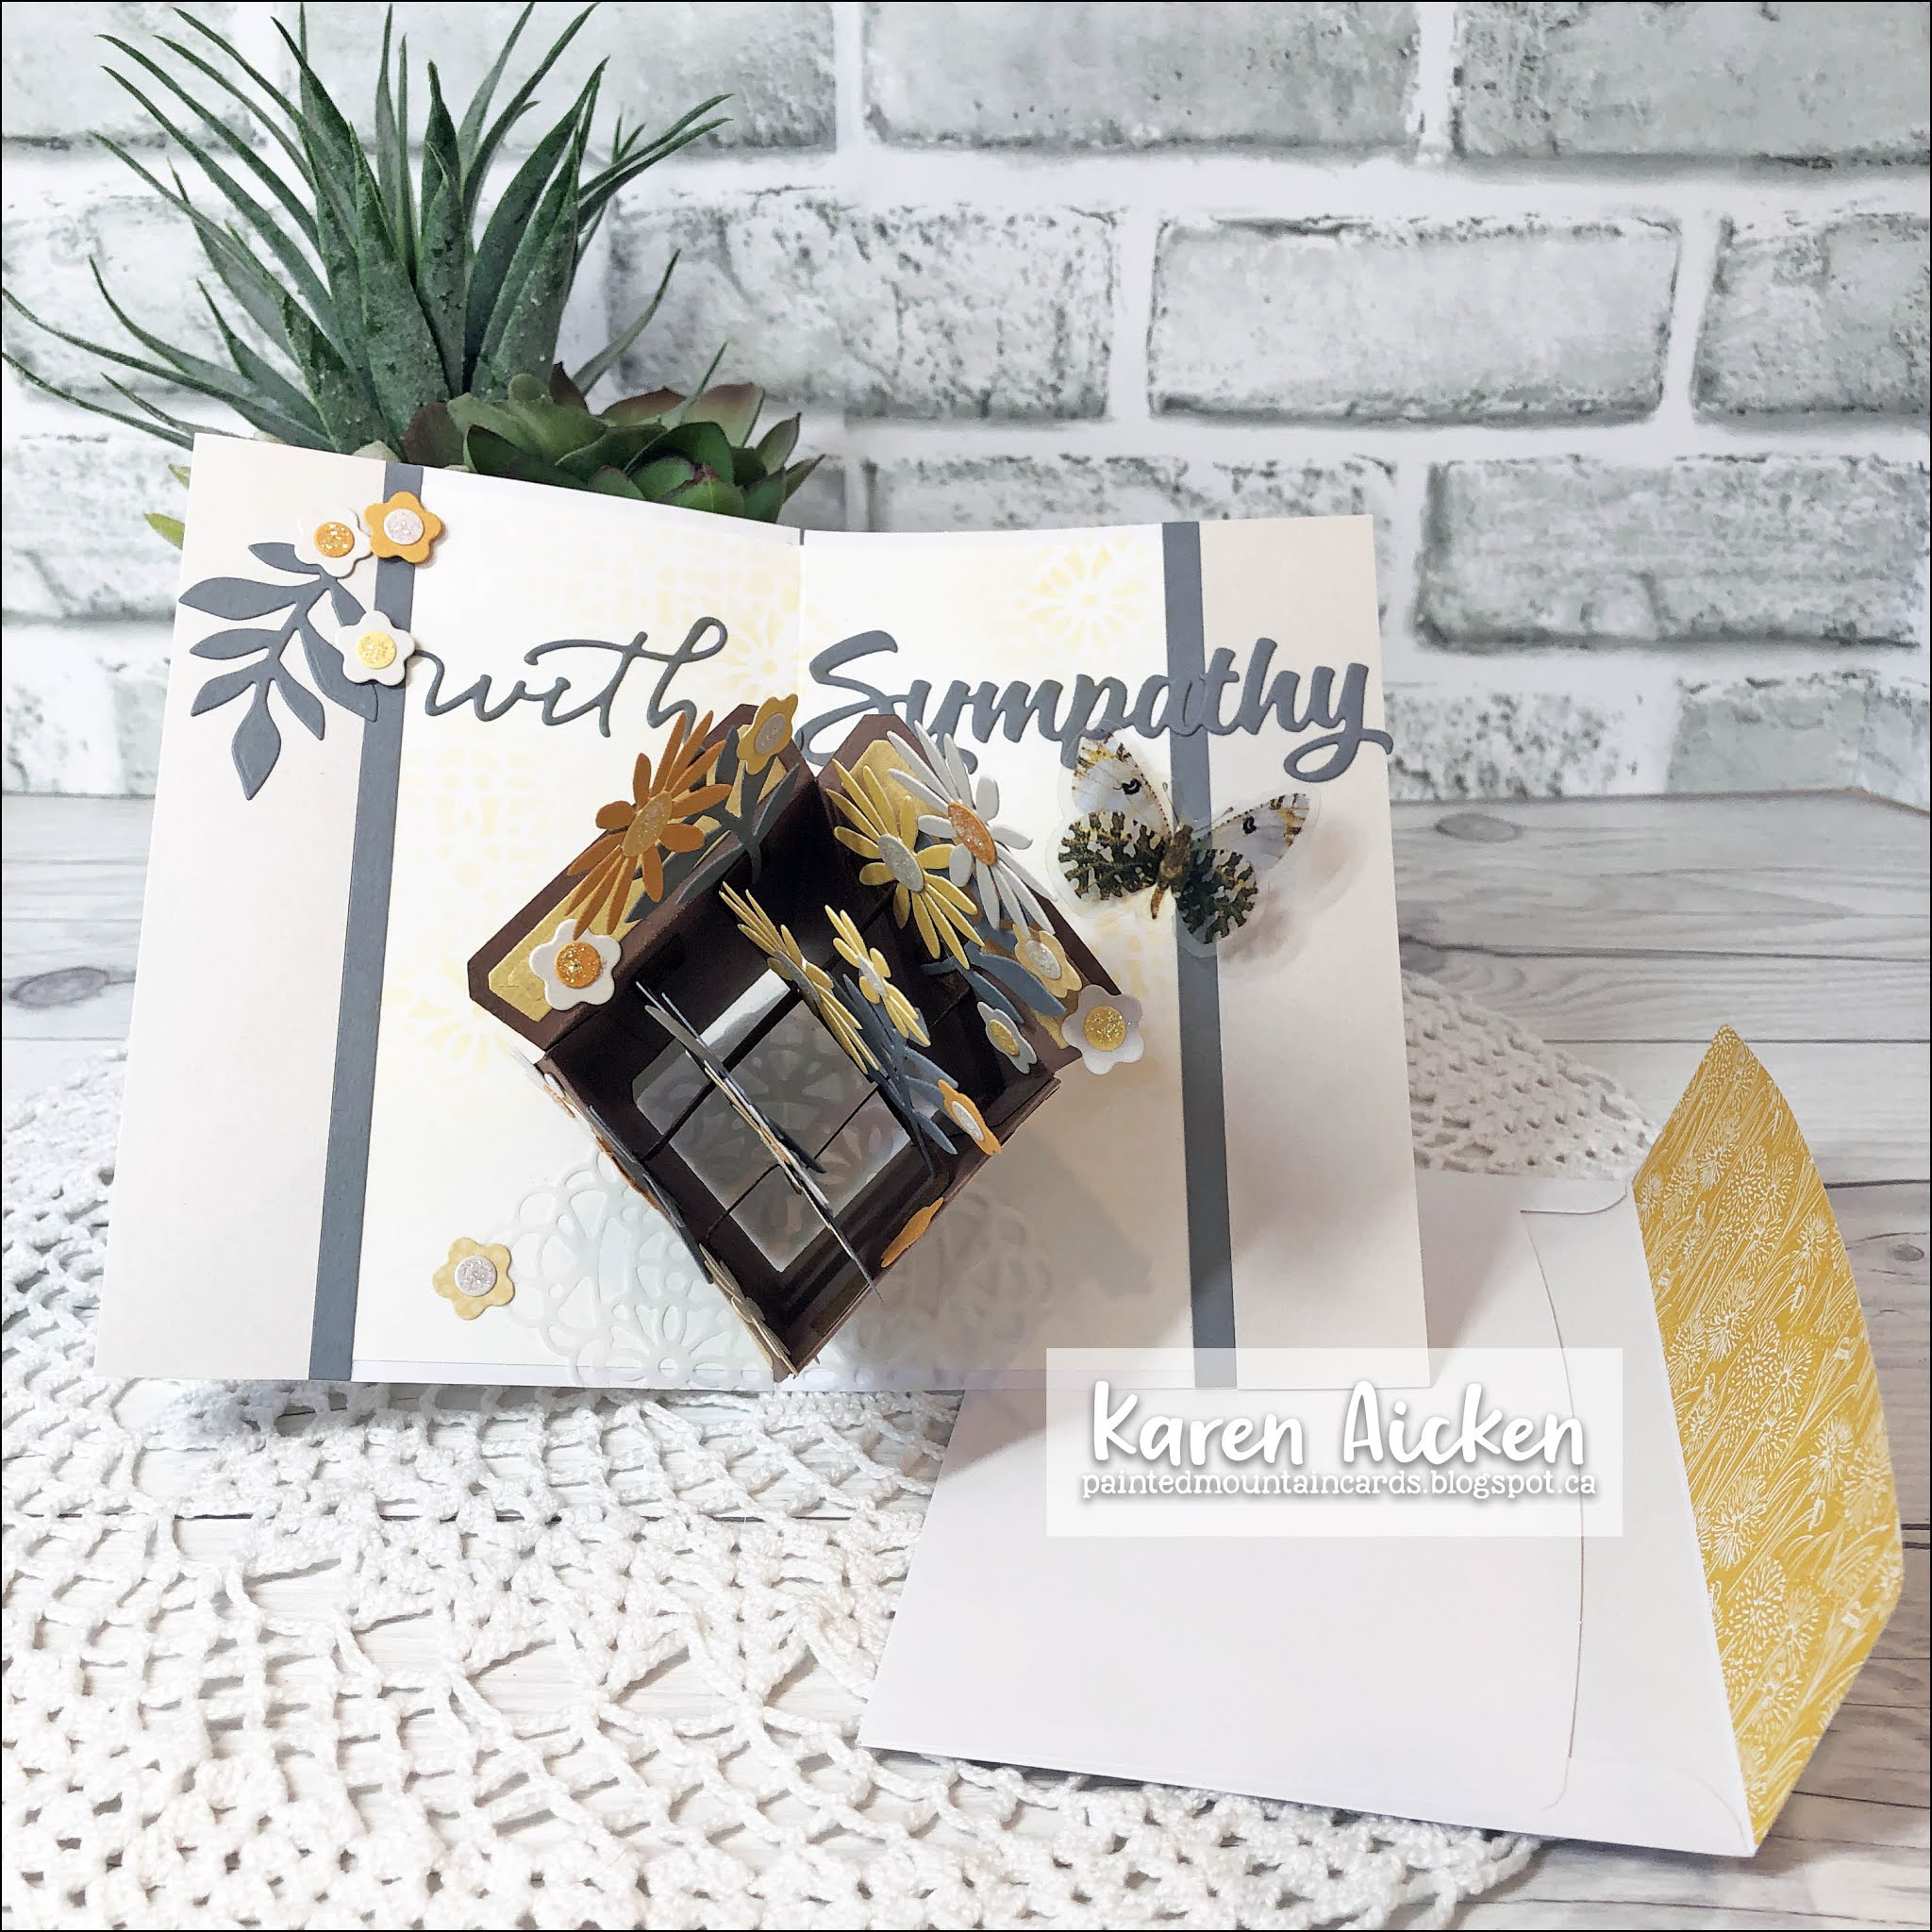
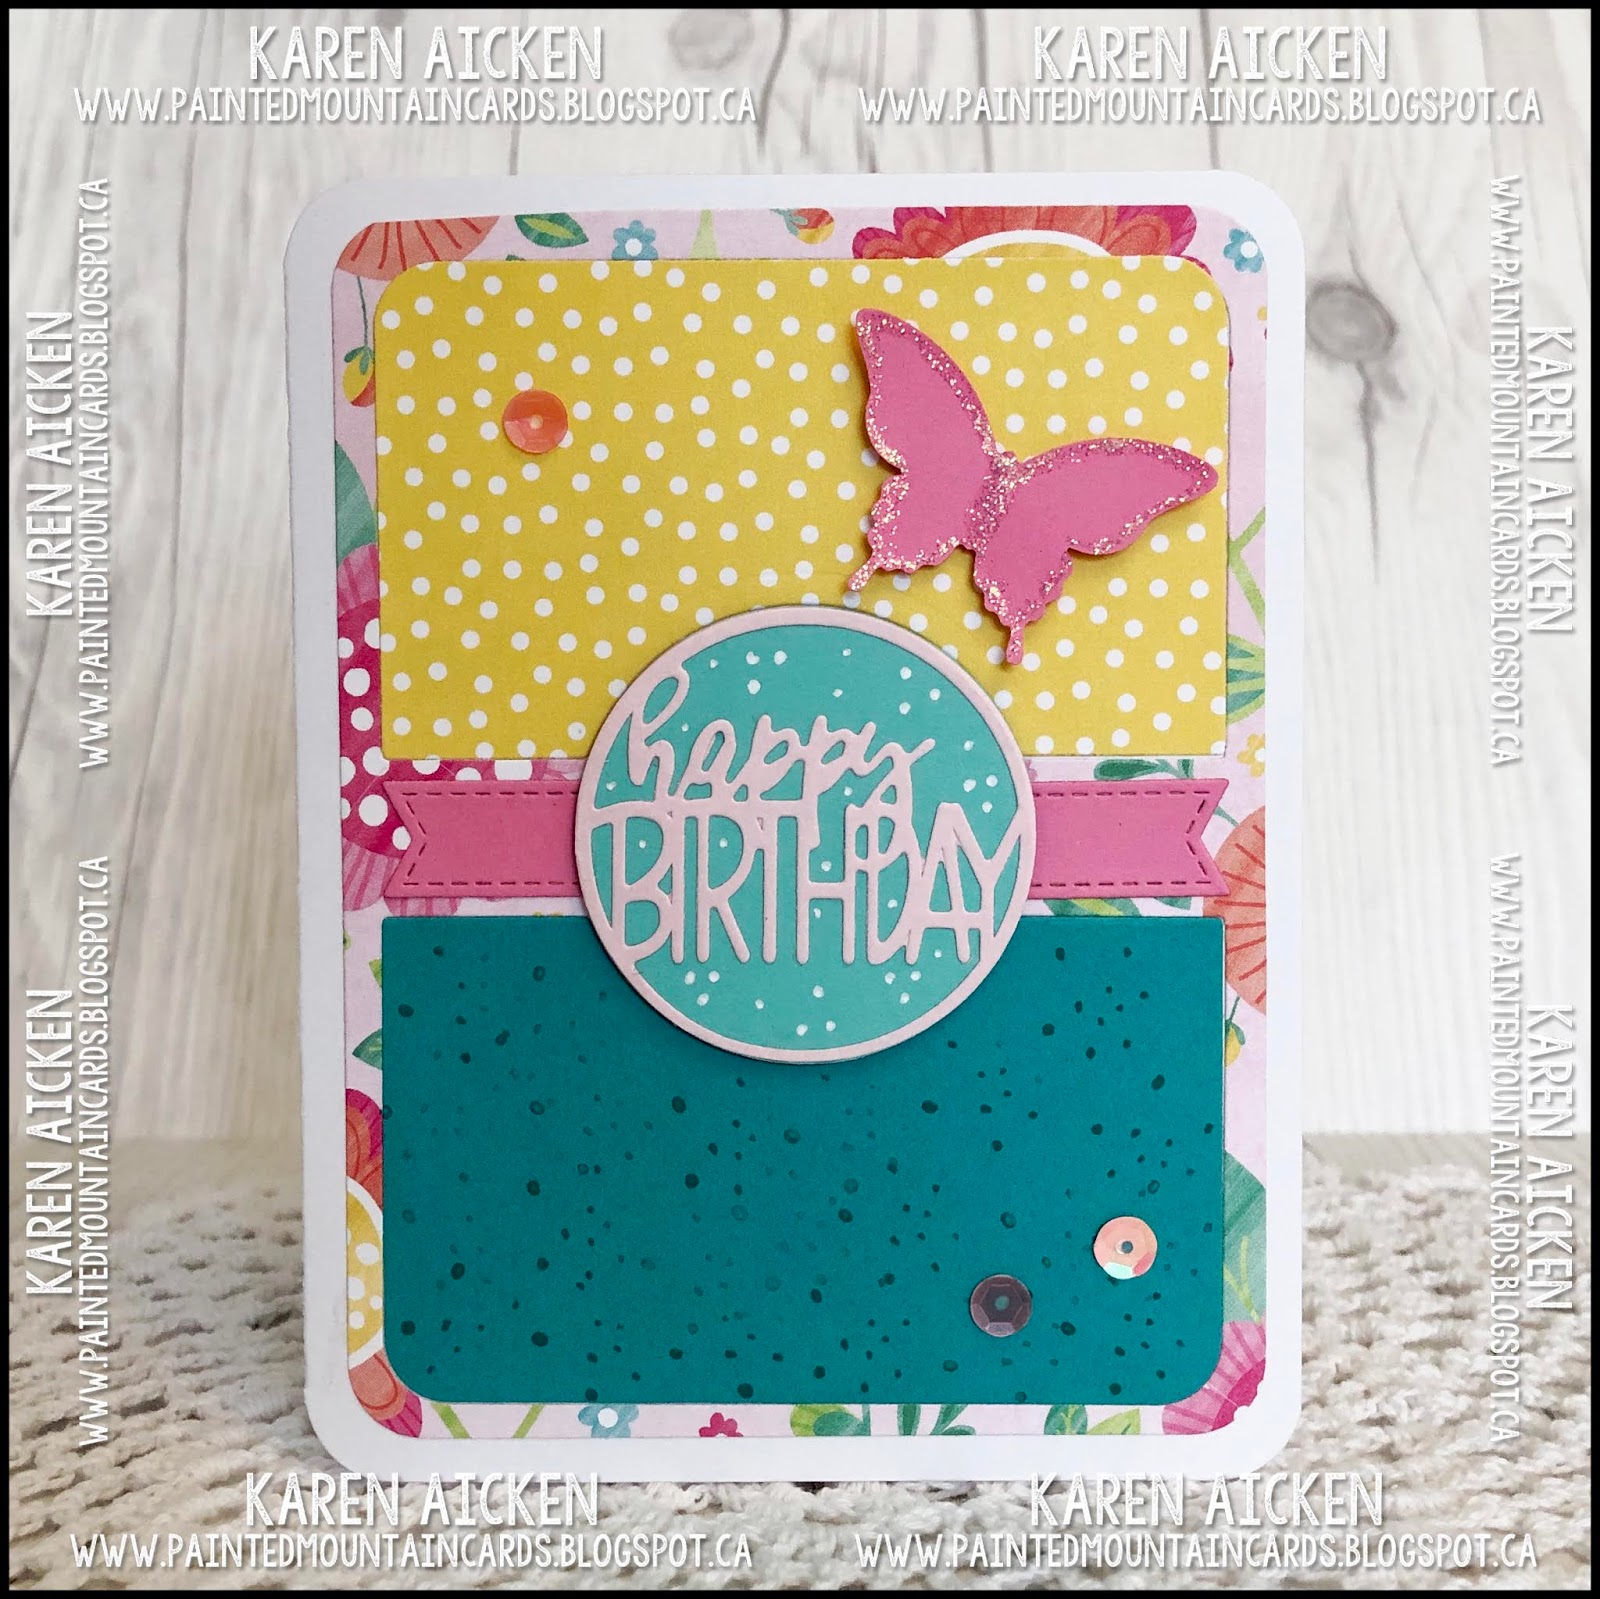
I have wanted to try this 'off set circle' technique that was very popular on social media at the end of last year so this seemed a good time to see if I liked it. And I do! I don't know the 'proper' name for the technique but if I use it again I will try to find out what it is.

Inside I used two more of the new Slim Stitched Rectangle dies, stencilling the green one with green ink and a stencil from STAMPlorations.  Check out the stencilled shamrock inside. I made that by being mindful of where I placed the small heart die to cut out the three green card stock hearts I used on the card front. 


Now for the prize information.  Each preview day, comments left on the Your Next Stamp Blog and Your Next Stamp Instagram will be selected to win one of the sets being showcased! Winners will be announced the day after each preview day.


Supplies
Stitched Slim Rectangle Dies - Your Next Stamp (available on Thurs Feb 25/21)
3D Letters & Numbers - Your Next Stamp (available on Thurs Feb 25/21)
3D Letters & Numbers die set - Your Next Stamp (available on Thurs Feb 25/21)
Stripetastic Heart Die Set - Your Next Stamp
White embossing powder
Stitched circle dies - MFT Stamps
Mini MISTI - My Sweet Petunia
Stencil - Aperture, Stamplorations
Taylored Expressions Blending Brush
Green fine point marker
Wink of Stella
Card Stocks - stash
Patterned paper - Doodlebug Designs
Card Size - 8.5 x 3.5", fits in a #10 Business Envelope

Thanks for stopping by today

February Paper Pumpkin Alternate Card Trio


Hello!  Today I'm sharing my February Paper Pumpkin Alternate Cards #6, 7 and 8! I really loved this pretty bouquet printed element and since the kit came with three of them I used them to create three alternate cards. The three coordinating envelopes have that lovely yellow polka dot liner coordinates well with one of the papers in the Flowers & Field paper package. As I mentioned in my first Paper Pumpkin video, I wouldn't have thought to pull in that patterned paper but since the kit came with a notice saying how well they worked together, I used it!


First up (Alternate Card #6) is an Easter card!


The bouquet was given a spritz with my Shimmer Spray and popped up onto the striped panel with thin foam tape. Those striped panels were actually card bases. The kit came with three of them and since they were printed front and back, I cut them apart to mount onto white card bases and that gave me six of the panels to use instead of three patterned card bases. 

The butterflies were punched using an older Martha Stewart Punch and the Happy Easter is a die set by Karen Burniston ... the Easter Charms. I cut it twice, once from a dark green that matches the green in the bouquet leaves and once from white. They were adhered together offset a little so the green on shadows the white. Finally I added a twine bow - the green twine came in the Paper Pumpkin kit.


Here is a peek at the inside. I added more punched butterflies to the stitched rectangles and the Happy Spring is also a die from Karen Burniston. Since the envelope was stamped with the In Bloom stamp set, I used the coordinating Stitched Booms and some scraps for the flower in the upper right corner. Oh, I am going to love those Stitched Blooms dies!!!


Paper Pumpkin Alternate Card #7 is one I can send out for Happy Mail!


Once again the bouquet was given a spritz of Shimmer Spray and was popped up with thin foam tape. I pulled out an older Hero Arts stamp set for the sentiment and added some of the punched butterflies that are also shimmery. While the yellow polka dot strip came in the kit, I added a stitched white scalloped border using an MFT border die.


Inside, I used more dies from the Blueprints #13 set (which is what I used to die cut all three of the green/aqua stitched rectangles) and will write a note on the white piece. The little yellow flower element came in the kit.

I also used the negative portion of one of the punched butterflies to create a stencil to use on the envelopes, and used Taylored Expressions blending brushes to apply the colour to the envelope fronts and flap. This is a retired Stampin' Up Punch that I used on the first batch of cards.


And finally, Paper Pumpkin Alternate Card #8.


The final bouquet was also given a spritz with Shimmer spray and was popped up with thin foam tape. I pulled out the sentiment from the June Paper Pumpkin kit "Box of Sunshine". I found an online listing for an unopened kit and purchased it but haven't used it yet. Those stamps though - they are going to be great!


Since this one will also be sent out as Happy Mail, I left the white area blank so I can write a little note. The yellow flower was included in the kit and I added two more punched butterflies.


All in all I made fourteen cards with this kit! I have another video sharing the remaining six cards late next week. If you would like to see my first five February Paper Pumpkin Alternates, you can find that HERE.


Supplies - everything from the February 2021 Paper Pumpkin Kit "Bouquet of Hope" unless listed below:

1078 Easter Charms - Karen Burniston
1084 Happy Spring - Karen Burniston
Shimmer Spray
Scalloped Border die - MFT Stamps
Thinking of You stamp - Hero Arts
Patterned paper - Field & Flowers, Stampin' Up
Blueprints #13 die set - MFT Stamps
Wink of Stella
Butterfly Punch - Martha Stewart
Stitched rectangle die - Elizabeth Craft Designs
Card stocks
Gold gel pen
Oh So Ombre patterned paper - Stampin' Up
June 2020 Paper Pumpkin 'Box of Sunshine'
Pierced Blooms dies - Stampin' Up
In Bloom stamp set - Stampin' Up
Stickles
Card sizes - all, standard A2 (4.25 x 5.5")

Thanks for stopping by today

Saturday 27 February 2021

February 2021 Paper Pumpkin Alternates


Hello!  Today I'm sharing my first five alternates using the February Paper Pumpkin Kit "Bouquet of Hope". Another amazing kit and I loved using it. I did finish the kit and will have more cards and another video sharing my alternates in the coming weeks. Today I have a walkthrough of these cards on YouTube


This Paper Pumpkin kit came with the supplies to create nine cards, 3 each of three different designs. I ended up making fourteen cards!! I love how generous the supplies are in the Paper Pumpkin kits.

My first card is a pop up card, and I kept the front fairly similar to the sample sheet other than I turned the card from landscape to horizontal. As I said in the video, I chose to only use one of the floral elements to make it more of the focus. The sample card used two.


Inside I used the Rockin' Rectangle Pop Up, a die set by Karen Burniston. For the flowers, I fussy cut a group of blooms from the Field & Flowers paper package which is also from Stampin' Up. I wouldn't have thought to use this paper, but the Paper Pumpkin kit came with a notice saying how well the kit would coordinate with this paper. Since I have a package of the paper, I pulled it out to use with the kit for the majority of my alternate cards.


The Rockin' Rectangle is a very versatile die set, and you can use it to animate all kinds of things and for many different occasions.


Card #2 is a Sympathy Card for my stash and in addition to the patterned papers, I also brought in a pearlized doily and poppy elements (also SU) from my stash. Both items were purchased from the Stampin' Up Clearance Rack awhile ago.


For this card, I turned the rose patterned card 'inside out' and added the sentiment onto a scalloped stitched rectangle. 


Card #3 is another Sympathy Card. Since I didn't think the green print on the lined envelopes went with anything else in the kit, I sacrificed one of them to die cut the stitched panel. That gave me a coordinating card and envelope and I liked it much better than using other items in the kit that didn't really match in my eyes. Ha, I'm really picky about my colours!


The butterfly punch is an older one by Martha Stewart and I still get a lot of use out of it.


Inside, I added a stitched panel, more punched butterflies and a stamped sentiment.


Card #4 is a Shaker Card that I made to send to a seller on Etsy (Mommy Panda Supplies, linked below) who has fun clay slices/sprinkles to use inside shaker cards. She is Canadian seller so you don't need to pay the huge shipping costs to buy them from the USA. Glendy has great customer service as well, and if you end up purchasing from her please let her know you found out about her from me. It's always good for a small business to know where your customers are coming from! (No, I don't get anything for referring her ... but I am so happy with every item I've purchased from her and I love to support Canadian small businesses!).


To create my shaker itself, I used the Circle Window and Frame die and the Circle Shaker Pouch - all from MFT Stamps. NOTE - I kept the rose printed fallaway circle from inside the shaker and used it on one of the cards I'll be sharing in the next video! The 'hello' was cut from white card stock and the shadow from vellum.


I added a sprinkling of butterflies inside and wrote my note on the white panel.


Here is a close up of the butterfly clay slices which were my latest purchase from Glendy (Mommy Panda Supplies on Etsy) and I was tickled to see that I could butt two of the butterflies up to each other and form a full butterfly as well as having the side view ones.


My final Paper Pumpkin alternate is very similar to the first one I shared except that I added that decorated panel to a larger card. This one is 5 x 6-1/2"!


The included Paper Pumpkin stamp set has a lovely bouquet image and I used it around the outer edges of the inside panel. I didn't add a sentiment to this one, as that way I can add one (if needed) when I go to send the card. Otherwise, I can write a note in the white space inside.


I'll be back tomorrow with another three cards (# 6, 7 & 8) and a video with the remaining cards (#9 through 14) next week.


Supplies:   Everything included in the 'Bouquet Of Hope' Paper Pumpkin kit, unless specified below.


Card #1
Shimmer Spray
1089 Rockin Rectangle Pop Up - Karen Burniston
Patterned paper - Flowers & Field, Stampin' Up
Wink of Stella
In Bloom stamps (for envelope) - Stampin' Up
Card size -  standard A2; 4.25 x 5.5"

Card #2
Patterned paper - Flower & Field, Stampin' Up
Gold embossing powder
Blueprints #13 - MFT Stamps
Poppy elements - Stampin' Up
Doily - Stampin' Up
Stitched Mini Scalloped Rectangle - MFT Stamps
Gold gel pen
Water brush
Mini MISTI - My Sweet Petunia
Card size -  standard A2; 4.25 x 5.5"

Card #3
Card stock - stash
*****cut apart envelope
Blueprints #13 - MFT Stamps
gold gel pen
Butterfly punch - Martha Stewart
Larger butterfly punch - Stampin' Up
Sympathy words - Hero Arts (older set)
Gold gel pen
Shimmer Spray
Card size -  standard A2; 4.25 x 5.5"


Card #4
Blueprints #13 - MFT Stamps
Stitched Rectangle die - Elizabeth Craft Designs
Circle Window & Frame die set - MFT Stamps
Circle shaker pouch - MFT Stamps
Card stocks
Acetate
Various shaker filler - stash
Butterfly shaker filler - Mommy Panda Supplies (Etsy)
Vellum
Hello - Hello Friend, Pink & Main
Oh So Ombre patterned paper - Stampin' Up
Butterfly punch - Stampin' Up
Wink of Stella
Shimmer Spray
Card size -  standard A2; 4.25 x 5.5"

Card #5
Card & Envelope - Michaels
Gold gel pen
Crayola marker
Water brush
Card size - 5 x 6.5", fits in the included envelope

Friday 26 February 2021

Floral Birthday Card Duo

Hello! Today I have two cards made using one of my FAVOURITE Sheetload sketches, the June 2020 one which I linked below for you. I made use of the edges of the large floral print paper by fussy cutting a few blooms and adding the straight edge to the matted layers.


Both the black self adhesive sequins and the black edged sentiment strip are leftovers from the February 2021 Paper Pumpkin kit. I know I haven't shared my cards made with that kit yet - because I rarely post things in the same order I make them. It's just the way my posts work out - but I will be sharing my Paper Pumpkin Alternates this week!

I stamped a sentiment inside - both cards have the same one - and my cards were finished.


The patterned paper package (12 x 12") was one of the free Sale-A-Bration items at Stampin' Up and I'm having fun using it! Both of these cards will be donated to my Mom's old nursing home, where I still donate 25 Birthday Cards each month. 

Supplies:
July 2020 Sheetload of Cards - Call Me Crafty Al (YouTube)
Card stocks - stash
Patterned paper - Flower & Field, Stampin' Up
Butterfly punch - Stampin' Up
Cool Tag Sentiments (words on front) - Your Next Stamp
Sequins & Black lined sentiment strip - February 2021 Paper Pumpkin
Wink of Stella
MISTI - My Sweet Petunia
Big Birthday Sentiments (words inside) - MFT Stamps
Card sizes, both - Standard A2 (4.25 x 5.5") 

Thanks for stopping by today

Thursday 25 February 2021

Bouquet of Flowers Sympathy Card

Hello! Today's card is a sympathy card made for friends. I wanted it to be extra special, and I chose Karen Burniston's Flower Pot Pop Up and scraps of card stock in various yellows and grey. I have a walk through on YouTube video: 

The card base and envelope is from Stampin' Up and I added flowers/vine and a 'Thinking of You' to the outside but kept everything quite flat so the card opens up all the way for display.


I used one of the square vellum doily's as a stencil to add a little colour to the inside of the card. All of the other white card stock is actually a pearlized card. The With Sympathy dies are also by Karen Burniston.


I have had these butterfly stickers in my stash for a long time and added one to the card as well.


Supplies:
Printed card base and envelope - Dandy Garden, Stampin' Up
1138 With Sympathy - Karen Burniston
1010 Flower Pot Pop Up - Karen Burniston
1102 Word Set 10 - Thinking of You
Card stock - stash
White pearl card stock
Striped patterned paper - unknown, leftover strip
Vellum Doily - Stampin' Up
Stickles
Butterfly Stickers - stash
Card size - 4-1/4 x 6-1/4", fits in the included envelope

Thanks for stopping by today

Wednesday 24 February 2021

Bright and Cheerful Birthday Card Trio


Hello! I found these photos and realized that even though I made these cards early last Spring, they didn't get posted. I guess because of all the confusion of COVID hitting, nobody knowing what was going on as our world turned upside down. So - today I'm sharing these three cards so I can finally file the photos away.


I don't have a supply list anymore, but I do know that I used the "Rounded Card with Circle Drop Ins" die set by Stephanie Barnard at the Stamps of Life for the card dies.


The insides were all done the same, using a Mini MISTI for oops-free stamping on all three panels.


All three cards were donated to my Mom's old nursing home!

Thanks for stopping by today

Tuesday 23 February 2021

Rainbow Thanks Slimline Card

Hello! I'm on the Crafty Meraki Blog today with this Slimline Thank You Card. I love using patterned paper on my cards, and lately I've been craving bright rainbow colours. I created my own rainbow patterned paper by cutting 1/2" strips of card stock and adhering them next to each other onto a piece of printer paper. This is a fun way to create your own custom patterned paper in your choice of colours!

For my card today I die cut the shadow from Thanks Word Shadow Die from the rainbow patterned paper, then cut a strip that measured 8.5 x 1" and matted that with black card stock. Cutting the Thanks Word Shadow Die again from white card stock, I chose the smaller outline portion and set the remaining two pieces aside to use another time. NOTE:  Keep the fallaway interior pieces to put back inside the "h, a, k and s" and adhere the outline portion and the fallaway pieces onto the rainbow shadow as shown.

I then adhered the rainbow strip along the inside bottom edge.


I chose one of the dies from the Slim Edger Dies from Pink Fresh Studio (and available in the Crafty Meraki shop) and cut the bottom front edge of my white card base. This not only gives a nice detail to the card front, it will allow the rainbow colours to show from the inside when the card is closed!

The black card stock strip was cut 5-1/2 x 1" and I fishtailed the ends. That was adhered, centred on the card front then the Thanks element was adhered with foam tape. A few rainbow coloured sequins sprinkled across the front and my card was finished!


"Crafty Meraki is a tribe of women who are all creators but more importantly, love helping others in any way we can! 

Meraki (may-rah-kee) a verb, or adverb, a Modern Greek word, derived from the Turkish “Merak” (Labor of love, to do something with pleasure), is applied to tasks, usually, creative or artistic tasks, but can be applied to any task at all. Meraki means to do something with passion, with absolute devotion, with undivided attention.

Crafty Meraki was born out of a vision to help creators do what they love doing the most- to create!"


Supplies:
Thanks Word Shadow Die - Crafty Meraki
Slim Edger dies - Pink Fresh Studio
Various card stocks - stash
Satin Rainbow Confetti - Studio Katia
Card size - 8.5 x 3.5", fits in a #9 or #10 Business Envelope

Thanks for stopping by today

Monday 22 February 2021

5 x 7" Flip-Its Sympathy Card

Hello!  My sympathy card supply has dwindled, and I want to build it back up. I used 'that paper' from Hobby Lobby which was sent to me as a RAK (Random Act of Kindness) in November. (Thank you Marilyn!!)  I chose the 5 x 7" Circle Flip-Its die set by Stephanie Barnard for my card and I have a walk through on YouTube: 


The With Sympathy circle die is a different die set by Stephanie Barnard, but it is sized to work with the Flip-Its set too. I love that! The circle element was given a spritz with my shimmer spray and gold gel pen highlights before it was popped up with thin foam tape. I added a piece of pretty, shimmery ribbon that is blue on one side and green on the other.


The butterflies were punched from vellum and adhered in the centre only so the wings can lift. I added green/gold Glitter Dots to the centre.


Inside, I stamped the sentiment onto a stitched circle and added another vellum butterfly. The label on the right was added so I have a place to sign our names.


I stamped on the envelope using coordinating colours, and this card was done and ready to put into the bin. Hopefully for a long time.


Supplies:
Patterned paper - Eucalyptus, Hobby Lobby
5 x 7" Circle Flip-Its die set - Stephanie Barnard
With Sympathy Circle die - the Stamps of Life
Ribbon - Stampin' Up
Card stocks - stash
Vellum
Butterfly punch - Stampin' Up
Wink of Stella
Stitched circle - MFT Stamps
Sympathy Words and flowers on envelope - Hero Arts
Tasteful Label dies - Stampin' Up
Glitter Dots - Elizabeth Craft Designs
Gold gel pen - Sakura
Card size:  5 x 7", fits in a standard A7 envelope

Thanks for stopping by today!