Thursday 29 April 2021

Slimline Shaker Birthday Card


Hello!  The Fun Friday Challenge #163 at Your Next Stamp starts today:  "Create
 a burst of color on your creation."  I made a bright and cheerful Slimline card that is also a shaker.


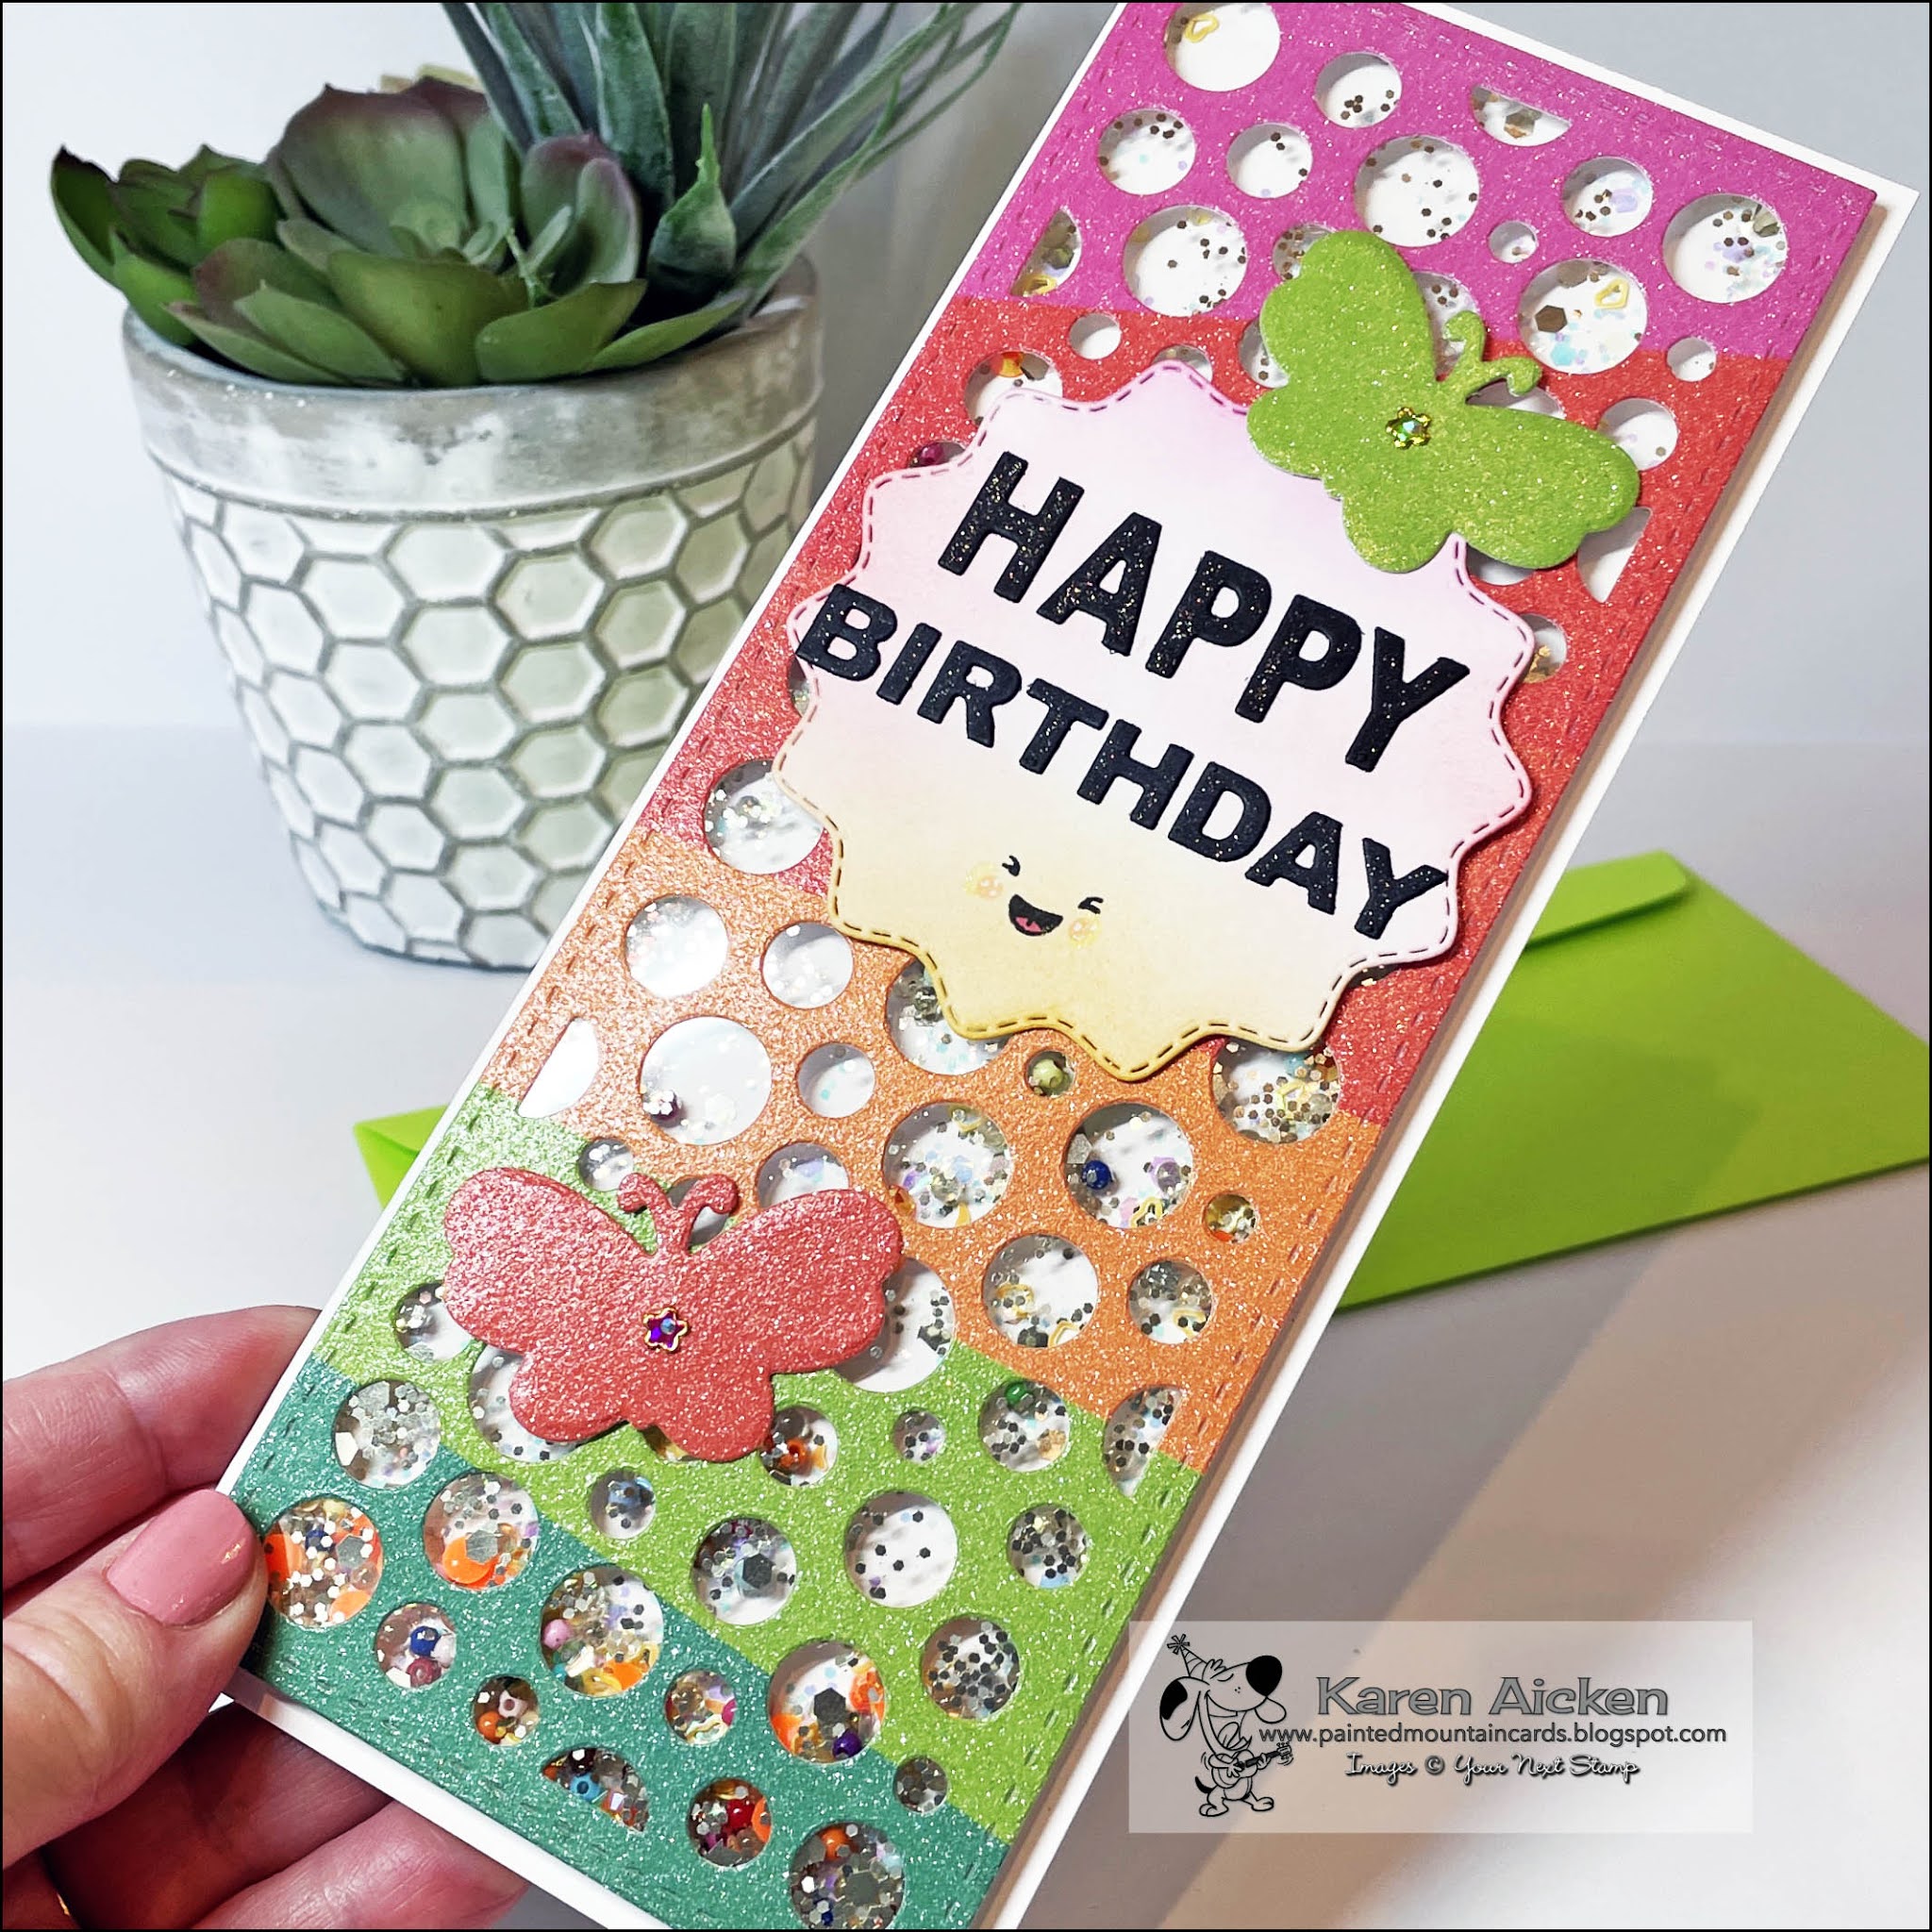
The colourful background die was cut from glittery card stock using the Slim Circle Panel Die and I added various filler to the shaker including a few seed beads in a rainbow of colours. The beads came in some kind of charity mailing, but I never send money to charities who send me stuff I don't want so I saved them to use in a shaker card.


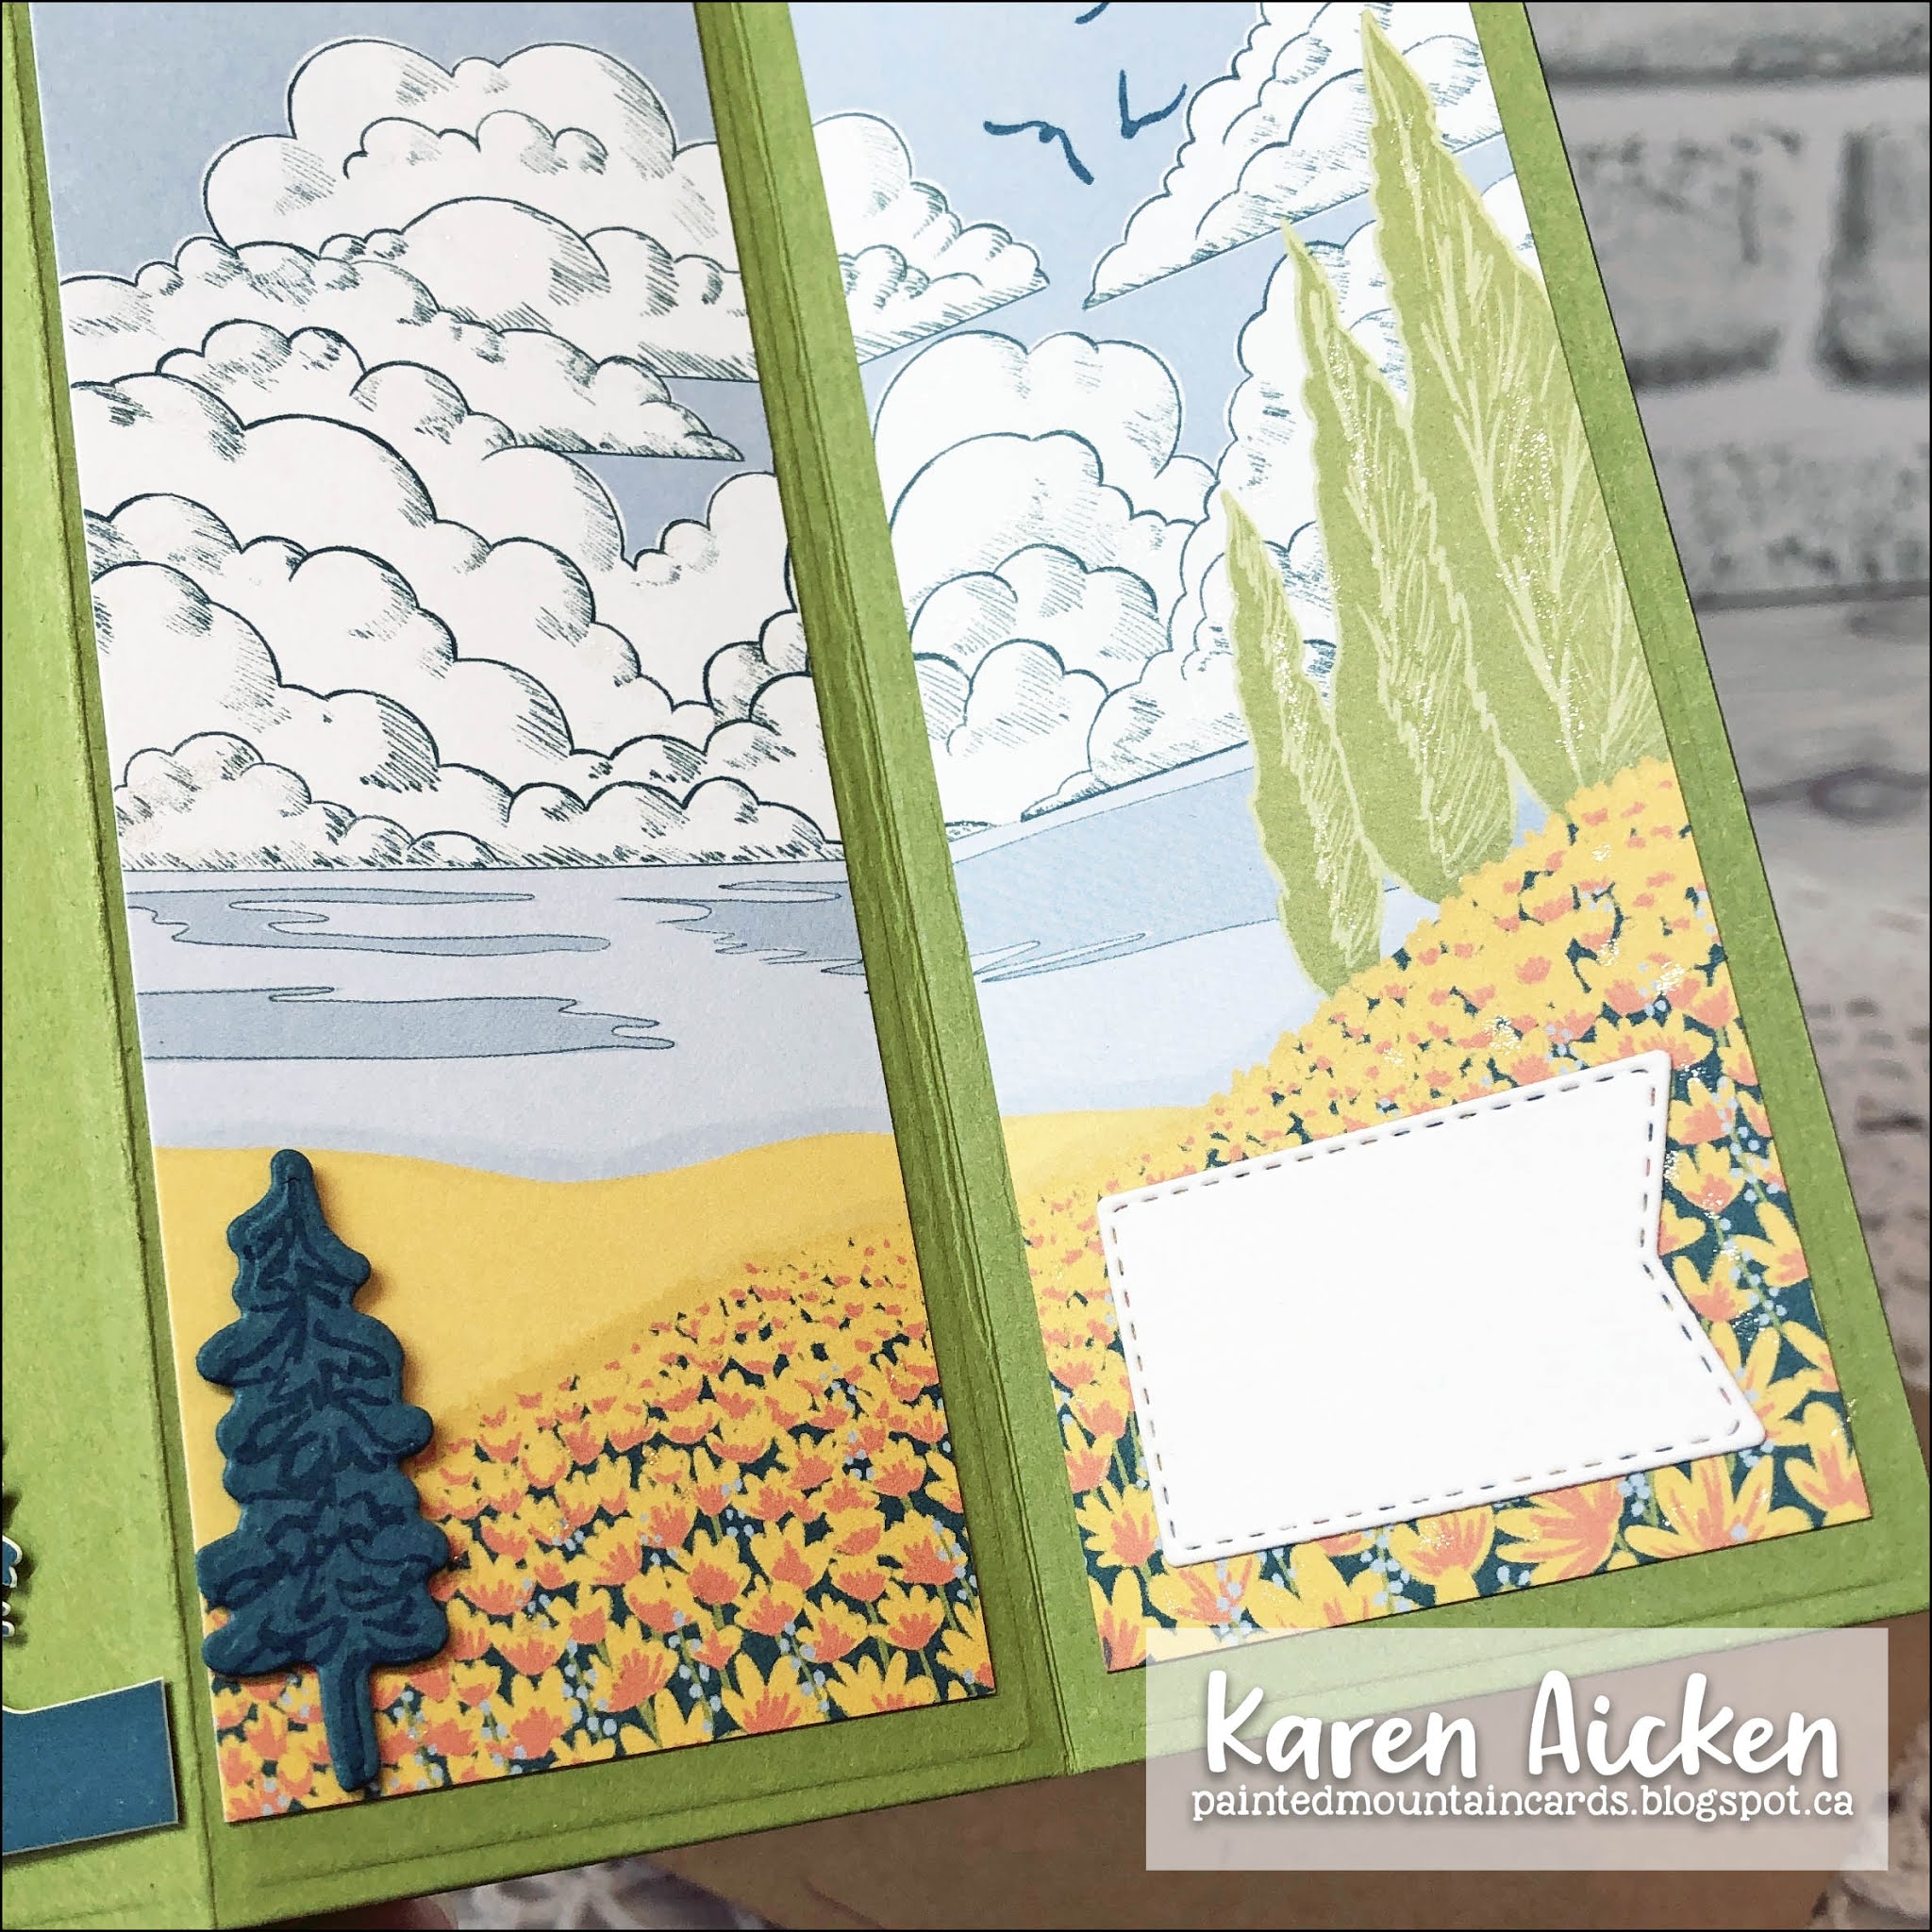
Inside I used the Slim Stitched Rectangles to cut both a patterned paper and a white panel, then added another die cut glittery butterfly. The butterfly dies are meant to cut out the pretty stamped butterfly in the Beautiful Butterfly set but I chose just to use the solid layer and let the bright glittered card stock take centre stage. I added a holographic sticker to the centre of each butterfly.


Our challenges always come with 2 ways to win:

#1 – Would you like the chance to win a YNS stamp set? Leave a comment on the Your Next Stamp Blog by May 5, 2021 at midnight est to be entered in the random drawing. Want more entries in the drawing? Leave comments on YNS’ IG and FB pages too!

#2 – Would you like the chance to win a YNS store e-gift card? Play along with the challenge! Link up your creation at the bottom of this post by May 13, 2021 at midnight est to be entered in the random drawing to win a $15.00 YNS gift certificate. If your creation contains YNS products and you are the random winner then you receive an extra $5.00.


This list contains some affiliate links. If you use these links to buy something I may earn a small commission at NO extra cost to you. Thank you for your support!


Additional Supplies:
Copic markers
White gel pen
Wink of Stella
Holographic flower stickers - Dazzles (old, from my stash)
Patterned paper - Over the Rainbow, Recollections
Acetate
Beads and shaker filler - stash
Card stocks

Card size - 3.5 x 8.5", fits in a #10 Business Envelope

Thanks for stopping by

Popsicle Pop Up Card


Hello!  This is my first April Paper Pumpkin Alternate card, and I made it a Pop UP Birthday card for our Granddaughter. I have a walkthrough of  this card on YouTube:  

This card is VERY sparkly, but of course all that shimmer is hard to capture in photos. 


Inside, I made a simple box pop up to animate the sentiment.


Both the stitched rectangle on the left side, and the stitched sentiment label on the pop up were cut from rainbow glitter card stock.


I can't wait to give this card to our Granddaughter for her birthday - she is going to love all the sparkle!

This list contains some affiliate links. If you use these links to buy something I may earn a small commission at NO extra cost to you. Thank you for your support!


Additional Supplies:
Everything included in the April Paper Pumpkin Kit as well as ...
Patterned paper - Artistry Blooms, Stampin' Up
Shimmer Spray
Tasteful Label dies - Stampin' Up
Sparkle words - UpliftingWords2Hear - the Stamps of Life
Glitter card stock - Stampin' Up
Stitched Nested Label dies - Stampin' Up
Happy Birthday - LJD Birthday Greetings, MFT Stamps
Bling - stash

Thanks for stopping by


Wednesday 28 April 2021

Mother's Day Waterfall Mini Slimline Card


Hello!  One of the die sets in Karen Burniston's new release is this Waterfall Card set and it even has different edges you can cut on the sides of the flap. I used the bracket edge for my card today and have a walkthrough on YouTube:  


As with my other new release cards, I created a Mini Slimline card! Pulling out some pretty stickers from my stash, I kept everything nice and flat to show that these cards really can be mailable.


As you pull the tab, the panels flip over to reveal the next sentiment and image.


While you could stamp a sentiment or write a message to be revealed on the decorator panel of the tab, I added another sicker as I have room for signing on the back of the card.


The flowers and sprig are from the Flowers and Bee die set.


The stickers got some glitter on them as well using Stickles.


When I do a card like this, I usually make it a post card style to keep the back nice and flat. In keeping with that, I used the shadow die for the new Happy Mother's Day to inlay into the back panel.


Here is a link to Karen Burniston's assembly video for the Waterfall Card:


This list contains affiliate links. If you use these links to buy something I may earn a small commission at NO extra cost to you. Thank you for your support!


Supplies:
Card stocks and scrap of patterned paper - stash
Stickers - Violette Stickers
Gold foil card stock scrap
Ribbon
"Hugs & Smiles" - Verve
Stickles
Wink of Stella
Card size - 6 x 3.5", fits in a #8 Envelope

Thanks for stopping by

Tuesday 27 April 2021

Flowers & Hello Slimline Card


Hello!  Today I'm sharing my weekly Design Team post for Crafty Meraki and I used two items from the new release called Meraki Cheer.  The Radiance Stamp set has been featured several times by the Design Team with amazing colouring. I know not everyone enjoys or is able to do detailed colouring so I wanted to show you a different way to add colour to pretty stamped images. After white heat embossing the floral image off the bottom edge of my white panel, I sprinkled it with water colour sprinkles and spritzed it with water. When it was dry I adhered it to my yellow Slimline card base. 


I did move some of the colour around with a water brush, as you get a completely random look with these sprinkles (think Color Bursts, Brusho as brand names) and sometimes there are 'bare' spots. You never get the same look twice with these sprinkles.

I adore the Word dies with Shadows from Crafty Meraki ... so many options with a single die set! Here I chose to use the inner script and outline, but didn't add the shadow die as well. The outline was cut from gold foil card stock.


Inside I cut two white panels, and added pigment sprinkles to the largest one and spritzed it with water. When dry there were layered and adhered inside the card for room to write a note.

One more look ...


"Crafty Meraki is a tribe of women who are all creators but more importantly, love helping others in any way we can! 

Meraki (may-rah-kee) a verb, or adverb, a Modern Greek word, derived from the Turkish “Merak” (Labor of love, to do something with pleasure), is applied to tasks, usually, creative or artistic tasks, but can be applied to any task at all. Meraki means to do something with passion, with absolute devotion, with undivided attention.

Crafty Meraki was born out of a vision to help creators do what they love doing the most- to create!"

This list contains some affiliate links. If you use these links to buy something I will earn a small commission at NO extra cost to you. Thank you for your support!

Additional Supplies:
Card stocks - stash
Pigment Sprinkles (Stampin' Up)
Shimmer Spray
Gold foil card stock - Stampin' Up
Copic markers
Bling - gems from a Diamond Painting Kit
Card size - 8.5 x 3.5", fits in a #9 or #10 Business Envelope

Thanks for stopping by

Monday 26 April 2021

Jar of Tulips Mini Slimline Card

Hello!  I have been itching to play with this Jar of Flowers stamp and punch set that I've had sitting on my stamping table for MONTHS. I have so many ideas for this set ... more ideas than time these days. I decided to just go ahead make a card to send out for Happy Mail and this is what I came up with.

I pulled out some retired patterned paper from a 6 x 6" package that was gifted to me a few years ago, and after stamping and cutting out the floral image I used Karin Water Colour markers and a water brush to add the vibrant colour. The blooms also got some shimmer from a Wink of Stella pen,

A strip of gold foil card stock was embossed with the Subtle embossing folder for shine and texture. The little hello die is from Karen Burniston's new Waterfall Card die set.


Finally, here is a peek at the inside, with more of the patterned paper and a strip of the embossed gold card stock. I stamped just the blooms across the bottom edge and added a punched butterfly.


If I were to make this card again, I would add a white rectangle or doily in behind the bouquet to make it stand out a little more.


Supplies:
Jar of Flowers and coordinating punch - Stampin' Up
Karin Water Color Markers
Water Brush
Gold Twine
Gold Shimmer Ribbon - Stampin' Up
Shimmer Spray
Wink of Stella
Patterned paper (retired) - Stampin' Up
Petite Scallop Mini Slim Stacklets - Taylored Expressions
Subtle Dynamic Embossing Folder - Stampin' Up
Gold foil card stock
Gold Fever Confetti - Studio Katia
Gold gel and White gel pens - Sakura
1161 Waterfall Card (hello) - Karen Burniston
Butterfly Punch - Martha Stewart
Card size - 3.5 x 5", fits in a #8 Envelope

Thanks for stopping by

Sunday 25 April 2021

March Paper Pumpkin, Cards #5 & 6


Hello!  I decided to keep things simple for two of my March Paper Pumpkin cards, and the outside is very similar to the sample shown in the instructions. I have been so busy with Design Team projects, I was falling behind on my Nursing Home Donation cards so these two will be donated to my Mom's old nursing home.

Thats the fun thing about Paper Pumpkin ... you can use the supplies to make the cards as shown in the samples and they turn out great. You can also treat it as a 'craft supply' box and use the contents to make any style of card you wish - which are known as Paper Pumpkin Alternates. 


I finished my last two Paper Pumpkin Alternate cards as well, and will be sharing those soon. I didn't think I'd get this kit finished before the April one arrived but because COVID is still affecting production and shipping, the April kit was delayed by a week or two. Then I got busy with Design Team projects and didn't get the March Paper Pumpkin cards shared in time anyhow!


Supplies:
Everything included in the March Paper Pumpkin kit except:
White card bases, A2
Stitched Rectangle dies - Your Next Stamp
1038 Tropical Scene (sun) - Karen Burniston
Mini MISTI - My Sweet Petunia
Lots of Birthday2Stamp - the Stamps of Life
Banner punch - Stampin' Up (retired)
Wink of Stella
Card sizes - Both, standard A2 (4.25 x 5.5")

Thanks for stopping by

Saturday 24 April 2021

Mini Slimline Cherry Tree Pop Up


Hello!  Today I'm sharing another Mini Slimline card using some New Release items by Karen Burniston.

I have a walkthrough of my card on YouTube

While the 'You're Sweet' is not part of the new release, the little bird I added is from the new Tiny Trees Pop Up.


Here is the card when fully open - you can see how nicely it stands for display.


I added cherries from the new Tree Fruit to the older sentiment die set and they are on the tree as well. Let me warn you - the Tree Fruit is TINY!!! I used double sided adhesive on the back of the card stock pieces so I wasn't fiddling with trying to glue those teeny cherries to their stems. My tweezers were also essential for placement.


The sentiment block dies come from the new Flaps and Frames - so many useful dies in that set that work for a lot more than the intended Slimline Flap card! The pretty border die is included and once again I used double sided adhesive on the back of the pink card stock so it was quick and easy to adhere to the white rectangle.


One more look at the Cherry Tree Pop Up!


Supplies:
1156 Tiny Trees Pop Up - Karen Burniston
1162 Slim Flaps & Frames - Karen Burniston
1154 Tree Fruit - Karen Burniston
1052 Word Set 6 Summer - Karen Burniston
1081 You're Sweet - Karen Burniston
Card stocks
Patterned paper - The Second Wind, Prima
White gel pen
Shimmer spray
Wink of Stella
Card size: 6 x 3.5", fits in a #8 envelope

Thanks for stopping by

Friday 23 April 2021

Two March Paper Pumpkin Pop Up Alternate Cards


Hello!  It's Fun Fold Friday here on my blog and I have two more March Paper Pumpkin Alternate cards to share. These have been done since the week I got my Paper Pumpkin kit, but I've had lots of Design Team projects to share so I'm just getting them posted now. These are my alternate cards #3 & 4 but I did finish the kit and have four more cards to share in the coming weeks. I have also been working on the April Paper Pumpkin Kit!

I have a walk through of my cards on YouTube


The tree stamps & dies I used are from the In The Pines stamp set, which is a holiday set but I love the tree images all year round!


This first card uses the Lever Card with Layers die set by Divinity Designs. I've had this die set for a couple of years and as soon as I saw the square design on the peach printed cards in the kit I knew it would work for a Lever Card!


I also used one of the larger printed panels from the kit to decorate the inside by splitting it in two.


My next card is also interactive - it's a Pop Up! 


I debossed the ECD Sprigs embossing folder and popped up the Happy Birthday die cut.


Inside is the pop up made using my Simple Box Pop Up tutorial, which is linked in my YouTube video above.


The patterned paper is one of the separate envelope liners that was included in the kit.


I'll be back in a couple of days with another March Paper Pumpkin share.


Supplies:
March 2021 Paper Pumpkin Kit
Lever Card With Layers - Divinity Designs
Card stocks
In the Pines - Stampin' Up
Tasteful Label dies - Stampin' Up
Wink of Stella
Grey Copic Marker
1054 Rectangles Crosshatch - Karen Burniston
Sprig embossing folder - Elizabeth Craft Designs
Happy Birthday Die - Penny Black
Perennial Birthday (sentiment inside) - Stampin' Up
White Gel Pen - Sakura
Card sizes - both, standard A2 (4-1/4 x 5-1/2")

Thanks for stopping by 

Thursday 22 April 2021

Spring Tree Pop Up Mother's Day Card


Hello! I'm back today with another Mini Slimline card that features the new release by Karen Burniston and I have a walk through on YouTube as well. 

While the You're Sweet is not part of the new release, those little ants are ... and they come in the new Picnic Elements. These ones got a little shimmer from a Wink of Stella pen.


Inside, I used the new Mini Tree Pop Up with the included 'fold splitter' which allows the tree pop up to be added away from the fold line. Karen Burniston has amazing assembly video's right on the product page!


I added a spiral from the Mini Pops Pop Up to one end of the 'fold splitter', then added a fairy holding a glass of lemonade. The Happy Mother's Day is also part of the new release and comes with the shadow layer ... yay for shadow layers!


The Spring Tree was attached to the other end of the 'fold splitter'. I chose pink foliage for something different - the Mini Tree Pop Up comes with everything you need to make a tree for all four of the seasons.


On the far left I brought in the new Picnic Elements, which I think are just wonderful.


Supplies:
Card stocks 
1156 Tiny Trees Pop Up - Karen Burniston (shipping April 19th)
White pearl card stock
Copic markers
1146 Mini Pops Pop Up - Karen Burniston
1130 Backyard Charms - Karen Burniston
1159 Picnic Elements - Karen Burniston (shipping April 19th)
Wink of Stella
Shimmer Spray
Plaid patterned paper - Lawn Fawn (older, from my stash)
1163 Happy Mother's Day - Karen Burniston (shipping April 19th)
1087 You're Sweet - Karen Burniston
Black marker
White gel pen - Sakura
Card size - 6 x 3.5", fits in a #8 envelope

Thanks for stopping by