Friday 29 July 2022

Snowman Pop Up


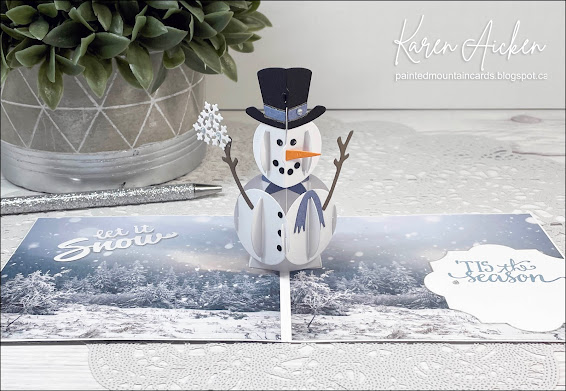
Hello my crafty friends. It's Fun Fold Friday here on my blog, and today I'm sharing a Christmas Card using Karen Burniston's Snowman Pop Up. Every time I use this die set, it amazes me - how much dimension you get but how flat it folds down. Just amazing.

I have all the details in a YouTube video:   


Karen Burniston has assembly videos for all of her pop up dies including this one. If you have the die, then you have probably already checked out her video tutorial so I don't attempt do 'reinvent the wheel' by doing another assembly one. I prefer to show you different ways you can use those same dies since people love to see a variety of looks! Here is the link to the Karen Burniston website, which includes the assembly videos!

Once you know how to assemble your die, the rest is card size, paper and colour choice as well as embellishments! You can change the look of your card every time you use the dies. 😊 Since it had been awhile since I created a Snowman Pop Up, I went back and re-watched the video before starting.


My card is larger than A2 - only because I've been doing this for so long I get tired of the A2 size. This one is 5.5 x 5" and will fit in a 5 x 7" envelope for mailing. It will mail for a single stamp, which I love.

The pretty patterned paper is a retired package I picked up on the Stampin' Up Clearance Rack last year (or maybe the year before).


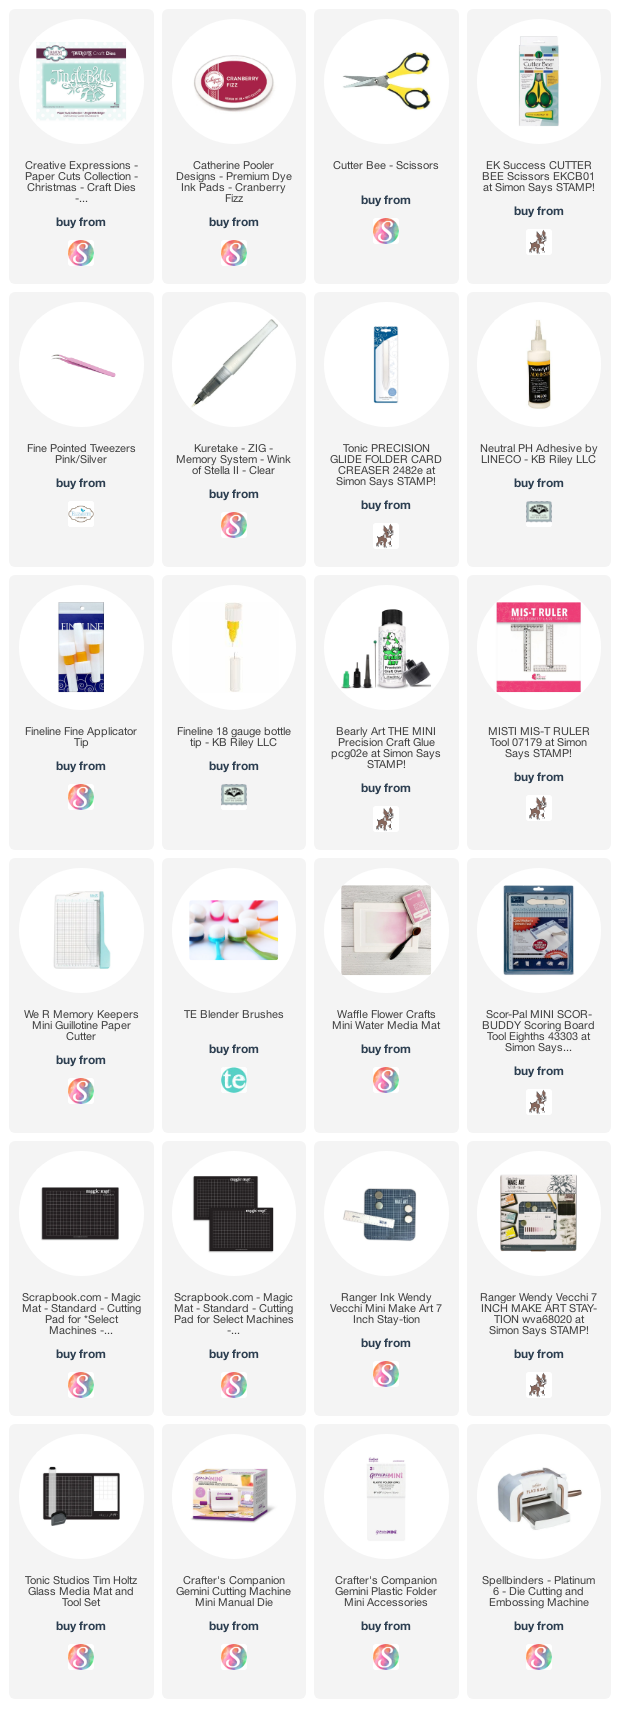
I used a few other dies by Karen Burniston and everything that is available is linked below for you.


... one more look ...


This blog uses affiliate links whenever possible. This means, that at no cost to you, if you make a purchase through one of my affiliate links that I may receive a small commission from your purchase. I only link products that I own, love and use for my card making and not every link below is an affiliate one! 😊

Any supplies I'm unable to link are listed at the very bottom of my post.

Additional Supplies:
Patterned paper - Feels Like Frost, 6 x 6" (Stampin' Up - retired)
Scraps of blue, black and orange card stocks
White card stock - Accent Opaque Digital Super Smooth (Amazon .ca)
Shimmer Spray

Wednesday 27 July 2022

Paper Pumpkin Alternate Butterfly Card Trio


Hello my crafty friends. I have a number of older Paper Pumpkin boxes to work through, and decided to work on this one (August 2021) until I'd finished it up. Here is a trio of cards using the kit, which is called Hope Box.  It wasn't actually full kit as I didn't need the stamps or ink spot and just purchased the refill kit.


As usual when working with Paper Pumpkin kits, I pull in all kinds of things from my craft room to finish off the cards. These ones use stamps & dies that are linked below, and older patterned paper from Stampin' Up. 


There was a large butterfly die cut in the kit that was meant for decorating the box, but I wanted to use it on cards instead. After it dried from my blast of shimmer spray, I cut it in half to get two card fronts from it.  The pretty Washi Tape flowers are from Pinkfresh Studio - I love having them die cut and ready to add to cards & tags.


Here is a peek at the inside of the above two cards. I love that lovely Birthday sentiment stamp from Studio Katia.


The second butterfly card is a Z-Fold card, my favourite kind of fun fold!


Here is a better look at the inside of the Z-Fold card.


This blog uses affiliate links whenever possible. This means, that at no cost to you, if you make a purchase through one of my affiliate links that I may receive a small commission from your purchase. I only link products that I own, love and use for my card making and not every link below is an affiliate one! 😊

Any supplies I'm unable to link are listed at the very bottom of my post.


Additional Supplies
PP Hope Box - August 2021, Stampin' Up
Shimmer Spray
Swirls Embossing Folder - Cuttlebug
Patterned paper - Artistry Blooms, Stampin' Up (retired)
White card stock - Accent Opaque Digital Super Smooth (Amazon .ca)
Bitty Birthday Wishes - MFT Stamps (retired)

Tuesday 26 July 2022

Three Fold Flap Mini Slimline Christmas Cards - with NO LEFTOVER SCRAPS!


Hello my crafty friends! Back in May I had an idea for using three 6 x 6" patterned papers to create a trio of Mini Slimline Fold Flap cards with NO leftover pieces. I was really happy with how it worked, and it's one of my most popular video's. 😊  You can find the video HERE and the coordinating blog post is HERE.

EDITED - I forgot to post the short video clip, so adding it after this post has gone live:


When I was flipping through some holiday papers, I decided to use these pretty (retired) foiled papers and create a trio of Christmas cards for my stash. The papers are 12 x 12", but I simply cut three 6 x 6" pieces from different sheets in the package. I don't usually buy (or use) 6 x 6" papers because I prefer to make Slimline cards to A2 sized cards and the 6" length is just not long enough! That's why I didn't cut all three of the sheets down to 6 x 6", as I wanted the 12" length on the remaining pieces available to use later on.


I used lots of copper foiling on this card to match the copper foiled bits in the patterned paper. Both positive and negative glimmer foiling worked perfectly for the circle elements on the card front. I used any leftover foiled scraps to die cut small snowflakes from. Those smallest snowflakes are actually from Karen Burniston's Evergreen Pivot Panels.


One more look ...

For reference, your card base is 7 x 6.25". Score at 1.25 and 3.5". Patterned paper - first cut is 1" (for the fold flap) and the second is 3.25" (for the inside). The leftover piece fits on the left front as shown in the video.

This blog uses affiliate links whenever possible. This means, that at no cost to you, if you make a purchase through one of my affiliate links that I may receive a small commission from your purchase. I only link products that I own, love and use for my card making and not every link below is an affiliate one! 😊

Any supplies I'm unable to link are listed at the very bottom of my post.


Additional Supplies:
Patterned paper - Joyous Noel, Stampin' Up (retired)
White card stock - Accent Opaque Digital Super Smooth (Amazon .ca)
Matte glossy card stock - stash

Monday 25 July 2022

Father's Day Platform Pop Up Card


Hello my crafty friends and welcome to Masculine Card Monday here on my blog.   I didn't get this shared before, but this is the card I gave to hubby for Father's Day. I created the card base with the fun Platform Pop Up by Lawn Fawn, and added Karen Burniston's Happy Father's Day to the centre piece. 

This card was also a stash buster, as the plaid patterned paper was just a partial leftover sheet in my stash and the dogs and paw print heart had been stamped, cut & coloured a few years ago. Both companies that made those dogs are no longer around - that's how old they are. But I'm making an effort to use up some of the stuff that's been hanging around so ...


It folded down completely flat to put in the envelope and he liked it!


This blog uses affiliate links whenever possible. This means, that at no cost to you, if you make a purchase through one of my affiliate links that I may receive a small commission from your purchase. I only link products that I own, love and use for my card making and not every link below is an affiliate one! 😊

Any supplies I'm unable to link are listed at the very bottom of my post.


Additional Supplies:
Blue card stock scraps
Dog images - Paper Smooches and TAWS
Pale peach cardstock
Copic markers
Patterned paper - Vacay, Photo Play

Friday 22 July 2022

Yappy Birthday Pop Up Card


Hello my crafty friends and welcome to Fun Fold Friday here on my blog. Today I'm sharing a Birthday Card using Karen Burniston's Circle Tag Book Pop up set along with stamps from Your Next Stamp. I have all the details in a YouTube video:  


The plaid paper was a partial sheet in my stash, and I was able to use it up on this card. One of my favourite things, is using up a whole sheet of 12 x 12" paper. 😊  The Happy Birthday and Happy Birthday Shadow are also from Karen Burniston and the 'Yappy Birthday To You' is from Taylored Expressions.


The fun images from Your Next Stamp were coloured with alcohol markers and highlighted with a sparkle gel pen.


I stamped the fun sentiment onto a Crosshatch Oval and added it to the back, which is where we will sign our names as well.


This blog uses affiliate links whenever possible. This means, that at no cost to you, if you make a purchase through one of my affiliate links that I may receive a small commission from your purchase. I only link products that I own, love and use for my card making and not every link below is an affiliate one! 😊

Any supplies I'm unable to link are listed at the very bottom of my post.


Additional Supplies:
Circle Stickers - Stampendous
Seam binding
Bakers Twine
Patterned paper - unknown
Alcohol markers
White card stock - Accent Opaque Digital Super Smooth (Amazon .ca)

Thursday 21 July 2022

Four Stencilled Snowflake Cards


Hello my crafty friends ... today I'm sharing the second set of Christmas cards I made using these fun layering stencils by Taylored Expressions. They are part of the 'Create In Quads' line which allow you to create 4 card fronts at one time. I have the birthday set as well, and shared those already. You can always check out the label to the right "Stencils" if you wish to see more cards like this.

When I did the birthday ones, I immediately cut the letter sized sheets into four A2 panels and started to make the cards. This time I remembered to stop and take a photo so you can see the finished result of the stencilling. I haven't made the cards with the red & pink stencils yet, but will be doing that soon. Since I had the stencils out anyhow, I went ahead and stencilled twice using different colour combinations on each sheet. That gave me eight card fronts!


For the first card, I added a stitched frame, acetate and foam tape so I could create a shaker. The large iridescent snowflake is a retired item from Stampin' Up, as are the tiny self adhesive ones. They give such nice sparkle and the sequins are shiny too. 😊 The sentiment strips are also by Taylored Expressions and linked below for you.


I have had the large Merry and Peace dies for many years - they are from Papertray Ink and probably retired. But I love them and keep using them on my holiday cards. If I see something similar, I will link it below.


The last card features that large, bold snowflake. ❤️   I added another one of those iridescent snowflakes along with the stamped sentiment.


Pulling out an older holiday greeting stamp set from Hero Arts, I did all of them the same inside ...


This blog uses affiliate links whenever possible. This means, that at no cost to you, if you make a purchase through one of my affiliate links that I may receive a small commission from your purchase. I only link products that I own, love and use for my card making and not every link below is an affiliate one! 😊

Any supplies I'm unable to link are listed at the very bottom of my post.


Additional Supplies:
White card stock - Accent Opaque Digital Super Smooth (Amazon .ca)
Green cardstock - stash
Iridescent snowflakes (large) - Stampin' Up (retired)
Peace and Merry dies, Papertrey Ink
Shimmer spray
Adhesive backed snowflakes (tiny) - Stampin' Up (retired)
Sequins & loose glitter - stash
Sentiment stamps inside cards - Hero Arts (retired)

Tuesday 19 July 2022

Red Jingle Bells Christmas Card


Hello my crafty friends.  I'm back with another Christmas card using this lovely Jingle Bells die that a friend loaned me. I made four holiday cards with it and this is number three. If you'd like to see the first two - click HERE.

The Jingle Bells piece was die cut from rainbow holographic card stock, mounted onto a red panel and then the whole thing was embossed with an ombre dots embossing folder. That panel was then adhered to a white card front that is sized 6 x 4.5". The tiny iridescent snowflakes add even more sparkle to the card front! I added the little white bow, but not sure I'm crazy about it.


Here is a look at the inside, with a stamped greeting on a matted layer.


This blog uses affiliate links whenever possible. This means, that at no cost to you, if you make a purchase through one of my affiliate links that I may receive a small commission from your purchase. I only link products that I own, love and use for my card making and not every link below is an affiliate one! 😊

Any supplies I'm unable to link are listed at the very bottom of my post.


Additional Supplies:
Red pearl cardstock - stash
Embossing folder - Stampin' Up (retired)
Seam binding
Rainbow Holographic cardstock, Mirri Card essentials - Hunky Dory
Sentiment - Hero Arts (old, from my stash)
White card stock - Accent Opaque Digital Super Smooth (Amazon .ca)
Self Adhesive Snowflakes - Stampin' Up (retired)

Monday 18 July 2022

Scrap 'n Stamp Canada is Celebrating Christmas in July!


Hello my crafty friends! I'm excited to be participating in the 12 Days of Christmas Inspiration hosted by Scrap 'n Stamp Canada

I was actually supposed to post before today, but my envelope took a detour and I didn't receive it in time. I have it now though and immediately got to work on a holiday card to share with you. Make sure to check out all the details on Instagram, where you can comment to be entered to win a prize to the Scrap 'n Stamp shop. You can find me on Instagram @karenaicken

Yes there are also deals and Bonus Bucks ... check it all out HERE

I created a Magic Iris Card, and used the stamps & dies "Winter Memories" by Photo Play. What adorable images! There is also a coordinating patterned paper package AND ephemera pack... and it's all available in the Scrap 'N Stamp shop.  

Below is what the card would look like coming out of the envelope ...

As you slide the arrow/tab down to the right the shutters in the centre start to open ...

... and below you can see it fully open with the sentiment revealed! I used the snowflakes included in the stamp set to create the background using Catherine Pooler Inks. And of course I added some bling too!

If you follow me you know I always finish the inside of my cards and here is the inside of this one. 

I added some tri-dots and random dots with a sparkly gel pen, which is hard to capture in photos but it's SO sparkly and pretty in real life!

Remember to head over to Instagram (@karenaicken)  and leave me a comment there to be entered to win. Also check back under Scrap 'n Stamps Instagram (@scrapnstampcanada) as there will be even more inspiration there for you!

The giveaway closes July 26, 2022, at Midnight EST. The winner will be chosen randomly and posted on the Scrap ‘N Stamp blog.


This blog uses affiliate links whenever possible. This means, that at no cost to you, if you make a purchase through one of my affiliate links that I may receive a small commission from your purchase. I only link products that I own, love and use for my card making and not every link below is an affiliate one! 😊

Any supplies I'm unable to link are listed at the very bottom of my post.

Additional Supplies:
Navy cardstock - stash