Saturday 31 August 2019

Shooting Star Shaker Cards

Hello my crafty friends

I finally got to play with this space themed shaker kit I got from Queen & Company in April! I got it since it would make great boy cards, with the rocket and space ship ... and then Karen Burniston came out with her Rocket Pop Up and Space Charms which I ended up playing with first.

But when I found out that our Grandson Ilai would actually have Kindergarten class while in daycare at the university, I had to make him a card. Of course his little sister Alma (age 2) also loves happy mail so I made one for her too with the same shooting star die.

Here are both cards together ... I love how different they look using the same die just by changing the papers!


First up is Alma's card, decorated with some bright sequins and a stardust glitter pen.


Here is a look at the inside:


The second card is for Ilai - he does not like any girly colours at all, so this one will make him happy.


This is the inside, where we wrote our message to him.


Supplies:
Grey, black and white card stocks
Space Shaped Shaker Kit - Queen & Company
Patterned paper - Be Brave, Pink & Main
Stitched rectangle - Your Next Stamp
Fishtail Banners - MFT Stamps
Sequins etc - stash

White card stock
Patterned paper - Sunny Studio Stamps
Space Shaped Shaker Kit - Queen & Company
Stitched rectangle - Your Next Stamp
1007 Charm Accordion (star) - Karen Burniston
Stitched Fishtail Banner and Fishtail Banner - MFT Stamps
Various sequins and filler - stash
Sakura Stardust Pen
Hey You - MFT Stamps

Thanks for stopping by today

Friday 30 August 2019

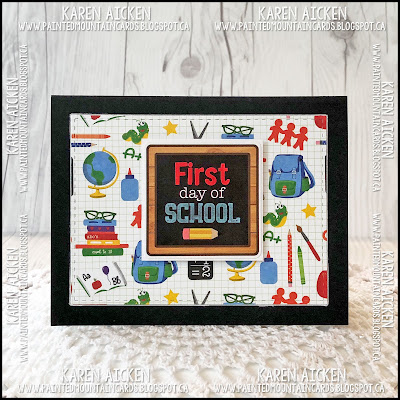
Three "Back To School" Cards

Hello my crafty friends

It's Fun Fold Friday here on my blog and today I'm sharing a trio of Back To School cards I made for the three grandkids that attend regular school. The other two have a daycare/school combination at the University and they go year round, so 'back to school' doesn't apply to them. Or so I thought - my daughter off-handedly mentioned that the kids in Ilai's group would have a kindergarten teacher come in every morning, so I will be making one more Back to School Card this week!


First up is Olivia's card:


 I made a Double Z Fold card, using fun papers and stickers from Photo Play and Echo Park. I added glue onto the sticker backs to be sure that they stay adhered.


 Zachary's card using a simple pop-up mechanism that I added the School Bus Journal Card/Cut Apart to.


Here is a side view so you can see the Pop Up a little better.


Ethan's Card is next, and for him I used the Katherine Label to create a pop up.


My teammate Frances Byrne uses the Katherine Label a LOT, and in a variety of orientations - so she inspired my choice of placement on this card.


Finally I have a short YouTube Video for you so you can see the cards 'in action'.


Supplies:
Black and white card stocks
Stitched rectangle die - Your Next Stamp
Patterned paper, Cut Aparts/Journal Cards and Stickers - both Echo Park and Photo Play
1011 Katherine Label Pop Up - Karen Burniston
Bling - Queen & Company
Circle dies - Hero Arts
Smaller Stitched Rectangle - Waffle Flower
Sakura white gel pen
Fun Foam

Thanks for stopping by today

Thursday 29 August 2019

Hooray Truck Birthday Card

Hello my crafty friends

I was looking for something else, and came across a 12 x 4" piece of cloud printed paper, and I decided to go ahead and use it for a card. There is still one more piece of it left for another day.

I punched balloons from card stock and added them to the die cut truck with bakers twine.


Below is a peek at the inside:


Into my stash with this one!

Supplies:
Truck die set - Spellbinders
Blue, black, red, white, grey and silver card stocks
Twine - Stampin' Up
Balloon Punch - Stampin' Up
Cloud patterned paper, Bug Discovery - Bella Blvd.
Black patterned paper - Pebbles
Stitched rectangle dies - Your Next Stamp
MISTI - My Sweet Petunia
Words - Birthday Cheer, Papertrey Ink
Black pen
Washi tape - my stash
W1 Copic marker

Thanks for stopping by today

Wednesday 28 August 2019

Seahorse Card Duo

Hello my crafty friends

One day last week I worked all morning on a card that I had in my head - and it was just a comedy of errors. It took three times longer than it should have - everything I did was an oops. Finally I decided to just toss it, something that rarely happens. I can usually work through the issue and get something I like but not this time! I did pull off a Distress Oxide inked panel to use on another project but then I had to come up with a card to redeem myself. If for no other reason than I needed to know I could do it! I ended up making two and they went quite quickly so I have no idea what was going on with the one that ended up in the trash. Sheesh.

This is the first card I came up with. It started with a leftover piece of turquoise card stock from the tossed card, and I inked it with dye inks and a splash stencil. Since I'm enjoying using both black card stock and acetate in my card making these days I pulled out those two as well.


What gives this simple card some oomph is that I layered a piece of acetate over the seahorse and splash panel, covering the edges with the black stitched frame. The seahorse is raised up with foam tape which gives the acetate a bit of a curve - it looks really cool in real life. Something else I will definitely try again! Think 'Shaker Card without any filler or foam tape for depth'.

Below you can see the shine from the acetate, which is missing in the photo above. I added sparkly Gumdrops on TOP of the acetate to resemble bubbles. I had tried white but they were very distracting and these ones pick up the blue/green ink used in the splashes.


Here is a peek at the inside:


As I went to tidy up and clean the splash stencil, I decided to use a slightly damp cloth wiping the stencil onto a white card stock panel and ended up with a 'free' background to use for a second card!

I cut the Wavy Panel Die from teal card stock. As I was about to put the fall away pieces into recycling I realized that I could use them at some point so adhered them to a white card stock panel and will use that later on.


The seahorse was adhered to the card with a paper spring for a little 'action', and I added some die cut seaweed and black sequins. I love how the black makes the colours pop.


Finally, here is a look at both cards together.


Here is a link to the YouTube video I use to create the Paper Spring: MayMay Made It Crafts

Supplies:

Seahorse dies - Elizabeth Craft Designs
Black, turquoise and white card stocks
Splash stencil - Taylored Expressions
Makeup Brushes
Acetate
Frame - Lawn Fawn
Pixie Dust Gumdrops - Your Next Stamp
Chameleon Color Tone marker
Seahorse inside - Hero Arts Monthly Club kit for March 2019
Black pen


Wave Panel Die - Your Next Stamp
Splash panel from cleaning the stencil with a damp brush :-)
White, teal and black card stocks
Seahorse die - Elizabeth Craft Designs
Paper Spring
Seaweed dies - Elizabeth Craft Designs
Word Stamps - LJD Birthday Greetings - MFT Stamps
Circle die - Hero Arts
MISTI - My Sweet Petunia
Sakura white gel pen
Seahorse stamp - Hero Arts Monthly Club kit for March 2019
Sequins

Thanks for stopping by today

Tuesday 27 August 2019

Bunch of Bookmarks

Hello my crafty friends

Today I'm playing along with the Fun Friday Challenge 121 at Your Next Stamp, which is an ABC Challenge ... Anything But a Card. You can see all of the details for the challenge HERE.

Since almost everyone in the family reads, I made a bunch of bookmarks for them! These are the ones I made for the men ...


... and these are the ladies choices ...


I just used some paper scraps and leftovers, a few punches, embossing folders and dies. I also made some for the Grandkids as two of them are reading chapter books now, but we were heading out to visit them and I forgot to take a photo. 💖

Thanks for stopping by today

Monday 26 August 2019

Llama, Butterfly and Beach Chair Pop-Up Gift Card Holders

Hello my crafty friends

It's Masculine Card Monday here on my blog and today I'm sharing a trio of Pop-Up Gift Card Holders using a die set by Lynda Kanase. I want to give a set of Gift Card Holders to our son's girlfriend for her birthday, and also package some up to give a friend.


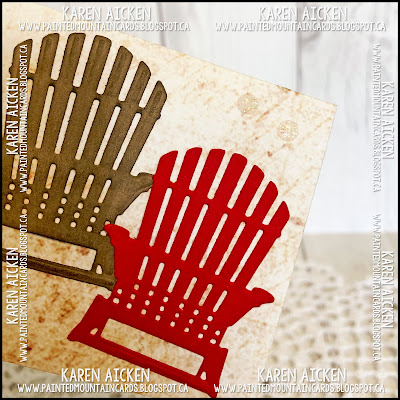
The first one features three die cut Adirondack chairs and would leans more towards masculine.


I took a photo both with the sample gift card I use for photos, and without so you can see the pop up a little better.


The second card has a Llama and a die cut grass border.


I got this stamp set from the Pink and Main booth at the Mesa Rubber Stamp show in March.


I used coordinating papers and my Punch Board to create envelopes for these Gift Card Holders.


The third one uses a printed butterfly from my stash - considering the paper and embellishments were from different companies, they went together really well.


Supplies:
Patterned paper - K & Company (Old, from my stash)
Card, Gift Cart Holder Pop-Up - Lynda Kanase
Kraft card stock
Grass Edge die - Your Next Stamp
Rounded Rectangle dies - Hero Arts
Cream card stock
Llama stamps - Pink and Main
Glaze pens
Chameleon Color Tone Markers
Word Bubble - Stampin' Up
Sakura white gel pen
Nuvo Crops
Envelope Punch Board          set up for a 3 x 4-1/2" envelope

Circle Die - Hero Arts
Butterfly ephemera- Tim Holtz
White card stock

Adirondack Chair, Seasonal Layer dies - Stampin' Up
Sticker - PSX
Red and White card stocks

Woodgrain paper - possibly Stampin' Up


Thanks for stopping by today

Sunday 25 August 2019

Six Dog and Cat Birthday Cards

Hello my crafty friends

I pulled out the Cat and the Dog punches, plus the coordinating Stampin' Up stamps for my Nursing Home donation cards today. They are simple, but nice and cheery and I think the residents will enjoy them. I made three of each design.


I used a handmade grass mask to brush ink onto stitched white panels for grass, then a cloud stencil and the same makeup brush for the clouds.


I like the shape of these Riley & Company word bubbles, AND that they have a stitched details. So I cut six of them to use on these cards.


The blue folded cards have been in my stash for YEARS so I was happy to USE them.


The word bubbles were facing the wrong way for the dog cards, so I flipped them over and stamped on the back side.


They cards are all the same inside, but the red cards have the words stamped in red rather than blue.


Supplies:
Blue, red and white card stocks
Stitched Rectangle dies - Your Next Stamp
1005 Nature Edges (for mask) - Karen Burniston
Cloud mask - Heffy Doodle
Happy Tails, Stamps and punch - Stampin' Up
Nine Lives, Stamps and punch - Stampin' Up
Speech bubble - Riley & Company
Words on front - Perennial Birthday, Stampin' Up
Stamps inside - Handwritten Happiness, MFT Stamps
Sakura pens - Black glaze, gold gel and white gel
W1 Copic marker

Thanks for stopping by today
Saturday 24 August 2019

Seven Slider Pop Up Gift Holders

Hello my crafty friends

Today I'm using an older die by Lynda Kanase to make a group of Slider Gift Card Holders. I'm also using some older patterned paper from my stash!


There are a couple of 12 x 12" sheets of cut aparts in the paper stack, and I used a bunch of them on these cards. When closed, you can't see the gift card that is hidden inside.


When you open the gift card holder, the gift card slides out and is revealed. So fun! Each one has a cut apart decoration and a circle as a place to write a message.


I used my least favourite pattern in the paper stack and the Envelope Punch Board to make envelopes for each of the gift card holders.


Here are a few detail shots:


Here is a short YouTube video so you can see how these Gift Card Holders work:


Supplies:
Card, Slider - Lynda Kanase
Patterned paper - Pebbles
White card stock
Circle dies - Hero Arts
Washi Tape - stash
Envelope Punch Board set for a 3 x 4" envelope
Label punch - Stampin' Up

Thanks for stopping by today