Friday 31 March 2023

Snowman Pop Up Christmas Card


Today's card is both for Fun Fold Friday and the 3rd edition to my monthly series "12 Months of Christmas".  I pulled out an older patterned paper package for my card and I was determined to use some of it, especially since it also has some coordinating solid cardstocks included. While it's hard to see in the photos - the front panel has embossed and glittery bits which really adds to the front of the card.

I have a walkthrough of my card on YouTube:   


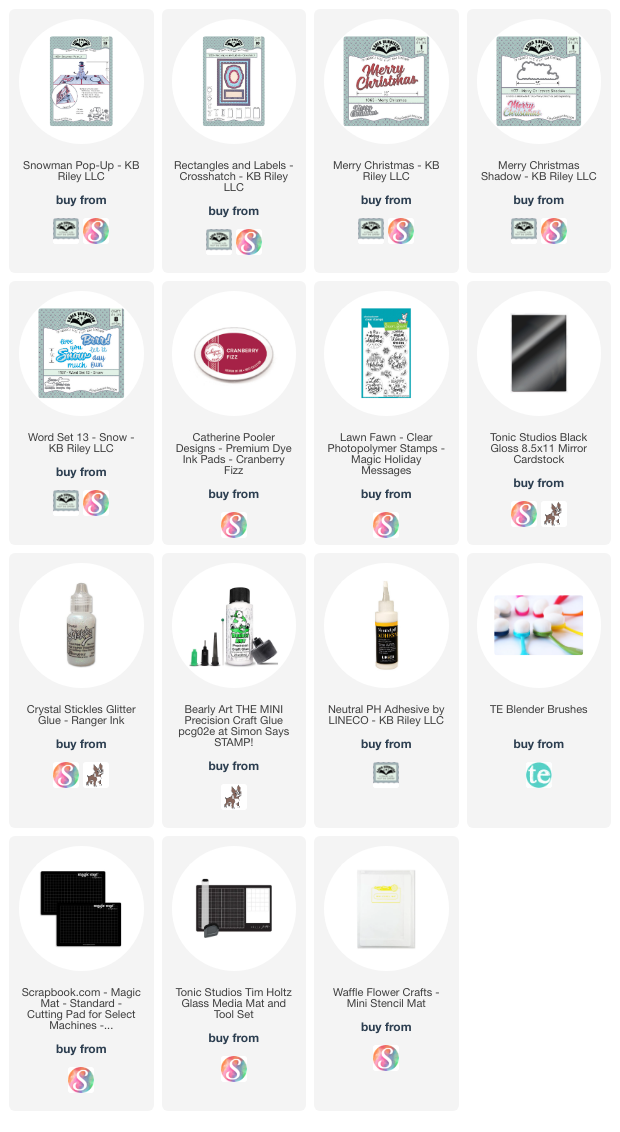
Karen Burniston's Merry Christmas was cut from black glossy cardstock for even more shimmer and shine.


Inside I used the Snowman Pop Up (also by Karen Burniston) and every time I make one of these cards I am AMAZED at how completely flat it folds down for mailing! I also used the new Rectangle and Labels Crosshatch, for my decorative papers and labels. In the video I show how I cut down three different panels for the inside.

Karen Burniston has assembly videos for all of her pop up dies including this one. If you have the die, then you have probably already checked out her video tutorial so I don't attempt do 'reinvent the wheel' by doing another assembly one. I prefer to show you different ways you can use those same dies since people love to see a variety of looks!
HERE is the link to the Karen Burniston website, which includes the assembly videos, or click on the product link below.


His hat and eyes were also cut from the black glossy cardstock, as was the Brrrrrr in the top left corner.


Even though I kept the front of the card nice and simple, the card felt unbalanced in my hand when it was opening. So I added a slightly smaller than 5 x 7" panel of white cardstock to the back of the card as well. Note, I didn't use any dimension or foam tape on the card front as you want these cards to open flat so the snowman can display.


Having been asked how many cards I make I thought it would be fun to keep track this year. Many of my posts include more than a single card or project and below is my tally. 

Card Tally for 2023
January - 53 cards
February - 56 cards
March - 55 Cards

Additional Supplies:
5 x 7" card base and envelope
Patterned paper & coloured card stock - Alpine Frost, sei (old, from my stash)
White cardstock
Black marker

This blog uses affiliate links whenever possible. This means, if you make a purchase through one of my affiliate links that you pay the same amount but I may receive a small commission from your purchase. I only link products that I own, love and use for my card making and not every link below is an affiliate one! 😊

Thursday 30 March 2023

Three Mini Slimline Easter Explosion cards (and Video Tutorial)

When I realized that the past couple of explosion cards I've made had a bit of a different fold than the ones I had shared previously, I decided to do a new tutorial. you can find that on YouTube

While I did these ones in a Mini Slimline sized card, the same 6 x 6" folded explosion piece fits in an A2 sized card as well. I think I like the larger card better, but you know I had to at least try it out in a Mini Slimline card! And I know the grandkids will enjoy their cards and that is what matters.

I was able to use up a bunch of smaller pieces of the patterned paper as well as full sheets inside, so I have made a big dent in my older Easter supplies this year! The stickers have been in my stash for a number of years. They are plastic and adhering them with white glue had them popping off. So I used a new-to-me-glue 'Beacon 3 & 1' which is a solvent glue. It stuck those plastic bunnies down perfectly!

That strip of bunny paper had been in the package, trimmed off of the sheet that was used on a different card long ago. I always keep these strips etc ... maybe if I didn't keep them I wouldn't have all those little leftover bits hanging around. But when I can use those little bits to create three cards? That makes it worth it, ha ha.

Below are pics of the explosion panels inside ...


Here is a link to my March 19th video where I shared several different Easter cards using the same fold but decorated differently. Those small cutaparts that are often included in those 6 x 6" paper pads fit perfectly! Here is the original tutorial I did folding it just a little differently.

Having been asked how many cards I make I thought it would be fun to keep track this year. Many of my posts include more than a single card or project and below is my tally. 

Card Tally for 2023
January - 53 cards
February - 56 cards
March so far - 54 Cards

Additional Supplies:
6 x 6" paper pad - Spring, Echo Park &
6 x 6" Flirty Florals, Q & Company &
6 x 6" Your Crafty Happy Place, MFT Stamps
White cardstock
Grass and cloud masks - MFT Stamps
Bunny Stickers - American Greetings (Old, from my stash)
Some Bunny stamp set - Simon Says Stamp (retired)
Big Bold Easter - Taylored Expressions (retired)

This blog uses affiliate links whenever possible. This means, if you make a purchase through one of my affiliate links that you pay the same amount but I may receive a small commission from your purchase. I only link products that I own, love and use for my card making and not every link below is an affiliate one! 😊

Wednesday 29 March 2023

Eight Sheetload Birthday Cards


I pulled out a 6 x 6" patterned paper pad from MFT Stamps, and decided to use some of the patterns and the June 2021 Sheetload of Cards to create eight more Birthday Cards to donate to my Mom's old nursing home.

It's not a really old paper pad, I've had it for under 2 years, and those small prints were perfect for birthday cards! The sentiment on the front is from Lawn Fawn.


I used the Mini Misti to stamp the inside of all the the cards, using a Catherine Pooler stamp.


Having been asked how many cards I make I thought it would be fun to keep track this year. Many of my posts include more than a single card or project and below is my tally. 

Card Tally for 2023
January - 53 cards
February - 56 cards
March so far - 51 Cards

Additional Supplies:

June ’21 Sheetload of Cards

Red cardstock

Blue cardstock

White cardstock

This blog uses affiliate links whenever possible. This means, if you make a purchase through one of my affiliate links that you pay the same amount but I may receive a small commission from your purchase. I only link products that I own, love and use for my card making and not every link below is an affiliate one! 😊


Tuesday 28 March 2023

Four Cheerful Easter Cards


I pulled out an older 6 x 6" Easter themed paper pad, and with the March Sheetload of Cards on my brain - I decided to use my adapted cutting guide (see my March Sheetload Video here to find out how I changed up the Sheetload) and created four cheery Easter cards.

I was also able to use up some Easter ephemera that has been hanging around my craft room for too long!


Inside I used oval dies and stamped a sentiment with Catherine Pooler Ink and my cards are ready to go. Man, I'm loving the CP colour Glitz these days!


Having been asked how many cards I make I thought it would be fun to keep track this year. Many of my posts include more than a single card or project and below is my tally. 

Card Tally for 2023
January - 53 cards
February - 56 cards
March so far - 43 Cards

Additional Supplies:
Used March 2023 Sheetload as inspiration (my version, lined above)
Patterned paper - Spring, Echo Park 6 x 6" 
Ephemra - Easter, Echo Park
White crinkle seam binding - Stampin' Up
Sentiment - Big Bold Easter - TE

This blog uses affiliate links whenever possible. This means, if you make a purchase through one of my affiliate links that you pay the same amount but I may receive a small commission from your purchase. I only link products that I own, love and use for my card making and not every link below is an affiliate one! 😊

Monday 27 March 2023

Mini Slimline Wine Themed Shaker Card Duo


I had so much fun making these cards! I needed one for a friend whom we were meeting for dinner, and decided to make a second one to have on hand. The wine bottles were die cut from a coated cardstock and then coloured with an alcohol marker. The coated paper came from a paper pad and I had pulled it out to set aside as I didn't really like it to use for cards. But it worked perfectly for these wine bottles! 

After colouring the die cut bottles with a tealish alcohol marker, I spritzed them with shimmer spray which made the marker run. I loved the mottled look it gave the bottles.

I created infinity shakers (also called edge-to-edge shakers, or full front shakers) by wrapping acetate around the Mini Slimline panel and attaching it at the back with strong tape after adding the filler. Then I mounted the shakers to green card bases.


The stamps are from both Riley & Company and MFT and I added some to the envelopes as well.


The second card has Karen Burniston's CHEERS across the front.


Having been asked how many cards I make I thought it would be fun to keep track this year. Many of my posts include more than a single card or project and below is my tally. 

Card Tally for 2023
January - 53 cards
February - 56 cards
March so far - 39 Cards


Additional Supplies:
Card Size - 3-1/4 x 6-1/4
Patterned paper - Photo Stack, DCWV (old - from my stash)
Transparency
Various sequins & filler - stash
Alcohol markers
Shimmer Spray
Rainbow holographic cardstock - Recollections
White cardstock

This blog uses affiliate links whenever possible. This means, if you make a purchase through one of my affiliate links that you pay the same amount but I may receive a small commission from your purchase. I only link products that I own, love and use for my card making and not every link below is an affiliate one! 😊

Friday 24 March 2023

5 x 7" Succulent Pop Up Card


It's no secret I love cactus and other desert images, but since I have a huge collection I haven't purchased any new ones for a very long time. When I saw this one though (Crafters Companion) I was smitten and I had to play with it as soon as it arrived. I cut it from a slightly patterned mirrored card stock and adhered it to a white cardstock panel. 

Then I used a water brush and Catherine Pooler inks to paint each section. When dry, the white panel was added to a rainbow holographic one and both mounted to the front of my 5 x 7" card. I chose not to add a sentiment to the outside, as I really wanted the image and the shine to be centre stage.


Inside, I used Karen Burniston's Paper Frames Pop Up cut from patterned paper then added the words with Catherine Pooler stamps & inks. 


The succulent/cactus dies are from Lawn Fawn and I cut them from scraps of the patterned paper and cardstock.


Having been asked how many cards I make I thought it would be fun to keep track this year. Many of my posts include more than a single card or project and below is my tally. 

Card Tally for 2023
January - 53 cards
February - 56 cards
March so far - 37 Cards

Additional Supplies:
5 x 7" Card blank and envelope
White cardstock
Sweet Succulent die - Crafters Companion
Mirri Damask cardstock, Hunky Dory
Patterned paper - Succulent Serenity, Lynda Kanase (discontinued)
Rainbow Holographic Cardstock - Recollections

This blog uses affiliate links whenever possible. This means, if you make a purchase through one of my affiliate links that you pay the same amount but I may receive a small commission from your purchase. I only link products that I own, love and use for my card making and not every link below is an affiliate one! 😊

Thursday 23 March 2023

Mini Slimline Window Card


I was so excited when asked to join in with Catherine Poolers Canadian Adventure video hop (which was yesterday) and I liked the supplies so much I had to make a second card. This one is also a Mini Slimline, but not with the pull feature. Instead I added a window to the card front and the images on the circle show when the card is opened AND closed. 


I just love that Moose Crossing patterned paper, and used it for my April Sheetload of cards too. 😊 That video will be available on April 2nd, which is when the collaboration team share their takes on the Sheetload of Cards.

Here is a link to the Video Hop on YouTube - you can still hop along and be inspired. Commenting on each of the videos gives you a chance to win a prize too.


Having been asked how many cards I make I thought it would be fun to keep track this year. Many of my posts include more than a single card or project and below is my tally. 

Card Tally for 2023
January - 53 cards
February - 56 cards
March so far - 36 Cards

Additional Supplies:
White cardstock

This blog uses affiliate links whenever possible. This means, if you make a purchase through one of my affiliate links that you pay the same amount but I may receive a small commission from your purchase. I only link products that I own, love and use for my card making and not every link below is an affiliate one! 😊


Wednesday 22 March 2023

Catherine Pooler's Canadian Adventure Video Hop


Welcome to the Canadian Adventure YouTube Hop! My crafty friends and I can't wait to share how we used the NEW 'O Canada Bundle' that’s part of the Global Adventure Pt. Tres Collection from Catherine Pooler Designs.

Since this is a video hop, all the details - including how to enter to win a prize - can be found with my YouTube video:  


Last week I shared a Mini Slimline sized Pull card, but didn't have a tutorial. The A2 sized ones have been around for many years but I had figured out the measurements for a Mini Slimline version and that is the tutorial in my video today. I'm featuring the products in the NEW 'O Canada Bundle' from Catherine Pooler!


When you open the card, you see there is a flap on the right side that you pull open to reveal the sentiment.


The cards stand for display, too!


I hope you will watch the videos in the hop, be inspired by all the fun creations - and leave comments on the videos for that chance to win a prize! Once again, the details are in the description of my YouTube video!


The O Canada bundle is available now at 

Catherine Pooler Designs!


Having been asked how many cards I make I thought it would be fun to keep track this year. Many of my posts include more than a single card or project and below is my tally. 

Card Tally for 2023
January - 53 cards
February - 56 cards
March so far - 35 Cards


Tuesday 21 March 2023

Teacup Shaped Card


Today I'm sharing the third card in my monthly series "Shaped Card". I enjoy making shaped cards but I find I am so busy using the other goodies in my craft room and making pop ups ... that I forget to make shaped cards. This series should allow me to make at least twelve shaped cards by the end of 2023. 😊

I started with this cute teacup die from Trinity Stamps and some older patterned paper from my stash. At first I made the card from white card stock but it didn't feel sturdy enough for me. I cut the shapes again using patterned paper and added them over the white card base. You can see in the photo below I trimmed away the fold on the patterned paper pieces so there would be no extra folds in the crease.


NOTE:  I trimmed a tiny bit from the bottom edge of the inside, which helps the card to stand nicely for display.

This card fits perfectly into a standard A2 envelope for mailing. 😊


Having been asked how many cards I make I thought it would be fun to keep track this year. Many of my posts include more than a single card or project and below is my tally. 

Card Tally for 2023
January - 53 cards
February - 56 cards
March so far - 34 Cards

Additional Supplies:
Pink cardstock
Kraft cardstock
White cardstock
Patterned paper - Blank Canvas, 1st Edition
Floral sticker - K & Company

This blog uses affiliate links whenever possible. This means, if you make a purchase through one of my affiliate links that you pay the same amount but I may receive a small commission from your purchase. I only link products that I own, love and use for my card making and not every link below is an affiliate one! 😊

Monday 20 March 2023

Easter Pull Out Card


Recently I shared a Mini Slimline Pull Out Card (tutorial coming later this week) but I also wanted to try it in a 5 x 7" size. This is the card I came up with!


Using some older patterned paper that included these vintage cut aparts, along with Rainbow Holographic card stock I was happy with the card and left it on my craft room desk. When I went in the next day though, I decided it needed something more and pulled out my bin of butterflies. 


These are from Pinkfresh Studios ... last year I purchased the layering stencils, die and stamp for these butterflies, and made a BUNCH of them in several different colorways. The finished butterflies were added to a plastic bin and I love being able to go through it and chose 'already done' butterflies to add to my projects. 


When you pull the inner card to the right, the sentiment (Karen Burniston) is revealed.


I haven't done a tutorial for this size, but below are the measurements I used.
Card base:  10 x 7", scored at 5" for a 5 x 7" card.
Inner card:  9 x 6.5", scored at 4.5 and 6.75".

I used Karen Burniston's Labels & Rectangles Crosshatch dies to cut the frame and aperture (window) in my card front and my large die cutting machine. You could also opt to cut your 5 x 7" card base in two panels. The front panel at 5.5 x 7", score down the left edge at 1/2". That panel would fit through most popular die cutting machines so you can cut your aperture from that.

Then cut your back panel at 5 x 7". Adhere the two together (after you cut your window) using that 1/2" edge on the front panel and wrapping it around to the back of the back panel.

Having been asked how many cards I make I thought it would be fun to keep track this year. Many of my posts include more than a single card or project and below is my tally. 

Card Tally for 2023
January - 53 cards
February - 56 cards
March so far - 33 Cards
Additional Supplies
Blue cardstock
White cardstock
Rainbow Holographic cardstock - Recollections
Patterned paper and cut apart - Springtime, Authentique (old, from my stash)
Gems - leftover from a Stampin' Up Card kit 
Grey Fineline marker

This blog uses affiliate links whenever possible. This means, if you make a purchase through one of my affiliate links that you pay the same amount but I may receive a small commission from your purchase. I only link products that I own, love and use for my card making and not every link below is an affiliate one! 😊

Sunday 19 March 2023

Stashbuster Pop Up Cards for Easter


As I have mentioned in other posts, I am making an effort to USE UP a bunch of my Easter supplies ... stickers, ephemera, pre-stamped and coloured images. Just stuff that has been hanging around for toooo long. I have made a big dent in it too ... and next year I will be able to purchase some new goodies for the season.

Today's cards are stashbuster cards and I made them all into pop ups too. I have a walkthrough of the cards on YouTube:  


This card was actually the last one I created, and used up some of the leftover papers etc from  the other six cards 😊.


I have had this patterned paper for several years, and have both the 12 x 12" AND the 6 x 6" pads. They must have been a screaming deal, ha ha. So I used one of the 6 x 6" pieces to create the explosion inside and decorated it with the cut-aparts from the smaller pad as well.


For the other six card fronts I used an older Sheetload sketch, February 2020. I used the paper layout only, not the 'nested string' etc that was shown on the sketch. 

The Peeps on the card below were in the little bin of pre-done embellishments I have ... initially they were made using this same paper pad and I had done enough for two cards. Glad to have used them up this year.


This card used a sweet sticker and a die cut word. It was done so long ago I didn't even remember who makes the Easter die, but I found it on Simon Says Stamp. It was also in that little bin.


Inside that card I used another sticker onto a stitched oval and that was added inside with one of Sam Calcotts paper springs. I'll link her video below if you want to watch it to see how she uses them.


This cute Riley the Moose image was also in the bin ... all coloured and everything. I guess I must not have needed any more Easter cards the year I coloured it so into the bin it went. 


For the inside of that card I used Karen Burniston's Little Twist Pop Up, but without the accordion folded panel that normally goes across the arms. There is less bulk and I always like showing you different ways you can use your dies. I also used her Easter Charms, cutting them from pastel mirrored card stock scraps.

NOTE:  I cut the bunny charm on the back side of the mirrored card stock to get the reverse image. 😊


Here is a link to Sam Calcotts video where she shows her paper springs Here is a link to the February 2020 Sheetload of cards video

Having been asked how many cards I make I thought it would be fun to keep track this year. Many of my posts include more than a single card or project and below is my tally. 

Card Tally for 2023
January - 53 cards
February - 56 cards
March so far - 32 Cards

Additional Supplies:

February 2020 Sheetload

Patterned paper, 12 x 12" and 6 x 6" pads: Springtime, Authentique

White cardstock

Sentiments - Old, some from my computer

Riley in basket - Riley & Company

Coloured pencils, blending stump and Gamsol

Bunny Stickers, old, stash

Ephemera - Easter, Echo Park

Chicks - Your Next Stamp

Alcohol Markers

Peeps - older card kit from Simon Says Stamp

Stickers - stash ($ Store?)

Gems - leftover from a Stampin' Up card kit

Easter Greetings - Michaels

Joules boutique  bunny sticker


This blog uses affiliate links whenever possible. This means, if you make a purchase through one of my affiliate links that you pay the same amount but I may receive a small commission from your purchase. I only link products that I own, love and use for my card making and not every link below is an affiliate one! 😊