Hello! Today I'm on the Divinity Designs Blog with these two Slimline cards. (All of the Divinity Designs items used are linked in the Supplies below.) I have a walk through of both cards on YouTube:
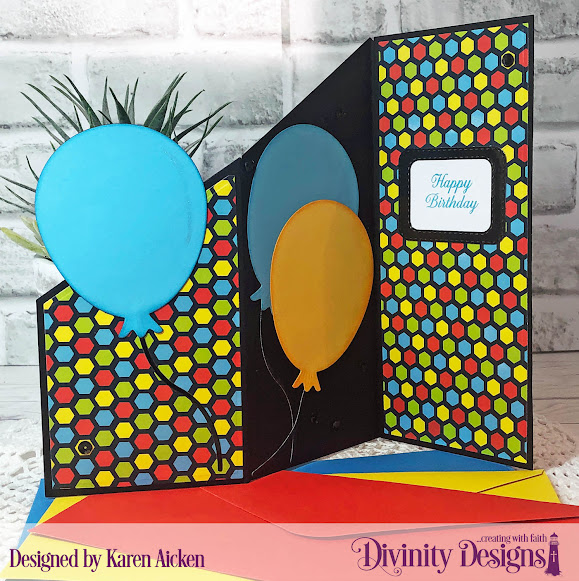
First up is a bright Birthday Card that is also a Fun Fold! I used the new Slimline Z Fold Card With Layers and papers from the slimline sized Geometric Paper Pad. Below is how the card would look coming out of the envelope.
The Slimline Z Fold With Layers comes with layering dies for three of the sections of the Z Fold Card, and if you want to decorate the other two sections you just need to cut the card stock or patterned paper from the back side instead of the front. I go over that more in the YouTube video. It's easy peasy to do, and is what I did for my yellow card stock layer.
Now for my second card - I am SO happy with how this one turned out! I knew when I saw the Slimline Flower Petal Background that it would make a beautiful Stained Glass looking card. Using the Divinity Designs Slimline Card Base** I die cut and embossed white card stock and set it aside while I worked on the Stained Glass Panel. After cutting the die from black card stock, I adhered a transparency to the back side and then a vellum panel behind that. I coloured the vellum from the back side using bright & happy colours, and when I was done I added it to the Slimline Card Base**.
Using the Double Stitched Circle die set, I cut a white circle and stamped the Raspberries and sentiment on it then added a couple of sequins for even more sparkle. That was popped up with foam tape and my card front was finished. In the photo below you can see all the shine you get from the transparency behind the Slimline Flower Petal Background.
Inside I used the Slimline Rectangles to cut a yellow and a white panel, embossing both so they have a lovely raised edge. I added some of the black fallaway pieces from the background die in two corners and added some shimmer with a Wink of Stella pen. Then I stamped the Raspberries again using a light colour of ink and finally, a single black sequin.
I hope you've enjoyed my March projects for Divinity Designs as much as I enjoyed creating them! I'll be back with more Divinity Designs Projects next month.
** Requires a larger die cutting machine
Supplies:
Z Fold With Balloons:
Slimline Z Fold Card With Layers - Divinity Designs
Big Balloon - Divinity Designs
Double Stitched Rounded Rectangles - Divinity Designs
Vintage Bird Labels (Happy Birthday) - Divinity Designs
Geometric Patterned Paper Slimline Sized - Divinity Designs
Card stocks
Sequins
Black mirror card stock - Tonic Studios
Glitter Brush Pen
Card size: 4 x 9", fits in a #10 Business Envelope
Stained Glass Slimline Card:
Slimline Flower Petal Background - Divinity Designs
Slimline Card Base** - Divinity Designs
Raspberries - Divinity Designs
Slimline Rectangles - Divinity Designs
Double Stitched Circles - Divinity Designs
Mini MISTI - My Sweet Petunia
Card stocks
Transparency
Shimmer Spray
Taylored Expressions Blending Brushes
Glitter Brush Pen
Sequins
Card size:


Love the bold bright colours
ReplyDelete