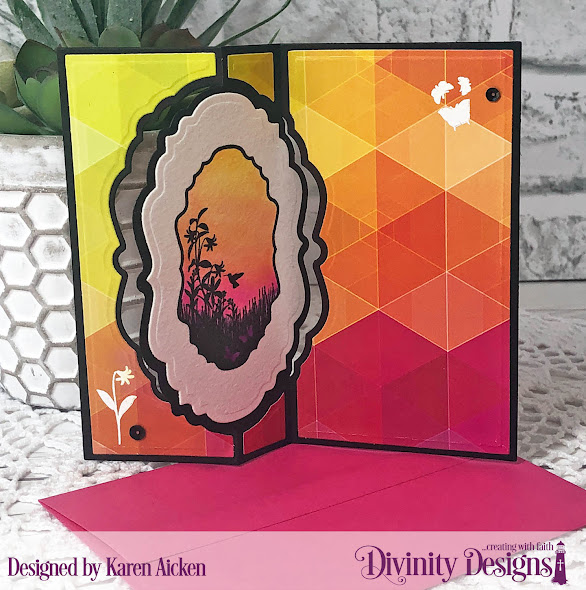
Hello! Today I'm sharing three cards for my Divinity Designs Guest Designer Post on their BLOG. I love the bright colours in the Geometric Paper Pad, so paired it here with pops of both black and white.
First up is a Birthday Card made with the Vintage Flip Fold With Layers and the Vintage Bird Label stamp set. I have a walkthrough of this card on YouTube:
My second card today also uses the Vintage Bird Labels - I love the silhouette look of these stamps, which of course is why I chose them. I die cut the Slimline Quatrefoil Background Die from white card stock and adhered that over a same sized piece of paper from the Geometric Paper Pad Slimline Size. One of the Double Stitched Vintage Labels was added to the top third, and on a smaller label I clear heat embossed the silhouette image that was stamped in black ink. The water colouring was done the same as the Flip Fold card above, using water colour markers scribbled onto a glass mat and picked up with a water brush. The painted image was popped up onto the white one with foam tape for dimension.
Using the Slimline Card Base die*** I cut my card base from black card stock and embossed the edges. Then the decorated Quatrefoil Background panel was adhered to the front making sure there was an even border all the way around. Finally - a few black sequins were added and my card front was done.
Here is a peek at the inside of the card. I used the Slimline Rectangle Dies to cut a slightly smaller black panel and embossed the edges. Then another rectangle die from the set was used to cut and emboss a smaller white panel. I added a couple of stamped images from the Vintage Bird Labels and there is lots of room to write my note on the white panel.
The white card base was created with the Slimline Card Base** die and the edges were embossed. Then I added the Slimline Flower Petal background to the card front making sure there was an even white border all the way around.
I'll be back next week with another Guest Designer Post using these fun products from Divinity Designs. Check out the Divinity Designs Blog for lots of inspiration from their Design Team!
** Requires a larger die cutting machine
Supplies:
Vintage Label Flip Fold With Layers - Divinity Designs
Vintage Bird Labels - Divinity Designs
Geometric Paper Pad Slimline Sized - Divinity Designs
Mini MISTI - My Sweet Petunia
Card stocks
Karin Watercolour markers
Wink of Stella
White embossing powder
Clear embossing powder
White gel pen - Sakura
Black Sequins
Card size - Standard A2, 4.25 x 5.5"
Slimline Card Base** - Divinity Designs
Slimline Quatrefoil Background Die - Divinity Designs
Slimline Rectangle dies - Divinity Designs
Geometric Paper Pad Slimline Size - Divinity Designs
Double Pierced Vintage Labels - Divinity Designs
Vintage Bird Labels - Divinity Designs
Card stocks
Karin Water Color Markers
Water Brush
Clear embossing powder
Water Colour paper
MISTI - My Sweet Petunia
Card size: ~4 x 9", fits in a standard #10 Business Envelope
Slimline Card Base** - Divinity Designs
Slimline Flower Petal Background - Divinity Designs
Slimline Layering Rectangle Dies - Divinity Designs
Geometric Paper Pad Slimline Sized - Divinity Designs
You Warm My Heart - Divinity Designs
Double Stitched Circles - Divinity Designs
Clear embossing powder
Grey Copic markers
Black sequins
Card size: ~4 x 9", fits in a standard #10 Business Envelope
Thanks for stopping by


Love the bright colors with the black & white details
ReplyDelete