Wednesday, 31 July 2019

Sparkly Snowflake Triple Flip Adaptation

Hello my crafty friends

I was SO excited when this idea worked. I had been busy doing paperwork and paying bills, dealing with my Mom's estate etc when BOOM this idea popped into my head. Well actually, the first idea was to use an acetate hinge and have just the snowflake be the flipper but I went with a rectangle under the snowflake and a card stock hinge for the first one.

The new Triple Flip die set is proving to be a fan favourite, and I'm thrilled to be able to share another way for you to use your dies! I have a lot of ideas for this technique - more ideas than days, haha. Since it is still July, I can call this my 'Christmas in July' post! I have seen some pretty wonderful holiday cards this month, which is always fun.

I adapted the Triple Flip and only used one 'flipper' - the one on the far left - and attached a decorated crosshatch rectangle to that arm.


I have had these snowflake dies for many years - and I'm not even sure who made them. I die cut the largest one from really sparkly card stock and adhered it to the flipping rectangle with foam tape. I also added some sparkly borders using Karen Burniston's Border Blends dies.


When you pull the tab, the rectangle flips over to reveal a sentiment and another die cut snowflake. The sentiment rectangle covers up the remaining slots that cut with the Triple Flip die, since we only needed the one on the left.


Because the pull tab arm has to extend all the way across the width without the additional two flipper arms, there is some wobble to it and it tends to sag below the notches a little. To remedy this, I added a narrow 1/2" long piece of foam tape above and below the pull tab about where the far right slot is. That keeps the pull tab arm where it needs to be!


The card is a top folding A2, and there is another stamped greeting inside.


I also have a little YouTube Video so you can see the card in action:


I have another idea for a Triple Flip adaptation that I will share in a couple of days. So fun!

Supplies:
Blue and white card stocks
Patterned paper - Winter Frost, Stampin' Up (retired)
1104 Triple Flip - Karen Burniston
1054 Rectangles Crosshatch - Karen Burniston
Glitter card stock - AC Moore
1091 Border Blends Party - Karen Burniston
Large Snowflake dies - unknown, older from my stash
Stamps on front - Verve (retired)
Water brush
Inside stamps - Hero Arts
Glitter Dots - Elizabeth Craft Designs

Thanks for stopping by today

Tuesday, 30 July 2019

Mermaid Tail Birthday Cards

Hello my crafty friends

Today I have two mermaid tail birthday cards to share. I haven't played with this pretty SU mermaid stamp set nearly enough so I got it out again along with the beach background stamps from Tailored Expressions. I had been taking part in a 30 Day Colouring Challenge on Instagram, so coloured up a full mermaid and then just the tail part twice for day 26. I will share the card I made with the full mermaid another day.


The background scene comes with the stamps to create the ocean and beach etc, and also two dies. One cuts a slot among the waves and one cuts a slit. For this card I die cut the slit and inserted one of the mermaid tails. This one has gold gel pen highlights, and of course I also added some sequins for birthday sparkle.


Both of the cards are the same inside ...


The second card has some action to it! I used the slot die cut and added the second mermaid tail using a slider disk. The tail doesn't slide along the track (which will be fun for a different card), but instead the tip of the tail waves back and forth. There isn't quite as much swing as I would like, I probably should have tried it with scrap papers first to get the weight just right. However, it's still sort of fun to tilt the card back and forth and watch that tail wave.


Below you can see the different positions of the mermaid's tail.


While I had the stamps and my MISTI out, I made 6 of these backgrounds and I have put four aside for different cards.

Supplies:
White Bristol Smooth Card Stock
White and blue card stocks
Mermaid - Magical Mermaid, Stampin' Up
Zig Clean Color Markers
water Brush
Prismacolor Pencils
Gamsol & Blending Stump
Sakura gold gel pen
Build a Background-Waves, stamp and die combo - Taylored Expressions
Rectangle dies - Hero Arts
Spinner Disk - MFT Stamps
Happy Birthday - Birthday Banners, Stampin' Up
Fun foam
Sequins
MISTI - My Sweet Petunia
Nuvo Glitter Drops
Stitched rectangle die - Your next Stamp
Words inside - In and Out Birthday, Taylored Expressions

Thanks for stopping by today

Monday, 29 July 2019

Masculine Pop Up Gift Card Holder Duo

Hello my crafty friends

I have been having so much fun with Karen Burniston's latest release I forgot I wanted to make a bunch of Gift Card Holders for our son's girlfriend's birthday. I also wanted to give some to a friend, so decided when I make one for Hannah I can also make one for my friend!

I loved this Stampin' Up stamp and die set when it first came out last year and it was the first thing I added to my shopping cart when that catalogue went live. It's just so perfect for masculine projects!


I used some patterned paper from my stash and of course kraft card stock. I've been using that a LOT lately!

To create the Pop Up Gift Card Holder, I used a die set by Lynda Kanase. I get SO much use out of that die set!! This is what it look like inside and you can see the slots where you would insert a gift card.


The second one uses the same elements, just different patterned papers from the stack.


I added one of my sample gift cards to show you what the Gift Card Holder looks like with a gift card inside.


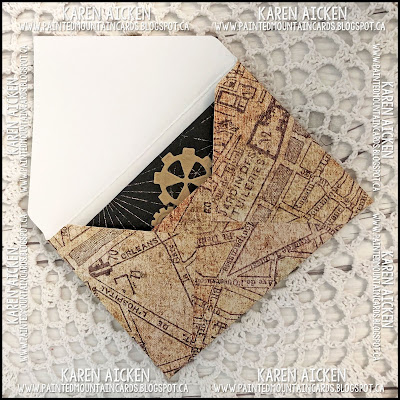
I didn't have any envelopes that would work well, so I made my own with coordinating patterned paper and my Envelope Punch Board!


Supplies:
Patterned paper - Prima
Carad, Gift Card Holder Pop-Up - Lynda Kanase
Kraft and white card stocks
Gears and car stamps and dies, Geared Up Garage - Stampin' Up
Sakura White gel pen
Stitched Rectangle dies - Your Next Stamp
Envelope Punch Board set up for 3 x 4-1/2"
Nuvo Drops

Thanks for stopping by today

Sunday, 28 July 2019

Wish Stand Up Birthday Card

Hello my crafty friends

Today I'm sharing an Easel, or Stand Up birthday card.


This is how the card looks coming out of the envelope - it folds completely flat for mailing. The green banner actually coordinates much better in real life than in the photo, ha ha.


This is what the card looks like inside - the patterned paper is very sparkly which I always like for a birthday card.


Supplies:
Lively Stand-Ups - Stephanie Barnard (the Stamps of Life)
Cream and green card stocks
Patterned paper - DCWV
Fishtail banner die 
Happy Birthday - Card Front with Script Words Drop Ins - Stephanie Barnard (the Stamps of Life)
Bird and inside stamps - MFT Stamps
Nuvo Glitter Pen
Zig Clean Colour Markers
Water Brush
Sakura white gel pen

Thanks for stopping by today

Saturday, 27 July 2019

C4C494 Masculine Pop Up Birthday Card with Cacti

Hello my crafty friends

It's Saturday and that means a new challenge at the Crazy4Challenges Blog. This month our hostess is Karen Ostergard! Donna K is joining us as our Guest Designer and you can find Donna's blog HERE.   


This is Karen's challenge for the week:  Today is my son's birthday - today's challenge is to inspire us with a masculine birthday card.


I made our nephew a birthday card, and since they live in Arizona I pulled out my SW themed paper stack that a friend knew I'd love and bought for me.

The front has Karen Burniston's new 'HOWDY', and one of the cut-aparts from the paper stack.


Inside I used the new Train Pivot Panel, turned vertically. This gives you a dynamic, generic pop-up with lots of platforms to decorate! 


I used stamps and dies from Taylored Expressions that I had picked up earlier this year. In fact, since I was using a template and my MISTI for the stamping, I stamped & die cut a small stack of the cacti to use on other projects!


Love these little banner dies ...


I also have a short YouTube video so you can see this card in action!


Check out the C4C blog to see how the Crazies have been inspired by the challenge. We'd  love to see your take on it, so be sure to stop by the Crazy 4 Challenges blog and link up your creations. If you are uploading to an online gallery, please use the keyword C4C493.

Supplies:
Patterned paper - Recollections
1106 Train Pivot Panel - Karen Burniston
1054 Rectangles Crosshatch - Karen Burniston
Cacti - Can't Touch This stamps and coordinating dies, Taylored Expressions
White, kraft and green card stocks
Banners - Skinny Mini Fiesta Border dies, Taylored Expressions
1097 Farm Edges - Karen Burniston
1100 Howdy - Karen Burniston

Card size - 4-1/2 x 6"


Thanks for stopping by today

Friday, 26 July 2019

Hanukkah Train Pivot Panel Card

Hello my crafty friends

It's Fun Fold Friday here on my blog and today I'm sharing another Hanukkah card made with the new Train Pivot Panel by Karen Burniston. Wednesday's Hanukkah card was also made with the same die and paper package but it looks completely different than this one! How fun to see the versatility you can get from a single die set.

The front is nice and simple - I cut one of the 4 x 6" journal cards from a sheet in the paper package and added some gold gel pen to the candle flames. I tied it with Bakers Twine and adhered it to my patterned card base.


Here is the inside! I made this card a little bigger than an A2 as I wanted to add a double row of the printed tiles from the patterned paper on each side. I also added a few more stickers from the package, and gold gel pen highlights on the train. The Train Tracks are from the new Train Elements and they are the perfect accessory die for the Train Pivot Panel.


Whenever I give anyone a card made with a Pivot Panel, they turn it to see what it looks like from the top - so I took a photo of that view for you. Such fun dimension!


Since I have a couple of Hanukkah stamp sets, I pulled them out and used Karen B's idea of adding dreidels to the train cars. So fun!


I am including a little YouTube video for you so you can see the card in action.


Supplies:
Patterned paper, journal card, stickers - Happy Hanukkah, Photo Play
1106 Train Pivot Panel - Karen Burniston
Stitched Rectangle dies - Your Next Stamp
White, navy, black card stocks
Sakura gold gel pen
Stamps - 8 Happy Nights, CAS-ual Friday Stamps
Symbol on train engine - Paper Smooches
1107 Train Elements - Karen Burniston
Water Brush
Bakers Twine

Card size - 4-1/2 x 6"

Thanks for stopping by today

Thanks for stopping by today

Thursday, 25 July 2019

Sunshine and Butterflies

Hello my crafty friends

Today I'm playing along with the Fun Friday Challenge #118 - SUNSHINE at Your Next Stamp. You can find all the details of the challenge HERE.

I love the sunny yellow on this puffy butterfly sticker, and of course I used the Sunburst Panel die from Your Next Stamp for my background.


I also used the Polaroid frame and Washi Tape Greetings (stamps and dies) - all from Your Next Stamp. I adhered the Washi Tape greeting with foam tape in the centre and glue dots on each end for some lift to the centre.


Here is a peek at the inside:


This card will be donated to my Mom's old nursing home.

Supplies:
Polaroid frame die - Your Next Stamp
Sunburst panel die - Your Next Stamp
Stitched rectangle  - Your Next Stampdies
Washi Tape Greetings (stamps and dies) - Your Next Stamp
Stamp inside -
White, blue and yellow card stocks
Butterfly puffy sticker - my stash
Bakers Twine
Sakura gold gel pen
Words inside - Picture Perfect Birthday, Stampin' Up

Thanks for stopping by today

Wednesday, 24 July 2019

Hanukkah Train Pop-Up

Hello my crafty friends

Last week I shared a different way to use the new Train Pivot Panels to create a dynamic, generic pop up, and said that I had made four cards with the technique. This is the third card I made, and by using a coordinated package of patterned paper and stickers, this card was Quick and Easy!!!


This lovely panel is a journal card, which I trimmed from a 12 x 12" sheet in the package and added gold Nuvo Drops. Since lots of people are participating in 'Christmas in July' challenges, I thought I'd duck in with a Hanukkah card. 😀


Here is a peek at the inside! I added the stickers to a sheet of lightweight acetate and fussy cut them out. This gives the illusion that the popped up images are floating! Note - while I used stickers for my card embellishments, you could also use stamps.


I will sign the card with a gold gel pen, but you could also add a small white rectangle as a signing block.


I actually made a second Hanukkah card with the Train Pivot Panels - this time used as intended, which will be on my blog tomorrow. I have a little YouTube video for you too:


Supplies:
Navy Duplex card stock (navy on one side, white on the other) older and from my stash
Patterned paper, Journal Cards, Stickers etc - Happy Hanukkah, Photo Play
1106 Train Pivot Panel - Karen Burniston
Stitched rectangle dies - Your Next Stamp
Acetate
Nuvo Glitter Drops
White card stock

Thanks for stopping by today

Tuesday, 23 July 2019

Sunny Fishing Days

Hello my crafty friends

Today I'm sharing a masculine birthday card that I made for the Fun Friday Challenge #118 - Sunshine at Your Next Stamp. You can find all the details for the challenge HERE.

I really like this wavy background die - I've had it for a couple of years. It also came in a vertical orientation and I always agonize of which one to get then think of all the ways I can use the one I didn't purchase ha ha. However this one does make great landscape backgrounds so I am glad I got the horizontal one. Your Next Stamp has one that is similar but in a vertical orientation and it comes with an additional circle die that fits in between the waves ... I have now added that to my YNS Wish List!

The cute stamps are by Your Next Stamp and I added a die cut sun from Karen Burniston's Tropical Scene. I would have added the sun anyhow, but it is perfect for the challenge.


Here is a peek at the inside:


Supplies:
Wavy background die - MFT Stamps
White, Kraft and blue card stocks
Catherine Pooler inks
Keepin' it Reel stamps and coordinating dies - Your Next Stamp
Black Olive Ink - Your Next Stamp
Chameleon Color Tone markers
Sakura glaze pen
Water brush
1038 Tropical Scene (sun) - Karen Burniston
Stitched rectangle die - Your Next Stamp

Thanks for stopping by today

Monday, 22 July 2019

Cactus Birthday Peek A Boo Card

Hello my crafty friends

Today is Masculine Card Monday here on my blog and I'm sharing the one and only 'Peek-A-Boo' card I'll ever make. While I was very happy with how the card turned out, when I showed hubby and he couldn't open it properly TWICE I started having doubts about it. Apparently you have to hold these cards 'just so' or they don't slide properly. I don't want to have to send directions with a card - people should be able to open a card on their own, without instruction. I would be hand delivering this one, so I could walk our SIL through the process, but I found that very frustrating.

While this is not a new idea, nor is it Jennifer McGuire's - she did post a video late last year with a great tutorial and very concise measurements and directions. I used her video to create the card. Then when it all sorta came apart when hubby tried to open it I went back to YouTube and used Glenda Cairns** idea of adding a sliding belly band. Works much slicker, but our son-in-law wasn't able to open it without my input so this style of card is definitely a fail in my book. 

This is the front of the card, and you can see the cactus and 'happy birthday' through the window.


When you open the card, a panel slides over the first image in the window and reveals a second image. For this card, it was a different potted cactus with the words 'looking' sharp!'.


Below you can see the second panel sliding over the first. This card works really well IF YOU HOLD IT PROPERLY, but otherwise the layers separate easily and the recipient could be left with something he/she has no idea how to reassemble.


Below you can see Glenda's belly band idea and if nothing else, it holds all the layers together so it doesn't all come apart. It was a great fix for that.


** You can see Glenda's 2016 YouTube Video HERE

Supplies:
Grey, white card stock
Cactus stamps - Newton's Nook
Dashing rectangle dies - Elizabeth Craft Designs
Happy Birthday - MFT Stamps
Patterned paper - Scrapbook.com
Celebrate 3D Drop-ins, Stephanie Barnard - Sizzix & The Stamps of Life
Label punch - Stampin' Up
Cactus and Pot dies - Concord & 9th
Enamel dots - Echo Park
Copics

Thanks for stopping by today

Sunday, 21 July 2019

Heart and Roses Birthday Card

Hello my crafty friends

We were clearing out an old dresser of my Mom's, and came across a bunch of Peel-Off Stickers. Since I still enjoy using Peel-Off's,  I took them to my craft room. There was only one of these heart/roses left on the sheet, so I coloured it up for the 30 Day Colouring Challenge I'd been participating in on Instagram. Then I just went ahead and made a full card to post instead!


I coloured the image with Zig Clean Colour markers scribbled onto an acrylic stamping block and picked up with a water brush. I love the rich, vibrant colours you get with the Zigs!


I added a few more peel-off's, a gold sequin that was sitting on my stamping table and I also used these sweet stitched label dies from Stampin' Up.


This card will go into one of the bags of cards I donate to my Mom's old nursing home.

Supplies:
White, red and aqua card stocks
Zig Clean Color Markers
Water brush
Patterned paper - Playful Patterns, Valentines - Taylored Expressions
Stitched Nested Labels - Stampin' Up
Gold border Peel-Off's
Happy Birthday Peel-Off's
Gold Corner Peel-Off's
White textured card stock - scrap from my stash
Gold novo glitte rpen
1089 Rockin Rectangle Pop-Up (sequins) - Karen Burniston
Gold foil card stock - Stampin' Up
Sequin on stamping table from other project
Stamp inside - Picture Perfect Birthday, Stampin' Up

Thanks for stopping by today