
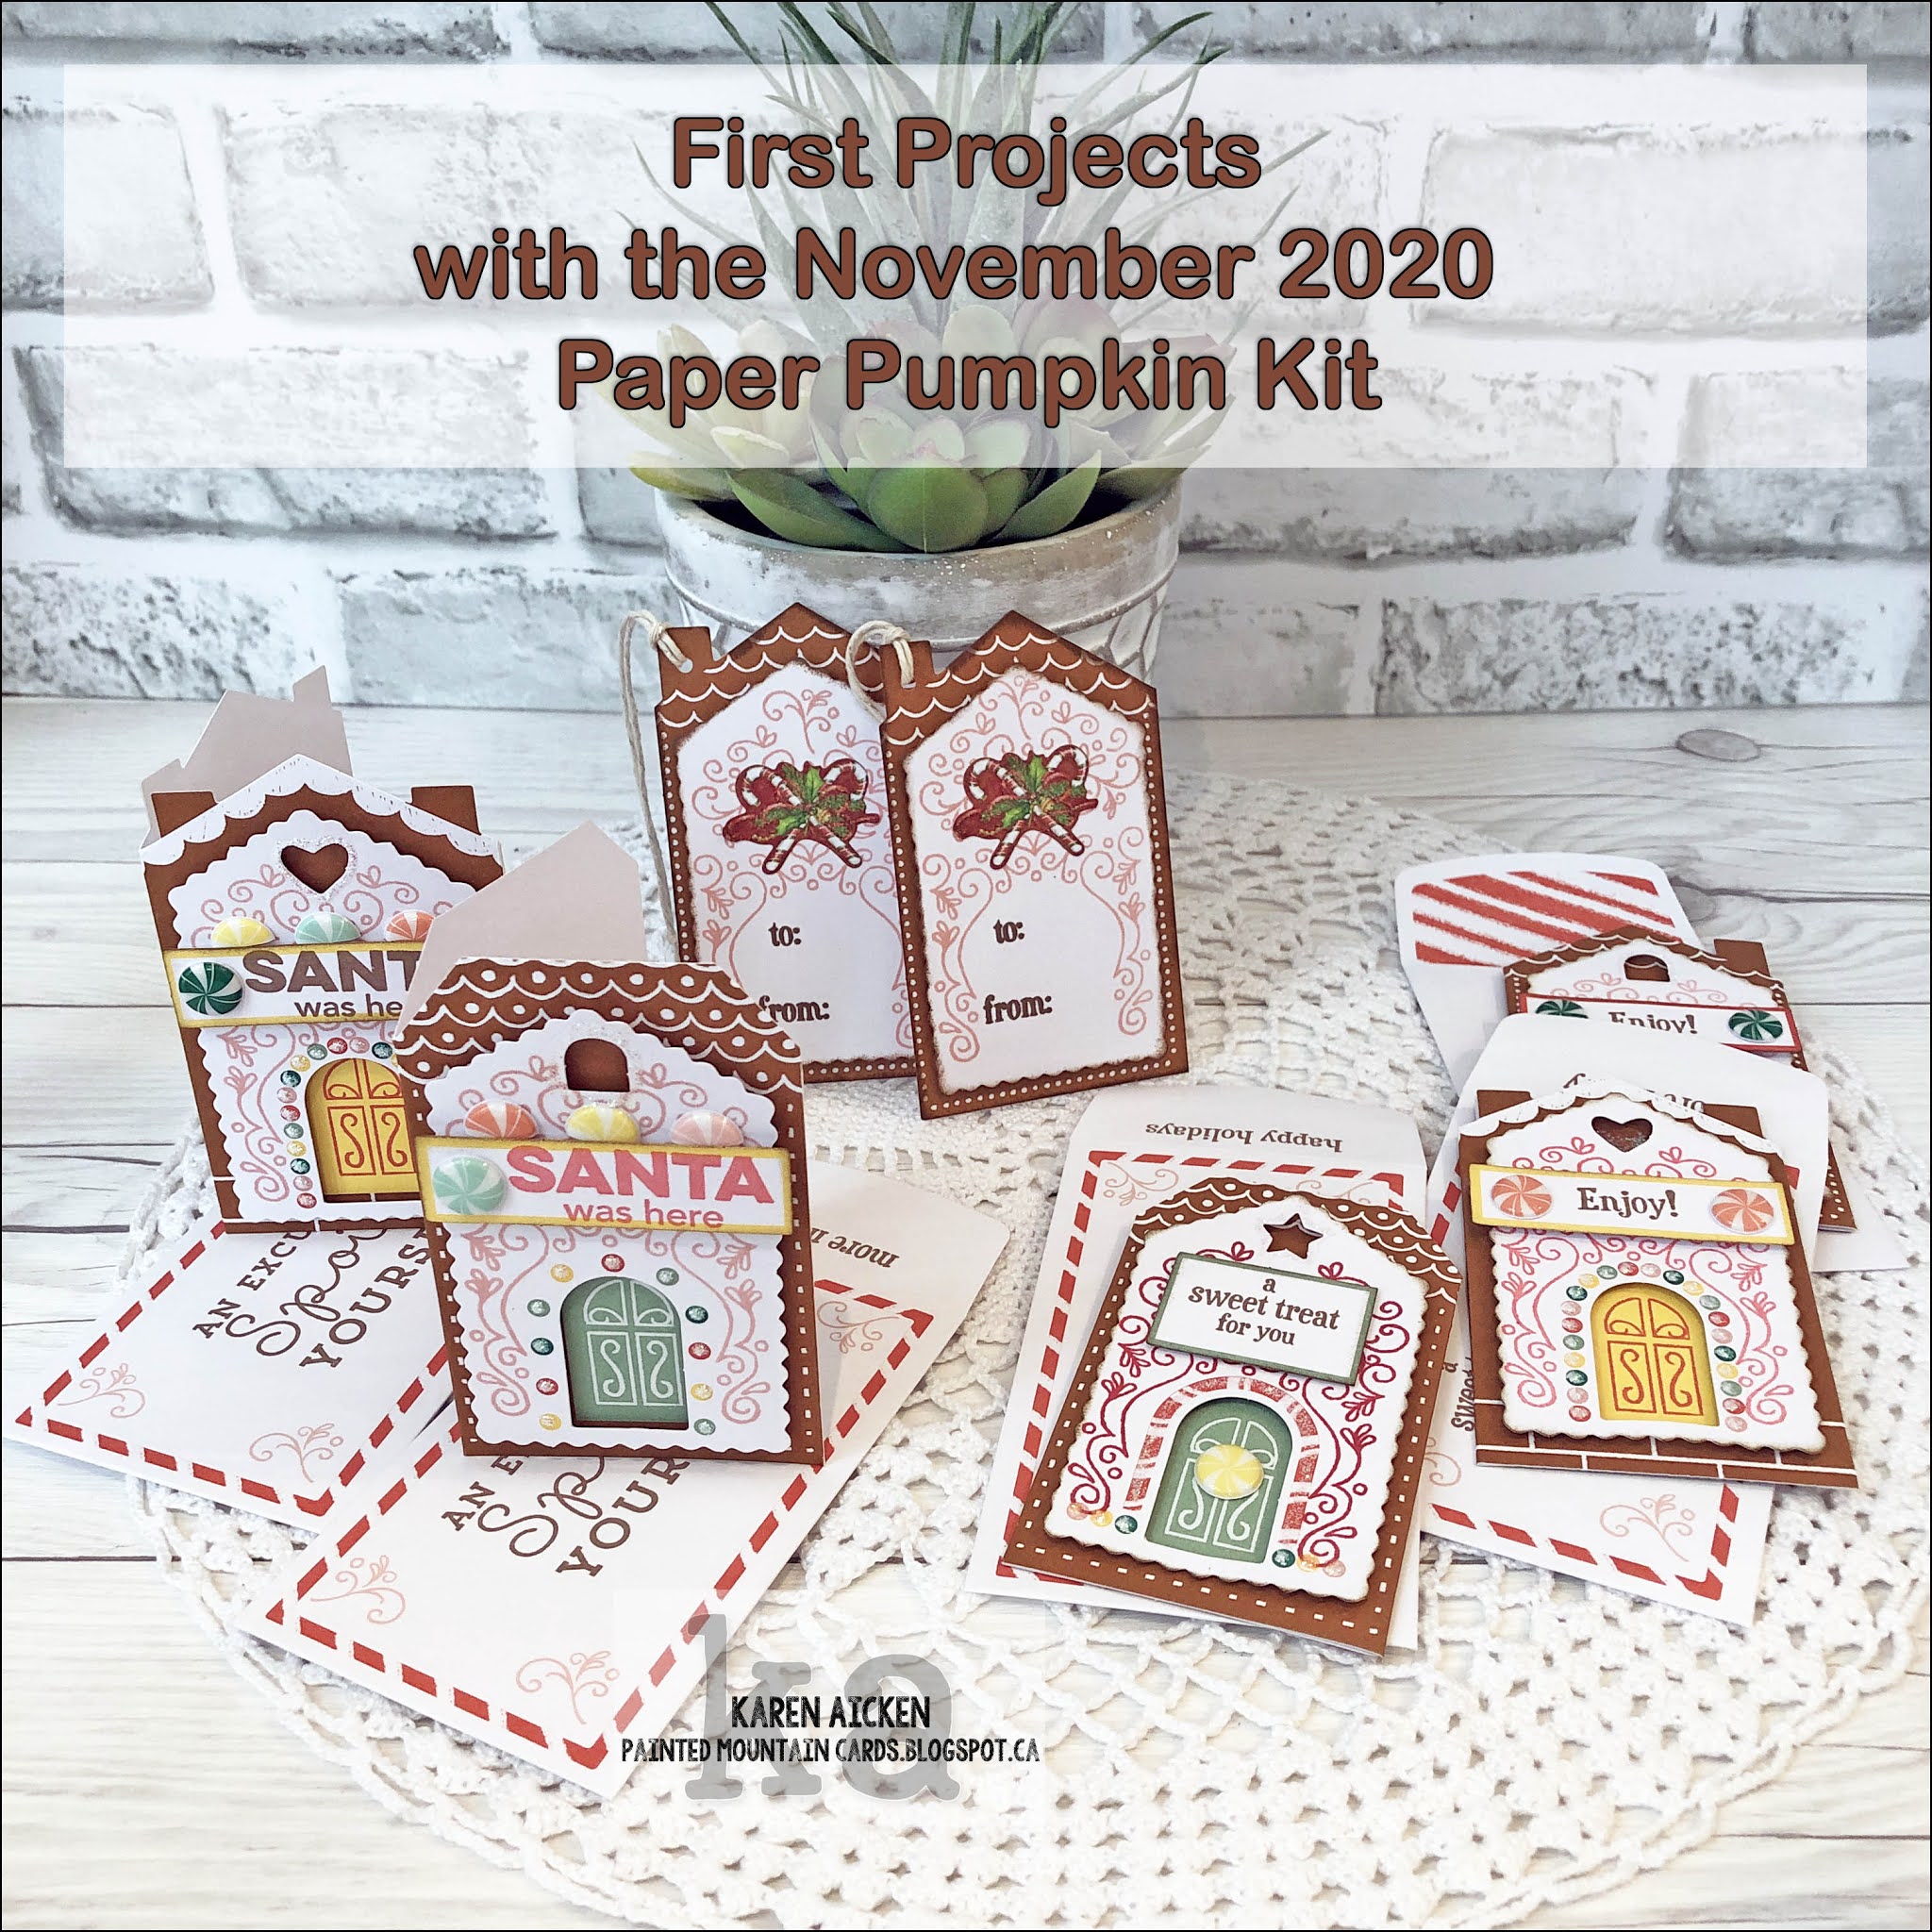
I got my November 2020 Paper Pumpkin kit on Tuesday evening which was perfect timing as I was getting a Christmas parcel ready to take to the post office and I needed a Gift Card Holder. This kit makes FIFTEEN cute pocket Gift Card Holders with coordinating envelopes ... see what I mean about perfect timing?
I also did a YouTube Video with a walkthrough of my first November 2020 Paper Pumpkin Projects! I have a lot of photos, mostly for other Paper Pumpkin subscribers who love to see what everyone does with their kits. I won't be offended if you just quickly scroll by and move on with your day. 😉
Now I make a lot of Gift Card Holders, so I don't need fifteen more - but the fun thing about Paper Pumpkin is you can make all kinds of things other than the suggested projects and Stampin' Up is very generous with their supplies. So I only made five Gift Card Holders, three as per the instructions with the little pocket and two that open like a card with a strip to hold the gift card. I will share the rest of my November 2020 Paper Pumpkin projects in a week or two.
This was the first one I made ... those puffy Candy Dots are just ADORABLE! I added lots of Stickles too, because ... well ... you know me and sparkle. I also gave these white panels a blast with my shimmer spray.


I did two nearly identical ones and then this one with the 'more squarish' rectangle on the front.


I used the Winter Charms by Karen Burniston to create the Gingerbread Man, and since I didn't have any of the same coloured card stock as in the Paper Pumpkin kit, I die cut the Gingerbread Boy charm from an area of the Gingerbread House that would be hidden by the white scalloped layer! Now this is a charm, but I snipped off the hanging hole so I would just have a Gingerbread Boy as he didn't need to hang in the doorway. 😊

I love those puffy Candy Drops, and I cut three different colours in half and added them at the top of the stamped label. Both the label and sentiment are from a retired SU set and not from the Paper Pumpkin kit. The cute little tree beside the doorway is also from the Winter Charms and a SU iridescent snowflake hides the hanging hole. I also added two punched trees behind the house - the snow hill was sitting on my stamping table from a different project so it worked out perfectly for this card.

When you open the left side, you see another Gingerbread Man and a punched tree along with one of the puffy Candy Dots.


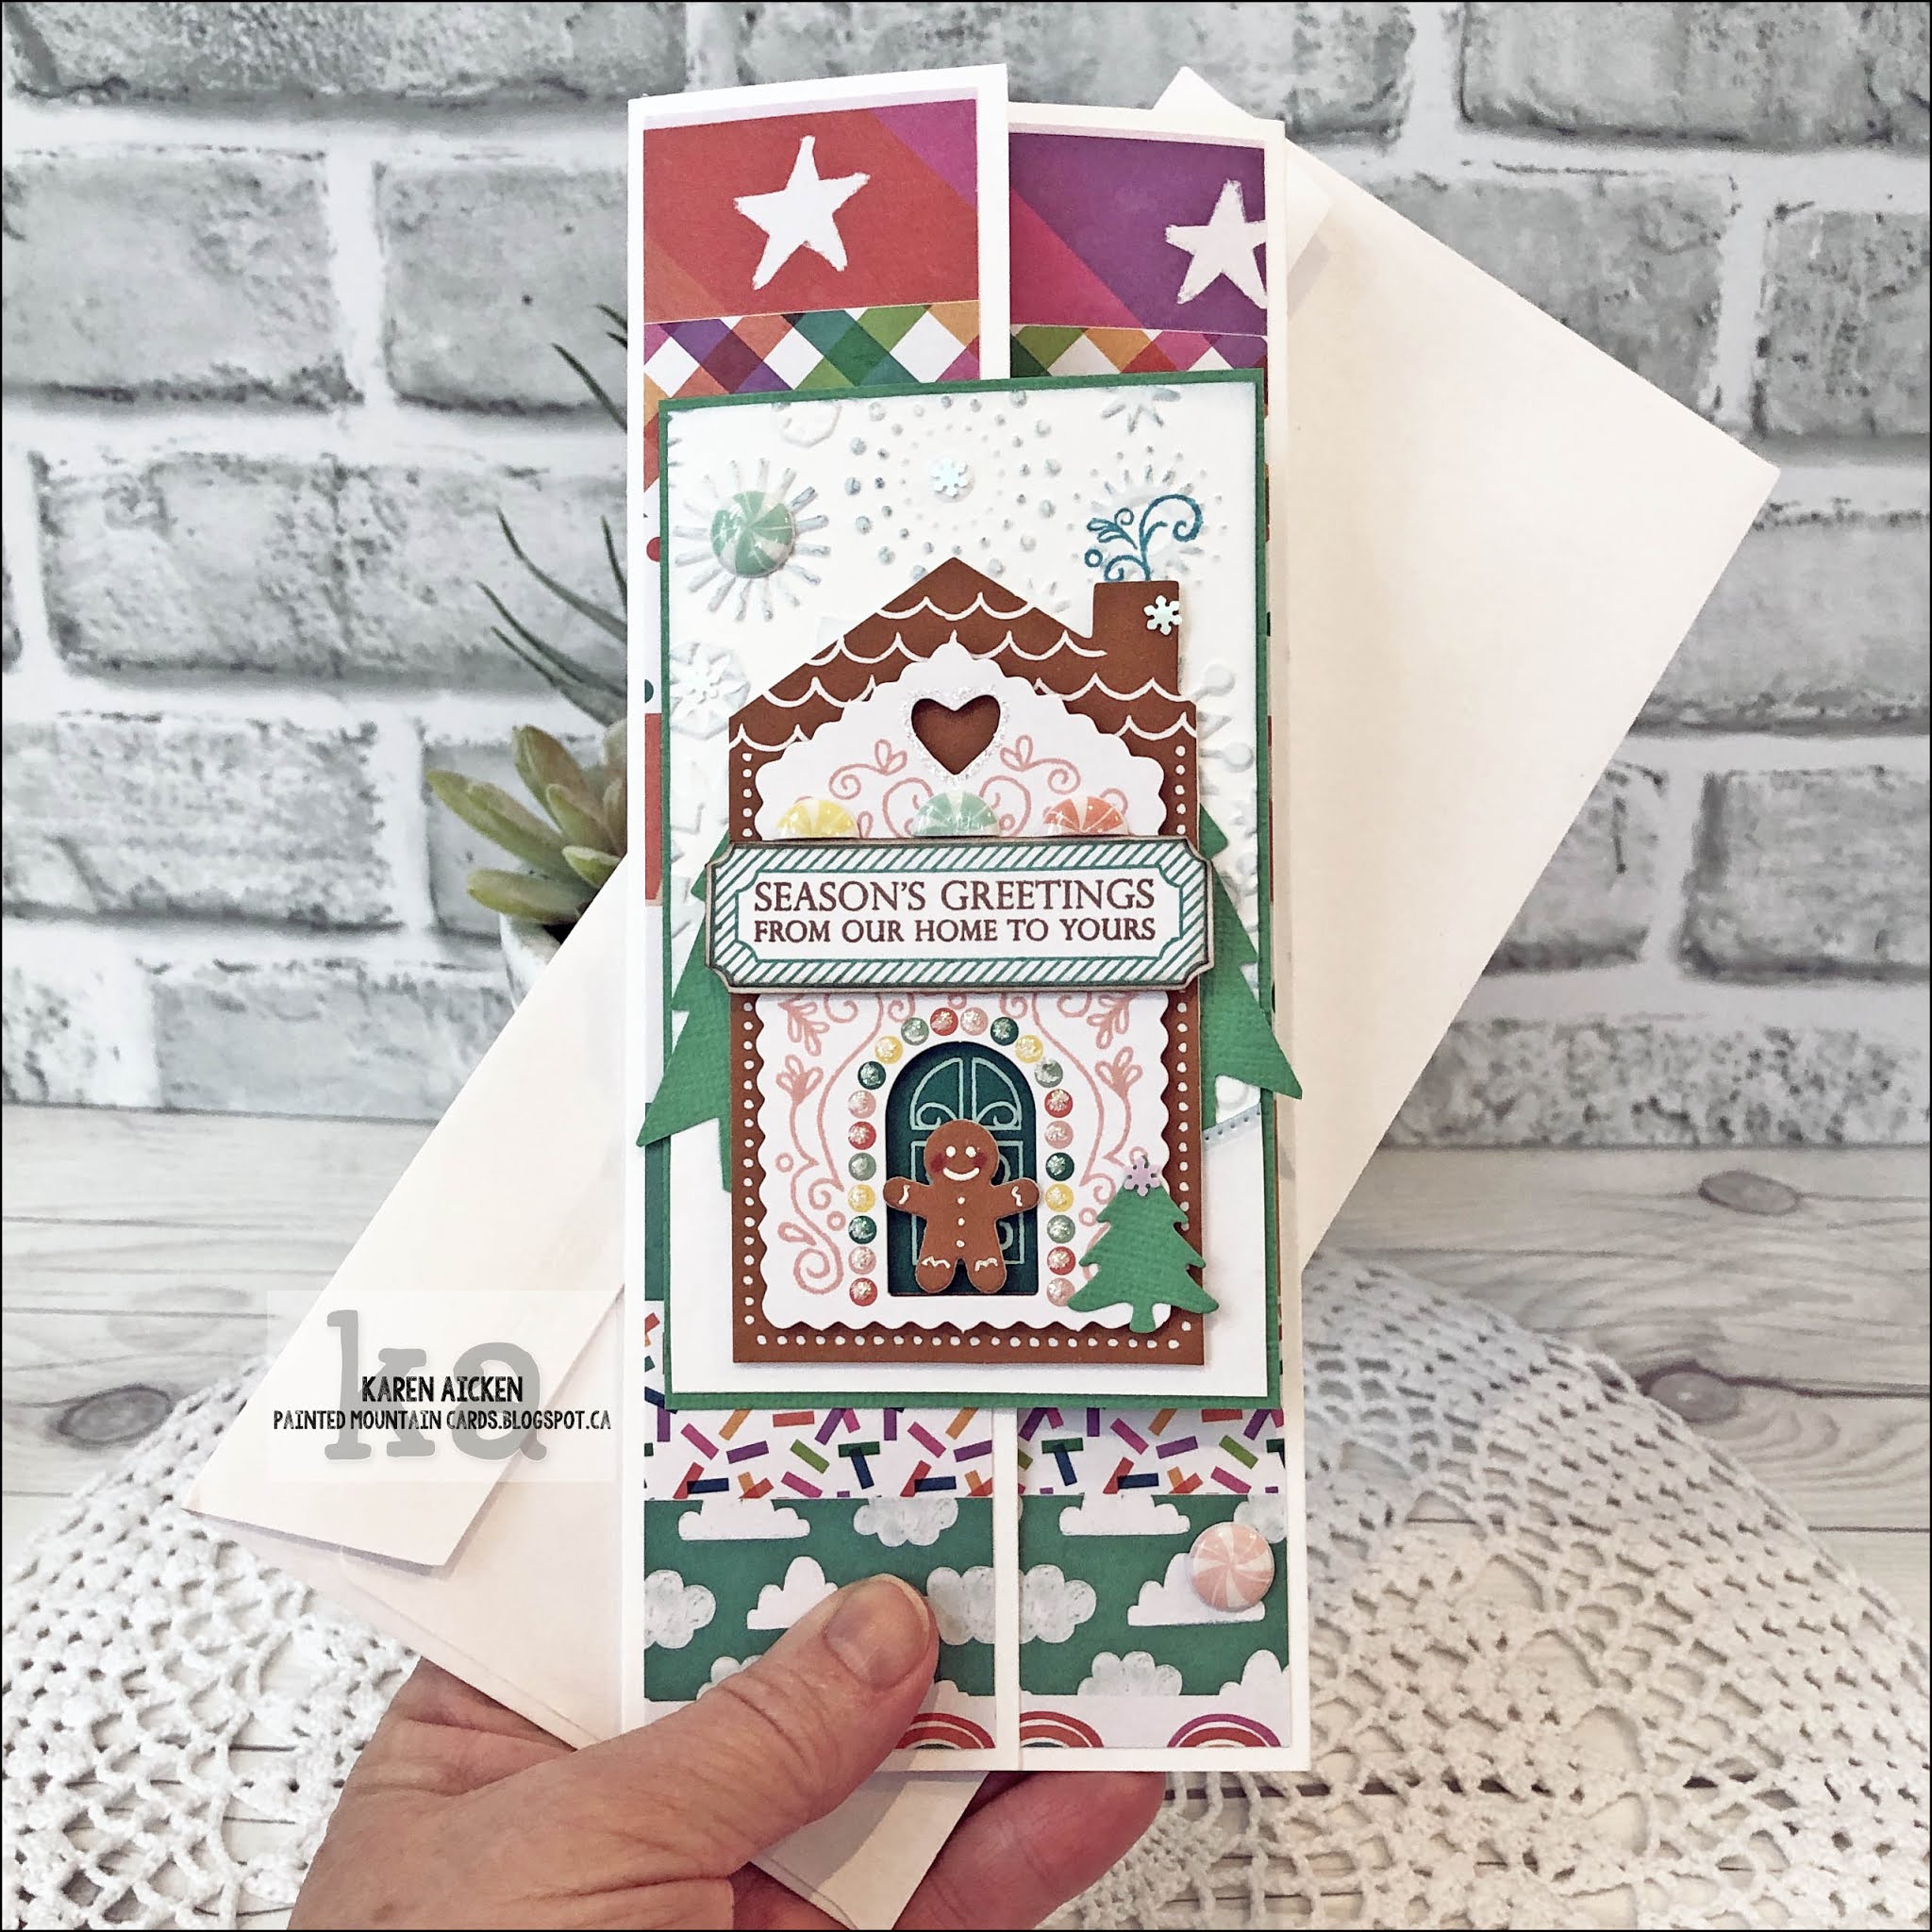
For those of you who want to make one of these Slimline Trifold cards, here are the measurements. Since I talk about making these in other videos, this is just a quick measurement guide.
- Cut your card base 8.5 x 8.5".
- Score 2" from the left side and 3" from the right side. This gives you your 3.5 x 8.5" Slimline card when it's folded.
- My decorated panel on the front measures 3 x 5".
- I cut my patterned paper layers 1/4" smaller, so if the left flap is 2 x 8.5", then my patterned paper (or DSP if you are a SU customer/demonstrator) is cut 1/4" smaller at 1.75 x 8.25".
Supplies: Unless listed below, everything came in the November 2020 Paper Pumpkin Kit from Stampin' Up
Gift Card Holders 1, 2 & 3
Mini MISTI - My Sweet Petunia
Shimmer Spray
Stickles
Clear heart resin sticker - Stampin' Up
Mini MISTI - My Sweet Petunia
Shimmer Spray
Stickles
Clear heart resin sticker - Stampin' Up
Gift Card Holders 4 & 5
Extra stamps - Gifting Fun, MT Stamps
Banners Pick A Punch - Stampin' Up
Card stocks
Gold Nuvo Shimmer Pen
Wink of Stella
Clear heart resin sticker - Stampin' Up
Copic marker
Stickles
Extra stamps - Gifting Fun, MT Stamps
Banners Pick A Punch - Stampin' Up
Card stocks
Gold Nuvo Shimmer Pen
Wink of Stella
Clear heart resin sticker - Stampin' Up
Copic marker
Stickles
#6 - Slimline Card
Patterned paper - Over the Rainbow, Recollections
Card stocks
1018 Winter Charms - Karen Burniston
Sakura white gel pen
Stickles
Copic markers
Snowflake embellishments - Stampin' Up
Double Pierced Hills - Your Next Stamp
Snowflake embossing folder - Cuttlebug
Stamps on front - Merry Christmas to All, Stampin' Up (retired)
Torn mask and
I-crafter blending brushes
Tree punch - McGill??
Greeting inside - October 2020 Paper Pumpkin
#7 and 8 - Tag duo
Candy cane embellishment - trimmed from long K & Co border sticker I've had for years.
Bakers Twine
Candy cane embellishment - trimmed from long K & Co border sticker I've had for years.
Bakers Twine
Thanks for stopping by today
Looks like a fun kit, love your creations
ReplyDelete