Showing posts with label Whimsy Stamps. Show all posts

Monday, 27 January 2025

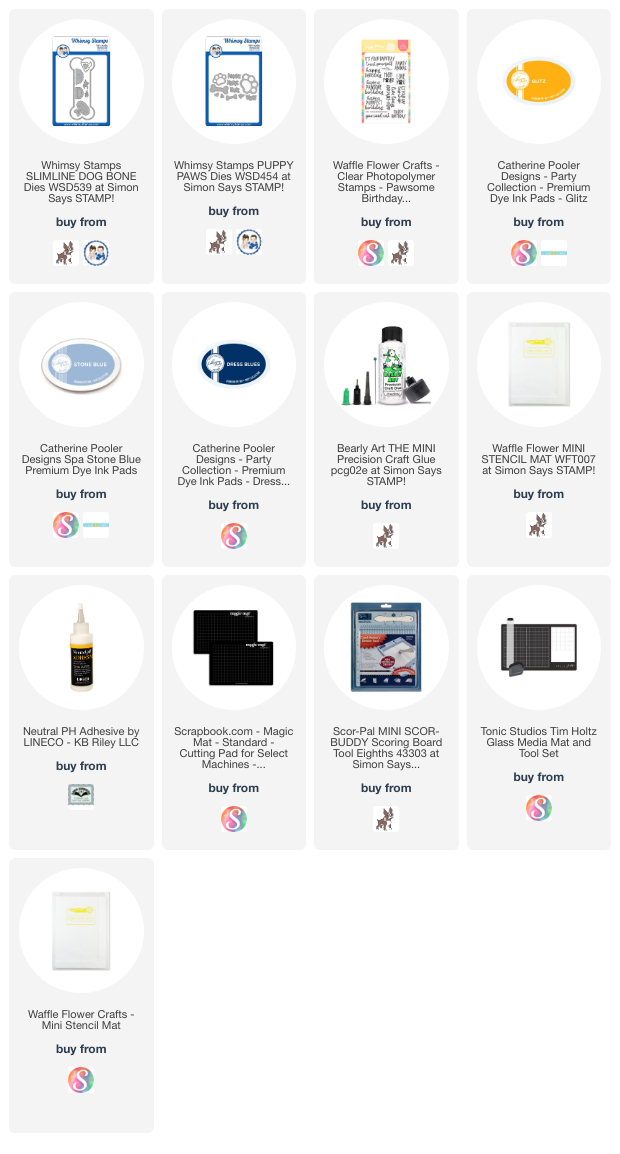
Slimline 'New Dog' Card


It's Masculine Card Monday here on my blog, and today I'm sharing the card I made for friends who welcomed a new dog into their family.

It was fun to pull out this bone shaped slimline die set (Whimsy Stamps) for their card. Slimline cards are hard to photograph in a normal square shape for social media, so in the photo below I inserted a pic of the inside, where we wrote our personal message.


Supplies used:
Slimline Dog Bone set - Whimsy Stamps
Patterned paper - Gilded Ink, Recollections
Words/Dog stamps - Dog Happiness, Frantic Stamper
Hearts - Hero Arts
Pops of Color - Scrapbook.com

Wednesday, 23 October 2024

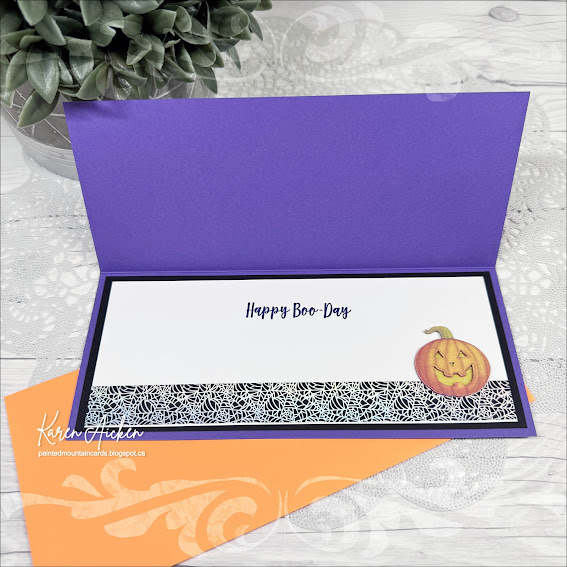
Halloween Slimline Duo


I love making Halloween cards - and when I went through my bin to get this years ready to mail, I didn't have enough! Which surprised me as I usually have lots leftover at the end of October each year. I pulled out this Slimline paper pad,  found two panels that would work for Halloween and these are the cards I came up with.

I have had these 3-d elements in my stash for YEARS. I probably hoarded them for the first couple of years but I'm over that and have been making an effort to USE my supplies and not trying to make them last for the rest of my life. Ha.


Aren't these ones cute? The frogs came with the googly eyes - so fun. I added a stamped sentiment with thin foam tape to finish off the card front.


I stamped the sentiment on a white panel that had holographic washi tape wrapped around the bottom edge (another item from my stash) and added another pumpkin element. The panel was matted with black and added inside the card.


I chose a different package of elements for the second card, and added the die cut BOO instead of a stamped sentiment.


It's hard to see in the photo, but the purple BOO layer was sprayed with Shimmer Spray.


The inside was done the same as the first card ...


Supplies used:
Patterned paper panel - Slimline Paper Pack 'Enchanted Forest", Whimsy Stamps
3-d Elements - old, from my stash
BOO die - Photoplay
Shimmer Spray
Inside greetings - Papertrey Ink
Catherine Pooler coloured inks
Sponge dauber - Ranger
Washi tape - old, from my stash
Happy Boo day - Sassy Pants Spooktacular, MFT Stamps


Friday, 28 June 2024

Holiday Slimline Wiper Card Duo


Welcome to Fun Fold Friday here on my blog!  I have two more holiday cards to add to my bin for Christmas 2024 - these ones are Slimline sized Wiper Cards and I have a walkthrough of these on YouTube


I used Slimline sized patterned paper along with a Wiper Card die set made for a 5x7" card - I love getting more uses out of my dies.  I also used the 'Above It All' stamp/die bundle that I got from Stampin' Up last year. Since we live in the foothills of the Rocky Mountains, I knew I could use this die set year round. You can take the gondola up to the top of Tunnel Mountain in Banff in the Spring & Summer for some spectacular views. Also in summer you can also take a gondola up Sunshine Mountain to hike around on top of the ski hill to see all the beautiful wildflowers.

In the photo above, you can see the card fronts and the piece that comes out when you pull on the sides. In the photo below you can see the back sides of both cards when they are closed. Yes, even though the papers are exactly the same the position of the prints are slightly different - I explain that in my video. Hint - I have a REALLY hard time making Wiper Cards - they just don't make sense in my brain. Ha.


Finally, the lower photo shows the back of the card in the open position.


Note - I lined up the die onto the right side of the papers and held it in place with removable tape before die cutting (I showed this in the video). Also, I trimmed about 1/4" from the top of the wiper piece and rounded the corners so it fit inside the card a little better. Since the card size is smaller than the 5x7" that the die was designed for I needed to make that adjustment. That part was easy peasy! 


Supplies used: 
Patterned paper - Slimline paper pack, Frozen - Whimsy Stamps
5x7" Rectangle Wiper Card die set - Sam Calcott, Made To Surprise/Mixed Up Crafts
Corner rounder
Push here - Lawn Fawn
Labels Crosshatch - Karen Burniston
Catherine Pooler coloured inks
Above it All stamps & dies - Stampin' Up
Silver Snowflake peel off stickers


Monday, 29 April 2024

Dog Bone Shaped Sympathy Card


I decided to make a pet sympathy card to have on hand, so pulled out the Slimline Dog Bone die from Whimsy Stamps. I also made it into a shaped card! To do this I die cut the bone three times. Twice from white card stock and once from the rainbow slimline patterned paper. After doing the stamping on the rainbow piece and adding the die cut dog, I adhered it to one of the white bones. For the remaining white bone, I scored those top bumps about 1/4" down from the top. Adding adhesive ABOVE the score line I attached the two pieces together. Ta dah - a shaped top folding card!


Now if I'd been smart, I would have done the inside stamping before I adhered the back to the card front. Instead, I stamped on a fishtail banner and adhered it over a scrap of the rainbow paper inside.


One more look ...


Supplies used:
Patterned paper -  Rainbow Magic Slimline paper pad,  Whimsy Stamps
Slimline Dog Bone die set - Whimsy Stamps
Pawfect Sentiments - Waffle Flower
Get Grounded stamps - Ink Blot Shop
Critter Condolences - MFT Stamps
Wink of Stella

Wednesday, 7 February 2024

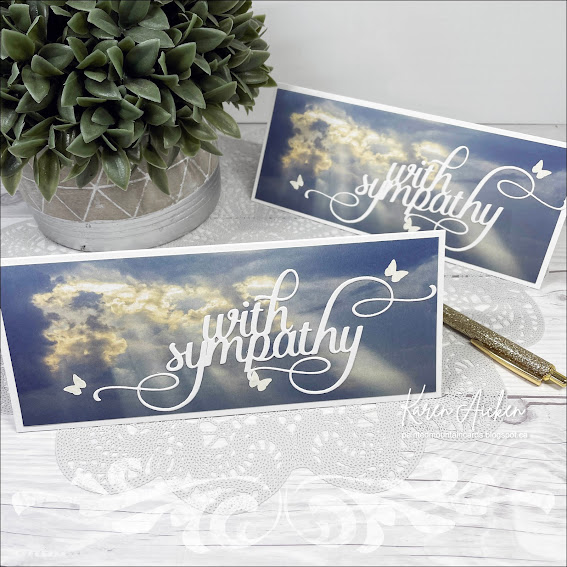
Slimline Sympathy Card Duo


I had been flipping through some of my Slimline paper packages to see what would work with the Grassy Grove forest die (see the last card I made with that die HERE). When I saw this beautiful cloud piece with the sun rays streaming through - I knew I wanted to make it into a sympathy card. Since there were two of the same prints in the package, I ended up making two cards.

I like butterflies on a sympathy card, so I pulled out an older punch that punches the tiny butterflies as well as a medium sized one. Adding three of the tiny butterflies to each of the card fronts, I gave them a bit of shimmer with Wink of Stella.


Inside, I stamped the sentiment on a scalloped panel, and added a medium butterfly that was inked with the same blue ink & a blending brush. Then I added two more butterflies using the negative punched piece as a stencil.  


Supplies used:
Patterned paper - Glorious Sky Slimline Paper - Whimsy
Slim Oversized With Sympathy die, Picket Fence Studios
Butterfly Punch - Martha Stewart (old)
Wink of Stella
Slimline Lacy Layers - Waffle Flower
Wink of Stella
Sentiment - Inside Out Sympathy, Catherine Pooler
Small blending brushes
Catherine Pooler coloured inks

Friday, 17 November 2023

Pet Sympathy Card


Welcome to Fun Fold Friday here on my blog.  I had to make another pet sympathy card for friends who had to say goodbye to their fur baby. It had come as a surprise to me, and I was feeling pretty down while making the card - so it's fairly simple on the front. I used a printed panel from The Little Book of Muddy Paws that I have been using so much this year, a simple grey mat, mirrored hearts and a stamped sentiment.


Inside I used Karen Burniston's Heart Collage Pop Up which creates a flurry of hearts when you open the card. A heart border and paw print outline, as well as a stamped sentiment finished off the card. 


Having been asked how many cards I make I thought it would be fun to keep track this year. Many of my posts include more than a single card or project and below is my tally. 

Card Tally for 2023
January - 53 cards
February - 56 cards
March - 55 cards
April - 32 cards
May - 43 cards
June - 34 cards
July - 56 cards
August - 106 cards
September - 61 cards
October - 51 cards & 5 Tags
November so far - 19 cards

I decided to cancel the subscription that provided linked thumbnails to what products I used on my cards. It was costing me out of pocket each month, so I’m back to listing what I used with a few affiliate links included.

Supplies:
5 x 7" Card Blank & Envelope 
Little Book of Muddy Paws - Hunkydory
Small blending brushes - I-crafter
Shimmer Spray
Short Rectangles Crosshatch - Karen Burniston
Best Friend (Poodle stamp) - Waffle Flower
Pawfect Sentiments - Waffle Flower
Paw Print - Puppy Paws, Whimsy Stamps
Nuvo Glaze

Tuesday, 8 August 2023

August 2023 Sheetload of Cards

I am in love with the August 2023 Sheetload of Cards and I can say it's my new favourite! I always know it's a great Sheetload when I want to make another set right after completing my first one. For this one though? I hadn't even assembled the pieces before I was rooting around for more papers to cut up. I have a set of Doodlebug papers & borders cut for a Thanksgiving set and some cheerful rainbow Christmas trees cut for holiday cards. You can see all the details of these Birthday Cards in my YouTube video:  


I thought the greeting would be cute on a die cut cloud, so that is what I did for the first four cards.

The next four cards have the striped paper as the diagonal strip and I wanted something more than just a cloud. Adding a die cut sun was just what I was going for and these cards make me HAPPY.


I added the same sentiment inside all eight of the cards and these ones are ready to go to my Mom's old nursing home. I am going to cut a bunch more from different papers to have ready to assemble, as this Sheetload goes together SO quickly! 😊


If you are wanting to download your own Sheetload of Cards, check out Call Me Crafty Al's YouTube video HERE.

Having been asked how many cards I make I thought it would be fun to keep track this year. Many of my posts include more than a single card or project and below is my tally. 

Card Tally for 2023
January - 53 cards
February - 56 cards
March - 55 cards
April - 32 cards
May - 43 cards
June - 34 cards
July - 56 cards
August so far - 23 Cards

I decided to cancel the subscription that provided linked thumbnails to what products I used on my cards. It was costing me out of pocket each month, so I’m back to listing what I used.

Supplies:
Patterned paper - Lets Party, Echo Park (Double sided)
Cloud & Sun dies - Up In The Clouds - Whimsy
Happy Birthday - Happy Cat, Your Next Stamp
Catherine Pooler Inks
Various cardstocks

Wednesday, 12 July 2023

Circle Shaped Card


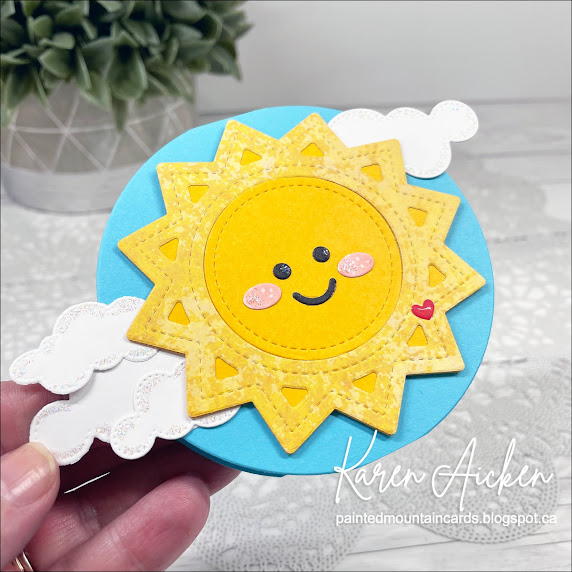
This is the 7th edition to my monthly series 'Shaped Cards'. This time I made a simple circle shaped card, decorated with a cheerful sun and some clouds. 

Below you can see that I trimmed off a small strip from the bottom edge - that allows the card to stand for display. The words inside are from Karen Burniston's Word Set 6 Summer and I added the tiny enamel heart. This card was for our youngest grandchild to celebrate the end of the school year! Thus, the extra glitter and sparkle 😊


To make the card base, I used a 3-3/4" circle die, with the 4x4" folded card base just under the edge of the die. That meant that the fold remained after I cut the circle ... thus a simple shaped circle card!


Having been asked how many cards I make I thought it would be fun to keep track this year. Many of my posts include more than a single card or project and below is my tally. 

Card Tally for 2023
January - 53 cards
February - 56 cards
March - 55 cards
April - 32 cards
May - 43 cards
June - 34 cards
July so far - 15 cards

Additional Supplies:
Bright yellow cardstock - stash
Yellow cardstock - stash
White cardstock - stash
Turquoise cardstock - stash
Scrap of yellow patterned paper - unknown

This blog uses affiliate links whenever possible. This means, if you make a purchase through one of my affiliate links that you pay the same amount but I may receive a small commission from your purchase. I only link products that I own, love and use for my card making and not every link below is an affiliate one! 😊 
 

Thursday, 1 June 2023

Paper Pumpkin Alternates, Easter Card Trio


Yes, I'm still sharing Easter cards. 😊  I had been working on this Paper Pumpkin kit in early Spring and thought I would make some of them into Easter cards. A few I sent out this year and the others I will hold onto until next year.  Between the daffodils and the bunny ... I couldn't help but make Easter cards!


The inside sentiments are Mini Strips (stamp and die) by Taylored Expressions. I did the inside of all three cards the same.


I'll be back next week with another alternate project with this kit!

Having been asked how many cards I make I thought it would be fun to keep track this year. Many of my posts include more than a single card or project and below is my tally. 

Card Tally for 2023
January - 53 cards
February - 56 cards
March - 55 cards
April - 32 cards
May - 43 cards
June so far - 3 cards

Additional Supplies:
No Matter The Weather Paper Pumpkin kit, March 2020
5 x 6.5" card base and envelope - Michaels
Patterned paper - Blank Canvas, 1st Edition (old, from my stash)
Rainbow Holographic Cardstock - Michaels
Happy Easter to You - io (Impression Obsession) 
Alcohol markers
White cardstock

This blog uses affiliate links whenever possible. This means, if you make a purchase through one of my affiliate links that you pay the same amount but I may receive a small commission from your purchase. I only link products that I own, love and use for my card making and not every link below is an affiliate one! 😊

Monday, 24 April 2023

'Jump for Joy' Slimline Card


This is one of those cards that I wish I'd taken a short video of, as the foiling looks so pretty in person. To my eye, the photos look rather lifeless as compared to how it looks in real life! I know Easter is behind us, but I had this idea and didn't get a chance to make it to send out for Easter 2023. So now I'm ahead for next year 😂.  This whole card started with Lawn Fawn's cloud hot foil plate and Spellbinders reverse foil plate. I am going to really enjoy the foiled clouds ... just need some more time to play with it.

The Slimline background is a die set by Whimsy stamps, and as I was creating the scene I just kept pulling things out to add to it. The Jump For Joy seemed to be perfect to use with those bunnies. It comes with a shadow die, but I didn't use this time. It was cut from a leftover piece of mirrored card stock for additional shine.


Inside I used a scalloped die to cut white cardstock, inked the edges and stamped a sentiment. Then I added a few more die cuts to dress it up a little and my card was done.


Having been asked how many cards I make I thought it would be fun to keep track this year. Many of my posts include more than a single card or project and below is my tally. 

Card Tally for 2023
January - 53 cards
February - 56 cards
March - 55 Cards
April so far - 26 Cards

Additional Supplies:
Shimmer Spray
Mirrored card stock - Mirri Damask, Hunky Dory
White cardstock
Easter sentiment - Verses Stamps

This blog uses affiliate links whenever possible. This means, if you make a purchase through one of my affiliate links that you pay the same amount but I may receive a small commission from your purchase. I only link products that I own, love and use for my card making and not every link below is an affiliate one! 😊

Friday, 21 April 2023

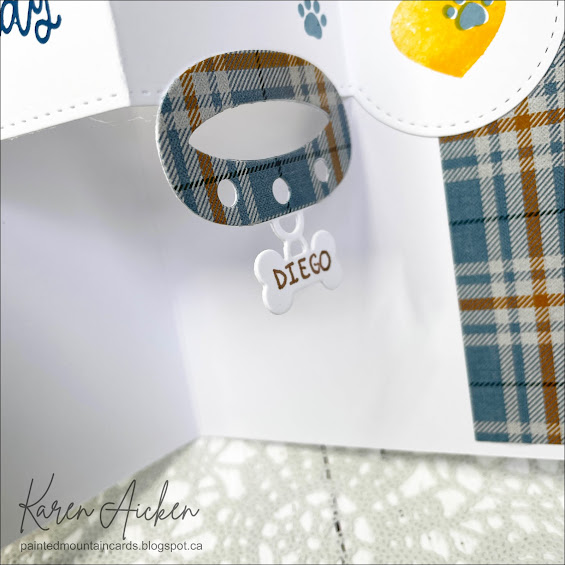
Pop Up Bone Card


It's Fun Fold Friday here on my blog!  Friends of ours had a birthday party for their dog Diego, who was turning EIGHTEEN! Many of their dog loving friends joined the celebration, and the dogs wore party hats while they ate their 'ice cream' and dog birthday cookie/cake.  We didn't bring our two dogs, only because it would have been too many people for Willow. She is not a people person, strangers scare her and why stress her out? We had fun, and of course I had to make little Diego a card for his birthday. First time I've ever made a dog a card, ha ha. 


Pulling out this printed panel from the Little Book Of Muddy Paws (Hunky Dory), because the colouring is so similar to Diego), I added it to a plaid panel then to a 5 x 7" card.  

Inside I added a pop up, created with the Slimline dog bone die from Whimsy. I folded it into 4ths and adhered the two outer edges inside the card making sure that nothing stuck out when the card was folded. The PAWTAY die was included with the bone set and I thought I would never use it. Ha - couldn't miss this opportunity!


I added the collar/tag along the bottom edge of the bone so it sort of dangled in the space. I hope that I'll be making Diego a 19th Birthday card next year too!


Having been asked how many cards I make I thought it would be fun to keep track this year. Many of my posts include more than a single card or project and below is my tally. 

Card Tally for 2023
January - 53 cards
February - 56 cards
March - 55 Cards
April so far - 25 Cards

Additional Supplies:
5 x 7" Card blank and envelope
Traditional Tartan & Rustic Wood patterned paper - Hunky Dory
Little Book of Muddy Paws, Hunky Dory
Brown fine point marker
Navy cardstock scrap

This blog uses affiliate links whenever possible. This means, if you make a purchase through one of my affiliate links that you pay the same amount but I may receive a small commission from your purchase. I only link products that I own, love and use for my card making and not every link below is an affiliate one! 😊

Friday, 10 March 2023

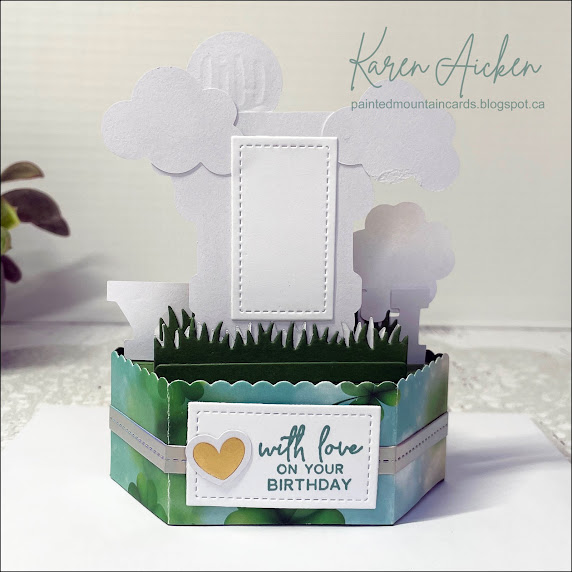
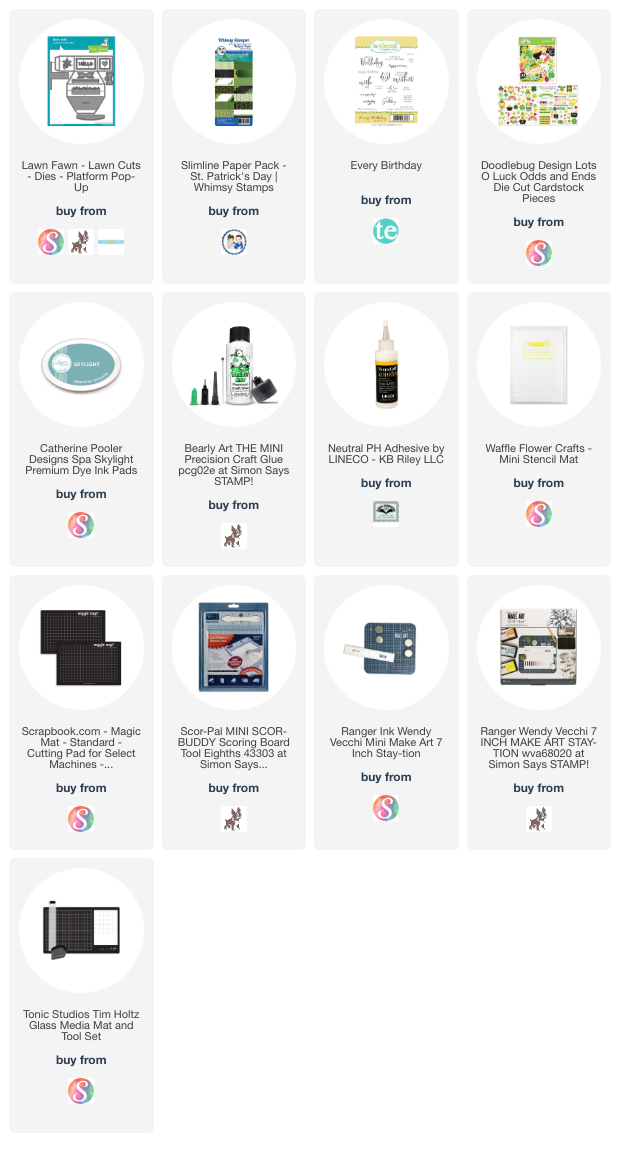
Platform Pop Up Card for a St. Patrick's Day Birthday


It's Fun Fold Friday here on my blog, and I'm sharing the third edition to my series "Platform Pop Up". Every year I make my friend Kelly a St. Patrick's Day birthday card so this one went to her.

I used a Slimline Paper pad by Whimsy Stamps and elements from Doodlebug for the card. I love the happy colours and touches of gold foiling on the elements.


Adding that stitched rectangle to the back helps stabilize the elements as well as giving me a place to write a personal message.


The whole thing folded flat to pop into a envelope for mailing. 


Having been asked how many cards I make I thought it would be fun to keep track this year. Many of my posts include more than a single card or project and below is my tally. 

Card Tally for 2023
January - 53 cards
February - 56 cards
March so far - 18 Cards

Additional Supplies:
Green cardstock
Rainbow Holographic cardstock - Recollections

This blog uses affiliate links whenever possible. This means, if you make a purchase through one of my affiliate links that you pay the same amount but I may receive a small commission from your purchase. I only link products that I own, love and use for my card making and not every link below is an affiliate one! 😊

Monday, 27 February 2023

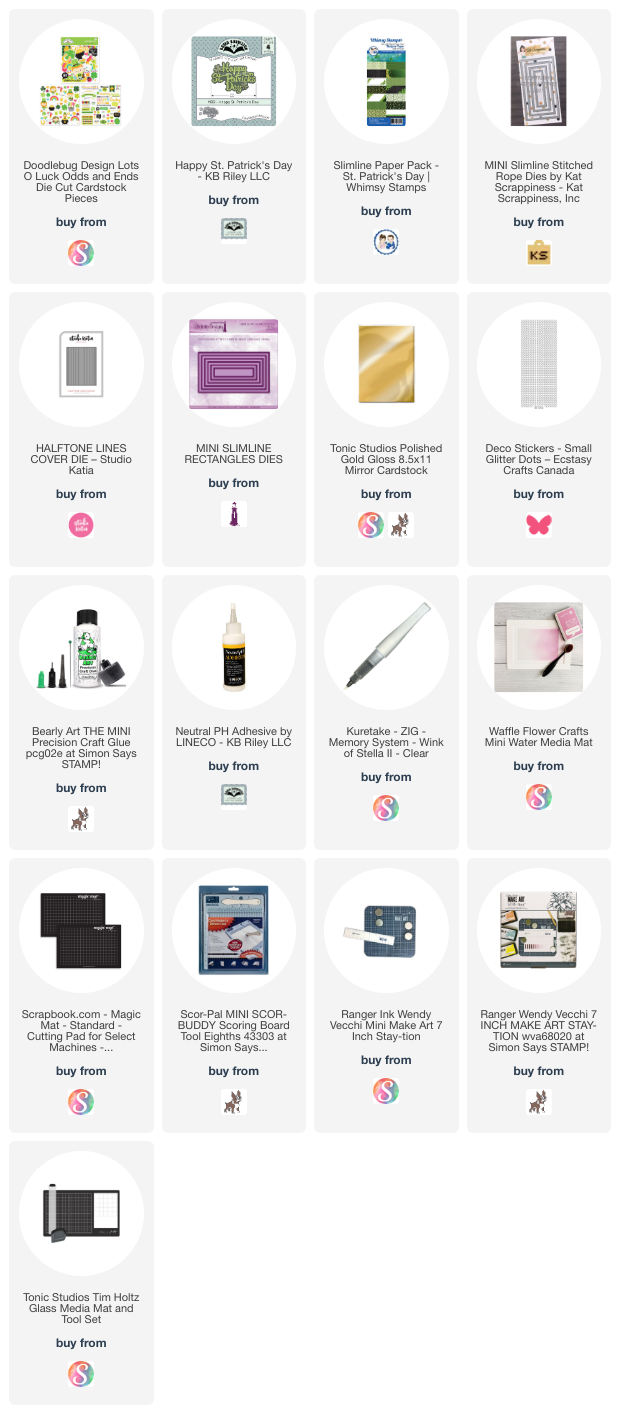
Mini Slimline Cards for St. Patrick's Day


I actually made these cards last year, as I like to send the grandkids cards for St. Patrick's day as they love happy mail. But I often run out of time to get them made and in the mail so this year I am ahead of the game. Ha. I pulled out a Slimline patterned paper pad from Whimsy Stamps, some puffy stickers ($ Store) from my stash and this is what I came up with.


There are SO many elements in those Odds & Ends packages by Doodlebug ... it was fun going through the package and adding some to my cards. Two of the cards are Pop Up's made with a folded cardstock strip.


Lots of sparkle and shine from the gold foiling on the stickers and ephemera, and I added gold  Peel Off stickers too.
 

Late last year I was asked how many cards I make but I didn't have a clear number. Since many of my posts include more than a single card or project, I thought it would be fun to keep track this year. 

Card Tally for 2023
January - 53 cards
February so far - 55 Cards

Additional Supplies:
3D Stickers - Dollar Store, old from my stash
Gold circle Stickers - Dazzles
White cardstock
Shamrock Washi tape - Doodlebug
Green fine point markers

This blog uses affiliate links whenever possible. This means, if you make a purchase through one of my affiliate links that you pay the same amount but I may receive a small commission from your purchase. I only link products that I own, love and use for my card making and not every link below is an affiliate one! 😊