Showing posts with label Series: New Fun Folds. Show all posts

Friday, 15 December 2023

Circle Gatefold Shaker


Welcome to Fun Fold Friday here on my blog. Today I'm sharing the 12th and final edition of my Monthly Series "New Fun Folds" and I used a new die set by Studio Light for this one. It's called Circle Shutter Card Essentials and I bought it in the fall from Ecstasy Crafts when I was ordering some Glitter Dots. I must have been in a shopping mood that day, as I ended up ordering a couple of card die sets! This was my first play with using one and I knew I wanted to use more of that pretty wintery scene patterned paper for my card.


I had also ordered the coordinating circle shaker blisters so decided to break those out too. This card took a little bit more thought and preparation than I am used to - I'm a craft-by-the-seat-of-my-pants type of card maker. It was worth it though and I knew just who I was making the card for.


This type of card - where you see the inside even when the card is closed - is truly outside of my comfort zone but now that I have one under my belt I will have fun playing with this die set in the New Year.


I added a panel to the back side which is where we wrote our personal greeting. 


... one more look ...


Having been asked how many cards I make I thought it would be fun to keep track this year. Many of my posts include more than a single card or project and below is my tally. 

Card Tally for 2023
January - 53 cards
February - 56 cards
March - 55 cards
April - 32 cards
May - 43 cards
June - 34 cards
July - 56 cards
August - 106 cards
September - 61 cards
October - 51 cards & 5 Tags
November - 46 cards
December so far - 15 cards (& 16 simple tags)

I decided to cancel the subscription that provided linked thumbnails to what products I used on my cards. It was costing me out of pocket each month, so I’m back to listing what I used with a few affiliate links included.

Supplies:
Circle Shutter Card Essentials - Studio Light
Frosted Christmas Solids
Peel Off's - Ecstasy Crafts
Shaker Blisters - Studio Light
Various shaker filler - stash
In & Out Christmas stamps - Taylored Expressions
Catherine Pooler Inks

Friday, 3 November 2023

Heart Flip Style Card for Thanksgiving


Welcome to Fun Fold Friday here on my blog. A few months ago I was placing an order at Ecstasy Crafts (Ontario Canada) for some Glitter Dots and Peel Off border stickers. They also carry the Studio Light line and I ended up adding a couple of those fun fold die sets to my online cart. This is one of them - the SL Heart Essentials die set. This is also the November edition to my monthly series "New Fun Folds".


It folds 'backwards' to any of the Flip-It cards I have made before and is also smaller than A2. This one creates a 4" square card which fits nicely in an A2 envelope. While initially I wasn't sure how I felt about it, once I made the card up I was quite happy with it. I actually made a video walkthrough but it has since disappeared. So instead I have a video showing how the card looks from different angles.

I used some years old patterned paper and 3-d border stickers from my stash as well as some narrow gold tape for some shimmer. And those Glitter Dots as well!


The acorn is an older Stampin' Up punch and I love getting it out for my fall cards.


Having been asked how many cards I make I thought it would be fun to keep track this year. Many of my posts include more than a single card or project and below is my tally. 

Card Tally for 2023
January - 53 cards
February - 56 cards
March - 55 cards
April - 32 cards
May - 43 cards
June - 34 cards
July - 56 cards
August - 106 cards
September - 61 cards
October - 51 cards & 5 Tags
November so far - 7 cards

I decided to cancel the subscription that provided linked thumbnails to what products I used on my cards. It was costing me out of pocket each month, so I’m back to listing what I used .

Supplies:
Patterned paper - Amber Moon, Prima (old)
SL Heart Essentials - Studio Light
Narrow gold tape - Amazon
Catherine Pooler Inks
Blending Brushes - Taylored Expressions
Give Thanks - Give Thanks Sentiments, Catherine Pooler
Thanksgiving Blessings - Taylored Expressions
Gold mirror cardstock
3D border stickers - old, from my stash
Acorn punch - Stampin' Up
White paint pen
Sticker on envelope - Mambi
Washi Tape

Friday, 13 October 2023

Halloween Book Easel Card


It's Fun Fold Friday here on my blog and todays card is for the October edition of my Monthly Series "New Fun Folds". I admit to purchasing this die set on a whim - I had some staples in my online shopping basket at R&R Scrapbooking and was randomly scrolling through pages. I have probably looked at this die set many times but on that day it really appealed to me. 

Add To Cart 😂


I have lots of ideas for it and had fun making this one up for Halloween. Initially I wanted to make a 'Book of Spells" ... but it morphed into a cute Halloween Easel Card instead. The Book of Spells is still on my list of ideas though!


The papers and ephemera are all by Doodlebug and have been in my stash for a long time. I  added a sparkly spider sticker as well. The wings on the bat element got some sparkle using a Wink of Stella pen and the black ribbon is also sparkly. 

While I did add foam tape to each of the page layers, I used thin foam tape so the card would be mailable. The lift to the pages shows better in real life. If I were hand delivering the card, I would use thicker foam tape. One of my ideas is to make a music book for our granddaughters piano teacher at the end of the year and for that one I will be using lots of foam tape!


Below is a peek at the inside, and where I will write my personal message when I send this card off to a paper crafting friend. The 'Boo To You' is one of the punch out elements that were included on a 12 x 12" sheet in the sample Doodlebug package and was popped up with foam tape to act as the bumper for the Easel part.

The card base itself was easy peasy - black cardstock cut 10 x 7" and scored at 5" to create a 7 x 5" card. The front was scored at 2.5" across the 7" side and the assembled book was adhered to the bottom flap - not crossing that 2.5" score line. That way it stands up nicely for display!


The card folds flat for mailing and fits in a standard 5 x 7" envelope.


Having been asked how many cards I make I thought it would be fun to keep track this year. Many of my posts include more than a single card or project and below is my tally. 

Card Tally for 2023
January - 53 cards
February - 56 cards
March - 55 cards
April - 32 cards
May - 43 cards
June - 34 cards
July - 56 cards
August - 106 cards
September - 61 cards
October so far - 20 cards

I decided to cancel the subscription that provided linked thumbnails to what products I used on my cards. It was costing me out of pocket each month, so I’m back to listing what I used.

Supplies:
Beautiful Book Pages - Moonstone (Hunkydory)
Patterned paper & punch outs - Doodlebug Designs (old variety pack)
Black Sparkle Ribbon - Stampin' Up
Stickers - Dollar Store
Nuvo Glaze
Wink of Stella

Friday, 29 September 2023

Autumn Greetings Zig Zag Card


It's Fun Fold Friday here on my blog, and I'm sharing a card made with a new die set - the Zig Zag Card Essential set by Studio Light. I was placing an order from Ecstasy Crafts and 'somehow' added a couple of new die sets to my shopping cart in addition to the Glitter Dots I was ordering. 😂. Since the die creates a fun fold card, it's also the September edition to my monthly series "New Fun Folds I have all the details in my YouTube video


Below you can see the card open and likely how it will be displayed ...


I like how the card folds up for mailing and this one fits in an A4 envelope (sized for a 4 x 6" photo), but if I didn't already have some I could easily make my own or size up to an A6 envelope.


Having been asked how many cards I make I thought it would be fun to keep track this year. Many of my posts include more than a single card or project and below is my tally. 

Card Tally for 2023
January - 53 cards
February - 56 cards
March - 55 cards
April - 32 cards
May - 43 cards
June - 34 cards
July - 56 cards
August - 106 cards
September so far - 61 cards

I decided to cancel the subscription that provided linked thumbnails to what products I used on my cards. It was costing me out of pocket each month, so I’m back to listing what I used with a few affiliate links included.


Supplies:
SL Circle Zig Zag Card Essential - Studio Light
Patterned paper - Amber Moon, Prima (old)
Gold mirror cardstock
Pumpkin and Acorn stickers - Recollections (old)
Sentiment - Autumn Greetings, Sunny Studio
Catherine Pooler inks
Blending brushes - Taylored Expressions
Twine
Gems - Color Essential Gold Mix, Spellbinders
Sparkly leaf sticker - Mambi Studios (stash)
Washi Tape on envelope - Amazon

Friday, 18 August 2023

Christmas Mini Slimline Tri Shutter Card


Today I'm sharing a card that works for a couple of my monthly series ... 12 Months of Christmas, and New Fun Folds! In the past 4 months, I had purchased exactly ONE new paper crafting item ... and this is it. It's the Mini Slimline Tri Shutter Die Set by Divinity Designs. I believe it was released in May, but I didn't end up ordering it until July. I have a number of the fun fold dies by Divinity Designs and I'm always impressed with them. Like the others, this one comes with the layering dies which makes it SO much quicker to complete your card. 


The base die cuts and scores your card stock and you can put the layering dies on your patterned paper(s) to take advantage of whatever print you are working with.  I cannot wait to play with this some more. The finished card (folded) is 3.5 x 6" - which is my preferred Mini Slimline size.


One more look ...


Having been asked how many cards I make I thought it would be fun to keep track this year. Many of my posts include more than a single card or project and below is my tally. 

Card Tally for 2023
January - 53 cards
February - 56 cards
March - 55 cards
April - 32 cards
May - 43 cards
June - 34 cards
July - 56 cards
August so far - 66 cards

I decided to cancel the subscription that provided linked thumbnails to what products I used on my cards. It was costing me out of pocket each month, so I’m back to listing what I used.

Supplies:
Double Stitched Circles - Divinity Designs
Patterned paper - The Four Seasons Winter, P13
Fluted Classics Circle dies - Spellbinders
Cozy Christmas Ephemra - My Minds Eye
Cardinal die - Impressions Obsession
Catherine Pooler Inks
Various cardstocks
Red glitter cardstock

Friday, 14 July 2023

Double Z Fold Cards (and Tutorial!)


I have a video tutorial to share today, for creating these easy Double Z Fold cards. While technically this isn't a NEW to me fun fold, I haven't made one in many years, so I'm counting it as the 7th edition to my monthly series "New Fun Folds". It's also Fun Fold Friday here on my blog!  You can find the YouTube video tutorial HERE: 


This first one is one of my July Ice Cream cards. Having ice cream on a certain day in July is a generational tradition and I've also been sending the family ice cream cards to celebrate that day for the past 20 years or so. If you would like to read more about the tradition, I wrote about it in THIS blog post.


I added both Pops of Color and Nuvo Glaze to two of the ice cream layers, then a tiny enamel heart. The letters for JULY also got a coating of Nuvo Glaze for lots of shine.


When I was doing the tutorial, I wanted to show how easy it is to change up what you add to the front. So I made a holiday card using a cut apart (or journal card) instead of the ice cream panel. So that also means this post is my 7th edition to the monthly series "12 Months of Christmas". 😊. Talk about packing a lot into a single post, ha ha.


I was actually so happy with how these cards turned out, I can't wait to make a few more for the holidays. Could be a great way to use up some of the scraps, partial sheets and leftover stickers I have laying around. 🤔🤔🤔

This card features a matted cut-apart on the front, and a stitched snowflake on the inner centre panel. You can decorate this panel - or not - it's up to you!

Measurements - assemble as shown in the video tutorial.

Card Base:  11 x 4.25", scored at 2.75 and 5.5"

Patterned paper for card base:  two at 2.5 x 4", one at 5.25 x 4"


Smaller Card Base:  9.75 x 3", scored at 4.25 and 7"

Patterned paper for smaller card base:  4 x 2.75" and two at 2.5 x 2.75"


Embellish the front as desired. You can add other layers or use embossing folders and coloured cardstock instead of patterned paper. Lots of ways to change this one up!


Having been asked how many cards I make I thought it would be fun to keep track this year. Many of my posts include more than a single card or project and below is my tally. 

Card Tally for 2023
January - 53 cards
February - 56 cards
March - 55 cards
April - 32 cards
May - 43 cards
June - 34 cards
July so far - 19 cards

Additional Supplies:
Patterned paper (including peach) Neapolitan, American Crafts (old, from my stash)
White cardstock
Ocean tides cardstock - Papertrey Ink (my stash)
Plaid patterned paper - Oh Canada, Flannel Shirt (Photo Play)
Cut Apart - Winter Meadow (Photo Play)
Shimmer Spray

This blog uses affiliate links whenever possible. This means, if you make a purchase through one of my affiliate links that you pay the same amount but I may receive a small commission from your purchase. I only link products that I own, love and use for my card making and not every link below is an affiliate one! 😊
Sunday, 18 June 2023

Birthday Balloons Wiper Card


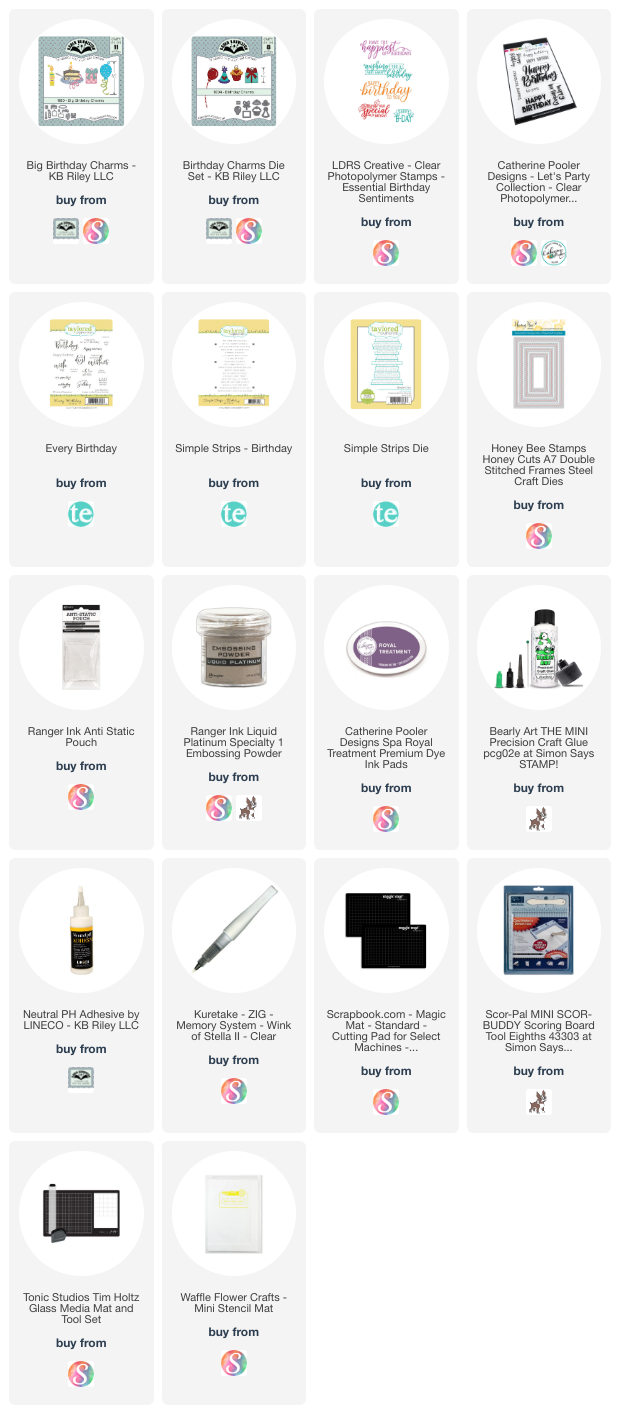
Today I'm sharing the 6th edition to my Monthly Series: New Fun Folds. I got this die set for my February Birthday, and while I played with it in early March I'm just now getting the card shared. I was saving it for this edition, as it IS a new (to me) fun fold die set. It is the "5 x 7" Wiper Card" die set by Sam Calcott at Mixed Up Crafts. We had been in Arizona over my birthday so I was able to get the set with my birthday $$ from Craft Stash US. 


When you pull on the sides, a decorated piece pops up over the top edge. I have been having a lot of fun with this scenic patterned paper, which was a 'free with purchase' from Stampin' Up. I added the Celebrate (Karen Burniston) and die cut balloons (Lawn Fawn). The balloons were die cut from rainbow holographic card stock and I added the highlights with a white paint pen.


Adding a white panel on the back gave me lots of room for a large stamped sentiment and a couple of balloons.


Having been asked how many cards I make I thought it would be fun to keep track this year. Many of my posts include more than a single card or project and below is my tally. 

Card Tally for 2023
January - 53 cards
February - 56 cards
March - 55 cards
April - 32 cards
May - 43 cards
June so far - 20 cards

Additional Supplies:
5 x 7" Rectangle Wiper Card Die Set - Mixed Up Crafts
Green cardstock
White cardstock
Pull stamp - SU Paper Pumpkin Feb '17 'Many Happy Birthday's
Patterned paper - Enjoy the Journey, Stampin' Up
Rainbow Holographic cardstock - Recollections

This blog uses affiliate links whenever possible. This means, if you make a purchase through one of my affiliate links that you pay the same amount but I may receive a small commission from your purchase. I only link products that I own, love and use for my card making and not every link below is an affiliate one! 😊


Wednesday, 10 May 2023

Faux Step Mother's Day Card


I have wanted to try one of these faux step cards for AGES, so I created a 5 x 7" version. This one was sent to my Mother In Law for Mother's Day and is the 5th edition to my monthly series "New Fun Folds". 


One of the reasons I was intrigued by this faux version ... and the reason I never invested in a step card die set (or side step as they are sometimes called), is that the cards usually collapse and don't display nicely for very long. This faux version seemed to be a good way to ensure that didn't happen, and it does work a lot better. 

Since I was happy with how sturdy they are I decided to make another one (to be shared another day) but I added the sentiment panel to the back side and added an accordion strip inside that holds the card upright. That, to me, was the perfect solution - and now I will be making more of this type of card.


I have had this patterned paper pad for many years - it has embossed shiny bits on it and is so pretty! Adding Karen Burniston's Happy Mother's Day, some stitched foliage and butterflies cut with rainbow holographic cardstock gives the card even more shine.


Inside I added a matted sentiment panel with a stamped sentiment and another little butterfly.


I didn't have a chance to do a tutorial, but below are my measurements.

Card base - 9 x 7", scored down the 9" side at  1.5", 3" and 6"

Patterned paper - 6.75 x 2.75"

Top folded piece - 10 x 4", scored at 5"

Refer to the photos for what the folding & placement looks like. If you are unsure use some older paper or cardstock to make a prototype! I will try to do a tutorial but it won't be until summertime.

Having been asked how many cards I make I thought it would be fun to keep track this year. Many of my posts include more than a single card or project and below is my tally. 

Card Tally for 2023
January - 53 cards
February - 56 cards
March - 55 Cards
April - 32 Cards
May so far - 23  Cards

Additional Supplies:
White cardstock
Blue cardstock
Patterned paper - Water Colour Bouquet, K & Co (old from my stash)
Happy Thoughts stamp set - Stampin' Up
Rainbow Holographic cardstock - Recollections
Heart - leftover from a different project and sitting on table

This blog uses affiliate links whenever possible. This means, if you make a purchase through one of my affiliate links that you pay the same amount but I may receive a small commission from your purchase. I only link products that I own, love and use for my card making and not every link below is an affiliate one! 😊


Friday, 7 April 2023

Fabulous Flip Birthday Card


This is my first play with a new to me die set, and it's also the 4th edition to my monthly series New Fun Folds! I received some fun dies for my birthday - this one is the 5 x 7" Flip Mechanism by Sam Calcott at Mixed Up Crafts. We were in Arizona at the time, so I was able to order from CraftStash US which worked out well.  I didn't purchase any craft supplies during the November Black Friday sales or at Christmas, so I was pretty happy to get some new goodies for my late February Birthday!


When you pull the frame panel to the right, a trio of sentiments is revealed. I kept things simple for this first card, but I am really looking forward to playing with this set a lot more. I have so many ideas!  I used some Mirri cardstock from Hunky Dory, so the frame panel is bright and shiny. Then I cut some of Karen Burniston's Big Birthday Charms from leftover pieces of the mirrored cardstock and loved how they turned out,.


Inside is a stitched frame, a stamped sentiment and a balloon from the same charm set.


One more look ...  The card stands nicely for display but it is a little front-heavy. My KB teammate Frances has had this die set for awhile and she made one with an accordion fold inside the card so it stands up more like a tent. I think I will try that idea next!


If you would like to see Sam's assembly video, click HERE.

Having been asked how many cards I make I thought it would be fun to keep track this year. Many of my posts include more than a single card or project and below is my tally. 

Card Tally for 2023
January - 53 cards
February - 56 cards
March - 55 Cards
April so far - 11 Cards


Additional Supplies:
Patterned paper - Mirri Card - Time to Celebrate, Hunky Dory
5x7” Flip Mechanism - Made to Surprise (Sam Calcott)
5 x 7” Card and Envelope
Wish Big, Taylored Expressions
Single Gem - leftover from Stampin' Up
Pull Stamp, Many Happy Birthdays (Stampin' Up Paper Pumpkin Kit)

This blog uses affiliate links whenever possible. This means, if you make a purchase through one of my affiliate links that you pay the same amount but I may receive a small commission from your purchase. I only link products that I own, love and use for my card making and not every link below is an affiliate one! 😊


Friday, 3 March 2023

Scrap N Stamp Canada March Inspiration Hop: "Baskets of Bunnies"


Welcome to the March Inspiration Hop by Scrap 'n Stamp Canada, with the theme 'Baskets of Bunnies'. They weren't able to get me any product for this hop, so I just pulled some older items from my stash and made a fun fold card. You can make this card with many of the items they have at Scrap 'n Stamp Canada though, so think of this more as a card idea you can make your own.


These Pull Out Fun Fold cards have been around for years and I have always wanted to make one. To put my own spin on it though, I created a Mini Slimline sized card! I didn't do a tutorial (I will have one later this month) but will list the basic measurements at the end of my post if you are curious.

Since it's a new (to me) Fun Fold with a new size - I'm counting this as the March edition to my series New Fun Folds!


The card has an aperture cut in the front and you can see through it to the inside. But when you open the card, you see that there is more to it ... the image inside is on sort of a reverse Z fold panel.


When you pull that panel to the right, another two panels are revealed. I added patterned paper to the center one and a stamped sentiment on the center one. The sentiment is from Lawn Fawns Magic Spring Messages which is a stamp set I got from Scrap 'n Stamp Canada awhile ago. Stamped in Catherine Pooler Ink, of course. The patterned paper and ephemera are by Echo Park.


I really enjoy making Mini Slimline cards, and finding ways to incorporate a fun fold into them. That being said, I also figured out the measurements for a 5 x 7" card which will be shared another day. And I will be doing this Mini Slimline one again soon! Below are my basic measurements:

Card Base: 7 x 6" - score in the centre at 3.5"

Pull out piece - 7.25 x 5.75", scored at 3.25 and 5.25"

Decorate the panels as desired (more details will be in my upcoming tutorial)


I hope you will check out the Scrap 'n Stamp Canada Blog, for a list of all the creators in the hop!


Late last year I was asked how many cards I make but I didn't have a clear number. Since many of my posts include more than a single card or project, I thought it would be fun to keep track this year. 


Card Tally for 2023
January - 53 cards
February - 56 cards

March so far - 12 Cards

Supplies:
Patterned paper - 'Spring' 6 x 6", Echo Park
Magic Spring Messages - Lawn Fawn
Blue ink - Hot Tub, Catherine Pooler
Ephemera, 'Easter' - Echo Park
Oval Stitched Rows - Divinity Designs
Stitched Circles - Divinity Designs
Corner Rounder - Creative Memories
Sequins - stash
Blue cardstock

Thursday, 16 February 2023

'Easy Gated Fun Fold' Cards


Today is the second edition of my series New Fun Folds. I was SO excited about this one, I went a little (ok, more than a little) crazy and made SIX different cards to share and a full video tutorial.  You can find my tutorial HERE:   


Since I went into all of the details in my video, I'll keep my comments here nice and short. 

This was the first card I made and the one that got me all excited about the this technique I had seen on Pinterest. It was a lovely Christmas card by Frenchie and I will link her video below if you are curious. Of course, I added my own spin to it since I'm not a Stampin' Up demonstrator I'm free to use anything I want to play with!


Both of these cards used half sheets of 12 x 12" patterned paper that I had leftover from previous projects. I loved using them up completely! The cactus card went to my Brother in Law for his birthday last month.

Then I pulled out a full 12 x 12" sheet and made two cards with it. I think it was the only sheet of that particular print I had - usually I purchase two when I buy a 12 x 12" sheet but for some reason I only had one of these. Instead of hoarding it (since I only had the one) I USED it up! Now I have two lovely fun fold Birthday cards for my stash.


Finally here are the two cards I assembled in the video tutorial. I thought this patterned paper would make lovely sympathy cards, and brought one to a friend as a gift when we went over for dinner. Turns out she needed a special sympathy card right away so I'm glad I brought it for her. 


While I do go over all the measurements in the video and also listed them in the video description - here they are again for reference:

Cut your double sided patterned paper 12 x 5.5" or 6" Score at 2", 4", 8" and 10" Inside layers for 5.5" height Mat layer 3.75 x 5.25" White layer 3.5 x 5" Inside layers for 6" height Mat layer 3.75" x 5.75" White layer 3.5 x 5.5"

Late last year I was asked how many cards I make but I didn't have a clear number. Since many of my posts include more than a single card or project, I thought it would be fun to keep track this year. 

Card Tally for 2023
January - 53 cards
February so far - 43 cards

***** HERE is the link to Frenchie's Easy gated fun fold *****

Additional Supplies
White cardstock
Corner Rounder - Amazon.ca
Floral paper (Card #1) Fresh Cut - Basic Grey
Roses patterned paper (Card #2) - Sweet Fairy Collection, Romantique
More Essential Sentiments - MFT Stamps
Cactus patterned paper - Charming Adventures (Wanderlust) American Crafts
Green, red, teal yellow cs scraps
Cactus dies - To The Point, Turnabout - Concord & 9th
Sympathy4You - the Stamps of Life
Doily - Stampin' Up
Roses patterned paper - last cards, K & Company 
3-D floral stickers - K & Company
Cactus Washi Tape - Doodlebug

This blog uses affiliate links whenever possible. This means, if you make a purchase through one of my affiliate links that you pay the same amount but I may receive a small commission from your purchase. I only link products that I own, love and use for my card making and not every link below is an affiliate one! 😊