Showing posts with label Mixed Up Crafts. Show all posts

Friday, 28 June 2024

Holiday Slimline Wiper Card Duo


Welcome to Fun Fold Friday here on my blog!  I have two more holiday cards to add to my bin for Christmas 2024 - these ones are Slimline sized Wiper Cards and I have a walkthrough of these on YouTube


I used Slimline sized patterned paper along with a Wiper Card die set made for a 5x7" card - I love getting more uses out of my dies.  I also used the 'Above It All' stamp/die bundle that I got from Stampin' Up last year. Since we live in the foothills of the Rocky Mountains, I knew I could use this die set year round. You can take the gondola up to the top of Tunnel Mountain in Banff in the Spring & Summer for some spectacular views. Also in summer you can also take a gondola up Sunshine Mountain to hike around on top of the ski hill to see all the beautiful wildflowers.

In the photo above, you can see the card fronts and the piece that comes out when you pull on the sides. In the photo below you can see the back sides of both cards when they are closed. Yes, even though the papers are exactly the same the position of the prints are slightly different - I explain that in my video. Hint - I have a REALLY hard time making Wiper Cards - they just don't make sense in my brain. Ha.


Finally, the lower photo shows the back of the card in the open position.


Note - I lined up the die onto the right side of the papers and held it in place with removable tape before die cutting (I showed this in the video). Also, I trimmed about 1/4" from the top of the wiper piece and rounded the corners so it fit inside the card a little better. Since the card size is smaller than the 5x7" that the die was designed for I needed to make that adjustment. That part was easy peasy! 


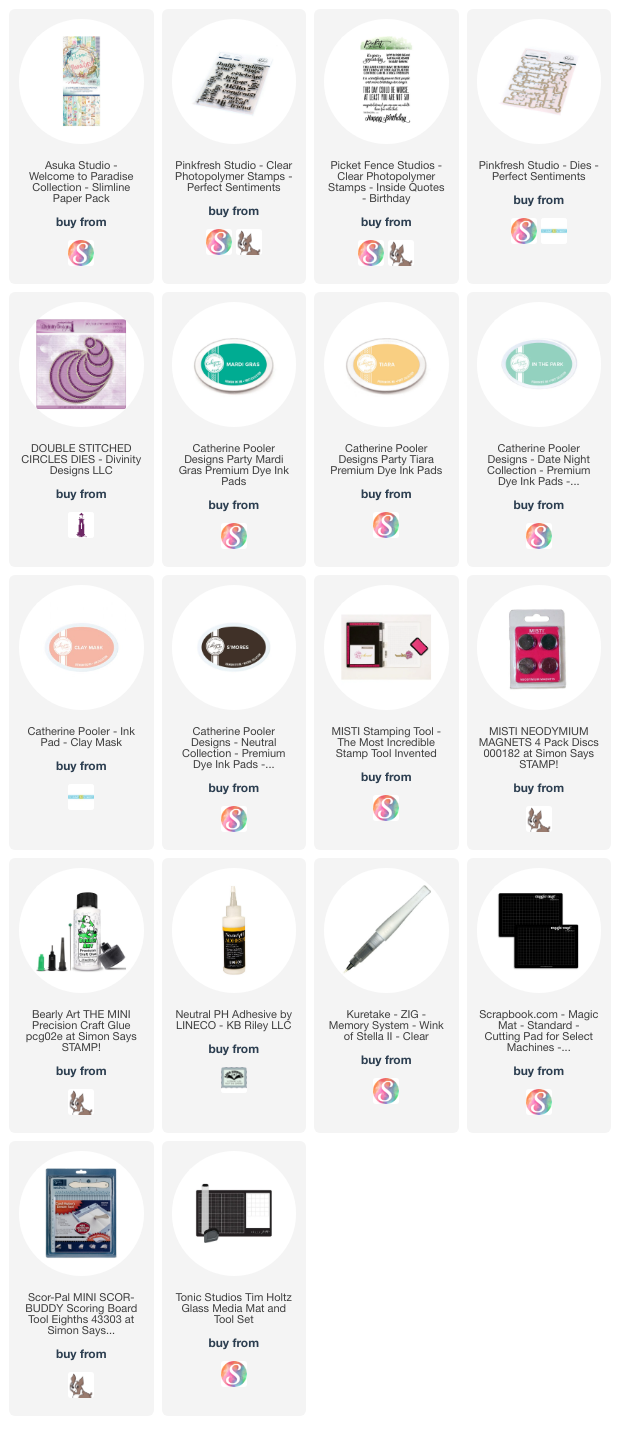
Supplies used: 
Patterned paper - Slimline paper pack, Frozen - Whimsy Stamps
5x7" Rectangle Wiper Card die set - Sam Calcott, Made To Surprise/Mixed Up Crafts
Corner rounder
Push here - Lawn Fawn
Labels Crosshatch - Karen Burniston
Catherine Pooler coloured inks
Above it All stamps & dies - Stampin' Up
Silver Snowflake peel off stickers


Monday, 1 April 2024

Hello Friend Flip Card


Happy April, friends!  Today I'm sharing a flip style card using older papers & ephemera and a die set by Sam Calcott (Mixed Up Crafts). The die set actually cuts two flip frames and fits perfectly on a 7 x 5" card, but this one is an A2 sized card and a single one works great on this size of card.


I likely wouldn't have thought to alter the die cut frame to be a single, but in Sam's assembly video (linked below) she shared that it would work and I have done it a couple of times now. I love that it makes this die set more versatile.

The chipboard elements are ones I have had for several years, having ordered them by mistake. Well I ordered them by choice but didn't read the description carefully enough - I don't find that chipboard elements make a card very mailable so I tend not to use them. For these ones, I peeled off several layers from the back and that made them much flatter - thus mailable. This card will mail for a single stamp!


You can have the frame pull to the left or to the right, for this card I have it pulling to the right. I added the PULL on a scalloped circle die and below is what you see when you pull that frame.


Here is a peek at the inside where there is lots of room to write a personal message.


 If you would like to see Sam's assembly video, click HERE.


Supplies used:
5x7" Flip Mechanism, Made to Surprise (Sam Calcott)
Patterned paper - Stamperia
Dots & Scallops dies - Catherine Pooler
Chipboard elements - Stamperia
Lacy Ovals - Waffle Flower
Words - Quilted Birds, Catherine Pooler
Catherine Pooler coloured inks
Stitched ovals - MFT Stamps
Dot Stamp - Stamps by Judith
Pops of Color, Snowflake - Scrapbook .com

Friday, 15 September 2023

Give Thanks Flip Card


It's Fun Fold Friday here on my blog and today I'm sharing another card made with Sam Calcott's 'Flip Mechanism'. It actually creates two frames but in her tutorial she shared that you could use just one if you wanted and that is what I did here. I love getting more looks from a single die set!


Because I used the same patterned paper for both the background and the frame, this card doesn't look like much in the above photo. But the pull frame lifts away from the card front to reveal a sentiment! This shows up much better in real life.


Every year I pull out this patterned paper pad, use a few sheets on my cards then back it goes for another year. So it's taking a LONG time to use it up, ha ha. Both of the cut aparts on the card front are included in the paper pad and I also pulled out some OLD stickers from my stash to decorate the front.


Here is a look at the inside. I have had these rub-ons for YEARS ... they were originally from Stampin' Up's clearance rack so I thought it was time to use them. They came with two sheets,  one in brown and one in white, so I added the white rub ons to the envelope. 


I loved being able to use up so many items from my Thanksgiving Card Bin on this card!

Having been asked how many cards I make I thought it would be fun to keep track this year. Many of my posts include more than a single card or projecSamt and below is my tally. 

Card Tally for 2023
January - 53 cards
February - 56 cards
March - 55 cards
April - 32 cards
May - 43 cards
June - 34 cards
July - 56 cards
August - 106 cards
September so far - 24 cards

I decided to cancel the subscription that provided linked thumbnails to what products I used on my cards. It was costing me out of pocket each month, so I’m back to listing what I used with a few affiliate links included.

Supplies:
5x7 Flip Mechanism, Made to Surprise (Sam Calcott)
Kraft 5 x 7" card base and envelope
Patterned paper - Amber Moon, Prima (old from stash)
Bless Home etc - Rub ons, Stampin' Up (old from stash)
Leaf stickers - Mrs. Grossmans (old from stash)
Push Here stamp set - Lawn Fawn
Glittery Stickers - Dollar Store (old) 


Friday, 28 July 2023

5x7" Wiper Card for a Music Teacher


It's Fun Fold Friday here on my blog and today I'm sharing a Wiper Card. Our youngest granddaughter takes piano lessons, so I made her a card to give her teacher at the end of June. 


I pulled out some (retired) masculine print patterned paper and an old music note stamp. After stamping the music notes I fussy cut them out and added Nuvo Glaze for some shine.


When you pull the sides, a rectangle pops up with music notes popped up with foam tape. 


There was lots of room on the back of the card for her to write him a message and sign her name, since 6 years olds write big. 🥰

Having been asked how many cards I make I thought it would be fun to keep track this year. Many of my posts include more than a single card or project and below is my tally. 

Card Tally for 2023
January - 53 cards
February - 56 cards
March - 55 cards
April - 32 cards
May - 43 cards
June - 34 cards
July so far - 55 cards

You may have noticed the affiliate thumbnails are no longer showing on my blog posts. That is because it costs money every month to share those links, and the past few months I havent made nearly enough sales to cover the cost. I would rather spend that money on craft supplies, than continue to pay out of pocket for a feature that viewers arent using.  I cancelled my subscription and will go back to just listing what I used in case anyone is curious about what I used.

Supplies:
5 x 7 Rectangle Wiper - Made To Surprise, Sam Calcott of Mixed Up Crafts
Patterned paper - Urban Underground, Stampin' Up (retired)
Giant Thanks So Much - Lawn Fawn
Music note - All Night Media (wood mount!)
Music - Stampendous (retired)
Nuvo Glaze - Tonic
Black Dazzles Peel Off's
PULL stamp - Paper Pumpkin Many Happy Birthday's - Stampin' Up (retired)


Tuesday, 20 June 2023

Sealife Slimline Wiper Card


I just adore this Slimline paper pad, so pulled it out again and had the idea to use the 5 x 7" Wiper die set with it to create a Slimline sized Wiper card. It worked perfectly - and since I have a number of different Slimline paper pads, I will be doing this again! NOTE: Since the dies are larger than the paper I used removable tape to line up the die so it didn't shift when going through my die cutting machine.


It's hard to see in the photos, but I added a number of clear enamel dots for a litlte shine and they resemble water bubbles. The stamped and die cut sentiment was popped up with foam tape.


Below is the back side, with a humorous sentiment and some stamped images. I added the same images to the envelope as well. 


Using a small stitched circle die and a scrap of the patterned paper, I cut the circle in half and stamped PULL on either side. These were attached to each side where the recipient would pull to reveal the wiper that is hidden inside. I have watched non card makers when they receive a wiper card and they aren't sure how to get it open, so this solves that problem. Ha.
Having been asked how many cards I make I thought it would be fun to keep track this year. Many of my posts include more than a single card or project and below is my tally. 

Card Tally for 2023
January - 53 cards
February - 56 cards
March - 55 cards
April - 32 cards
May - 43 cards
June so far - 21 cards

Additional Supplies:
Pull stamp - Paper Pumpkin February '17 Many Happy Birthday's (Stampin' Up)
Gems/resin dots - No Matter the Weather Paper Pumpkin kit (Mar 2020), Stampin' Up
Seas the Day stamp - Stampin' Up
White cardstock
5x7" Wiper Card - Sam Calcott, Mixed Up Crafts

This blog uses affiliate links whenever possible. This means, if you make a purchase through one of my affiliate links that you pay the same amount but I may receive a small commission from your purchase. I only link products that I own, love and use for my card making and not every link below is an affiliate one! 😊

Sunday, 18 June 2023

Birthday Balloons Wiper Card


Today I'm sharing the 6th edition to my Monthly Series: New Fun Folds. I got this die set for my February Birthday, and while I played with it in early March I'm just now getting the card shared. I was saving it for this edition, as it IS a new (to me) fun fold die set. It is the "5 x 7" Wiper Card" die set by Sam Calcott at Mixed Up Crafts. We had been in Arizona over my birthday so I was able to get the set with my birthday $$ from Craft Stash US. 


When you pull on the sides, a decorated piece pops up over the top edge. I have been having a lot of fun with this scenic patterned paper, which was a 'free with purchase' from Stampin' Up. I added the Celebrate (Karen Burniston) and die cut balloons (Lawn Fawn). The balloons were die cut from rainbow holographic card stock and I added the highlights with a white paint pen.


Adding a white panel on the back gave me lots of room for a large stamped sentiment and a couple of balloons.


Having been asked how many cards I make I thought it would be fun to keep track this year. Many of my posts include more than a single card or project and below is my tally. 

Card Tally for 2023
January - 53 cards
February - 56 cards
March - 55 cards
April - 32 cards
May - 43 cards
June so far - 20 cards

Additional Supplies:
5 x 7" Rectangle Wiper Card Die Set - Mixed Up Crafts
Green cardstock
White cardstock
Pull stamp - SU Paper Pumpkin Feb '17 'Many Happy Birthday's
Patterned paper - Enjoy the Journey, Stampin' Up
Rainbow Holographic cardstock - Recollections

This blog uses affiliate links whenever possible. This means, if you make a purchase through one of my affiliate links that you pay the same amount but I may receive a small commission from your purchase. I only link products that I own, love and use for my card making and not every link below is an affiliate one! 😊


Thursday, 15 June 2023

Paper Pumpkin Alternate Flip Card Duo for Spring

Each week I've been sharing my alternate cards using the March 2020 Paper Pumpkin kit called No Matter The Weather. For these ones I made two nearly identical cards using the 5 x 7" Flip Mechanism by Sam Calcott. In her assembly video she mentioned being able to use the double flip as a single, and I just had to try it out. I still made larger cards - these ones are 5 x 6.5" because I wanted to use the umbrella patterned paper and it was in a 6 x 6" paper pad. 

I have a walkthrough of my cards on YouTube:


Folding the stitched circle pieces in half (from the kit) I stamped PULL on them and added them to the side you would pull to flip the rain boot piece over. I did one that pulls to the right and one that pulls to the left and I cannot decide which one I prefer. 😊

Inside the cards I stamped the rain boots and greenery, as well as a lovely Easter sentiment that I've had for a couple of years. I love the size of it!

... one more look ...

I'll be back next week with another alternate project with this kit.

 If you would like to see Sam's assembly video, click HERE.


Having been asked how many cards I make I thought it would be fun to keep track this year. Many of my posts include more than a single card or project and below is my tally. 

Card Tally for 2023
January - 53 cards
February - 56 cards
March - 55 cards
April - 32 cards
May - 43 cards
June so far - 19 cards

Supplies: (NOTE our internet has been either intermittent or out completely, so I'm not able to add the linked thumbnails for this post. I am not even sure if it will even post  - I've been trying since the 15th! 😳 Eventually it will get sorted out though)

No Matter The Weather Paper Pumpkin kit, March 2020 (Stampin' Up)

5 x 7 Flip Mechanism - Sam Calcott, Made to Surprise

Patterned paper - Blank Canvas, 1st Edition (old, from my stash)

White cardstock

Umbrella patterned paper, 6 x 6" Spring - Echo Park

Pull stamp - Paper Pumpkin Feb 17, Many Happy Birthdays (Stampin' Up)

Spring Sentiments - Elizabeth Craft Designs

5 x 6.5" Card blank and envelope - Michaels

Alcohol markers

Slimline ATC Windows Die - Whimsy Stamps

Catherine Pooler inks: Date Night, Do Si Do, In the Park, Aquatini

Nuvo Glaze - Tonic Studios

Wink of Stella

Thursday, 25 May 2023

Paper Pumpkin Alternate #2 'Under The Weather' Card


Today I'm sharing the second alternate card made using an older Paper Pumpkin Kit "No Matter The Weather". I spent some time back in the early Spring making cards with the kit and managed to get it all finished off!  Of course, I did my own thing and hardly followed the kit instructions/inspiration at all.

This was one of the few times I actually cut down one of the envelopes to use the liner as a patterned paper. It matched the elements perfectly and I didn't have another green that would. Considering the envelopes were note card rather than A2 size, I didn't mind cutting one down as much as I would if it were an A2 size. The kit came with tiny clear enamel raindrops and I added three of them to this card as you can (barely) see in the photo below.


Here is a look at the inside, with a sentiment block matted in sunny yellow paper, and stamped & fussy cut rubber boots. The boots are attached with one of Sam Calcotts paper springs so they have a little movement.

I'll be back next week with another alternate project with this kit!

Here is a link to Sam Calcotts video where she shows her paper springs.


Having been asked how many cards I make I thought it would be fun to keep track this year. Many of my posts include more than a single card or project and below is my tally. 

Card Tally for 2023
January - 53 cards
February - 56 cards
March - 55 Cards
April so far - 39 Cards

Additional Supplies:
No Matter the Weather Paper Pumpkin Kit - March 2020
Blue Skies Ahead - MFT Stamps
White cardstock
Alcohol markers

This blog uses affiliate links whenever possible. This means, if you make a purchase through one of my affiliate links that you pay the same amount but I may receive a small commission from your purchase. I only link products that I own, love and use for my card making and not every link below is an affiliate one! 😊

Wednesday, 17 May 2023

Mother's Day Flip Card


Today I'm sharing the Flip Card I made for our middle daughter for Mother's Day ❤️


Once again I used this beautiful patterned paper. I had purchased it specifically for our May Birthdays and Mother's Day and I have made good use out of it! I am also really enjoying the 5 x 7" Fabulous Flip die set by Sam Calcott, especially on cards that I will hand deliver. That way I'm free to add as many layers as I want without worrying about extra postage.

In her tutorial (linked below) she suggests cutting the frame a second time (which adds to the weight) and I used a heavy weight card base as well. The Flip pieces also have a couple of layers on them. I was really happy with the card (and our daughter liked it too) so I'm just giving you the heads up about adding layers and additional postage.


My friend Frances had has this die set for awhile, and she made a card with an accordion strip along the inside bottom edge to help the card stand nicely for display. I tried it out and it worked like a charm!  

Below you can see the sentiments that are revealed when you pull the frame to the right, but you also have the option of having it pull to the left when you are assembling your card.


Since this card doesn't open like a traditional card, I added a decorated panel to the back where we wrote our personal message. The Happy Mother's Day is by Karen Burniston, and I love the shadow cut from that holographic cardstock. ❤️


 If you would like to see Sam's assembly video, click HERE.

I'm not sure what measurements Frances used for her card, but I took a 7 x 3" strip of white card stock, and scored it down the 3" side at .5, 1.5 and 2.5" to create the accordion folded strip. If you are making a different sized card, you would change your measurements for that size ... this one is a 5 x 7" card.

Having been asked how many cards I make I thought it would be fun to keep track this year. Many of my posts include more than a single card or project and below is my tally. 

Card Tally for 2023
January - 53 cards
February - 56 cards
March - 55 Cards
April - 32 Cards
May so far - 29 Cards

Additional Supplies:
 5 x 7" Fabulous Flip die set, Sam Calcott (Made to Surprise)
White cardstock
5 x 7" Card blank and envelope
Pink cardstock
Rainbow Holographic Cardstock - Recollections
Pull stamp - from an old Stampin' Up set
Sequins - the Cat's Pajamas

This blog uses affiliate links whenever possible. This means, if you make a purchase through one of my affiliate links that you pay the same amount but I may receive a small commission from your purchase. I only link products that I own, love and use for my card making and not every link below is an affiliate one! 😊


Thursday, 20 April 2023

'All About You' Diamond Flap Front Fold


Today I'm sharing another card made with one of the die sets I received for my Birthday. This one has the dies to cut the angled card side & layer - you cut it and attach it to a 5 x 7" panel which then becomes the back of your card. This was my first play with it and I was happy enough with my card until it was finished and I went to stand it up for display. It fell right over!  

So I will have to figure out a different way to use this set, maybe by adding a second angled panel on the right edge so it would open like an angled gatefold card? Or flip it around so the largest edge is on the bottom - opposite to what I have here?  I'm not at all disappointed in the purchase though as I know there are lots of options with it once I play with it a little more.


I added the stamped sentiment onto a stitched circle which is lifted up with one of the cardstock springs that I have been using SO much lately. I will link Sam Calcott's video below if you are interested in learning how she makes them. 


Here is a link to Sam Calcotts video where she shows her paper springs. 

Having been asked how many cards I make I thought it would be fun to keep track this year. Many of my posts include more than a single card or project and below is my tally. 

Card Tally for 2023
January - 53 cards
February - 56 cards
March - 55 Cards
April so far - 24 Cards

Additional Supplies:
Creative Craft Easy Folds 5 x 7" Diamond Fold - Craft Stash US
White cardstock
Patterned paper - Enjoy the Journal, Stampin' Up
Purple fine liner marker

This blog uses affiliate links whenever possible. This means, if you make a purchase through one of my affiliate links that you pay the same amount but I may receive a small commission from your purchase. I only link products that I own, love and use for my card making and not every link below is an affiliate one! 😊

Monday, 17 April 2023

Super Shiny Magic Iris Birthday Card


I just love this card! It is SOOOOO shiny and the patterned cardstock fairly shouts celebration 😊.  This is the 4th edition to my monthly series Magic Iris and I made it into a birthday card for a friend. The purpose for my monthly series, is for me to USE some of these dies that I liked enough to purchase but haven't played enough to justify the cost. I'm not trying to come up a bunch of unique or clever ways to use the dies (although that might happen), I just want to use the dies to make cards for people I know will enjoy them. I know my friend will really like this one!


The package of printed cardstock came with three different patterns, in addition to the two I used on this card there is one with stars. Let me tell you, I save all but the tiniest scraps of this mirrored card stock. Ha. When you slide the lever down as the arrow shows, the shutters open to reveal the stamped sentiment.

I also added Karen Burniston's CELEBRATE near the bottom of the card cut from gold mirror cardstock.


I kept the inside fairly simple, cutting the Giant Happy Birthday from the same mirrored card stock as I cut the Magic Iris Add On from. I did mount it to a small white circle before attaching it to a cardstock spring, as the spring showed through the letters. While the spring showing through was distracting, the circle seems to serve a purpose and I don't mind it at all.


This spring is something I'm using a LOT - it was designed by Sam Calcott of Mixed Up Crafts and I will link a video for you where she shows how she makes them HERE.


Having been asked how many cards I make I thought it would be fun to keep track this year. Many of my posts include more than a single card or project and below is my tally. 

Card Tally for 2023
January - 53 cards
February - 56 cards
March - 55 Cards
April so far - 19 Cards

Additional Supplies:
5 x 7" Card blank and envelope
White cardstock
Mirri 'Time to Celebrate' card stock, Hunky Dory

This blog uses affiliate links whenever possible. This means, if you make a purchase through one of my affiliate links that you pay the same amount but I may receive a small commission from your purchase. I only link products that I own, love and use for my card making and not every link below is an affiliate one! 😊

Friday, 7 April 2023

Fabulous Flip Birthday Card


This is my first play with a new to me die set, and it's also the 4th edition to my monthly series New Fun Folds! I received some fun dies for my birthday - this one is the 5 x 7" Flip Mechanism by Sam Calcott at Mixed Up Crafts. We were in Arizona at the time, so I was able to order from CraftStash US which worked out well.  I didn't purchase any craft supplies during the November Black Friday sales or at Christmas, so I was pretty happy to get some new goodies for my late February Birthday!


When you pull the frame panel to the right, a trio of sentiments is revealed. I kept things simple for this first card, but I am really looking forward to playing with this set a lot more. I have so many ideas!  I used some Mirri cardstock from Hunky Dory, so the frame panel is bright and shiny. Then I cut some of Karen Burniston's Big Birthday Charms from leftover pieces of the mirrored cardstock and loved how they turned out,.


Inside is a stitched frame, a stamped sentiment and a balloon from the same charm set.


One more look ...  The card stands nicely for display but it is a little front-heavy. My KB teammate Frances has had this die set for awhile and she made one with an accordion fold inside the card so it stands up more like a tent. I think I will try that idea next!


If you would like to see Sam's assembly video, click HERE.

Having been asked how many cards I make I thought it would be fun to keep track this year. Many of my posts include more than a single card or project and below is my tally. 

Card Tally for 2023
January - 53 cards
February - 56 cards
March - 55 Cards
April so far - 11 Cards


Additional Supplies:
Patterned paper - Mirri Card - Time to Celebrate, Hunky Dory
5x7” Flip Mechanism - Made to Surprise (Sam Calcott)
5 x 7” Card and Envelope
Wish Big, Taylored Expressions
Single Gem - leftover from Stampin' Up
Pull Stamp, Many Happy Birthdays (Stampin' Up Paper Pumpkin Kit)

This blog uses affiliate links whenever possible. This means, if you make a purchase through one of my affiliate links that you pay the same amount but I may receive a small commission from your purchase. I only link products that I own, love and use for my card making and not every link below is an affiliate one! 😊