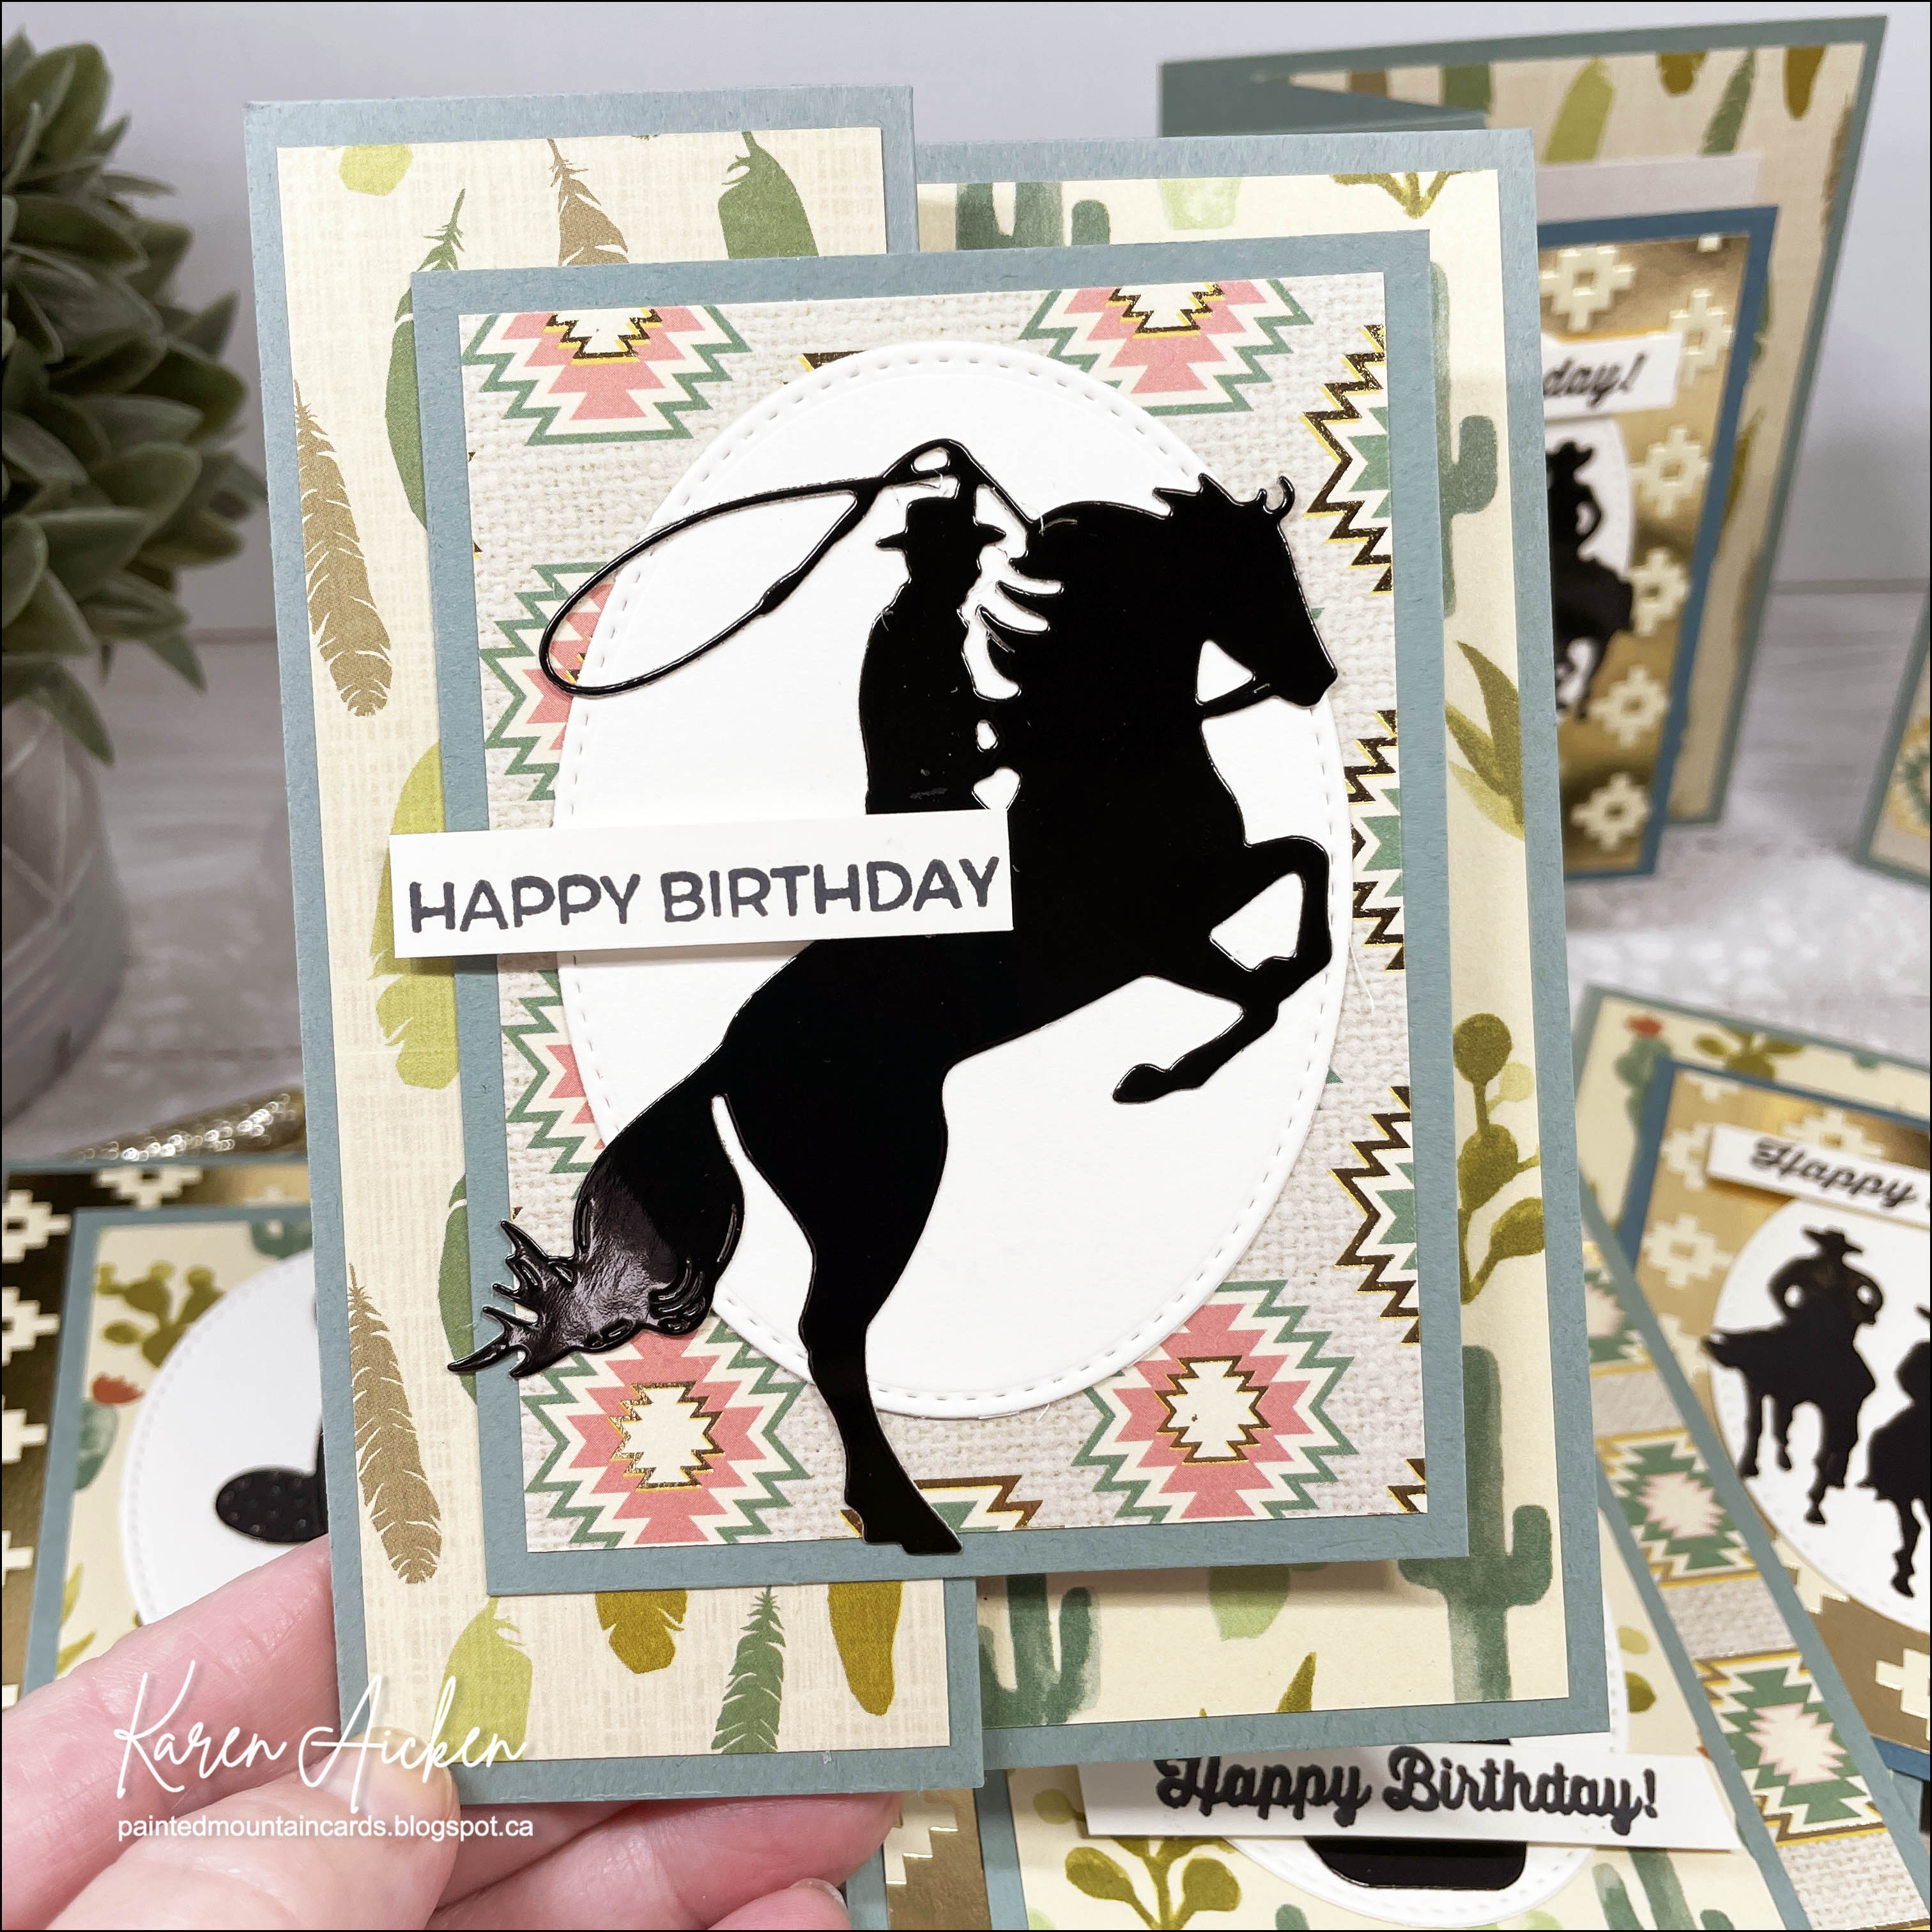
It's no secret that I love making Z Fold Cards, and since I am going to need several masculine birthday cards in the next little while I pulled out the October 2019 Sheetload of Cards.
I've had this paper pad for a number of years and I like that some of the sheets have gold foiling on them. It was fun to pick the four different patterns to use with the Sheetload cutting guide as well as what die cut elements I would be adding to the fronts. These were cut from black glossy cardstock for a little more pizzazz.
Inside the cards I chose a couple of Funny Bones sentiments and alternated which ones went with which cards.
There are two of each silhouette design so I have enough variety to choose what card goes to which friend/family member.
I thought this sentiment went perfectly with the horseback riders above.
I love this 'bucking bronco' die so it was fun to get it out again.
Below is one more of the funny sentiments.
Supplies used:
Patterned paper - Desert Dream, Recollection (old)
Today I'm sharing the 6th edition to my monthly series "12 Months of Christmas". Last month I created a 5 x 7" Faux Step Card and I liked it so much I wanted to try a Mini Slimline version. I really like this one too and hope to do a tutorial for it over the summer.
I pulled out the Magic of Winter package from Echo Park - I used it a LOT last year and still have many bits leftover for even more cards. Since I wanted to feature one of the cutaparts from the package, my measurements are a little different than they would be for a 'regular' Faux Step Mini Slimline card. I didn't even really take note of the measurements for this one - it was a 'let's see if this works' type of card.
Since I used double sided patterned paper for the accordion base, the penguins on the back were upside down. I cut a same sized piece as the back panel and added it so the penguins would be right side up on the back of the card. 😊
The sentiment is a Funnybones stamp from Riley & Company, and even though it's JUNE, I'm already tired of winter. HA - that should tell you how much I dislike winter and being cold.
Having been asked how many cards I make I thought it would be fun to keep track this year. Many of my posts include more than a single card or project and below is my tally.
Card Tally for 2023 January - 53 cards February - 56 cards
March - 55 cards
April - 32 cards
May - 43 cards
June so far - 16 cards
Additional Supplies:
White cardstock
Snowflake punches - Martha Stewart
This blog uses affiliate links whenever possible. This means, if you make a purchase through one of my affiliate links that you pay the same amount but I may receive a small commission from your purchase. I only link products that I own, love and use for my card making and not every link below is an affiliate one! 😊
Its Masculine Card Monday here on my blog and today I'm sharing a funny card I made for our Son In Law's birthday. Last month I shared a tutorial for creating these Easy Gated Fun Fold Cards and said that I was having SO much fun with the idea and had made several more of them since filming the video. This is one of them and I have even more coming up. They are so quick and easy and you can get two of them from a single 12 x 12" sheet. You can find my YouTube tutorial HERE, and below is a quick one showing how the card opens.
I started with some scenic patterned paper and a Funny Bones sentiment.
I love that this paper is double sided! I pulled out some other stamps from my stash to finish off the card but felt it still needed something. So ... the (retired) pine tree die from Elizabeth Craft Designs was the finishing touch.
I have been asked how many cards I make but I didn't have a clear number. Since many of my posts include more than a single card or project, I thought it would be fun to keep track this year.
Card Tally for 2023 January - 53 cards February - 56 cards
March so far - 14 Cards
Additional supplies:
5 Part Pine - Elizabeth Craft Designs (retired)
Green cardstock
White cardstock
Stitched banner - MFT (retired)
Birthday Wishes - Your Next Stamp
Corner Rounder
Alcohol markers
This blog uses affiliate links whenever possible. This means, if you make a purchase through one of my affiliate links that you pay the same amount but I may receive a small commission from your purchase. I only link products that I own, love and use for my card making and not every link below is an affiliate one! 😊
It's Masculine Card Monday here on my blog and today I'm sharing the Birthday card I made for my hubby. I just love the water coloured mountain/nature scenes in this patterned paper. The Happy Birthday and Happy Birthday Shadow (by Karen Burniston) are popped up with foam tape, and I added a die cut tree-line for even more trees.
Inside, the new Bam Box allows the camper to spring up and is also the bumper that keeps the card front in the easel position. I have had the camper die for over a year, and can't believe this is the first time I've used it. Sheesh ...
Inside, I added another panel of the patterned paper - this one features a campfire in the foreground with mountains in the distance. I stamped an older Funny Bones sentiment from my stash.
This card was very meaningful, since not only was it a milestone birthday for my hubby, we had just bought a camper!! So the sentiment, while funny and true - hit home as our bank account is still in shock. Ha.
The card started out as 5 x 6.5" - it was a card and envelope set I picked up at Michaels many years ago - but I trimmed it to 5 x 6.25" as that worked better with the 6 x 6" patterned paper.
I rooted through my embellishments looking for a small dog sticker, but most of the ones I had were too big for the camper. However - the Doodlebug Designs one fit and it was blue so matched the card!
... one more look ... I gave the card to him on his birthday last month, and it is still out on display. He really liked it!
A couple of times recently, I was asked how many cards I make but I didn't have a clear number. Since a lot of my posts include more than a single card or project, I thought it would be fun to keep track this year.
2023 Tally: 19 Cards
Additional Supplies:
5 x 6.5" Card and envelope - Michaels
White cardstock
Camping sentiment - Funny Bones R & Co
Treeline die - Tim Holtz/Sizzix
Dog - Puppy Love, Shape Sprinkles, Doodlebug Designs
Black cardstock scrap
This blog uses affiliate links whenever possible. This means, if you make a purchase through one of my affiliate links that you pay the same amount but I may receive a small commission from your purchase. I only link products that I own, love and use for my card making and not every link below is an affiliate one! 😊
Using several dies by Karen Burniston, I created this birthday card for a friend. It fits perfectly in a standard A2 envelope and will mail for a single stamp. The Banners Crosshatch dies have alternating crosshatch and straight edges, and the cute dog is from the Doghouse Tiny House Add On.
I made the dog a little more festive with a party hat and balloons from the Birthday Charms set. I chose soft colours and subtle prints for the card, which actually carries a punch inside!
Back in November I had purchased several new Funny Bones stamps from Riley & Company and this is one of them. I thought it would be cute to have as a fun surprise inside a card. I used a 1 x 4" strip of white cardstock, scored at 1/2" as a hinge to connect the front and back banners.
I am going to include a running tally on how many cards I make this year, not counting the ones I don't share on my blog. I donate 25 Birthday Cards each month to my Mom's old nursing home and don't often take photos or post the majority of those. A couple of times recently, I was asked how many cards I make but I didn't have a clear number. Since a lot of my posts include more than a single card or project, I thought it would be fun to keep track this year.
2023 Tally: 17 cards
Additional Supplies
Patterned paper - Day Dreamer, Dear Lizzy
White cardstock
Black marker
Funny Bones Stamp - Riley & Company
This blog uses affiliate links whenever possible. This means, if you make a purchase through one of my affiliate links that you pay the same amount but I may receive a small commission from your purchase. I only link products that I own, love and use for my card making and not every link below is an affiliate one! 😊
I talk a about the details of this card in my YouTube video HERE:
Yes, I made another Slimline card. I am really enjoying this format, and the challenge of coming up with ways to make them interactive. It's also fun to have such a different size of 'canvas' to lay out stamps, dies and embellishments.
Everything but the card base and tree trunk was done with white card stock, inked with both the Taylored Expressions and i-crafter Blending Brushes. The clouds and tractor/hill were die cut from the white panel and inked, then inlaid back in like a puzzle.
Inside I used the Katherine Label Pop Up by Karen Burniston, adding the fun Hunting for Taco's stamp from Riley & Company.
I also added some inked clouds and fun banners - which are from the Dress Up Riley Camping set.
Ahahaha - that Funny Bones stamp just cracks me up.
Supplies:
Hunting Riley - Riley & Company
White and kraft card stocks
Catherine Pooler Inks
Chameleon Markers
Sakura Black Glaze and White Gel Pen
Kraft card stock
1097 Farm Edges - Karen Burniston
1045 Outdoor Scene - Karen Burniston
Copic Markers
1011 Katherine Label Pop Up Dress Up Riley Camping Accessories (banner) - Riley & Company Dress Up Riley Farm Accessories (chicken, branch, smoke puff) - Riley & Company i-crafter blending brushes Taylored Expressions Blending Brushes
Card size: 3.5 x 8.5”, fits in a Standard #10 Business Envelope
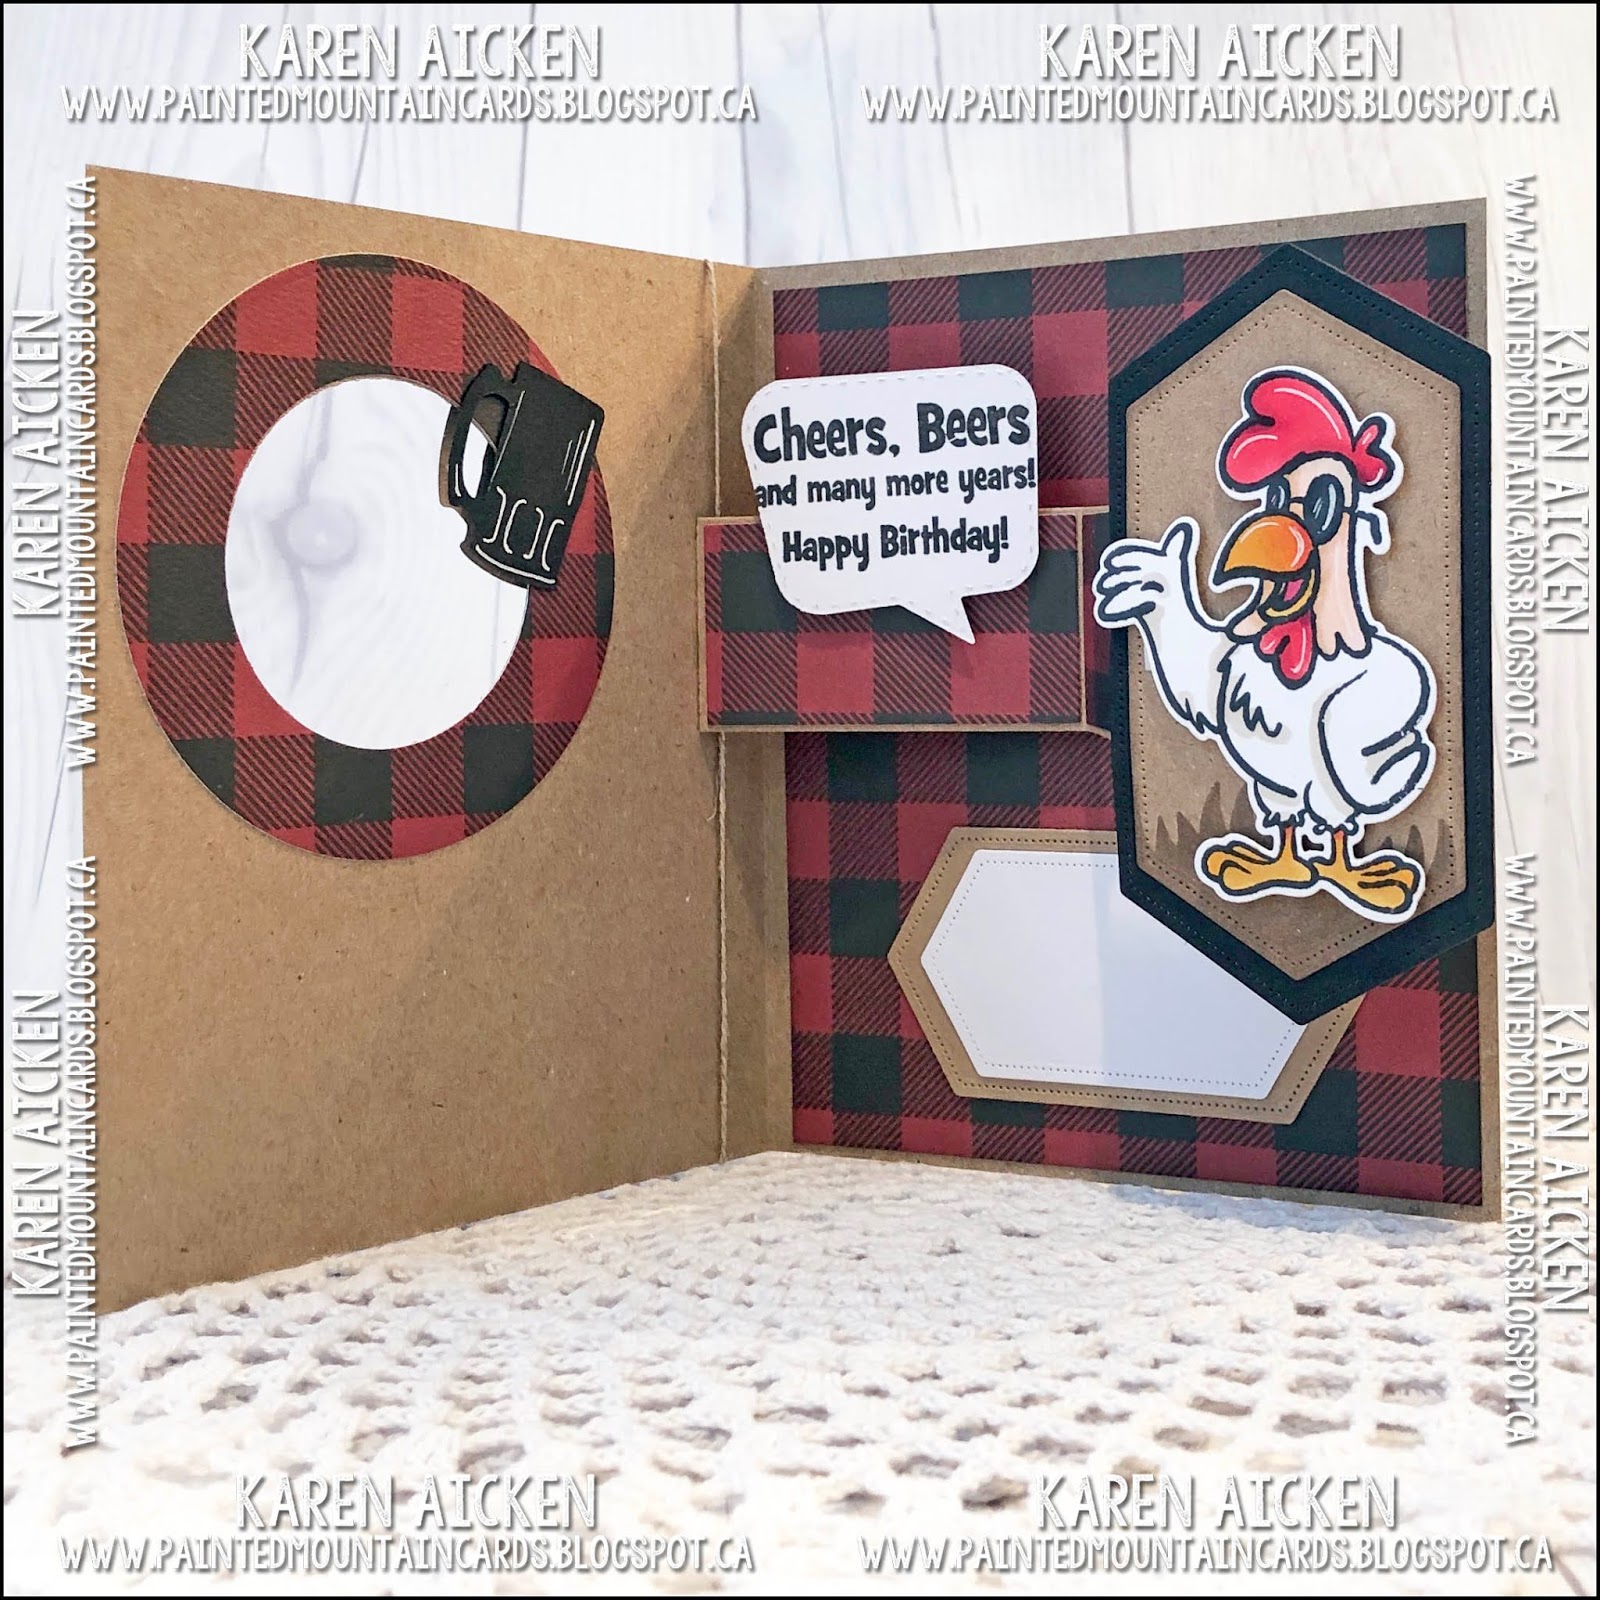
It's Masculine Card Monday here on my blog and today I'm sharing the card I made for hubby's Birthday last month.
The video's on Blogger are quite small so if you would like to see them larger, click HERE for my YouTube channel.
I white heat embossed the sentiment on a Kraft banner - it's something I say to him all the time, so of course I had to add it onto his card. The Beer Mug comes from the Happy Hour Charms by Karen Burniston.
Inside I used the Rockin' Rectangle and the fun Rooster stamp from Your Next Stamp. I knew I wanted to use this Funny Bones stamp with their word bubble, and since the word bubble was facing the wrong direction I used the back side of it.
Since you could see the back of the Beer Mug on the front of the card through the window, I added a second one inside in the same position.
I get such a kick out of this rooster image and look forward to using it on more cards coming up.
Supplies: White, yellow, black and kraft card stocks Clucking Cool stamp and die - Your Next Stamp Copic markers White pearl card stock Makeup brushes 1110 Happy Hour Charms - Karen Burniston Buffalo plaid paper - Carta Bella 1089 Rockin' Rectangle - Karen Burniston Grass stencil - MFT Stamps 1057 Circle Crosshatch - Karen Burniston Acetate Twine - Stampin' Up Cheers Beers - Funnybones, Riley & Company Word Bubble - Riley & Company White embossing powder Fishtail banner - MFT Stamps Cool Tag Banner Sentiments - Your Next Stamp Card size - 5 x 6"
Hello my crafty friends Today I'm sharing a card for the Coffee Lover's Blog Hop! You can find all the details for the hop HERE.
I used some retired patterned paper from Stampin' Up, along with fussy cut images from the papers. The word stamps are sure to make someone smile, and I added some sparkly Gum Drops as well.
This Z Fold Card with Layers die set is from Divinity Designs, but I am calling it a Diagonal Trifold Card. It's also referred to as a Zig Zag Card. :-)
I think I will send this to our middle daughter, whose dealing with a toddler that is determined to make 3:30 am the start of her day. Yikes!
Here is the view from the back, where there is lots of room to write a note.
I am really enjoying this Z Fold die set!
Supplies: Z-Fold card and layers die set - Divinity Designs
Brown and white card stocks
Patterned paper - Stampin' Up (retired)
Circle dies - Hero Arts
A yawn stamp - Funnybones, Riley & Company
Fun foam
Decaf stamp - Funnybones, Riley & Company
Ice Ice Baby Sparkly Gumdrops - Your Next Stamp
Enchanted Garden Gumdrops - Your Next Stamp
Sakura while gel pen
Card size - 4 x 5.5", fits in a standard A2 Envelope
Welcome to Karen Burniston's October 2019 Designer Challenge! KB asked us to use either the Autumn Elements or the Word Set 7 Autumn for our project today so I made a humorous Thanksgiving card.
For my card front I used the Crosshatch Rectangles to die cut a pretty gold foil mat. Since the entire centre was going to be covered up with the rust panel though, I die cut a smaller Crosshatch Rectangle out of the centre to reserve for another project. No point in wasting specialty paper that nobody is going to see anyhow!
I have a short YouTube video so you can see what the card looks like as it opens and closes, with more pictures and a full supply list below the video.
I die cut the HAPPY from Word Set 7 Autumn eight times from an ink smooshed background, and adhered them - slightly staggered - onto a rust panel. The Thanksgiving word was die cut from a strip of the same gold foil card stock as the matt and layered onto a kraft strip. I LOVE the little acorn die (acorn and top) in the Autumn Elements set so I had to add a trio of them to the card front.
Can we just talk about these ink smooshed panels for a minute? I was SO happy with how they turned out. They just make my heart happy! I used regular white card stock from Office Depot - the same stuff I use for just about everything - and swiped one colour of Distress Oxide ink onto my glass mat. A quick spritz with a spray bottle of water then I smooshed my card stock panel into the ink puddle. I repeated the steps with 3 more panels since I rarely plan ahead I wasn't sure how many I might need for the card.
By the time I was finished with the 4th panel the first one was dry so then I repeated with a second colour etc. I used four colours in total and of course the panels were pretty warped when they were dry from all the water, smooshing, dipping and dragging. I splattered each of the panels with gold shimmer paint then put them under a heavy stack of paper overnight. The next morning I die cut the two for the inside with the Crosshatch Rectangles.
I coloured Hunting Riley with Chameleon Color Tone markers, so he was actually stamped on Neenah card stock as I'm finally remembering that alcohol markers bleed on the Office Depot stuff.
I have a scrap of card stock that was cut with the grass die from the Nature Edges set and I keep that with my stencils. I pulled it out and brushed some brown ink over a section of the card to create a ground for Riley. I cut the fence from the new Farm Edges and used a portion of that behind him as well.
This Funny Bones sentiment just cracks me up. I might have laughed and spit out my coffee the first time I read it online and of course had to add it to my shopping cart. Ha. To the spinner arm I added a pumpkin from the Autumn Elements and a plated turkey embellishment from my stash. Another little acorn was added to the corner of the stamped rectangle.
I didn't want to cover up any more of the pretty background, so didn't add a signing block. This is a card I'll be sending out so we can just sign our name with a black marker and it will show up just fine.
I hope you will check out what the rest of the Design Team came up with for the challenge - their blogs are linked on the right. Karen Burniston will have her project & video on her BLOG tomorrow (Wednesday) and you will find that HERE.
Supplies: 1060 Word Set 7 Autumn - Karen Burniston 1054 Rectangles Crosshatch - Karen Burniston 1059 Autumn Elements - Karen Burniston 1042 Spinner Square Pop Up - Karen Burniston 1097 Farm Edges - Karen Burniston 1006 Nature Edges (to use as a grass stencil) - Karen Burniston White, rust, kraft and brown card stocks Distress Oxide inks Gold shimmer paint - Stampin' Up Gold foil card stock - Stampin' Up Shot my first turkey - Funny Bones, Riley & Company Hunting Riley - Riley & Company Neenah card stock for stamping Riley Chameleon Color Tone Markers Chameleon Color Pencils Sakura black glaze and gold gel pens Turkey printed embellishment - my stash Card size Wide A2 (5.5 x 4.25")
It's Fun Fold Friday here on my blog and I have a humorous card to share today. I think the new cow 'Bennie/Bessie' from Riley & Company is so much fun! Here I dressed her up with the Sophie's Dress Up images and the colouring was for Day 27 of the 30 day colouring challenge I'd been participating in on Instagram. It was fun getting her onto a card, and I chose Karen Burniston's Spinner Square Pop-Up for my card base today.
Once again I used the make up brushes to add colour to the background panel and thought I'd tell you more about them in case you are unfamiliar with these cheap 'Life Changing Blending Brushes'. My friend Betty told me about them when she was visiting us in Arizona in March. I was skeptical but knew she would not steer me wrong. I had not paid any attention to all the buzz about these brushes, simply because of the price. Upwards of $40 for a set of brushes when I already have brushes and sponges for stencils? Not for me, no matter HOW wonderful they are. Or so I thought, ha ha.
We each picked up the cheap set from Amazon down there and I was immediately hooked. I am using them almost daily now! At the end of my post I will add a link from Amazon.ca in case you are interested. If you are reading my blog from a different country than Canada you will know what to look for at least. All the US people have their own favourite shopping sites I'm sure.
When you open the card, the funny saying spins out from behind the cow panel.
I have a YouTube video so you can see the card in action:
This is not an affiliate link - I don't get a commission or any kind of compensation. But I am in love with the brushes and just wanted to share the information in case any of my Canadian peeps are interested. There are lots of tutorials online using the 'Life Changing Blending Brushes' where you can see why I like them so much.
Supplies: Kraft, white card stocks Patterned paper - Floral Graph Rainbow Petite Print, Doodlebug 1042 Spinner Square Pop-Up - Karen Burniston Acetate Bennie/Bessie - Basic Dress Up Cows, Riley & Company Chameleon Color Tones and Color Tops Wink of Stella 1006 Nature Edges (masks) - Karen Burniston Makeup Brushes Happy with a Twist - Funny Bones, Riley & Company Clear embossing powder Does Up Riley - Spring Showers (sun) - Riley & Company Dress UP Riley - Sophies Accessories