Showing posts with label Napkin Fold Card. Show all posts

Saturday, 1 May 2021

Napkin Fold Anniversary Card

Hello!  When I first played with the Napkin Fold die set by Divinity Designs, I knew I wanted to try it with patterned paper, so I pulled out this older paper from my stash and made an Anniversary card. I have a walkthrough on YouTube as well:  

The card is held closed with a Belly Band that was decorated with fussy cut images from the same paper package and smaller paper strips. I also added gold gel pen highlights to the fussy cut succulent.


Inside, I cut the words Happy Anniversary (also from Divinity Designs) from gold foil card stock and added a few more fussy cut succulents.


This list contains some affiliate links. If you use these links to buy something I may earn a small commission at NO extra cost to you. 

/p>


Additional Supplies:
Card stocks
Patterned Paper - Kaisercraft, Greenhouse Collection (retired)
Card stocks - stash
Card size - 4" Square, fits in a standard A2 envelope

Thanks for stopping by

Saturday, 17 April 2021

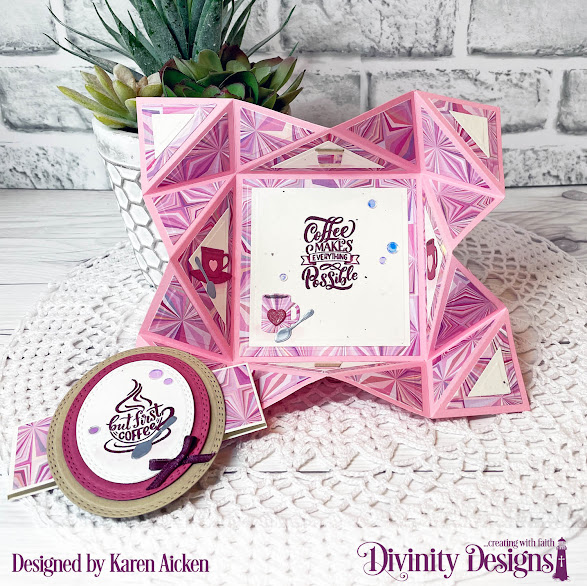
Coffee Themed Napkin Fold Card


Hello!  Today I'm sharing a second Napkin Fold Card. The Napkin Fold Card With Layers** was part of the April Release at Divinity Designs. You can find lots of inspiration on the Divinity Designs Blog HERE, and I have a walkthrough of my card on YouTube

I really like the script on these But First Coffee stamps and I added one to the Belly Band and another one inside. The Oval Stitched Rows dies are new-to-me and I quite like the detail they give! The little spoon was cut from matte silver card stock and comes from the Bitty Cups & Mugs, which is what I used to decorate the inside as well.


Here is a peek at the inside, with all the folds opened up. I added the second layer of triangles only on the larger ones that surround the inside as well as the four outside corners. The Mini Cups & Mugs dies were perfect for decorating around the coffee themed words.


The card is held closed by a Belly Band, which is also a die set by Divinity Designs. It works great for holding closed those cards that have lots of folds and want to spring open when they come out of the envelope.

You can always find lots of inspiration by Divinity Designs on their BLOG and everything is available at Divinity Designs.

** Requires a larger die cutting machine


Supplies:
Napkin Fold Card with Layers** - Divinity Designs
Geometric Paper Pad (Slimline Sized) - Divinity Designs
Belly Band - Divinity Designs
Oval Stitched Rows - Divinity Designs
But First Coffee - Divinity Designs
Mini Cups & Mugs dies - Divinity Designs
Bearly Art Glue
Card stocks
Water brush
Silver card stock
Wink of Stella
Grey comic marker
No hole sequins - Studio Katia
Ribbon - stash
Card size - ~4 x 4", fits in an A2 Envelope

Thanks for stopping by

Sunday, 11 April 2021

Napkin Fold Card


Hello! Today I'm sharing a Fun Fold card using the new Napkin Fold Card With Layers from Divinity Designs. I have a walkthrough of my card on YouTube as well: 


The card is held closed with a Belly Band; another die set from Divinity Designs. I bought it since I like to make fun fold cards and sometimes they like to spring open on their own. This one comes with score lines (and layering dies!)  so it works well for those thicker fun fold cards. I added stamped and layered roses (My World stamp and Die combo) to a Double Stitched Circle, and a black Scalloped Circle. Then I added the Best Wishes, which is from the Celebration Word Dies. 

I die cut the largest layer of triangles from a pink mirror card stock so that is what I used for the Best Wishes as well. I love the sparkle and shine this gives!  I also went over the roses with a Wink of Stella pen.


Below is what the card looks like open - this is definitely one that's better to see in action! I have already started another Napkin Fold card - it's such a cool fold and I couldn't wait to play with it again.

Click HERE to go to the Divinity Designs Blog

Click HERE to see Divinity Design's Napkin Fold Card tutorial.


Thanks for stopping by