Showing posts with label Elizabeth Craft Designs. Show all posts

Tuesday, 23 July 2024

Mini Slimline Snowflake Tri-Shutter Card

I plan on making at least one holiday card each month, & this is the one I made for July. Here in Southern Alberta we are in a heat wave ... and my craft room is the warmest room in the house. Obviously I'm not getting a lot done in there these days! We don't have AC so when it gets to be over 30ºC (86ºƒ) the house can get a little uncomfortable. I am happy to sit outside on our back deck, where there is enough shade and a bit of a breeze to cut the heat but I don't haul a bunch of crafting stuff out there to work on.  Having RA and limited mobility - that is waaaaaay too many steps to bring it out and then back in to put away. I'd rather sit and listen to a podcast or audio book. It's also why I didn't do a full video for this card --- it's just too hot!


I wanted to make a fun fold card, so pulled out this Mini Slimline Tri-Shutter die set by Divinity Designs. The card base die can fit through a regular die cutting machine and you don't even need extended pads if you use removable tape. Just run it through on one end, turn the die/cardstock around and run it through the rest of the way. However, I do have a Big Shot Plus that I can use for larger dies like this. If I'm going to cut one using the big machine though, I usually cut a couple more and add the die cut bases in with the die set to use the next time. 

I've had this silver foiled snowflake paper (12 x 12') for a couple of years but realized after I die cut the layers and added them to the white card base, that I covered up the sticker on the back so I have no idea who makes it!

After I finished the stamping and the card was 'finished', I had a look through my small snowflake dies to add a few extra as embellishments. But you know what? I decided that I liked it just the way it was. 😊  One more card for my holiday stash.


Note, the measurements for the matted rectangle inside the card are:  3 x 2.75", and 2.75 x 2.5"

Supplies used:
Mini Slimline Tri Shutter Die Set (with Layers) - Divinity Designs
Patterned paper - unknown
Rainbow Holographic cardstock - Recollections
Snowflake die - Elizabeth Craft Designs
Catherine Pooler coloured inks
Front sentiment - Snowflake Season, Penny Black
Inside Sentiment - Christmas Classics, Stampin' Up


Wednesday, 3 July 2024

Honey Pot Mini Slimline


Last week I shared a Mini Slimline card with leftover strips of patterned paper that came in Paper Roses' cardmaking kit "Bee Happy". Today I'm sharing another Mini Slimline and it's my final card with the kit!! There is only one small piece of black printed paper left and the sentiments but I'm calling it done and tossing all the tiny bits and pieces. I save all but the smallest pieces when working with a kit, because sometimes they are perfect to punch or die cut a little somethin' something' to add to a card from the kit. When I'm done with the kit though, I'm done with all the small pieces too. The sentiment strips I added to my clear envelope of stamped ones to use on future cards.

There are touches of gold on the card, with the narrow gold foil tape, the gold foil bee stickers and I rubbed the honey pot lid with gold Lunar paste. I was happy with how well that die cut worked on this card!


Below is a peek at the inside ...

Note:  I did colour the foil bee stickers with a yellow alcohol marker to make them stand out a little more.

I didn't count how many cards I made with the kit, but it was well over a dozen and I really enjoyed using it.


Supplies used:
Bee Happy Cardmaking Kit - Paper Rose
Gold foil narrow tape - Amazon .ca
Honey Pot dies - Honey Bee Stamps
Gold Lunar Paste
Blending sponge
Catherine Pooler coloured inks
Hello die - MFT Stamps
Shimmer Spray
White gel pen
Alcohol markers
Gold bee stickers - Amazon .ca
Petite Scalop Mini Slimline die - Taylored Expressions
Bee Sentiments - Elizabeth Craft Designs (old)


Tuesday, 25 June 2024

Mini Slimline 'BUZZING BY TO SAY...' Card


I was moving things around in my craft room and found the Bee Happy pouch with a few leftover pieces inside it. This is a cardmaking kit by Paper Rose that I worked on a lot several months ago. I decided to see what was in the pouch and ended up with enough pieces to make two Mini Slimline cards. This is the first one and I'll share the second one another day.

There were no more ephemera pieces left so I stamped and die cut a bee to add onto a die cut hexagon. The bee was coloured with alcohol markers with some glitter glue added as well. The outside sentiment is in the same stamp set as the bee (Studio Katia).


Here is a peek at the inside, with a very old stamp and a few scraps of the patterned paper. Since there is narrow gold tape on the front I added a strip inside as well.


Supplies used:
Bee Happy Cardmaking Kit - Paper Rose
Gold foil narrow tape - Amazon .ca
Hexagon Crosshatch dies - Karen Burniston
Honey Bees - Studio Katia
Alcohol Markers
Wink of Stella
Blending brushes - Taylored Expressions
Catherine Pooler Coloured Inks
Bees Sentiments - Elizabeth Craft Designs (old)


Friday, 16 February 2024

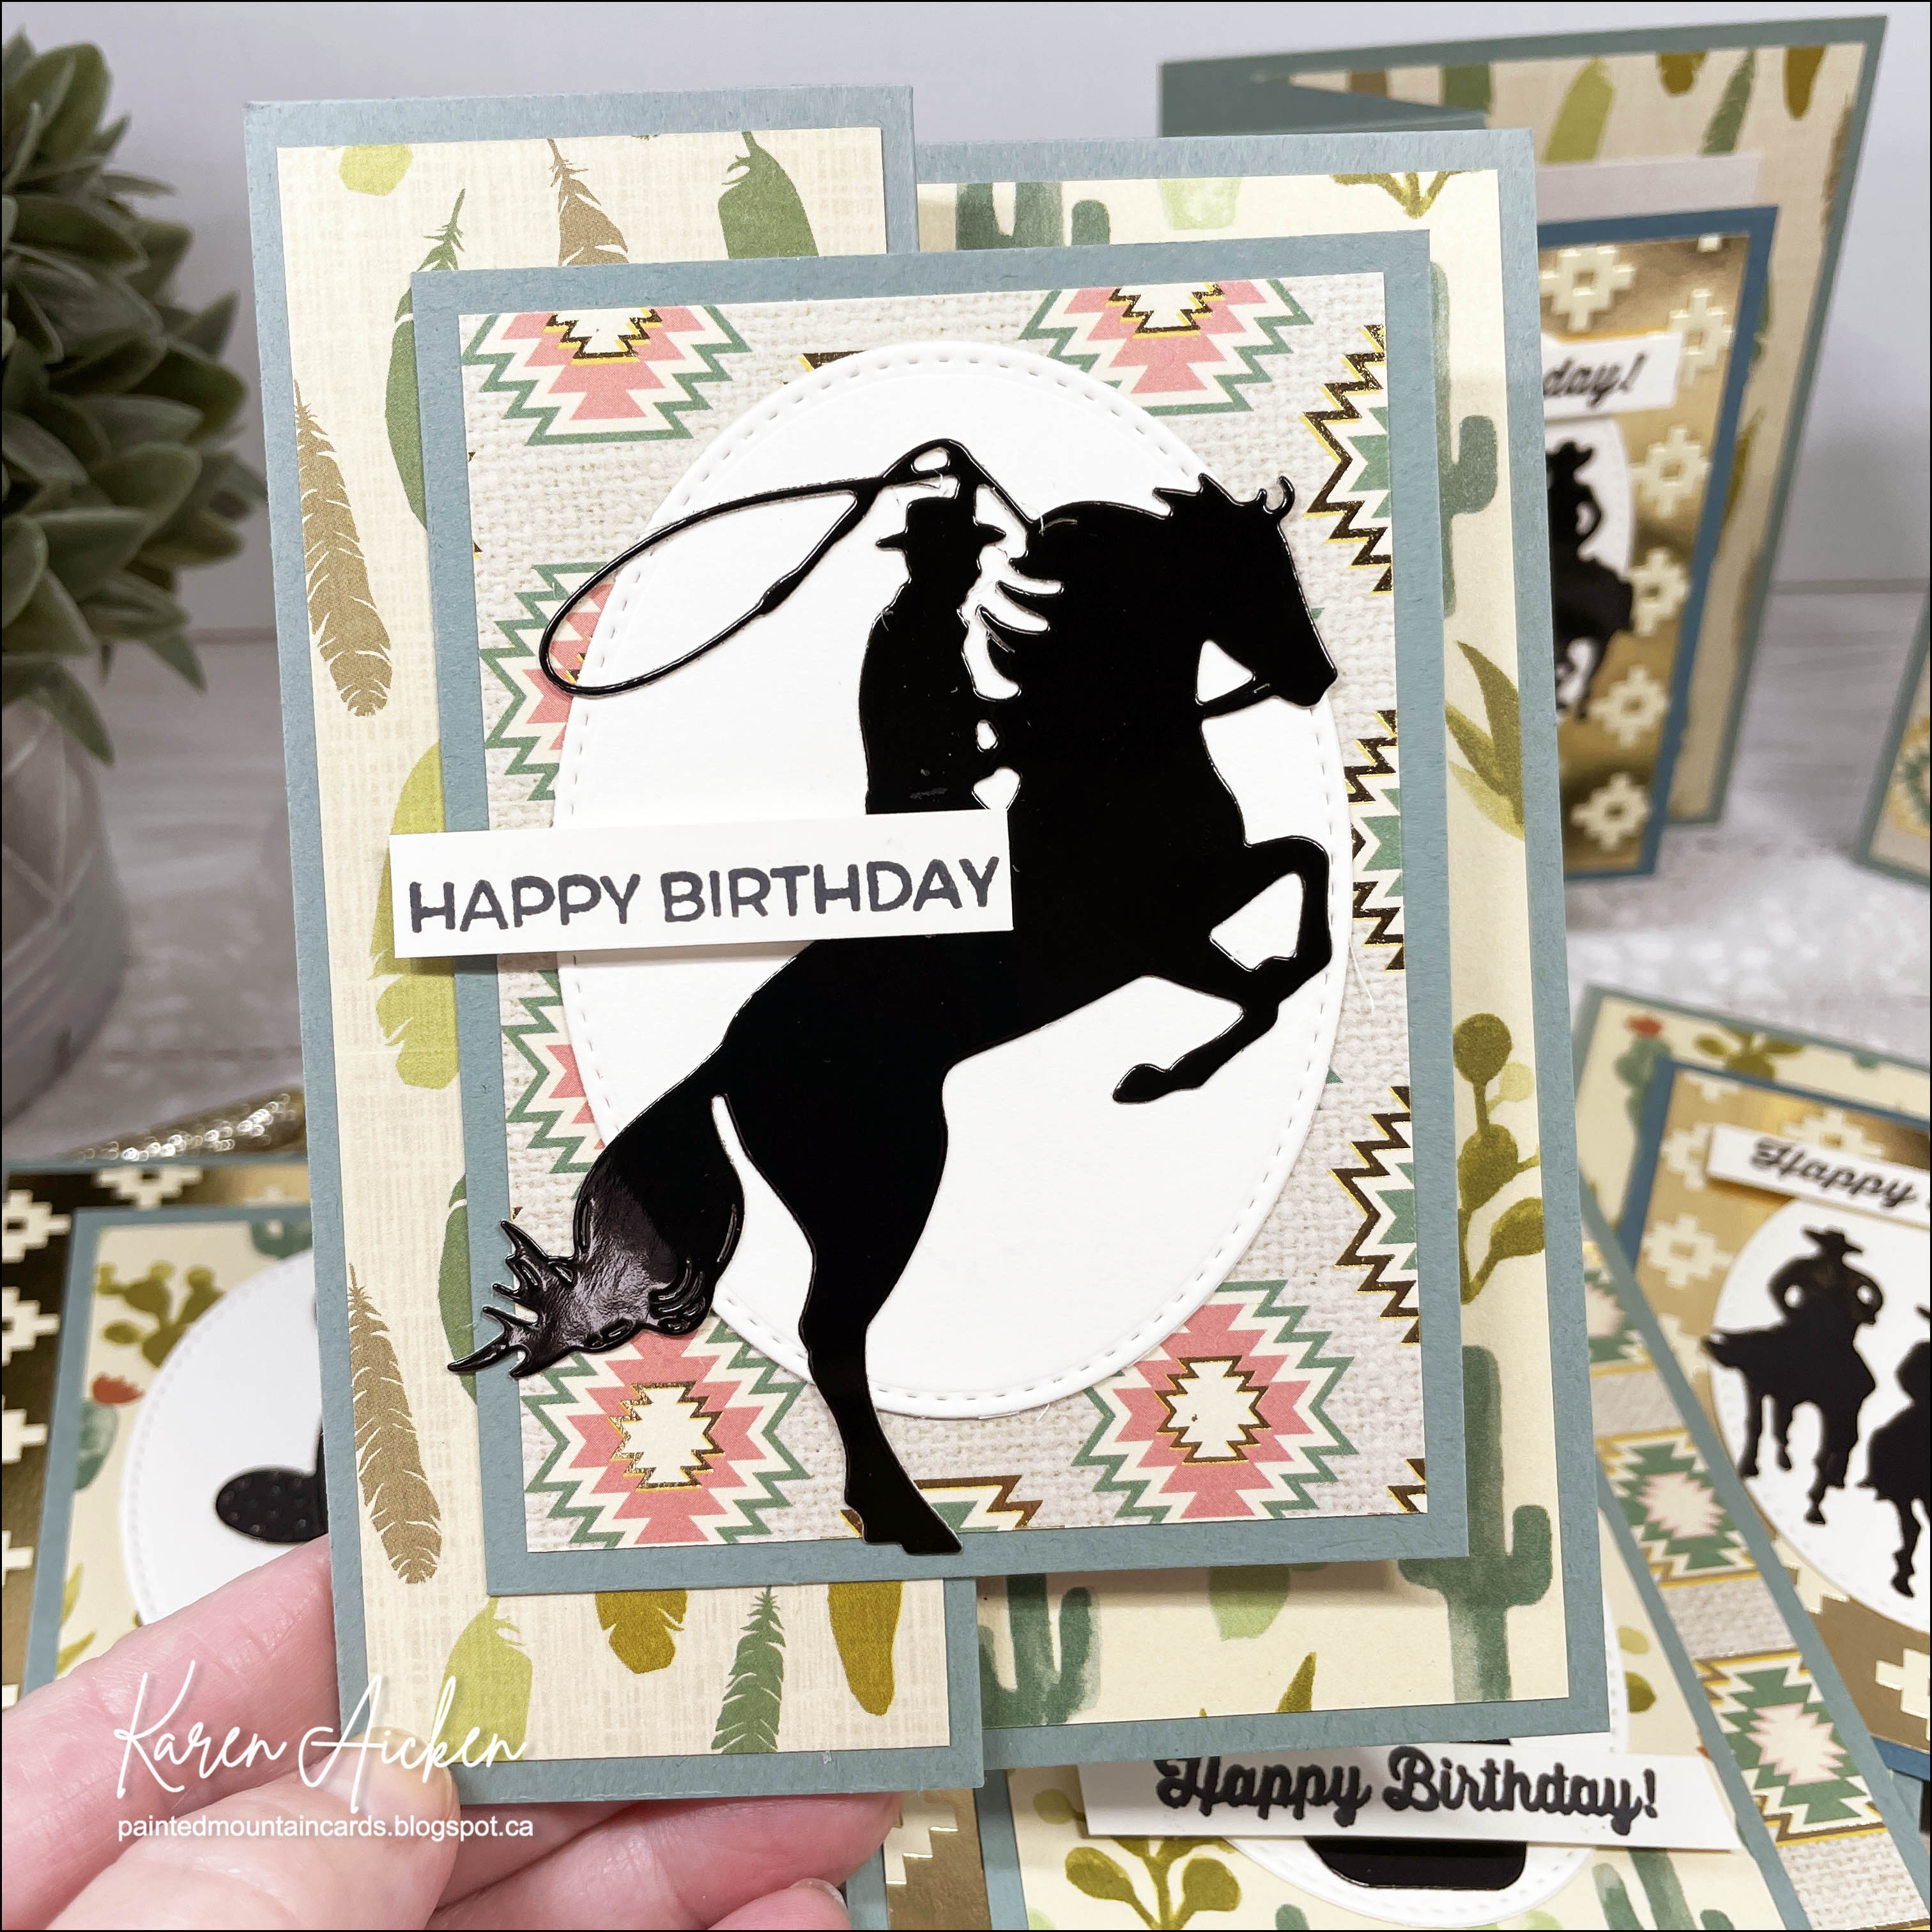
Eight Desert Themed Birthday Cards


Welcome to Fun Fold Friday here on my blog!

It's no secret that I love making Z Fold Cards, and since I am going to need several masculine birthday cards in the next little while I pulled out the October 2019 Sheetload of Cards.

I have a walkthrough of my cards on YouTube:


I've had this paper pad for a number of years and I like that some of the sheets have gold foiling on them. It was fun to pick the four different patterns to use with the Sheetload cutting guide as well as what die cut elements I would be adding to the fronts. These were cut from black glossy cardstock for a little more pizzazz.


Inside the cards I chose a couple of Funny Bones sentiments and alternated which ones went with which cards.


There are two of each silhouette design so I have enough variety to choose what card goes to which friend/family member.


I thought this sentiment went perfectly with the horseback riders above.


I love this 'bucking bronco' die so it was fun to get it out again.


Below is one more of the funny sentiments.


Supplies used:
Patterned paper - Desert Dream, Recollection (old)
Stitched oval dies - MFT Stamps
Black glossy cardstock
Feather dies - Elizabeth Craft Designs (old)
Bucking horse - Paper Rose
Cactus & Pot - Paper Rose
Cowboys & Cactus Silhouettes - Divinity Designs
Small Happy Birthday - Birthday Banners, Stampin' UP
Larger Happy Birthday - Happy Birthday Many Ways, Catherine Pooler
Inside sentiments - Funny Bones, Riley & Company
Gold Nuvo Drops

Monday, 12 February 2024

Six Animal Birthday Cards


Welcome to Masculine Card Monday here on my blog!

I am always so inspired by patterned paper. I opened the drawer where I have these 6x6" paper pads looking for something completely different but spied this older pad and pulled it out. Then I went looking through my Sheetloads for a 6x6" paper edition and decided to go with the one from November 2021.

As usual when I am creating a Sheetload I cut down all the papers and cardstock according to the sketch & cutting guide, then I adhere everything down to the card bases. At that point I start looking through my stash to see what I already have that can be used to decorate the front. Since the majority of Sheetload cards I make are Birthday Cards I'll be donating to my Mom's old nursing home, I knew I would have a Happy Birthday somewhere on the front.

I pulled out a bin of stamped and die or fussy cut images that were done many years ago. These ones were already coloured and everything! I used to haul stamped images when we were camping or at our cabin and would spend the evenings colouring and fussy cutting. I only used a fraction of what I made up and everything left went into a clear bin. 

I added the animals to the card fronts with foam tape and the Happy Birthday onto a fishtail banner and my fronts were done.


Inside is a stamped sentiment on a white panel and there is lots of room for the staff to sign for the residents who will be receiving these cards.


When I was finished these cards, I had another look at the remaining papers and cut down more sheets for a second set of cards. I'll be sharing those next week.

Supplies used:
Patterned paper - 6x6" Reunion, My Minds Eye (old, from my stash)
Animal Stamps - Elizabeth Craft Designs (retired)
Water colour pencils
Water brush
In & Out Birthday stamps - Taylored Expressions
Mini Misti
Various cardstocks
Catherine Pooler inks

Thursday, 15 June 2023

Paper Pumpkin Alternate Flip Card Duo for Spring

Each week I've been sharing my alternate cards using the March 2020 Paper Pumpkin kit called No Matter The Weather. For these ones I made two nearly identical cards using the 5 x 7" Flip Mechanism by Sam Calcott. In her assembly video she mentioned being able to use the double flip as a single, and I just had to try it out. I still made larger cards - these ones are 5 x 6.5" because I wanted to use the umbrella patterned paper and it was in a 6 x 6" paper pad. 

I have a walkthrough of my cards on YouTube:


Folding the stitched circle pieces in half (from the kit) I stamped PULL on them and added them to the side you would pull to flip the rain boot piece over. I did one that pulls to the right and one that pulls to the left and I cannot decide which one I prefer. 😊

Inside the cards I stamped the rain boots and greenery, as well as a lovely Easter sentiment that I've had for a couple of years. I love the size of it!

... one more look ...

I'll be back next week with another alternate project with this kit.

 If you would like to see Sam's assembly video, click HERE.


Having been asked how many cards I make I thought it would be fun to keep track this year. Many of my posts include more than a single card or project and below is my tally. 

Card Tally for 2023
January - 53 cards
February - 56 cards
March - 55 cards
April - 32 cards
May - 43 cards
June so far - 19 cards

Supplies: (NOTE our internet has been either intermittent or out completely, so I'm not able to add the linked thumbnails for this post. I am not even sure if it will even post  - I've been trying since the 15th! 😳 Eventually it will get sorted out though)

No Matter The Weather Paper Pumpkin kit, March 2020 (Stampin' Up)

5 x 7 Flip Mechanism - Sam Calcott, Made to Surprise

Patterned paper - Blank Canvas, 1st Edition (old, from my stash)

White cardstock

Umbrella patterned paper, 6 x 6" Spring - Echo Park

Pull stamp - Paper Pumpkin Feb 17, Many Happy Birthdays (Stampin' Up)

Spring Sentiments - Elizabeth Craft Designs

5 x 6.5" Card blank and envelope - Michaels

Alcohol markers

Slimline ATC Windows Die - Whimsy Stamps

Catherine Pooler inks: Date Night, Do Si Do, In the Park, Aquatini

Nuvo Glaze - Tonic Studios

Wink of Stella

Friday, 5 May 2023

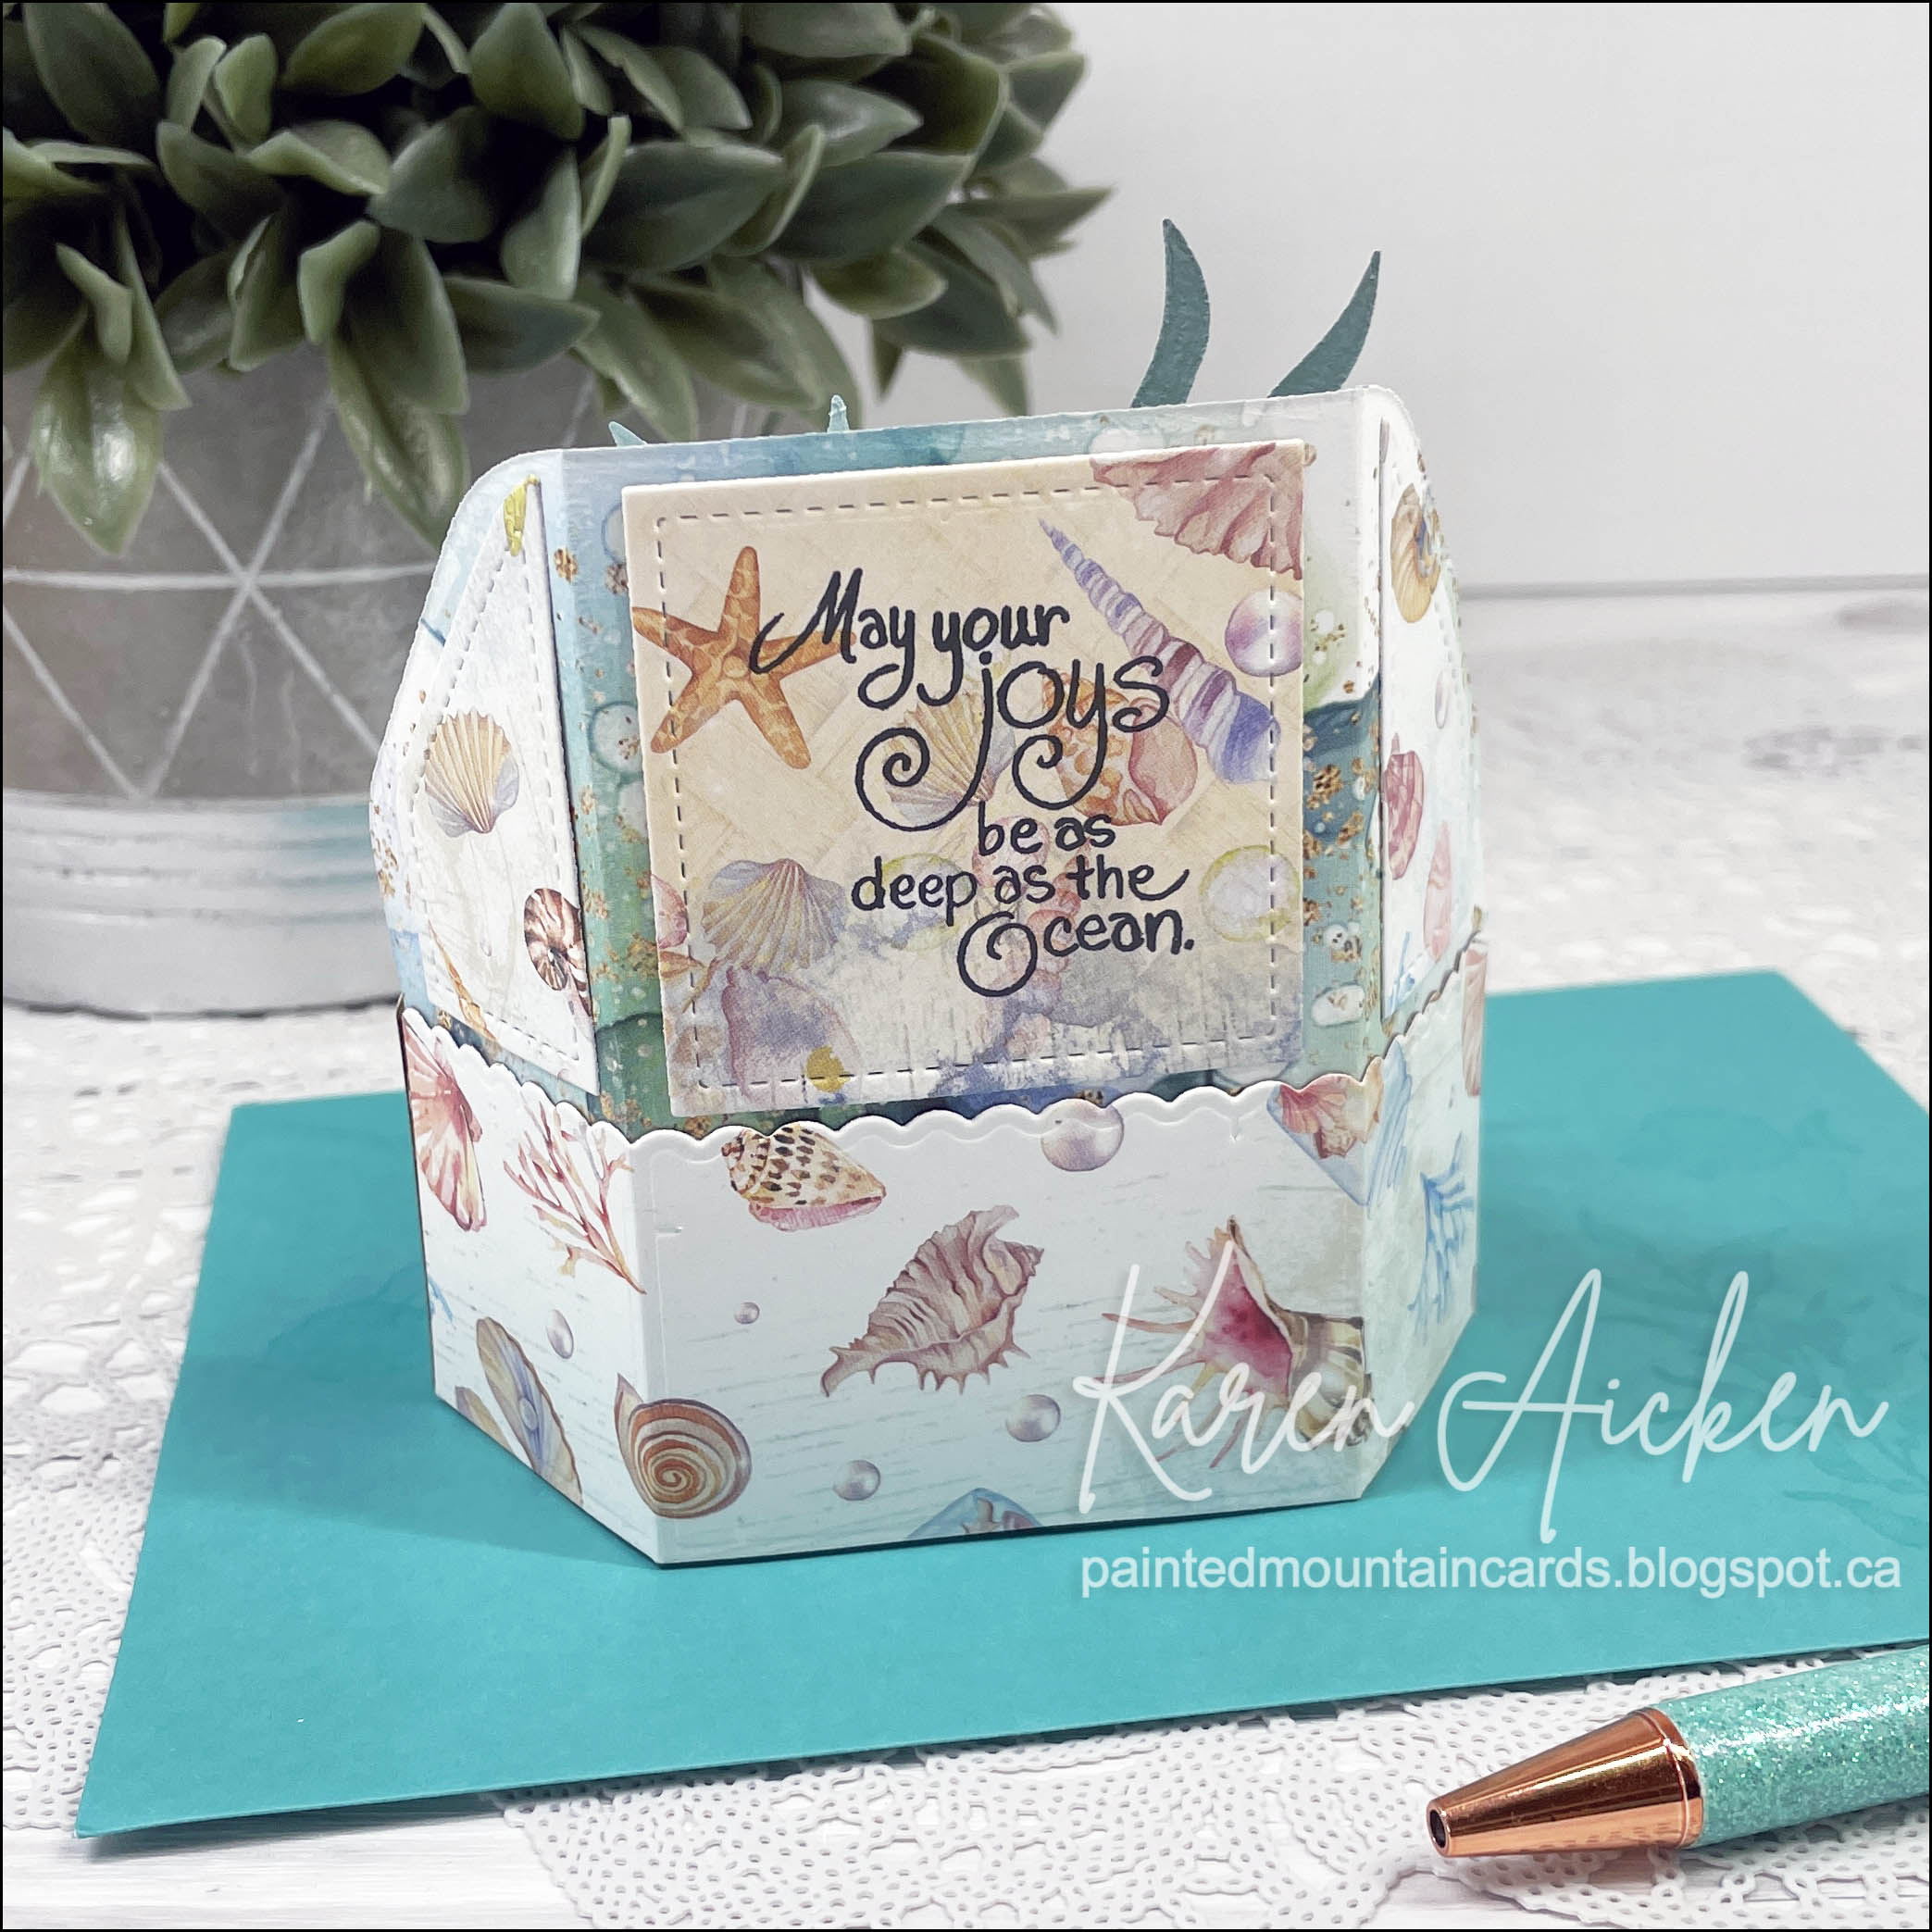
Underwater Platform Pop Up Card


Today is Fun Fold Friday on my blog & I'm sharing the 5th edition to my monthly series 'Platform Pop Up' cards. Back in early March I finally broke down and purchased the Add On for the Platform Pop Up. This was my first play with it and I think it's going to be fun! 


As usual, my card started with the patterned paper which is Slimline sized and nice and heavy weight. Then I pulled out Karen Burniston's Sea Animals to decorate the platform tabs. Building as I went, I added a couple of sand dollars then some seaweed and iridescent bubble gems.


I stamped a sentiment on the back from an older stamp set by Stampendous.


This card folds down flat and will mail in a 5 x 7" envelope!


Having been asked how many cards I make I thought it would be fun to keep track this year. Many of my posts include more than a single card or project and below is my tally. 

Card Tally for 2023
January - 53 cards
February - 56 cards
March - 55 Cards
April - 32 Cards
May so far - 20 Cards

Additional Supplies:
Blue cardstock
Black marker
Sand Dollar - Sea of Textures, Stampin' Up (retired)
Envelope stamping - Seas the Day, Stampin' Up
Words - Stampendous (retired?)
Seaweed - Elizabeth Craft Designs (retired)
White pearl cardstock
Blue pearl cardstock scraps
5 x 7 teal envelope

This blog uses affiliate links whenever possible. This means, if you make a purchase through one of my affiliate links that you pay the same amount but I may receive a small commission from your purchase. I only link products that I own, love and use for my card making and not every link below is an affiliate one! 😊


Thursday, 2 February 2023

February 2023 Sheetload Of Cards


It's the 2nd of the month and that means it's time for the Collaboration Team to share their Sheetload of Cards. I'm on the YouTube Collaboration Team so HERE is the link to my YouTube video.  


I added pops of gold foil using older die's and I really like how they added to the card!


Once again I made birthday cards that I will donate to my Mom's old nursing home.


See what the Collaboration Team created:    YOUTUBE: http://bit.ly/3HO3bqV    INSTAGRAM: https://www.instagram.com/explore/tags/slctfeb2023/


If YOU CREATE cards using this month’s SheetLoad, PLEASE USE the following hashtags: #SUYSFeb2023 #ShowUsYourSheetLoad

      Get more details on how to “Show Us Your SheetLoad”, here: https://youtu.be/8r6JbbGfWmo


Find out how to download the February 2023 SheetLoad of Cards, here: https://youtu.be/ZXq67liMggs


Late last year I was asked how many cards I make but I didn't have a clear number. Since many of my posts include more than a single card or project, I thought it would be fun to keep track this year. 

Card Tally for 2023
January - 53 cards
February so far - 20 cards
Additional Supplies:
Green cardstock
White cardstock
Patterned paper - Tropicool Vibes, Lynda Kanase (Sizzix)
Stitched circles - MFT Stamps
Pair of Leaves - Elizabeth Craft Designs
Feathers/Leaves - Paper Smooches
It's Your Day - Taylored Expressions
Wild Greenery - MFT Stamps

This blog uses affiliate links whenever possible. This means, if you make a purchase through one of my affiliate links that you pay the same amount but I may receive a small commission from your purchase. I only link products that I own, love and use for my card making and not every link below is an affiliate one! 😊


Wednesday, 1 February 2023

Eight Stashbuster Birthday Cards


I'm starting off February with stash buster cards! Back in November, I went through an older 6 x 6" paper pad and made a few 'stacks', or 'card kits' out of some coordinating papers. I used a stitched rectangle die for the largest background panel and set the stacks off to the side to work on as I felt like it. 

Little by little I ended up with nine card fronts! I did them similar to the way I do my Sheetload of Cards, doing all the paper cutting and then adhering everything to the card base. THEN I decided what to use for the sentiments and decorative elements.

I went through my binder of pre-done embellishments (made years ago when we were in the mountains for weekends) and decided what elements worked with the different papers. Then I went through my odds & ends box to see if any of the circles/ovals/labels in there would work. I was able to use up a bunch of items both from the binder and the box!!  I shared a single card that didn't photograph well with these eight awhile ago and you can see that one ***HERE***


I used my MISTI to stamp the same verse inside all eight of the cards. It's from the Stamps of Life, the Lots of Birthday2Stamp.


Everything I used has been in my craft stash for so long, I doubt it's still available, so I'm not going to even bother listing the supplies. The cupcake was from Elizabeth Craft Designs, Ice Cream was from Sizzix, Patterned paper a Dear Lizzy Daydreamer pad, some stitched rectangles, leftover circles & labels etc.

Late last year I was asked how many cards I make but I didn't have a clear number. Since many of my posts include more than a single card or project, I thought it would be fun to keep track this year. 

Card Tally for 2023
January - 53 cards
February so far - 8 cards

Saturday, 21 January 2023

Water Coloured Tulip Birthday Card


Back in November, I went through an older 6 x 6" paper pad and made a few 'stacks', or 'card kits' out of some coordinating papers. I used a stitched rectangle die for the largest background panel and set the stacks off to the side to work on as I felt like it. 

Little by little I ended up with nine card fronts! I did them similar to the way I do my Sheetload of Cards, doing all the paper cutting and then adhering everything to the card base. THEN I decided what to use for the sentiments and decorative elements.

I went through my binder of pre-done embellishments (made years ago when we were in the mountains for weekends) and decided what elements worked with the different papers. Then I went through my odds & ends box to see if any of the circles/ovals/labels in there would work. I was able to use up a bunch of items both from the binder and the box!! When I was finished the cards though, this one didn't really go with the rest of them so it's in it's own post. 😊 The remaining eight will be shared another day.

The tulip is a Peel-Off sticker (from Elizabeth Craft Designs) had been adhered to water colour cardstock and probably coloured with Tombow markers and a water brush. Then it was fussy cut and didn't get used for whatever project I had been working on so ... into the binder it went. And there it sat. For years. I was SO HAPPY when I saw how well the colours worked for the patterned paper! I added it to a die cut oval with foam tape, and used more foam tape to add the oval to the card front.


I added a stamped sentiment on a small fish tail banner, then added a stamped panel inside and my stash buster card was finished. This will go to my Mom's old nursing home. NOTE: I have a plastic envelope filled with stamped birthday sentiments that I can go through when card making. So I just pulled one from that envelope for the card front, and added it to a peach scrap.


I'm not even going to list the supplies used, since everything is so old and has been sitting in my craft room for years.

A couple of times last year, I was asked how many cards I make but I didn't have a clear number. Since a lot of my posts include more than a single card or project, I thought it would be fun to keep track this year. 

2023 Tally: 39 Cards

Tuesday, 15 November 2022

Merry & Bright Mini Slimline Card


Hello my crafty friends. Today I'm sharing a card that I actually made using two narrow leftover strips of patterned paper. One was a boarder strip with the gold foiling, and when adhered together they were sized perfectly for a Mini Slimline card! 

Using the Short Crosshatch Rectangle dies by Karen Burniston, I cut the panels then layered the patterned paper one over a white panel with thin foam tape. A few gold Peel Off snowflake stickers and some gems were added for additional sparkle and finally a stamped sentiment finished the card front.


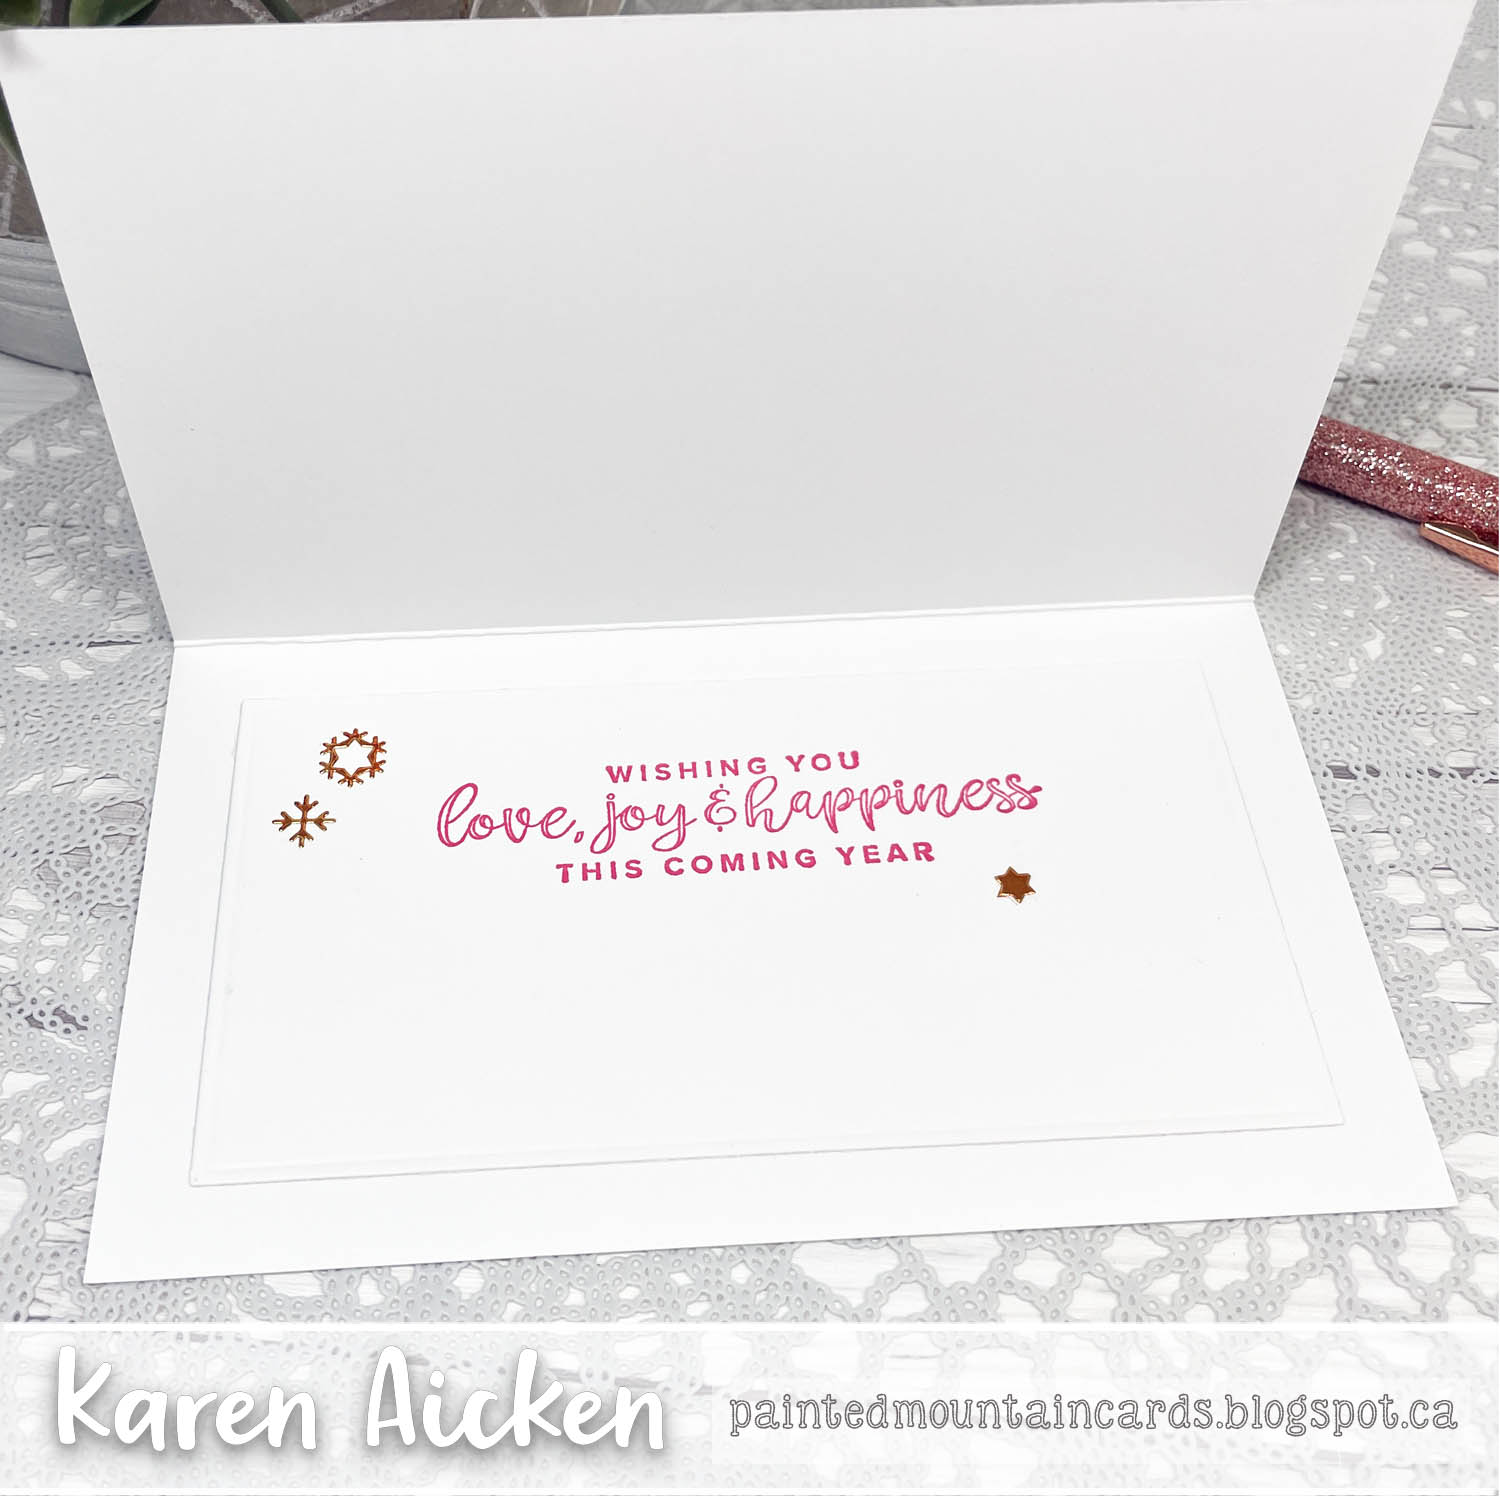
Inside is a stamped sentiment and three more of the peel off stickers. The ones inside were coloured with a pink alcohol marker before adhering them to the card.


I loved being able to use up some scraps with this quick and easy card.

This blog uses affiliate links whenever possible. This means, that at no cost to you, if you make a purchase through one of my affiliate links that I may receive a small commission from your purchase. I only link products that I own, love and use for my card making and not every link below is an affiliate one! 😊

Any supplies I'm unable to link are listed at the very bottom of my post.

Additional Supplies:
Patterned paper - Holiday Bash, Recollections
White cardstock
Snowflake Peel Off's - Elizabeth Craft Designs
Sentiment - Encircled in Warmth, Stampin' Up (retired)

Thursday, 10 November 2022

Snowmen & Sweets, A Sheetload Rewind


Hello my crafty friends! I actually made these cards back in early October. If you follow me you know I rarely post things in the same order I make them. I was thinking ahead for the upcoming November Sheetload of cards and deciding on what paper pad to use. I don't usually do this, but for some reason I wanted to use this pad for the Sheetload. Once I saw the November Sheetload though, I went in a different direction entirely. Ha.

However, I was able to use an older Sheetload with these papers - the February 2020 Sheetload of Cards - and this is what I came up with. I have a walkthrough of my cards on YouTube


The sentiment stamps are ones I've had for YEARS and I matted the ones on the fronts with a blue mirror cardstock.


Here is a peek at the inside ... all of the cards have the same sentiment.


Using the cutting guide for this Sheetload, you will have some patterned paper pieces leftover. I went ahead and used most of those on these two extra cards.


I also turned one of the Sheetload cards into a Pop Up using Karen Burniston's Rockin' Rectangle.


This blog uses affiliate links whenever possible. This means, that at no cost to you, if you make a purchase through one of my affiliate links that I may receive a small commission from your purchase. I only link products that I own, love and use for my card making and not every link below is an affiliate one! 😊

Any supplies I'm unable to link are listed at the very bottom of my post.

Additional Supplies:
Feb 2020 Sheetload of Cards
Patterned paper - Holiday Bash, Recollections (old)
White cardstock
Stamp on front - Hero Arts (old)
Banner punch - Stampin' Up (retired)
Gold peel offs and snowflakes, and words - Elizabeth Craft Designs
Blue cardstock
Adhesive backed snowflakes - Stampin' Up (retired)