Showing posts with label Pigment Craft Co. Show all posts

Monday, 27 November 2023

Gift Card Holders (& Tutorial)


After many years of making the same type of Gift Card Holders (see that tutorial HERE) I decided to change it up and even managed a video tutorial!  There are lots of this type of Gift Card Holders out there, but I didn't like how deep the pocket was for a lot of them. That is why I came up with my own measurements and wanted to share. These will fit in a standard A2 envelope.


The first pair uses double sided patterned paper. One has a large snowflake on the front and the other is a 3 x 4" red foil cut apart.


Below you can see the pockets on the left side where you would add the gift card.


This next pair was done with one having a cardstock base and the other from patterned paper. This patterned paper wasn't nearly as sturdy as the first pair so I added a printed panel inside to help with that.


The pockets and sentiments are revealed when you open the holders.


This one was quick and easy and just features pretty patterned paper along with a die cut oval on the front.


Finally, one made with gold foiled patterned paper that I inked with blending sponges and dye inks. The card I made to go with this Gift Card Holder will be up on my blog tomorrow. 😊


Gift Card Holder by Karen Aicken

Base is 10.25 x 4.25"

Score at 2 and 4.75". Be mindful of paper direction! 
Turn it and look at where the score lines will be before scoring

Patterned paper - One at 5.25 x 4" (this goes on the inside right)

One panel at 2.5 x 4"  (this is for the front left)

  One at 1.75 x 4"  (this is to cover the pocket)


Having been asked how many cards I make I thought it would be fun to keep track this year. Many of my posts include more than a single card or project and below is my tally. 

Card Tally for 2023
January - 53 cards
February - 56 cards
March - 55 cards
April - 32 cards
May - 43 cards
June - 34 cards
July - 56 cards
August - 106 cards
September - 61 cards
October - 51 cards & 5 Tags
November so far - 42 cards

I decided to cancel the subscription that provided linked thumbnails to what products I used on my cards. It was costing me out of pocket each month, so I’m back to listing what I used 

Supplies:

Snowflake Gift Card Holder:
Patterned paper - Peaceful Prints, Stampin' Up (old)
Double Stitched Circle dies - Divinity Designs
Large Snowflake die - Impress (old)
Corner Rounder
Project Life Journal Card & Banner Sentiment
Giftable Greetings - MFT Stamps
Peel off Snowflakes - Ecstasy Crafts

Masculine Gift Card Holders:
Patterned paper - unknown
Stitched Ovals - MFT Stamps
Treat Yourself & dies - Pigment Craft Co
Catherine Pooler Inks
Blending Brushes - Taylored Expressions
Gorgeous Grunge - Stampin' Up
Trucking Along & punch - Stampin' Up

Simple Winter Gift Card Holder
Giftable Greetings - MFT Stamps
Braided Oval die - Pinkfresh Studios

Gold Foiled Gift Card Holders
Patterned paper - Holiday Bash, Recollections (old)
Inverted Scallop Circles - Pinkfresh Studios
Short Rectangles Crosshatch - Karen Burniston
Word Set 12 Anniversary - Karen Burniston
Narrow gold tape - Amazon
Mirrored hearts - Kat Scrappiness
Gold foil cardstock
Blending brushes - Taylored Expressions

Monday, 12 June 2023

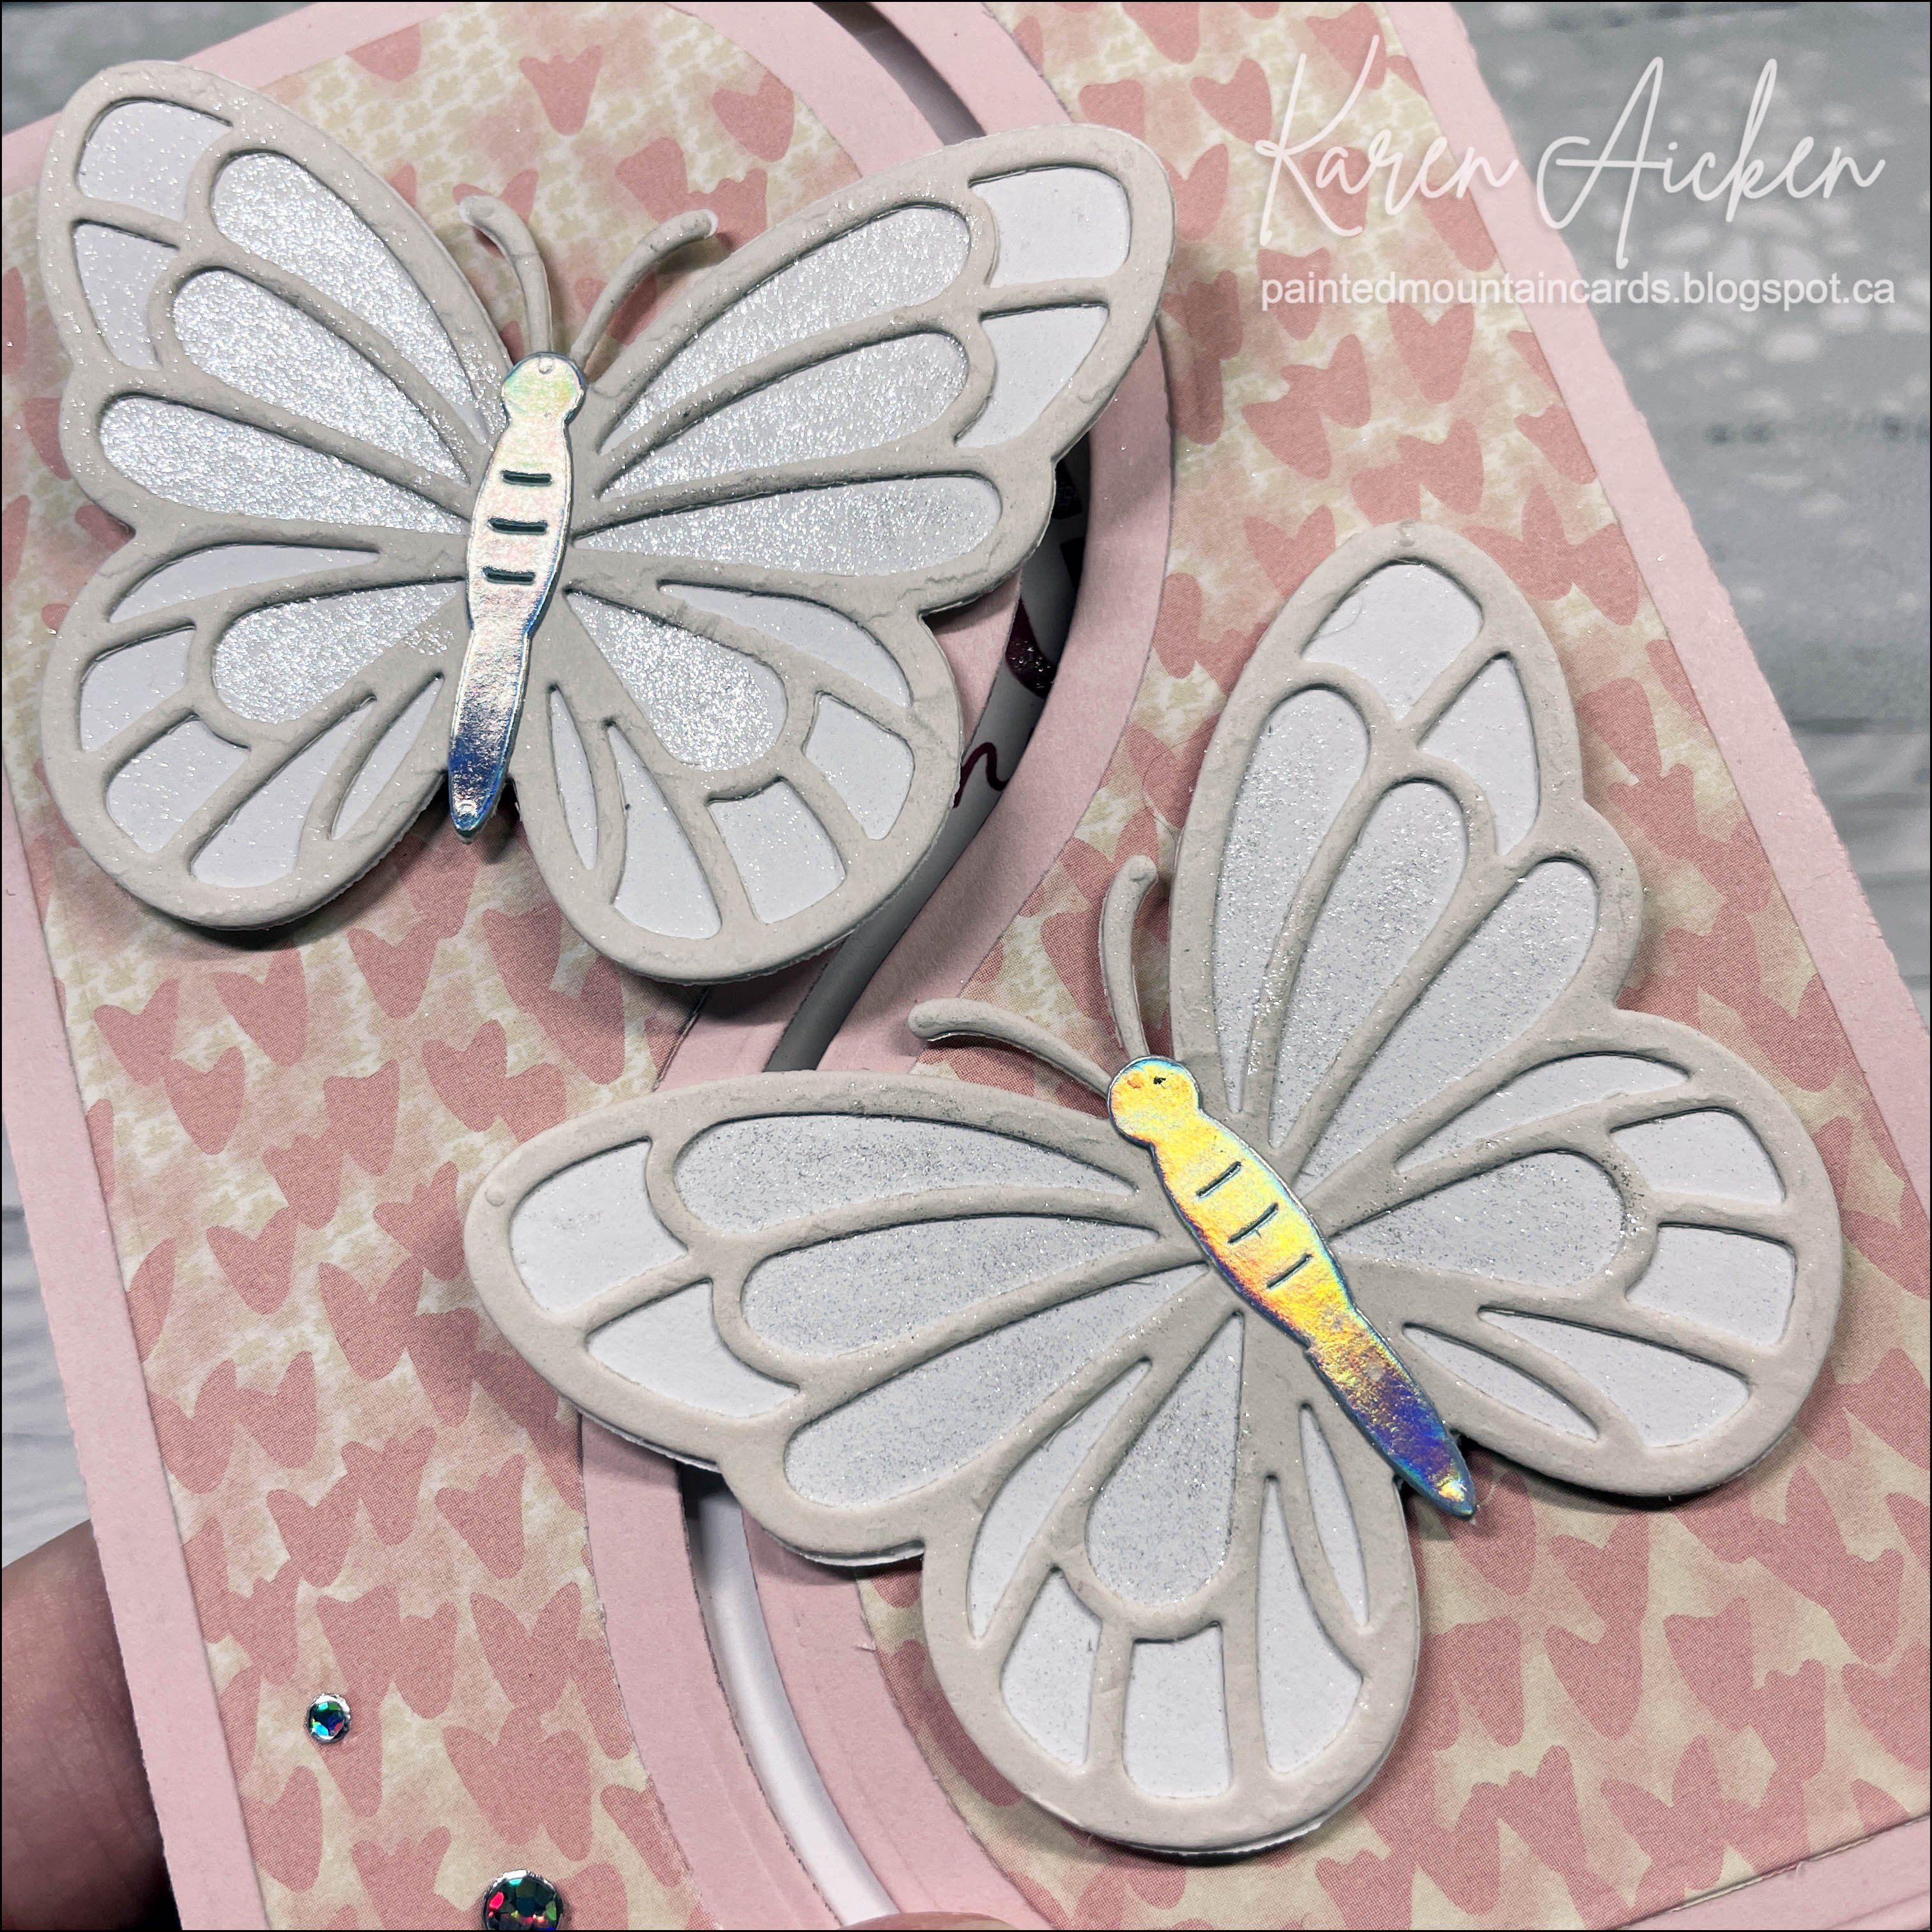
Butterfly Curvy Gatefold Card


I spent some time in February trying to USE UP a big stack of 6 x 6" patterned paper that had been part of a Stampin' Up paper share several years ago. I'm happy to say that this card used the final sheet! A lot of the cards I made with those papers won't be shared on my blog, simply because there are so many of them. I have shared a few and have a few more to come but I mostly made birthday cards to donate to my Mom's old nursing home.

Today's card uses the Curvy Gatefold die set by Creative Craft and I added Lawn Fawn butterflies.


Here is a peek at the inside, with a stamped sentiment and another butterfly. I also used a small leftover paper strip. Since I am low on Thank You cards, this one will go into my stash.


I added Wink of Stella at the bottom edge of the solid letters, but it was hard to photograph. It adds such a lovely shine as it catches the light.


Having been asked how many cards I make I thought it would be fun to keep track this year. Many of my posts include more than a single card or project and below is my tally. 

Card Tally for 2023
January - 53 cards
February - 56 cards
March - 55 Cards
April - 32 Cards
May - 43 Cards
June so far - 15 Cards

Additional Supplies:
Curvy Gatefold - Creative Craft
Patterned paper -old, stamping' up ... last one of a huge paper share 6 x 6"!
Rainbow Holographic Cardstock - Recollections
Shimmer spray
Flat Gem Stickers - Dazzles

This blog uses affiliate links whenever possible. This means, if you make a purchase through one of my affiliate links that you pay the same amount but I may receive a small commission from your purchase. I only link products that I own, love and use for my card making and not every link below is an affiliate one! 😊


Thursday, 12 January 2023

Hello Butterfly Easel Card


Today's card is the first one in my series 'Throwback Fun Fold Dies'. As I mentioned in **THIS** post, I am going to start running several different monthly series this year. That will allow me to use a lot more of the stamps & dies already in my craft room and share even more ideas with you.

The die I used is called "Lively Stand Up" card, and I bought it many years ago from the Stamps of Life. Since it creates an A2 sized Easel Card I carefully lined up the die on a printed & foiled A2 notecard also from my stash. This card was truly a 'stash buster', as even the butterfly on the front is from an Ideology package I've had for years.
 

While the die cuts a small notch that you would normally tuck the front into to make it 'stand up', I prefer adding a bumper raised up with foam tape. That was cut from another one of the printed/foiled note cards in the same package. I added some brown patterned paper and a few gems as well as the die cut hello. That die was in the same package as the Lively Stand Up.


Inside you can see the remainder of that second note card panel and a stamped sentiment. 


... another look at the pretty foiling from the note cards ...

A couple of times last year, I was asked how many cards I make but I didn't have a clear number. Since a lot of my posts include more than a single card or project, I thought it would be fun to keep track this year. 
2023 Tally:  22 Cards

Additional Supplies
Lively Stand Up - the Stamps of Life (retired)
Printed Card Foiled - Hobby Lobby
Brown patterned paper - Natural Botanical, Hobby Lobby
Lively Frameless - Sizzix (retired)
Butterfly - Tim Holtz Ideology 93554

This blog uses affiliate links whenever possible. This means, if you make a purchase through one of my affiliate links that you pay the same amount but I may receive a small commission from your purchase. I only link products that I own, love and use for my card making and not every link below is an affiliate one! 😊

Thursday, 10 November 2022

Snowmen & Sweets, A Sheetload Rewind


Hello my crafty friends! I actually made these cards back in early October. If you follow me you know I rarely post things in the same order I make them. I was thinking ahead for the upcoming November Sheetload of cards and deciding on what paper pad to use. I don't usually do this, but for some reason I wanted to use this pad for the Sheetload. Once I saw the November Sheetload though, I went in a different direction entirely. Ha.

However, I was able to use an older Sheetload with these papers - the February 2020 Sheetload of Cards - and this is what I came up with. I have a walkthrough of my cards on YouTube


The sentiment stamps are ones I've had for YEARS and I matted the ones on the fronts with a blue mirror cardstock.


Here is a peek at the inside ... all of the cards have the same sentiment.


Using the cutting guide for this Sheetload, you will have some patterned paper pieces leftover. I went ahead and used most of those on these two extra cards.


I also turned one of the Sheetload cards into a Pop Up using Karen Burniston's Rockin' Rectangle.


This blog uses affiliate links whenever possible. This means, that at no cost to you, if you make a purchase through one of my affiliate links that I may receive a small commission from your purchase. I only link products that I own, love and use for my card making and not every link below is an affiliate one! 😊

Any supplies I'm unable to link are listed at the very bottom of my post.

Additional Supplies:
Feb 2020 Sheetload of Cards
Patterned paper - Holiday Bash, Recollections (old)
White cardstock
Stamp on front - Hero Arts (old)
Banner punch - Stampin' Up (retired)
Gold peel offs and snowflakes, and words - Elizabeth Craft Designs
Blue cardstock
Adhesive backed snowflakes - Stampin' Up (retired)

Wednesday, 31 August 2022

Sparkly Dog Gift Tag


Hello my crafty friends. I'm back today with another gift tag using the Wrap It Up dies & stamps from Pigment Craft Co. I also pulled in a bunch of stuff from my craft room - the dog is from a no-longer-around company called Paper Smooches. It was stamped then covered with some double sided adhesive then Silk Microfine Glitter from Elizabeth Craft Designs. Several years ago I made a bunch of these, so ... time to use one up at least.

I had just received my order from Studio Katia with their 'Simply Hi' items and had also ordered the Iridescent Ice Flakes. The larger ones will make great toppers for party hats, so I added one here. 

The blue polka dot paper was just a partial sheet so I got to use that up too. I added a dot of silver Stickles into each of the white spots for Birthday sparkle and shine.


I didn't realize the stamping was a little crooked until I was editing the photos ... oops!

This blog uses affiliate links whenever possible. This means, that at no cost to you, if you make a purchase through one of my affiliate links that I may receive a small commission from your purchase. I only link products that I own, love and use for my card making and not every link below is an affiliate one! 😊

Any supplies I'm unable to link are listed at the very bottom of my post.

Additional Supplies:
White cardstock
Seam binding
Twine
Dog - Paper Smooches (retired)
Blue Dot dsp scraps
Silver Stickles

Wednesday, 24 August 2022

Treat Yourself Tag


Hello my crafty friends!  Today I'm sharing the tag I made to add to a white gift bag for a family member who's celebrating a Birthday.  I had the patterned paper out since I'd used it to create another Sheetload of Cards, and thought it would make a cute tag. Then I pulled out stamps & dies from Pigment Craft Co.

The gift is some lovely teas from David's Tea and also one of her favs - dark chocolate Salted Caramels. They wrapped the chocolates for me at the shop, but the teas went into the white gift bag. I thought the 'Treat Yourself' was perfect! 


This blog uses affiliate links whenever possible. This means, that at no cost to you, if you make a purchase through one of my affiliate links that I may receive a small commission from your purchase. I only link products that I own, love and use for my card making and not every link below is an affiliate one! 😊

Any supplies I'm unable to link are listed at the very bottom of my post.

Additional Supplies:
White cardstock
Patterned paper - Hello Happiness, Taylored Expressions (retired)
Sequins - leftover from a Paper Pumpkin kit
Ribbon - stash
Silver cord - stash

Monday, 15 August 2022

Gold & Black Tag


Hello my crafty friends!  Today I'm sharing another gift tag using mostly supplies I bought from Pigment Craft Co when they were having their Canada Day sale. Love the size and shape of this tag - so different! I cut it from gold foiled paper (free with purchase from Stampin' Up during SALEabration).  I cut the tag again from white card stock and offset the two tags.

The gold pearl cardstock was sitting on my stamping table - it was just a partial sheet. Also close to me was the (retired) Garden Greenhouse from Stampin' Up so I cut some leaves using those dies. The stamped rectangle needed a little pop, so I die cut one of Karen Burniston's Border Blends from black card stock and tucked that up underneath for a cute scalloped look. Since I can't link the pearlized gold I used, I found others I can link for you.


The sequins & gems are from Studio Katia and there are gold gel pen highlights on the stamped sentiment.

This blog uses affiliate links whenever possible. This means, that at no cost to you, if you make a purchase through one of my affiliate links that I may receive a small commission from your purchase. I only link products that I own, love and use for my card making and not every link below is an affiliate one! 😊

Any supplies I'm unable to link are listed at the very bottom of my post.


Additional Supplies:
Patterned paper - Silver & Gold Specialty, 6 x 6" - Stampin' Up (Sale A Bration)
Gold thread - stash
Black sparkle ribbon - Stampin' Up (retired)
Garden Greenhouse dies - Stampin' Up (retired)
Black & Crystals - Studio Katia (gift with purchase)

Tuesday, 9 August 2022

Strawberry Tag


Hello my crafty friends. I've been having fun making tags these days, so here is another one using supplies from Pigment Craft Co.  I love the large size of this strawberry set and this was my first play with it. While I had everything out, I stamped and die cut 4 strawberries so I have more to create with.

The top photo shows the glitter from the Wink of Stella, but of course it's better in real life. The gift is for a friend, and I'm giving her a set of hand-made cards. 


This blog uses affiliate links whenever possible. This means, that at no cost to you, if you make a purchase through one of my affiliate links that I may receive a small commission from your purchase. I only link products that I own, love and use for my card making and not every link below is an affiliate one! 😊

Any supplies I'm unable to link are listed at the very bottom of my post.


Additional Supplies:
Lt Pink cardstock - Michaels
Ribbon - Stampin' Up (retired)
White card stock - Accent Opaque Digital Super Smooth (Amazon .ca)
Silver thread - stash

Monday, 1 August 2022

Tag Duo


Hello my crafty friends.  I have two long posts coming tomorrow (Karen Burniston's Designer Challenge AND the August Sheetload of Cards). Thus today's share is a quick one. I don't share a lot of my tags here but since I had nothing else for today I thought it would be better than nothing. 😊

I used dies from Pigment Craft Co, but the pony stamp is from Honey Bee. The plaid patterned paper was a partial 6x6" sheet in the package, and I was able to use that piece up on these two tags, which will be for my stash. Since I can't link that retired paper for you I found a few others that would also work.    

I did some outlining with a gold gel pen and also added some gold leafing along the torn plaid paper edge. You know I love a little sparkle & shine!   

This blog uses affiliate links whenever possible. This means, that at no cost to you, if you make a purchase through one of my affiliate links that I may receive a small commission from your purchase. I only link products that I own, love and use for my card making and not every link below is an affiliate one! 😊

Any supplies I'm unable to link are listed at the very bottom of my post.


Additional Supplies:
Plaid patterned paper - Plaid Tidings, Stampin' Up (retired)
Crinkled Seam Binding - stash
Bling - Queen & Company (stash)

Monday, 11 July 2022

60th Anniversary Card with Foiling


Hello my crafty friends. Today's card has foiling, foiling and more foiling! 😊  A friend's parents were celebrating their 60th Wedding Anniversary (!!!) and she requested a card shower. Of course I obliged and this is the card I came up with. 

I started the card with a pink cardstock layer that has the texture added from the Dashed Diamonds Cover Plate from Pigment Craft Co. I love how perfectly it fits on an A2 card, leaving just a little border all the way around. The Hexagon frame was gold foiled and die cut, then I got out some of my sentiment Hot Foil Plates as well as the solid hot foil plate. Once I had foiled the Congrats and Happy Anniversary I used the solid plate and the negative foil pieces to get another set of greetings. After die cutting I chose to use the negative ones on this card and put the others away for another day.

The beautiful Washi Tape has gold foil accents and I added some bling too. 😊  The #60 is from Karen Burniston's new Mini Alpha & Numbers - I didn't use the shadow dies on this card though.


Inside, I added the large Washi Tape wreath, a foiled dotted circle and a foiled Best Wishes that was also die cut. Everything was popped up with thin foam tape for some dimension and I was SO happy with how the card turned out. I hope the Anniversary couple will enjoy it too.


This blog uses affiliate links whenever possible. This means, that at no cost to you, if you make a purchase through one of my affiliate links that I may receive a small commission from your purchase. I only link products that I own, love and use for my card making and not every link below is an affiliate one! 😊

Any supplies I'm unable to link are listed at the very bottom of my post.


Additional Supplies:
Light pink card stock - Michaels
White card stock - Accent Opaque Digital Super Smooth (Amazon .ca)

Friday, 1 July 2022

3rd Annual Canada Day Video Hop


Happy Canada Day!  I’m joining a group of Crafty Canadian YouTubers and we’re celebrating this special day by featuring Canadian craft products, shops and publications who have generously sponsored today’s event with over $1000 in prizes!  I had so much fun creating my projects with items from Pigment Craft Co and all of the details are in my YouTube Video:



THANK YOU to the amazing and generous sponsors of this Video Hop - be sure to check out the discounts, prizes and other offerings - Emily has all the details on her blog:

My first project is a Slimline Shaker card - I just ADORE that Jumbo Candy Die and have lots of ideas for it.


I had to make it into a shaker and was happy to see how well it fits on a Slimline card! The white scalloped layer is a Slimline die from Studio Katia (also linked below) and I used the Pigment Craft Co inks BLUSH to add some colour around the perimeter of the white Slimline card base.


Here is a peek at the inside, with the Best Ever stamp and die set. How fun is that large sentiment? ❤️


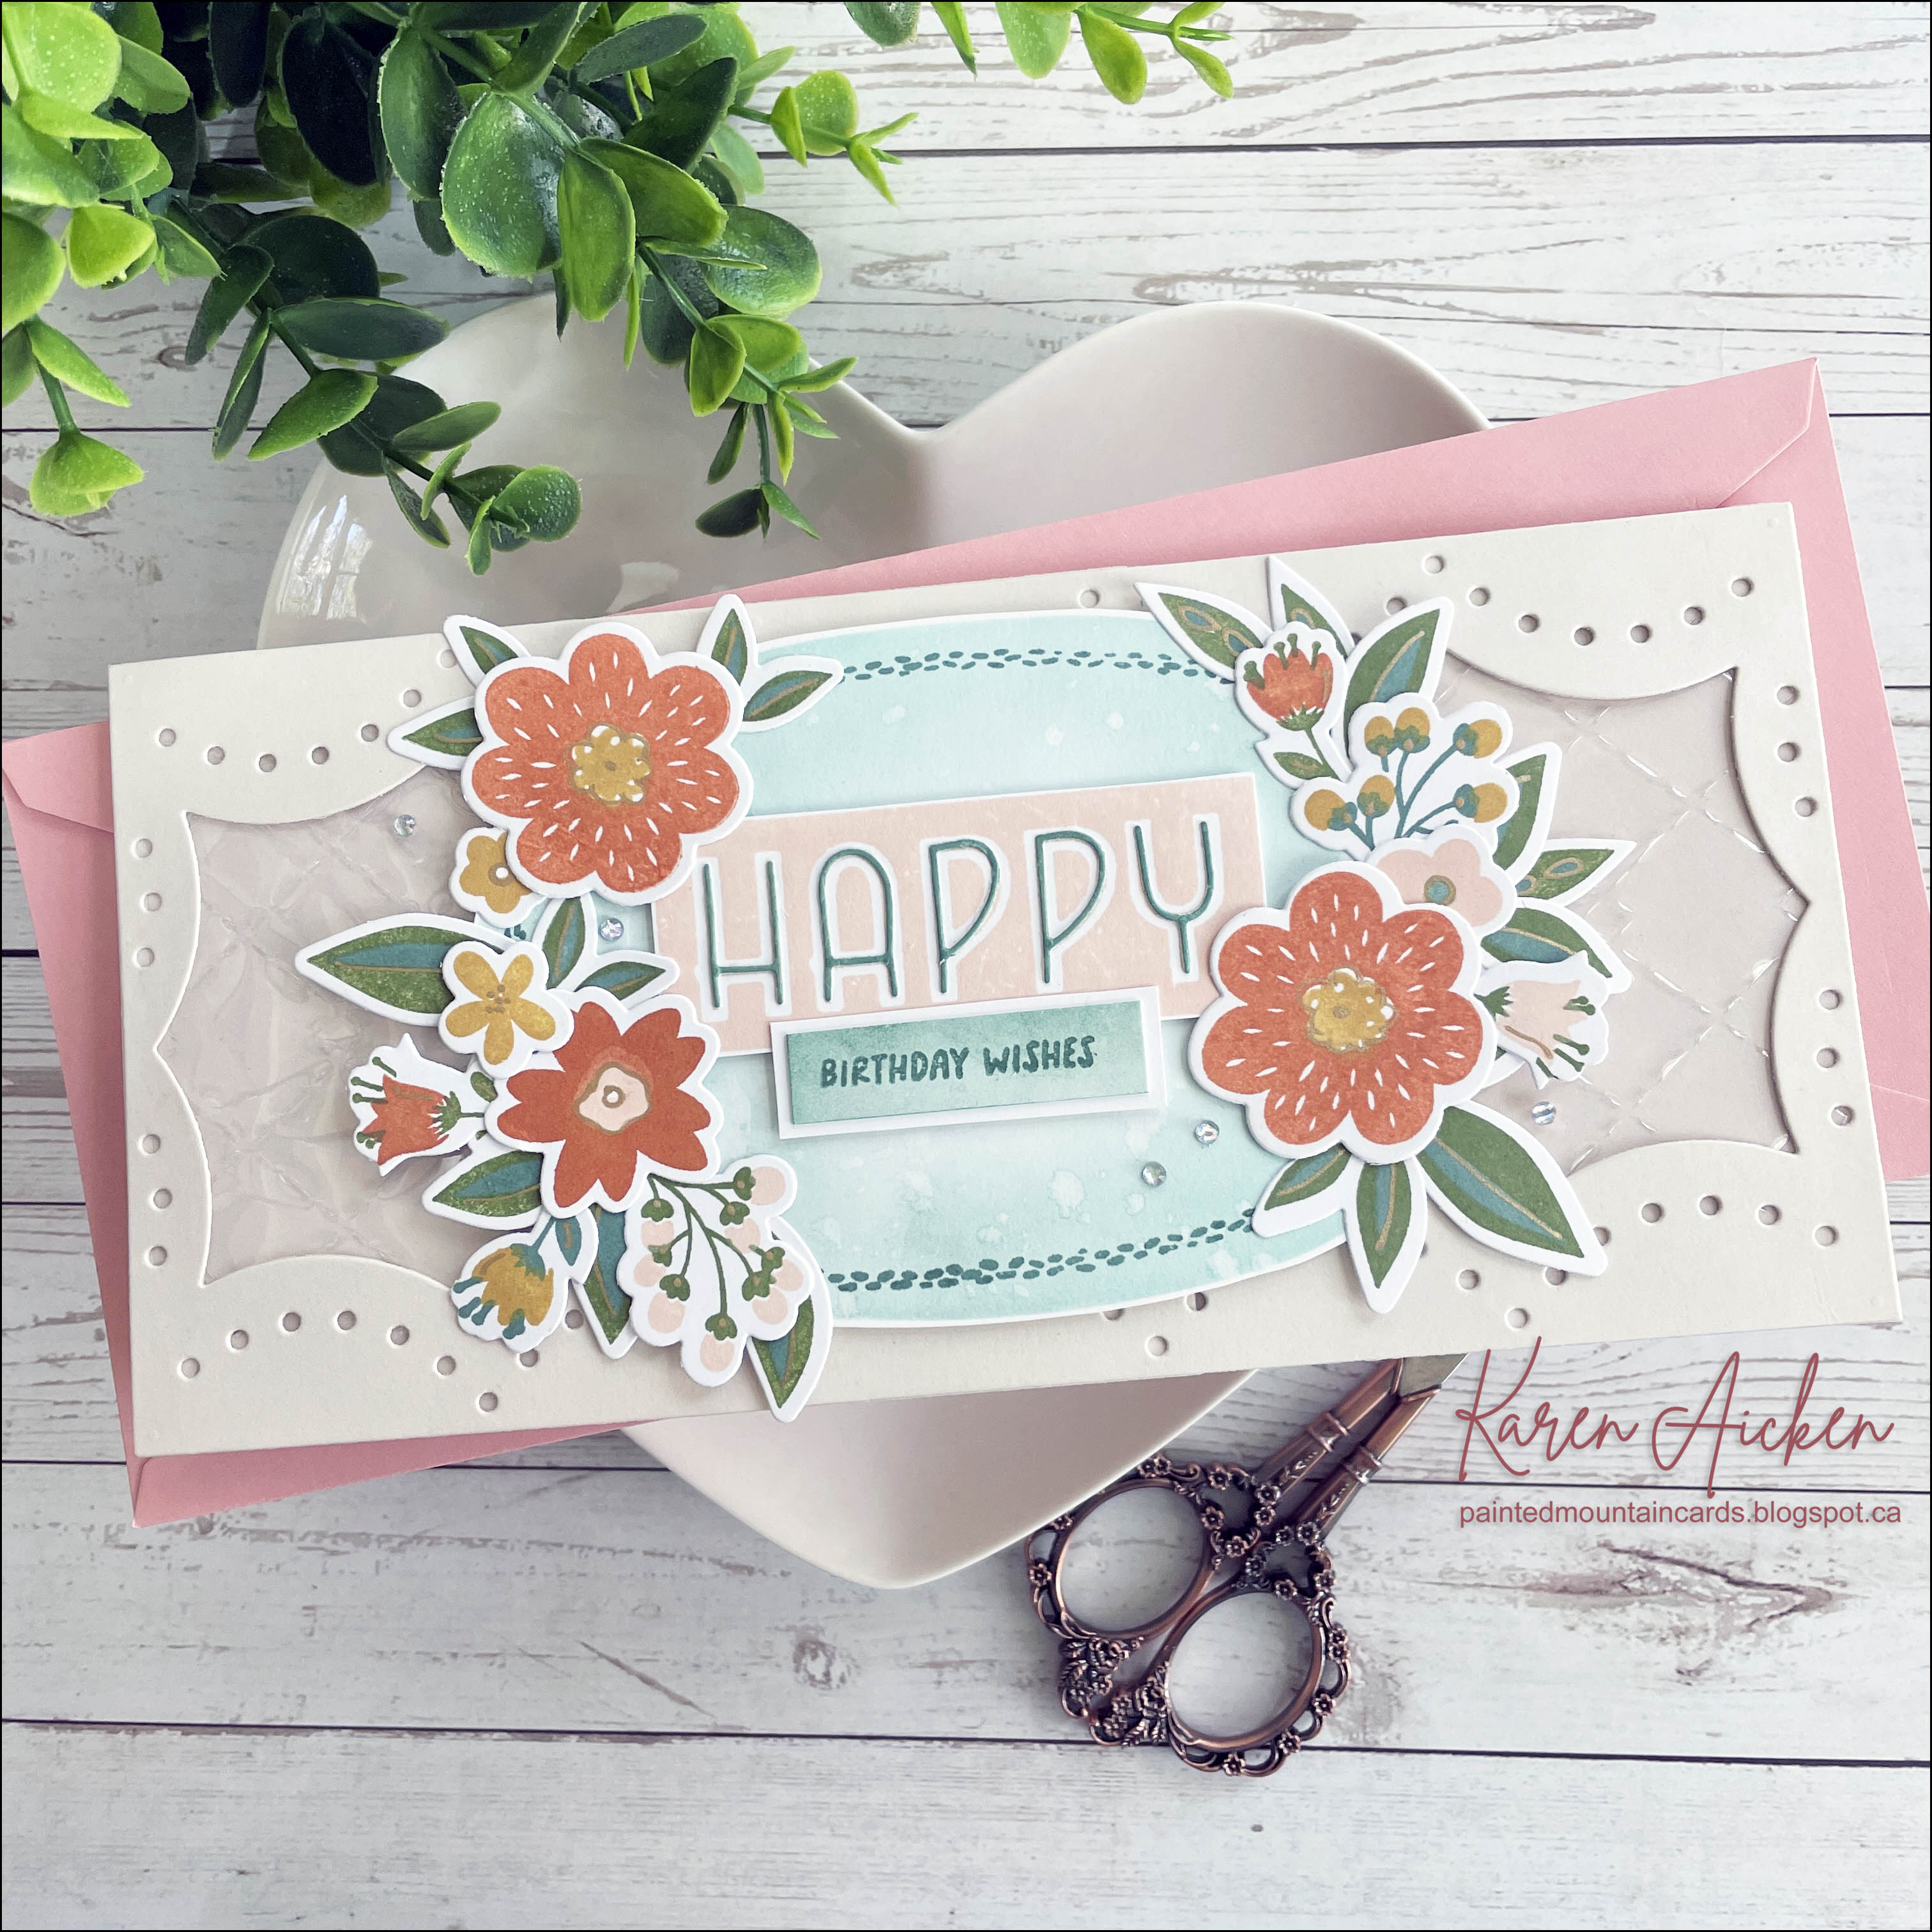
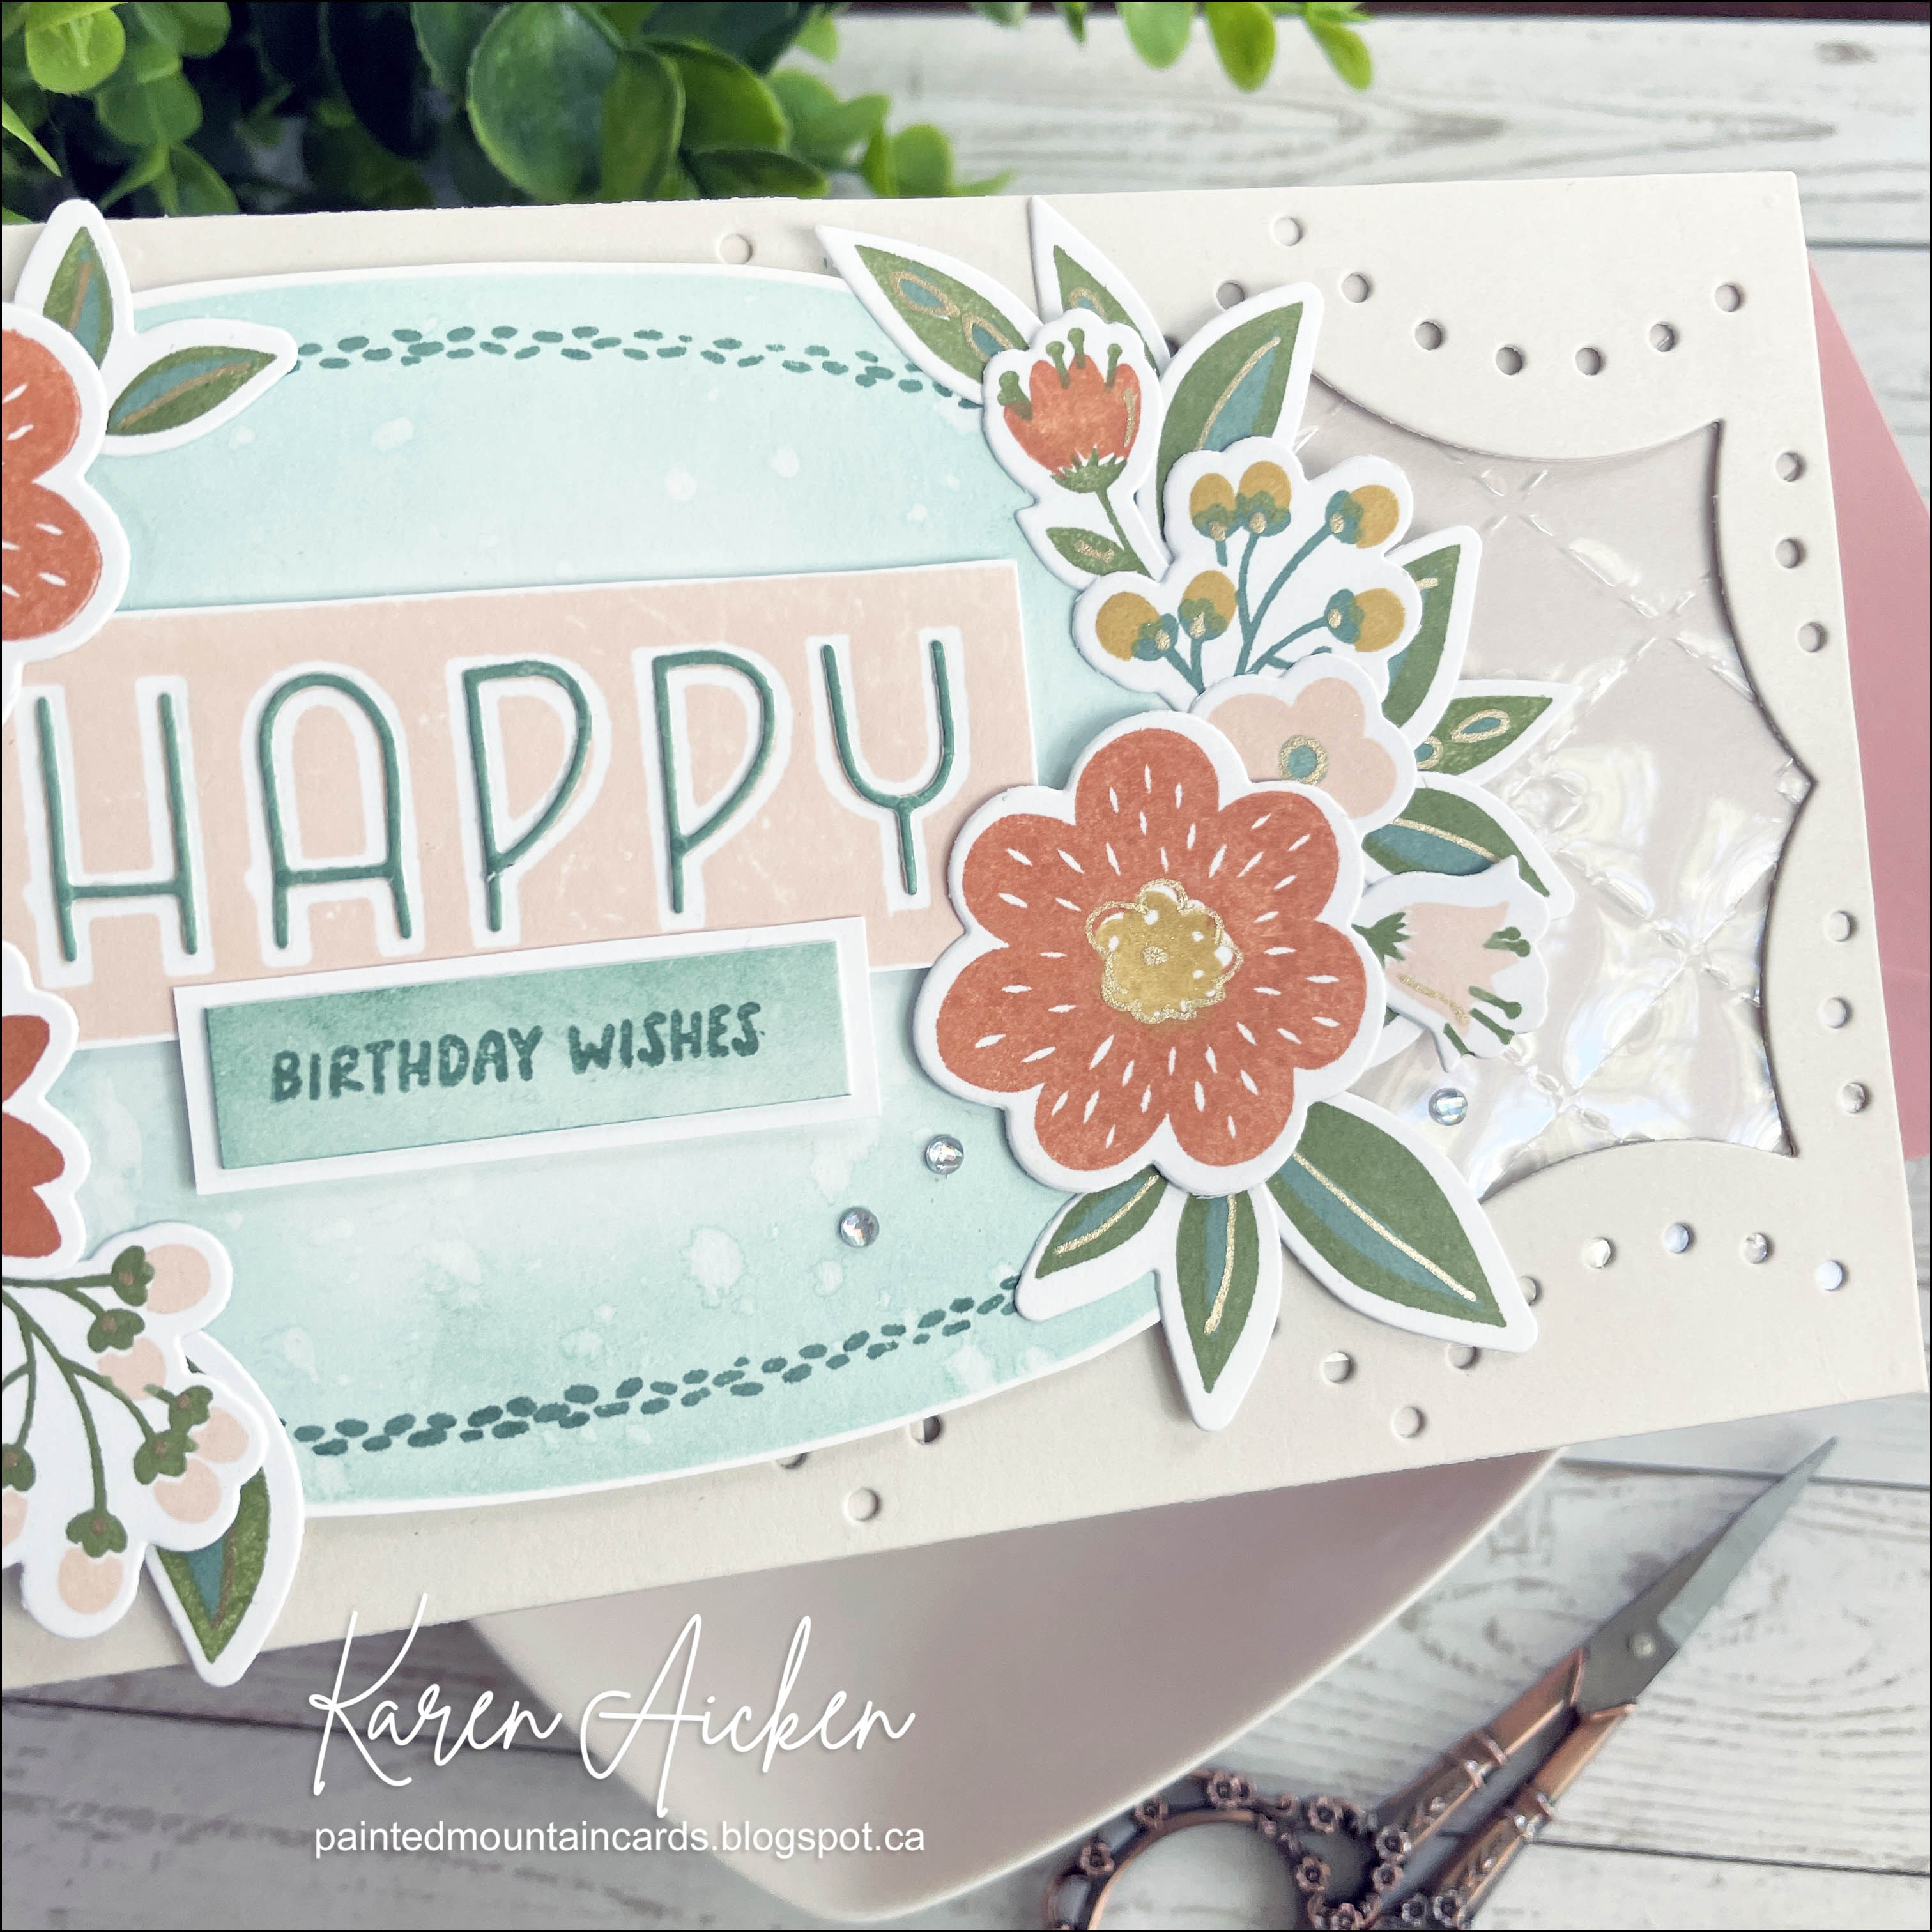
The Scallops & Trims die is sized for an A2 card and cuts at 4 x 5.25". Because I wanted to make a Slimline card using that die set, this Slimline is 4 x 8.5" instead of the 3.5 x 8.5" that the first card measured. I cut transparencies just a little smaller than the Scallop frames and ran them through with the Dashed Diamonds Cover Plate. This gave such a nice embossed texture to the transparencies! 


I needed something large to cover where the two Scalloped Frames overlapped, so I used the Oval Frame stencil, and the Happy Easter set (stamps & dies) to create the focal point. The only image in the Happy Easter set that is truly only for Easter ... is the word/die EASTER. Other than that one, the set can be used all year round!


Inside, I added a white card stock panel and several more of the blooms from the Happy Easter set.


Finally, I made a Gift Bag decoration. Initially it was going to be a tag, but I liked how it fit on the bag as a decoration. This is for our Grandson, who celebrates a birthday this month. There will be candy, a small gift (his main gift will be separate) and I can tuck his Birthday Card inside as well.


I love how versatile the Pigment Craft Co products are ... the sentiment I used on the front are from the Berry Sentiments - which are meant to work with the berry product line. But they are just perfect for the candy items too!


Be sure to leave a comment on the video's, and hop along to be inspired. There are SO many great prizes and giveaways, the more you comment on the YouTube videos - the higher your chances of winning! (Please indicate if you are in Canada or elsewhere as a few prizes are restricted to Canadian addresses only.)  All of the giveaway details are on Emily’s blog.


**********Your next stop on the 2022 Canada Day Video Hop is Candice Richardson**********


This blog uses affiliate links whenever possible. This means, that at no cost to you, if you make a purchase through one of my affiliate links that I may receive a small commission from your purchase. I only link products that I own, love and use for my card making!

Any supplies I'm unable to link are listed at the very bottom of my post.


Additional Supplies:
Gold/ copper sequins - stash
Light peach cardstock - Michaels
White card stock - Accent Opaque Digital Super Smooth (Amazon .ca)
Plaid patterned paper - Vacay, Photo Play (Double sided)
Seam binding - stash
Grey Copic marker
Transparency - office supply store