Showing posts with label House & Fence Pop-Up. Show all posts

Tuesday, 5 October 2021

Pop Up Halloween Card


Hello!  It's time for Karen Burniston's October Designer Challenge, where she challenged her Design Team to create a card with the theme 'Haunted - create a Halloween Card'. I combined some new release dies with some previously released ones and since I didn't do a YouTube video I have lots of photos in this post!

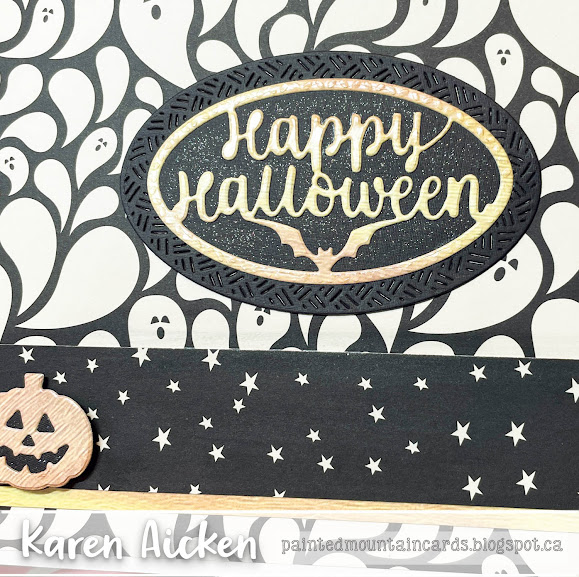
I pulled out some retired patterned paper but everything that is available is linked below for you. The Happy Halloween was layered onto a Crosshatch Oval that has been spritzed with Shimmer Spray. The little pumpkin is from the new Haunted Tiny House Add-Ons.


Inside is the Pop Up! If you follow me, you know I rarely post my projects in the same order I make them. I have several Christmas cards done & ready to post in December, and Halloween cards coming up that were made back in August. 😊. I made this card as soon as I finished the September Designer Challenge because I was inspired! I combined elements from the new Haunted Tiny House Add On with the House & Fence Pop Up! 


It's been too long since I made a floating floor card so this seemed like the perfect time to pull that set out, and when I realized I could decorate that house with the decorator dies in the Haunted Tiny House Add On set, I was off and running. This is larger than A2 - it's a 7 x 5" card that fits in a standard A7 envelope for mailing.


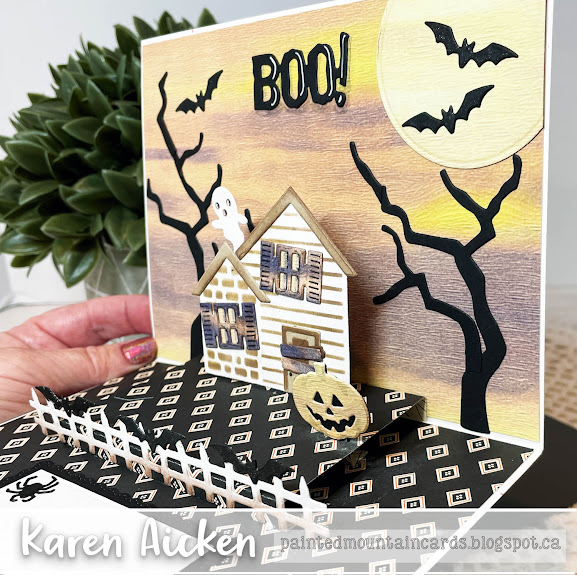
To create the spooky trees in the background, I die cut the tree from the Landscape Scene several times from black card stock. Then I snipped some of the branches off the trees and reassembled them to create two taller trees that looked different from each other.

The bats that decorate the crooked fence, the ghost and pumpkin are all from the Haunted Tiny House Add On set!


Finally, since I wanted a place to sign the card, I added a sentiment block with the Slim Flaps and Frames. NOTE:  The floating floor cuts two slots for you to pop up items in the foreground but I only used one of them. To hide the second slot, I fussy cut another diamond from a scrap of the patterned paper and glued it over the little slot opening!


This blog uses affiliate links whenever possible. This means, that at no cost to you, if you make a purchase through one of my affiliate links that I may receive a small commission from your purchase. I only link products that I own, love and use for my card making!

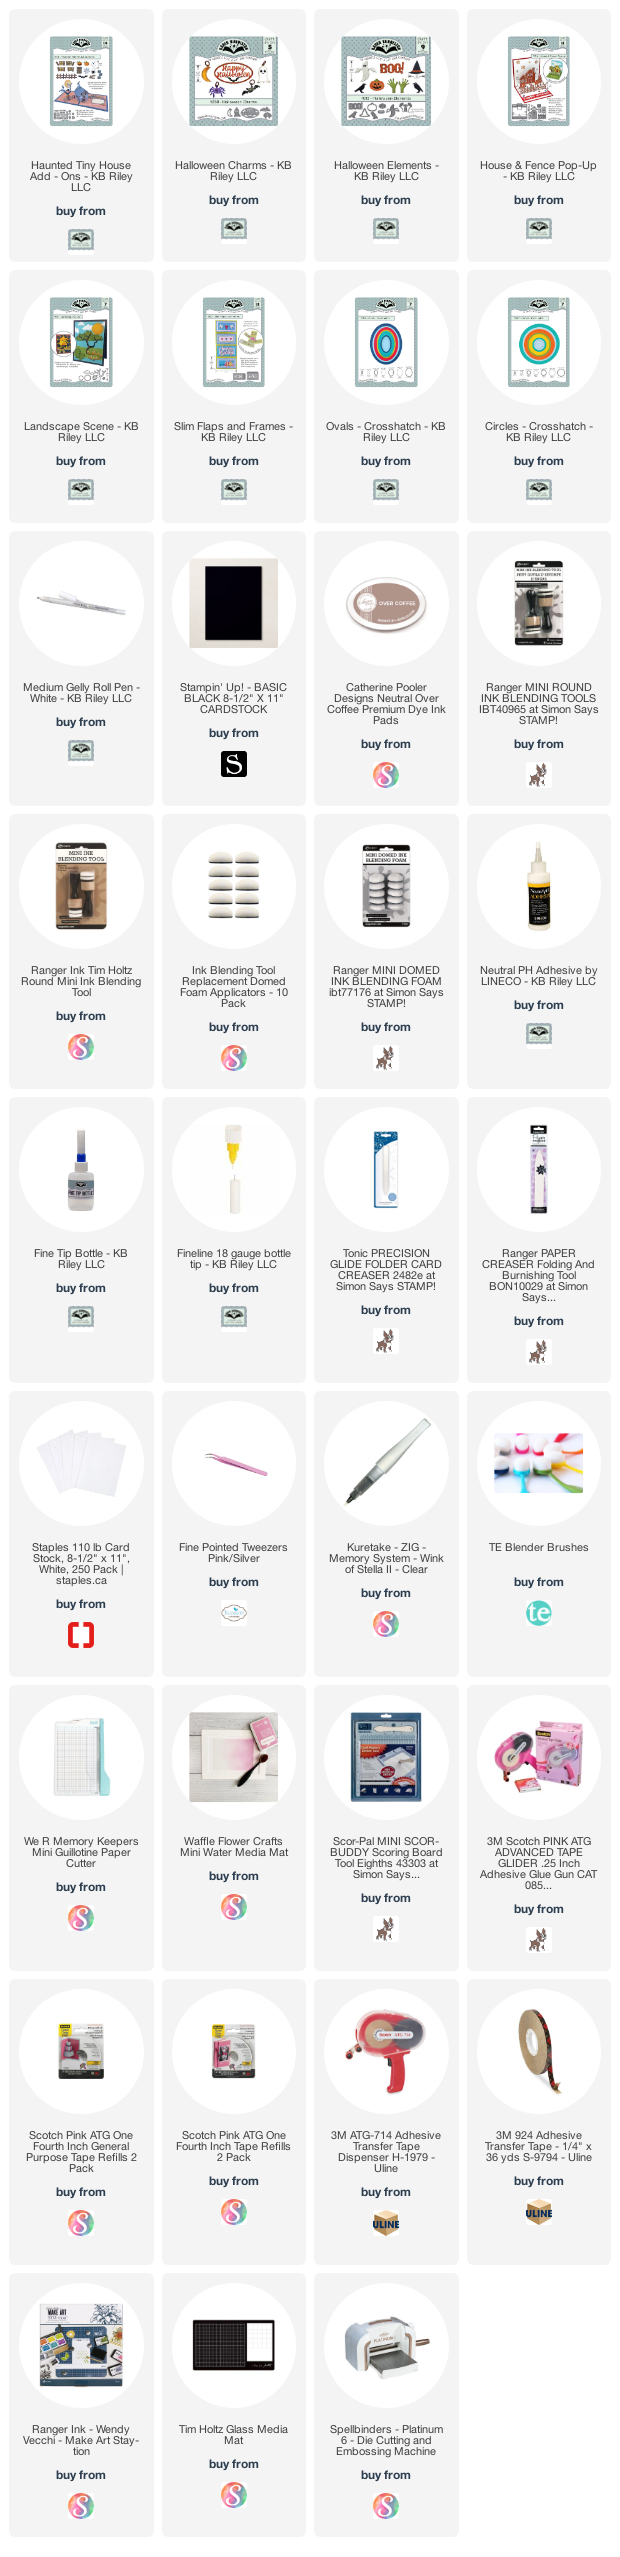
Additional Supplies:
Confetti card stock - stash
Black marker
Cloud patterned paper - Adorable Scorable Painted Clouds, Hunky Dory
Halloween patterned paper - Happy Haunting, Stamping Up (retired)
Shimmer Spray

Thanks for stopping by

Wednesday, 5 June 2019

Fishing Riley Pop-Up Card

Hello my crafty friends

Today I'm sharing a fun Pop-Up card made with Riley (the moose!), a Funny Bones sentiment and dies by Karen Burniston.

As usual, I kept the front nice and simple because all the fun is on the inside. When I was finished and tidying up I found these three black card stock circles on my stamping area from a different project so I added them to the card front.


Look at the cute scene inside! I used the floating floor die from the House and Fence Pop-Up to animate a pair of evergreen trees and Riley. I chose Dress Up Riley and also the Dress Up Riley Sports stamps to make my fishing moose.


The Dress Up stamps were coloured with Chameleon Color Tone and Color Top markers. Riley himself was stamped in black onto kraft card stock and I simply added colour to his antlers with Chameleon Pencil Crayons. I coloured his hooves with a grey marker and Riley was done - so quick and easy! I also added a black glaze pen to his eye for some sparkle.


Finally, here is a side view so you can seee the dimension a little better.


Supplies:
Basic Dress Up Riley stamp and die - Riley and Company
Dress Up Riley Sports Clear Stamps - Riley and Company
Too Much Happy stamp - Funny Bones, Riley and Company
Kraft and white card stocks
Chameleon Colored Pencils
MISTI - My Sweet Petunia
Chameleon Color Tone markers
Chameleon Color Top markers
Sakura black glaze pen
Sakura white gel pen
1015 House & Fence Pop- Up (Floating Floor die) - Karen Burniston
Green polka dot patterned paper - Lawn Fawn
Other dotted paper - scraps from my stash
1045 Outdoor Edges - Karen Burniston
1038 Tropical Scene - Karen Burniston
1006 Nature Edges - Karen Burniston
1054 Rectangles Crosshatch - Karen Burniston
Black Olive Ink - Your Next Stamp
Wink of Stella
Twine - Stampin' Up
1090 Border Blends Argyle - Karen Burniston

Thanks for stopping by today


Friday, 24 August 2018

New House Pop-Up Card & Gift Card Holder

Good morning friends

Our son and partner purchased a new house in the same town as our eldest daughter, and this is the card we gave them. I had so much fun creating the front of the card, using a photo they sent us when the SOLD sign went up and some Photo Frames by Lynda Kanase. I printed the photo with my Instax SHARE printer, and cut the frames from some Colorburst backgrounds I had in my stash. All of the words & borders in the different Photo Frame sets work with each other so I paired a HAPPY with the ADVENTURE and cut some of the included arrows and a heart too. The Home Sweet Home is a Wild Whisper stamp.


Inside, I made it a Pop-Up using Karen Burniston's House & Fence Pop-Up. I just love the floating floor that comes with that die set.


I used more of my Colorburst backgrounds for the shrub and tree foliage, and also below our signing block. a bunch of stitched clouds form a shrub and there are white gel pen accents on the fence.


We gave them a gift card to a home improvement store as a housewarming gift. They had a big 'to do list' so we thought it might come in handy to pick up some shrubs or a tree of their choice. Their new back yard is HUGE! And bare. I used Lynda Kanase's Slider Card die for the Gift Card Holder, and added a paintbrush die cut to the front.


The ENJOY is from Karen Burniston's Word Set 6 Summer - another die I get a lot of use out of.


I have several used/empty gift cards that I use as photo props, this is not the actual card we gave them. 

Supplies:
1015 House & Fence Pop-Up - Karen Burniston
Kraft, yellow, black, brown, red, blue, grey card stocks
Woodgrain packaging
Black marker
1005 Tree Pop-Up - Karen Burniston
1006 Nature Edges - Karen Burniston
1054 Rectangles Crosshatch - Karen Burniston
1002 Word set 1 Greetings - Karen Burniston
Stamps - Wild Whisper
Photo Frame, Travel - Lynda Kanase (Sizzix)
Photo Frame & Words - Lynda Kanase (Sizzix)
Instax SHARE printer
1019 Gift Card Label (hearts) - Karen Burniston
Copic marker
Wink of stella
Card, Slider - BigZ die - Lynda Kanase (Sizzix)
Patterned paper - Basic Grey
Corner Rounder - We R Memory Keepers
Paintbrush die - MFT Stamps
1052 Word Set 6 Summer - Karen Burniston

Thanks for stopping by today

Tuesday, 5 June 2018

Karen Burniston's June 2018 Designer Challenge

Good morning friends

Welcome to Karen Burniston's June Designer Challenge - this month the challenge is:  "The Great Outdoors". The new release is shipping this week and the new Tent Pop-Up is going to be VERY popular. I wanted to use it for my challenge card but show you a different way you can use it.

I have had this camping/outdoors themed paper pack for a couple of years, so pulled it out and got to work. I like to keep the fronts of my cards fairly simple when all the fun is on the inside. I cut the banner from the Word Set 5 Royalty and adhered it over the puffy camper sticker to hide the words that were printed on it. Then I cut the 'enjoy' from the new Word Set 6 Summer from patterned paper and again from fun foam. Adhering them together gave the word lots of dimension.


Here is the little camping scene I created inside:


I had so much fun putting this together! I used the floating floor from the House & Fence Pop-Up and used just the front of the tent. The tent flaps were tied back with fine jute twine then I adhered a hand cut triangle behind the opening with foam tape for dimension. The treeline and hills were cut using the Nature Edges die set and I did a little paper piecing on the trees. Then I added some puffy star stickers to the sky.


To make the tall lantern, I used the stir stick from the Coffee Cup Pop-Up and adhered the smallest lantern from the Camping Charms to the top. I tied a little loop of fine jute twine through the loop at the top and let it hang loose. Then I cut three fish, inked and sparkled them, they strung them on another loop of the same jute. 

Looks like the racoon and the hedgehog have been busy fishing, as they each have a fish to add with the others.


Finally, here is a side view so you see the pop-up and dimension a little better.


Tips and Tricks:
**For this card I used the squirrel belly on the fox. Don't be afraid to mix things up!
**The sign was fussy cut from a printed border on one of the sheets in the paper package.
**Unfortunately after opening and closing the card several times, the base of floating floor started to crack. Usually washi or micropore tape on the back side of the score line helps if your card stock/patterned paper is prone to cracking but the card was already assembled. So I carefully painted some gel medium along the folded edges but will make a point to double check for cracking before cutting a Pop-Up mechanism.. A lot of DCWV patterned papers crack, but I didn't think the We R Memory Keepers would also crack. Now I know!

I hope you will check out the rest of the Design Team posts  - their blogs are linked on the right. Karen Burniston will have her project on HER BLOG tomorrow (Wednesday June 6) and she will also share the teams posts. It's always fun to see them grouped together in one post.

Supplies:
1015 House & Fence Pop-Up - Karen Burniston
1048 Tent Pop-Up - Karen Burniston
1006 Nature Edges - Karen Burniston
Patterned paper - We R Memory Keepers (the rust, yellow and green card stocks were included in the stack)
1045 Outdoor Scene - Karen Burniston
Twine - Stampin' Up
1016 Winter Animals - Karen Burniston
1001 Woodland Animals - Karen Burniston
Copic markers
White gel pen - Sakura - Karen Burniston
Black fine point marker
Kraft, white and brown card stocks
1040 Coffee Cup Pop-Up (stir stick) - Karen Burniston
1049 Camping Charms - Karen Burniston
Sakura glitter gel pen
Stickles
1034 Word Set 5 Royalty (banner) - Karen Burniston
1052 Word Set 6 Summer - Karen Burniston
Sizzix double sided adhesive fun foam
Crayola markers
Water Brush

Card size - 5-1/2 x 5"

Thanks for stopping by today

Tuesday, 6 February 2018

It's Good To Be "U", Designer Challenge Card.

Good morning friends

Welcome to Karen Burniston's February 2018 Designer Challenge! This month our theme is "CASTLE" - use the new Castle Pop-up for a card of any theme. Will it be a fairy princess castle? A sand castle? The Eyrie? You decide! 

Below is the front of my card. I trimmed a foiled journal card from the paper stack, and mounted it to the front of my card along with a panel of patterned paper. The "It's Good To Be" banner is from the new WORD SET 5 ROYALTY. There are several different word options you can insert inside the banner when you cut it, and here I've used the 'It's Good To Be' one.   The crab is from the new SEA ANIMALS set, and he is holding the letter "U".


The "U" was trimmed away from the word QUEEN, which is also included in the Word Set 5 Royalty set.


Inside I have an underwater castle scene!  

This will be for our Grandson's birthday, so I added a '6' and the 'th' from the new NUMBERS set. I like that you can personalize a Pop-Up with these cool numbers. And I cannot, CANNOT believe that Ethan is going to be six!


Below is another view of my underwater scene. I added the cute Sea Turtle and Crab from the SEA ANIMALS die set, more of the WORD SET 5 ROYALTY words, the CASTLE from the Castle Pop-Up, the HAPPY BIRTHDAY (yes, again. I love this die!), and everything is adhered to the Floating Floor from the House & Fence die set. 


I used the PRINCESS & MERMAID die set, to create a Merman with a few snips of my scissors. He has a crown (because he IS a King, you know), and a Sword from the Tiny Accessories 1 set. I also added a gold crown and seashell above the word 'Day'.


I like how the SEA TURTLE and CRAB look like they are floating in behind the castle wall.


There is lots of dimension to this card, but I wasn't worried about how thick it was since I will be giving it to the Birthday Boy in person. I also want to point out that the castle top does stick out from the bottom a little. I'm fine with it, Ethan won't notice and the card will be displayed open so it isn't an issue. But if I wanted to be sure it was entirely hidden when using the Floating Floor base, I would make the finished card 5-3/4" or 6" deep. This one is 5-1/2" deep.

I hope you will check out what the rest of the Design Team has come up with for the challenge - this CASTLE POP-UP die set is really something! Their blogs are linked on the right. Karen Burniston will have her project tomorrow (Wednesday) on her blog.

Supplies:
Patterned paper - Craft Smith
Champagne foil card stock - Stampin' Up
Twine
Teal, navy, kraft and oatmeal card stocks

Card size - 5 x 5-1/2"

Thanks for stopping by today
SaveSave

Tuesday, 2 January 2018

January 2018 Designer Challenge for Karen Burniston

Good morning friends

Welcome to Karen Burniston's first Designer Challenge of 2018 ... "BIRTHDAY BANNERS!" - Pennants! Bunting! Banners! Flags! Incorporate a fun string of something into a card with a birthday theme". Full disclosure, I had 'Banners and Bunting' on the brain when I made my card, but completely forgot about the birthday part. So my Designer Challenge Card is a Valentine's Card - but I did incorporate lots of Banners!


The front of my card has three banners from the Twist Panel Pop-Up card. I like that you get both the pennant shape and the fishtail one in the set - and I used them both here, adding a heart to the centre one.


Inside I used the floating floor from the House & Fence Pop-Up. That is such a cool little die to animate all kinds of things! It's easy peasy to use, too. I strung another trio of banners across the top alternating with die cut hearts.


Just for fun, I added more fishtail banners along the edge of the floating floor to resemble a picket fence. I added a Dog from the Cat & Dog set to the left support. Love that little bandana!


A little heart-holding-bear is on the right support.


There are hearts in several of Karen Burniston's die sets and here I used the one in the Twist Panel Pop-Up. I've always wanted to do a tree of hearts and I am happy with how it turned out.


The Gift Card label is such a good size, it also works great as a generic label to add a greeting to. Here I trimmed the bottom portion off, added some hand lettering and another heart for good measure.


Tips & Tricks:  
When you are adding layers inside a Pop-Up card, you have to watch for catch points like the layered heart at the top centre banner and the top of the tree. It's also a good idea to place the hearts in the tree one at a time, checking to be sure they don't catch on the picket fence as the card is closing. If you place them but don't press the hearts down firmly you can move them if you need to.

I die cut the animals twice, once out of the patterned paper and once out of black. Once the coloured animals were attached to their supports, I adhered the black one to the back side effectively sandwiching the support in between the animals. The card stock I used wasn't quite sturdy enough for my liking, so adding the backing layer helped with that.

Be sure to check out my fellow Design Team members - their blogs are linked to the right. Karen Burniston will have her blog post/project tomorrow (Wednesday) on her BLOG.

Supplies:
Patterned paper - Prima
1015 House & Fence Pop-Up (floating floor) - Karen Burniston
1005 Tree Pop-Up - Karen Burniston
Black textured card stock, red card stock
1024 Cat & Dog - Karen Burniston
Twine
1009 Twist Panel Pop-Up (banners and hearts) - Karen Burniston
1016 Winter Animals - Karen Burniston
Black fine point marker
Copic markers
1019 Gift Card Label - Karen Burniston
Chalks - Stampin' Up
Sakura black glaze pen
Seam binding
Card size - 4-1/2 x 5-1/2"

Thanks for stopping by today

Wednesday, 15 November 2017

Polar Bear & Sleigh Holiday Pop-Up Card

Good morning friends

I have a fun Pop-Up card to share today that I made using a bunch of Karen Burniston's dies and a paper package from Stampin' Up. The card front is simple because all the fun is on the inside. I added a pair of labels from the Katherine Label Pop-Up and the bear from the Winter Animals set. Cutting him out of white makes him a Polar Bear!


Inside I used the Floating Floor  & fence from the House & Fence Pop-Up along with the sleigh from the Sleigh Pop-Up.


The words from the Holiday Word Set are interchangeable & can be combined however you want, so I used both the Christmas & the Greetings for my sentiment. All of Karen Burniston's Word Set dies work together so with four sets now, you can combine a lot of different words for your greeting! The label at the top was made by putting one side of a paper strip at a time into the Katherine Label Pop-Up label die. That gave each side a stitched and shaped detail.


I love how perfectly the little fence fits on the floating floor.  I made a trio of Polar Bears for the inside and added one to the sleigh with a die cut gift. That sleigh! It's going to be so much fun.


Into my holiday card stash with this one. In fact, I'd better get started getting the cards organized and decide who gets which one.

Supplies:
Patterned paper - Stampin' Up
White card stock
Green star dream card stock
1015 House & Fence Pop-Up - Karen Burniston
1021 Sleigh Pop-Up - Karen Burniston
1016 Winter Animals - Karen Burniston
Black fine point marker
Stickles
1011 Katherine Label (labels) - Karen Burniston
1022 Word Set 3 - Holiday - Karen Burniston

Thanks for stopping by today

Tuesday, 10 October 2017

Paper Pros Thanksgiving House Pop-Up Card

Good morning friends

It's time for another Paper Pro's challenge ... this month Caz Counsell issues the challenge "HOLIDAY CARDS".  I'm sure that most people would interpret that to mean Christmas or other winter holidays, but I went with a Thanksgiving theme.


I like the shape of the tree in Karen Burniston's Tree Pop-Up, so used it bare on the card front. The yellow dots in the patterned paper are all embossed and shiny for additional texture.


Inside I used the House and Fence Pop-Up, but not on the floating floor. Instead I cut the Pop-Up bump with the die from the Tree Pop-Up and attached the decorated house to that.


I added a couple of trees in behind the house, with the foliage cut from a piece of card stock I coloured with Colorbursts & Magical Shakers. Then they got some shimmer with a Wink of Stella pen.


The labels come from the Katherine Label Pop-Up set - those label dies are so versatile!


The sweet fence and stone path was cut from the same water coloured card stock and I added another blank label for us to add our signature etc.


This is a casual challenge, with a varying number of participants each time. This month we have:


Be sure to check out their HOLIDAY CARD inspiration!

Supplies:
Rust, brown and cream card stock
Magical Shakers - Lindy's Stamp Gang
Gold acrylic paint
Glossy accents
Nuvo Crystal Drops
Wink of Stella
Patterned paper - DCWV
Happy Thanksgiving - PSX
Coloured pencils - Prismacolor
Fun foam
Pumpkin stamps and dies - Lawn Fawn
Chalks - Stampin' Up
Stitched Fishtail Banner die - Elizabeth Craft Designs
Gratitude stamp - Hero Arts?

Card size - 7 x 5"

Thanks for stopping by today