Showing posts with label Chameleon Coloured Pencils. Show all posts

Monday, 28 March 2022

Masculine Z-Fold Birthday Cards


Hello my crafty friends and welcome to Masculine Card Monday here on my blog. Today I'm sharing three birthday cards that are also fun fold cards. I pulled out an older Paper Pumpkin kit, but since I wasn't keen on the samples in the instructions I just did my own thing. 

OMGoodness, this donkey just cracks me up. It's from Whimsy Stamps (linked below) and I actually purchased the stamp set to make some humorous cards for another friends birthday. I'll be sharing those next week - after his Big Day. I added gold gel pen and glossy accents to one of the front teeth. 😂


Here is a peek at the inside, with a second funny sentiment.  


When I was making the cards, I had a friend on the brain. We were meeting him for dinner that weekend and I wanted to bring him a Birthday card. We celebrate Birthday's close together so were celebrating both at once. Below is the card I made specifically for him. 


I'm still having fun with the Cool Cactus set from your Next Stamp - I used Chameleon coloured pencils, Gamsol and a blending stump to add the colour. Below you can see the black glazed pen glasses as they are raised and shiny.


This is a peek at the inside of his card ... the little banners were cut from leftover pieces in the kit and added to each of the cards.


The other two cards have been put into my stash. 

 This blog uses affiliate links whenever possible. This means, that at no cost to you, if you make a purchase through one of my affiliate links that I may receive a small commission from your purchase. I only link products that I own, love and use for my card making!

Any supplies I'm unable to link are listed at the very bottom of my post.


Additional Supplies:
Paper Pumpkin kit "On My Mind", July 2019 - Stampin' Up (retired)
Rust card stock - stash
White card stock - Accent Opaque Digital Super Smooth (Amazon .ca)
Chameleon coloured pencils
Blending Stump
Circle Stickers - Dazzles

Monday, 7 February 2022

Cool Cats Shaker Card


Hello my crafty friends!  Your Next Stamp is putting the spotlight on this adorable stamp set "Cool Winter Cats' ... and I just had to make a colourful shaker with it. The background was stencilled with both puffy clouds and 'snowballs' using YNS stencils. After stamping I coloured the skiing cat with Chameleon coloured pencils.


I haven't added a sentiment to the inside yet - just a strip of patterned paper and another skiing cat image ... that way this could also be a winter Birthday Card when I go to send it. Or I will save it until next Christmas. Nothing like being ahead of the game! 😊 Whoever I send it too, I expect they will enjoy shaking the snowy filler around.

This blog uses affiliate links whenever possible. This means, that at no cost to you, if you make a purchase through one of my affiliate links that I may receive a small commission from your purchase. I only link products that I own, love and use for my card making!

Any supplies I'm unable to link are listed at the very bottom of my post.


Additional Supplies:
Various shaker filler - stash
Chameleon Coloured Pencils 
White card stock - Accent Opaque Digital Super Smooth (Amazon .ca)

Thursday, 9 January 2020

Blue Chameleon Birthday Card

Hello crafty friends ...

Today I have a card for Fun Friday Challenge #130 at Your Next Stamp. The theme is   "Shades of Blue - keep the winter blues away and show how great the color blue is by including blue somewhere in your creation".


The Fun Friday challenges come with two chances win prizes!! Comment on the YNS Blog, Instagram or Facebook pages for a chance to win a free stamp set. Comment on all three to increase your chances, but comments must be left by January 14th. The winner will be announced on January 17th on the YNS Blog.
 See more details about the prizes at the end of my post today.


For my card, I chose this fun Chameleon from the 'One In A Chameleon' stamp set and made a Birthday Card for my stash.


The Chameleon was coloured in with Chameleon Color Tone and Color Top markers. I added the turquoise Color Top to the Blue marker for several seconds then just coloured. So fun to get this kind of graduation in colours with only one marker.

I also added a couple of blue Gumdrops.


Here is a peek at the inside, with the greeting stamped in two colours of blue ink.


The Fun Friday Challenge #130 runs through January 24th at midnight. One random participant will win a $15 gift certificate to the Your Next Stamp store.  If YNS stamps or dies are the focal point then the winner receives an additional $5 gift certificate for a total of $20.  The winner will be announced on the YNS Blog the Sunday after the challenge closes. Check it all out on the Your Next Stamp blog HERE.


Supplies:
Neenah card stock (for the stamping)
Sketch - Viva la Verve May 2018, Julie Tilman
Circle dies - Hero Arts
Patterned paper - All About A Boy, Echo Park
White and navy card stocks
MISTI - My Sweet Petunia
Chameleon Color Tone and Color Top markers
Chameleon Color pencils
Cloud Stencil - Echo Park
Makeup brushes
Sakura white gel and black glaze pens
Black marker
Copic markers
Fun foam
Card size - Standard A2 (4.25 x 5.5")

Thanks for stopping by today

Sunday, 13 October 2019

Owl & Pumpkin Halloween Card

Hello my crafty friends

I'm so happy to be Guest Designing at Your Next Stamp this month! They released two new stamp sets with the character and fun I love about their stamps.

For today's card, I used the owl and pumpkin from the new Spooky Fun stamp set. I really like the YNS Scrapworks Large Sunburst die set and used it again here with a bunch of scrap papers to create the vintage vibe background.


I love this owl! I coloured the image with my Chameleon markers and coloured pencils then fussy cut it out and added it to the YNS Cool Tag One die. You can see I also added some YNS Gumdrops as well.


Here is a peek at the inside, where I used some of the off cuts from the card background. Fun that the background was made from scraps and I used a scrap of those scraps for the inside. Ha.


There are gold sparkly Gumdrops on the banners for a little sparkle.


Supplies:
Cool Tag 1 die set - Your Next Stamp
Stitched rectangle dies - Your Next Stamp
Black Olive Ink - Your Next Stamp
Spooky Fun stamp set - Your Next Stamp
Pixie Dust Gumdrops - Your Next Stamp
Retro Gumdrops - Your Next Stamp

Chameleon Color Tone Markers
Chameleon Coloured pencils
Gold Shimmer Pen
Patterned paper - Prima
Circle die - Hero Arts
Peach, white card stocks

Card size - standard A2 (5x5 x 4.25)

Thanks for stopping by today

Saturday, 12 October 2019

'Have a Spooky Fun Day' Card

Hello my crafty friends

I'm back today sharing a Halloween card made with the adorable new Spooky Fun stamp set from Your Next Stamp. I really like the size of these images! So many companies are going with smaller and smaller stamps, but I prefer a little bigger. Ha ha this one might look smaller but that is because the card is a full 5 x 7", and not the standard A2.

I used the Large Sunburst die (also YNS) and some Doodlebug papers to create the colourful background, then layered the coloured image and fishtail banner with some Gumdrops.


I coloured the image with my Chameleon Color tone markers and pencils.


Here is a peek at the inside, where I stamped the greeting over a couple of stamped paint streaks (another fun YNS stamp set). I really like that there is a greeting for inside your cards in the Spooky Fun stamp set as they can be few and far between.


Supplies:
Scrapworks, Large Sunburst die - Your Next Stamp
Spooky Fun stamp set- Your Next Stamp
Black Olive Ink- Your Next Stamp
Stitched Fishtail Banners- Your Next Stamp
Cool Tag Banner Sentiment stamps- Your Next Stamp
Spellbound Gum Drops- Your Next Stamp
Retro Gum Drops- Your Next Stamp
Paint Swooshes stamps- Your Next Stamp

Patterned paper - Doodlebug
Black, orange and white card stocks
Stitched circle die - MFT Stamps
MISTI - My Sweet Petunia
Chameleon Color Tone markers and pencils
Sakura white gel and black glaze pens
Chalks - CraftT
Catherine Pooler coloured inks

Card size - 5 x 7", fits in a standard 5 x 7" envelope

Thanks for stopping by today

Tuesday, 8 October 2019

Halloween Wobble Cards

Hello my crafty friends

If you follow my blog, you know that I am a Big Fan of Your Next Stamp and I'm SO happy to be Guest Designing for them this month. They have released two new stamp sets which are filled with fun images and I used both sets for my cards today.

I started with the Stitched Stripe Panel Insert die ... and the key word here is INSERT.  I cut a scalloped rectangle from black glossy card stock, then cut the Stitched Stripe Panel Insert from the centre. I repeated the process with a Stitched Rectangle die cut from orange glitter paper. The die cuts just the stripes!! The fallaway stripes have a wonderful stitched detail so I added the black stitched stripes into the glittered orange rectangle, and the orange glitter stripes into the black glossy one. Note, you can't see the stitched detail on the glittered paper so it gives the illusion that the orange stripes are wider than the black ones. Cool!


The Spooky Fun stamps really are fun for Halloween, with a variety of critters ready to celebrate. The Way Cool Monsters comes with a bunch of different sentiments that also fit in the sign that one monster is holding. This set can be used all year long!  I immediately had several ideas, so you will be seeing more of these stamps as I create our Halloween cards this month.

Below are both cards I created with the sparkly and glossy backgrounds ...


The first card has a kitty sitting in a pumpkin, with candy around him. While there are coordinating dies available for both new stamp sets, I don't have them (yet) so the images are cut by hand.


Once the kitty was coloured and fussy cut I adhered it to the kraft circle with a mini Action Wobble. It bobs and wobbles around on the card, which is always fun.


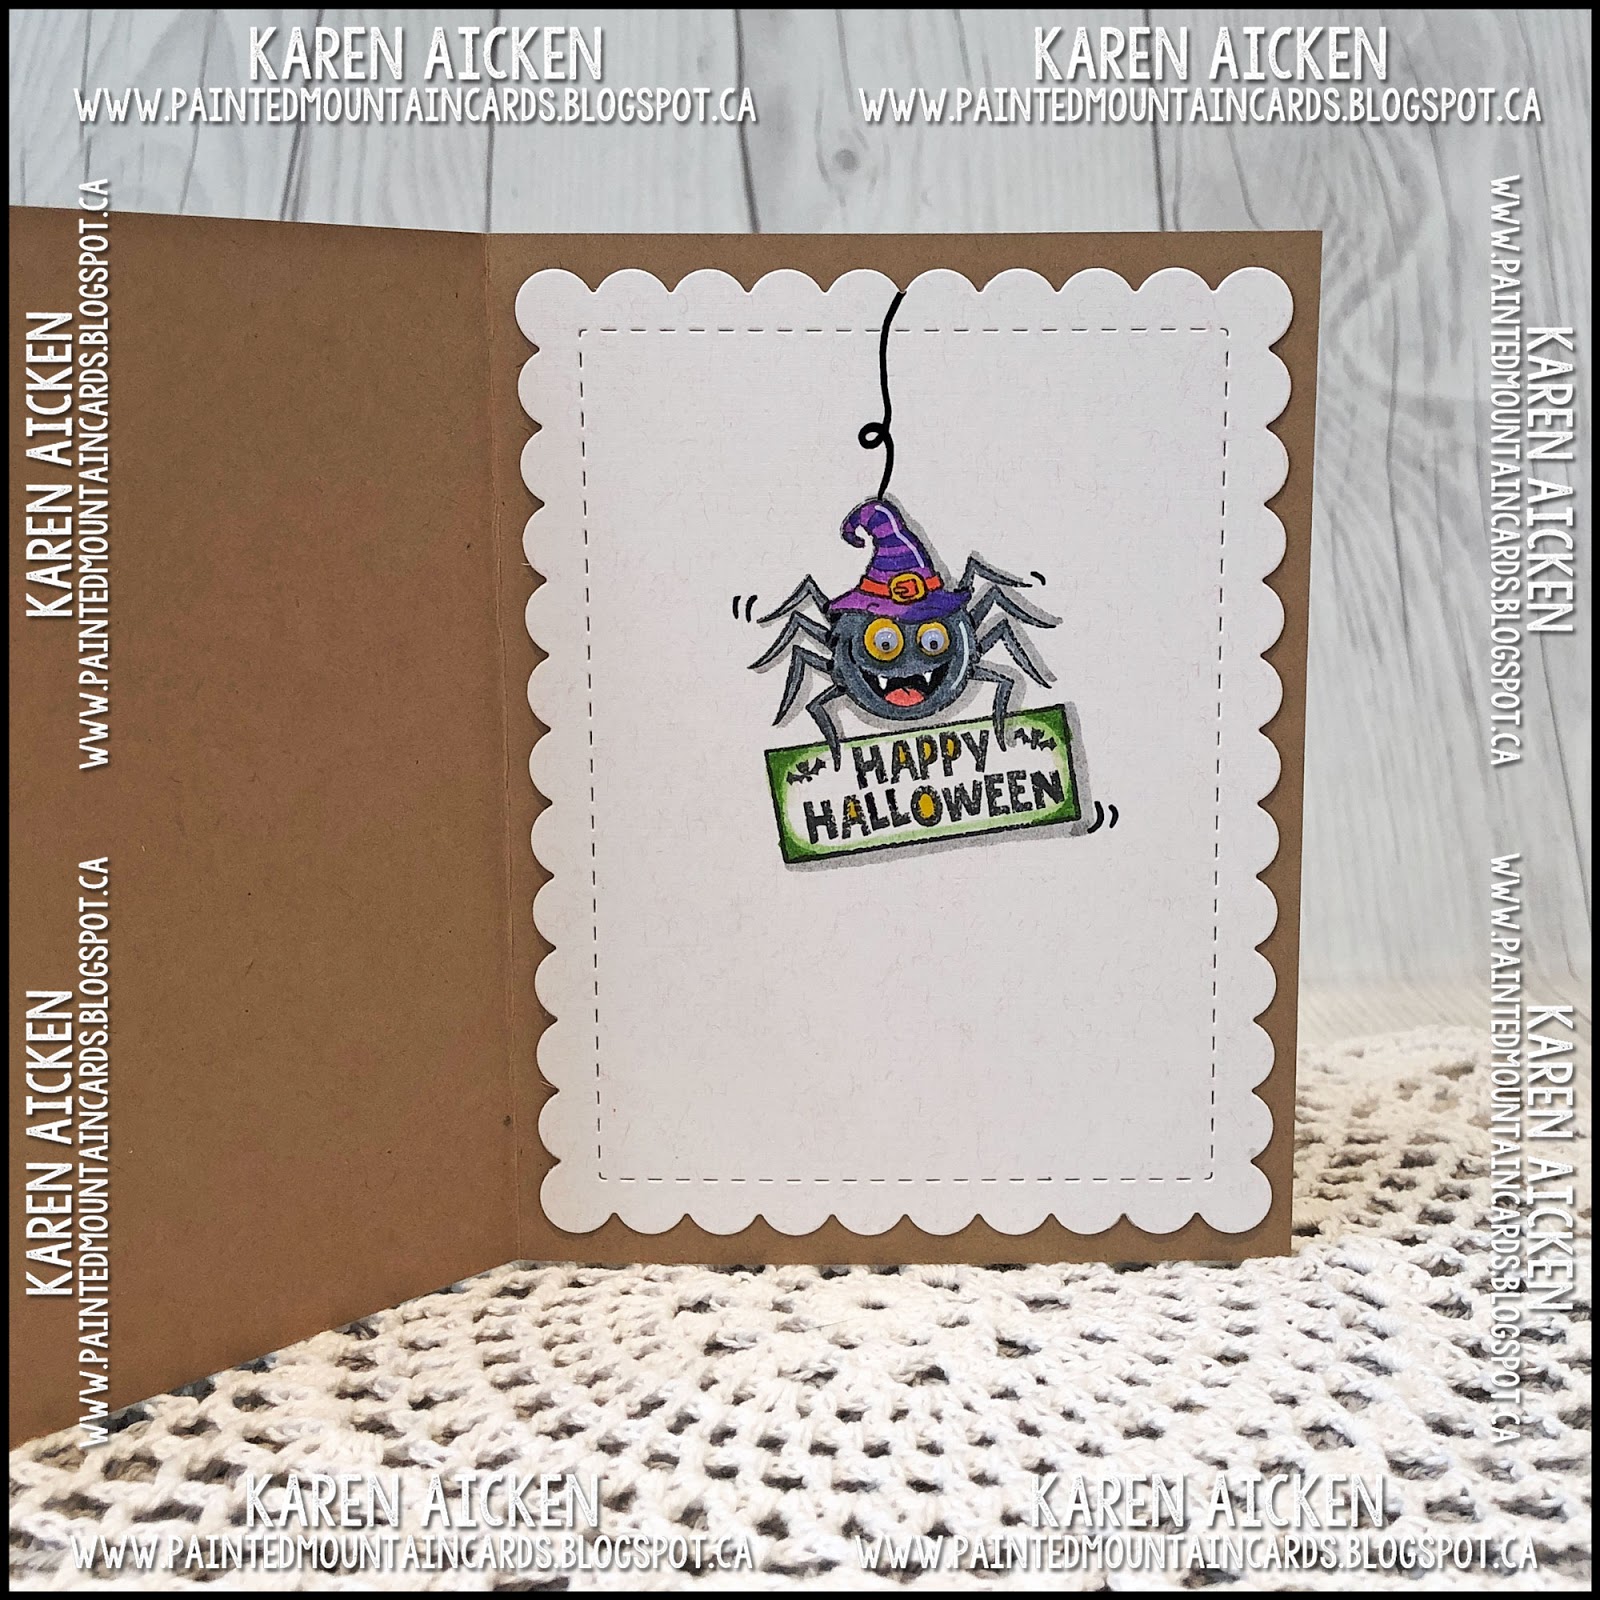
Inside I added the cute spider image fro the Spooky Cute stamp set, colouring it in and adding a black glaze pen line for the spider to hang on. I also added movement marks with a black pen.


For a little additional fun, I added wiggly eyes to the spider!


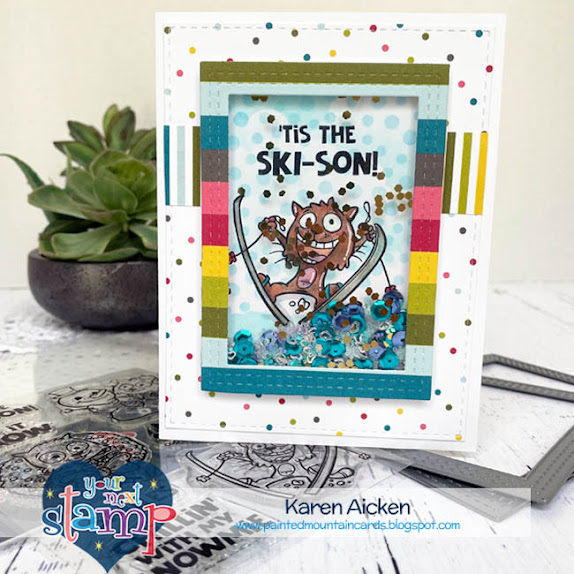
The second card has this fun monster holding a sign from the Way Cool Monsters and I stamped Happy Halloween from the same set on the sign. I'm looking forward to making some cute Birthday Cards with this set too.


Once again, the image is adhered to the card with a mini Action Wobble and I added some YNS Gumdrops for additional colour & shine.


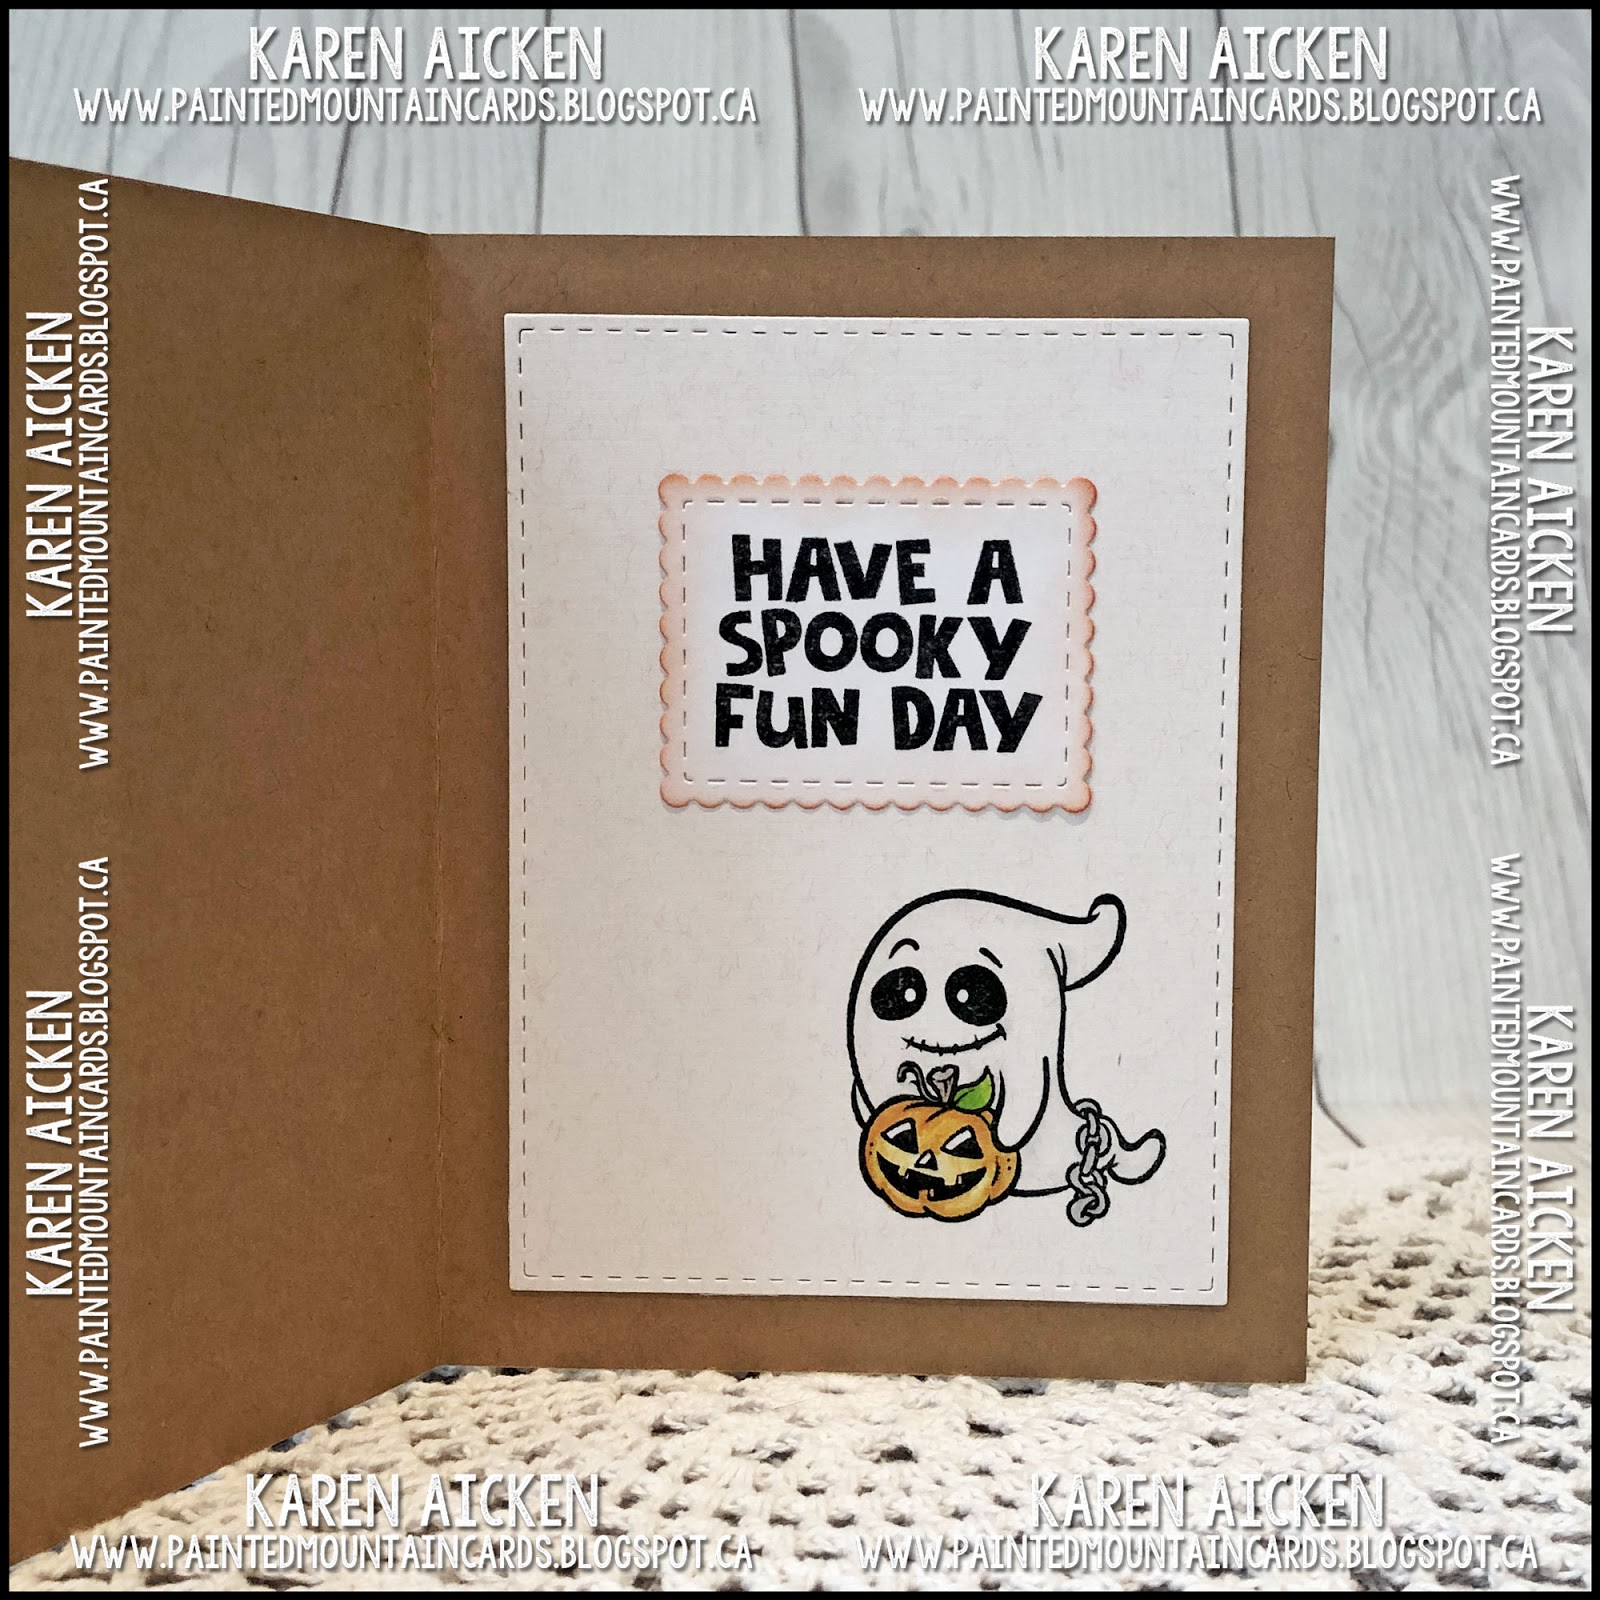
Here is a peek at the inside using images from the Spooky Fun stamp set. Both new stamp sets work well together.


I hope you enjoyed what I've made with these two new stamp sets from Your Next Stamp ... I'll be sharing additional Halloween cards using them soon.


Supplies:
Stitched Stripe Panel Insert die - Your Next Stamp
Stitched Scalloped Rectangle die set - Your Next Stamp
Stitched Rectangle die set - Your Next Stamp
Scrapworks - Large Sunburst die set (stitched circle) - Your Next Stamp
Spooky Fun stamp set - Your Next Stamp
Way Cool Monsters stamp set - Your Next Stamp
Rainbow Sparkle Gumdrops - Your Next Stamp
Black Olive Ink - Your Next Stamp

Kraft, light peach, white card stocks
Black glossy card stock - Stampin' Up
Orange glitter card stock - Stampin' Up
Circle die - Hero Arts
Bristol Smooth Card Stock
Zig Clean Color markers
Water Brush
Chameleon Color Tone Markers
Chameleon Color Top Markers
Chameleon Coloured Pencils
Small Action Wobbles
Sakura black and yellow glaze pens, and white gel pen
Wiggly Eyes

Card sizes - standard A2 (4.25 x 5.5")

Thanks for stopping by today

Tuesday, 1 October 2019

Turkey Shot Spinner Square Pop Up Card

Hello my crafty friends

Welcome to Karen Burniston's October 2019 Designer Challenge! KB asked us to use either the Autumn Elements or the Word Set 7 Autumn for our project today so I made a humorous Thanksgiving card.

For my card front I used the Crosshatch Rectangles to die cut a pretty gold foil mat. Since the entire centre was going to be covered up with the rust panel though, I die cut a smaller Crosshatch Rectangle out of the centre to reserve for another project. No point in wasting specialty paper that nobody is going to see anyhow!


I have a short YouTube video so you can see what the card looks like as it opens and closes, with more pictures and a full supply list below the video.


I die cut the HAPPY from Word Set 7 Autumn eight times from an ink smooshed background, and adhered them - slightly staggered - onto a rust panel. The Thanksgiving word was die cut from a strip of the same gold foil card stock as the matt and layered onto a kraft strip. I LOVE the little acorn die (acorn and top) in the Autumn Elements set so I had to add a trio of them to the card front.


Can we just talk about these ink smooshed panels for a minute? I was SO happy with how they turned out. They just make my heart happy! I used regular white card stock from Office Depot - the same stuff I use for just about everything - and swiped one colour of Distress Oxide ink onto my glass mat. A quick spritz with a spray bottle of water then I smooshed my card stock panel into the ink puddle. I repeated the steps with 3 more panels since I rarely plan ahead I wasn't sure how many I might need for the card.

By the time I was finished with the 4th panel the first one was dry so then I repeated with a second colour etc. I used four colours in total and of course the panels were pretty warped when they were dry from all the water, smooshing, dipping and dragging. I splattered each of the panels with gold shimmer paint then put them under a heavy stack of paper overnight. The next morning I die cut the two for the inside with the Crosshatch Rectangles.


I coloured Hunting Riley with Chameleon Color Tone markers, so he was actually stamped on Neenah card stock as I'm finally remembering that alcohol markers bleed on the Office Depot stuff.

I have a scrap of card stock that was cut with the grass die from the Nature Edges set and I keep that with my stencils. I pulled it out and brushed some brown ink over a section of the card to create a ground for Riley. I cut the fence from the new Farm Edges and used a portion of that behind him as well.


This Funny Bones sentiment just cracks me up. I might have laughed and spit out my coffee the first time I read it online and of course had to add it to my shopping cart. Ha. To the spinner arm I added a pumpkin from the Autumn Elements and a plated turkey embellishment from my stash. Another little acorn was added to the corner of the stamped rectangle.


I didn't want to cover up any more of the pretty background, so didn't add a signing block. This is a card I'll be sending out so we can just sign our name with a black marker and it will show up just fine.

I hope you will check out what the rest of the Design Team came up with for the challenge - their blogs are linked on the right. Karen Burniston will have her project & video on her BLOG tomorrow (Wednesday) and you will find that HERE.

Supplies:
1060 Word Set 7 Autumn - Karen Burniston
1054 Rectangles Crosshatch - Karen Burniston
1059 Autumn Elements - Karen Burniston
1042 Spinner Square Pop Up - Karen Burniston
1097 Farm Edges - Karen Burniston
1006 Nature Edges (to use as a grass stencil) - Karen Burniston

White, rust, kraft and brown card stocks
Distress Oxide inks
Gold shimmer paint - Stampin' Up
Gold foil card stock - Stampin' Up
Shot my first turkey - Funny Bones, Riley & Company
Hunting Riley - Riley & Company
Neenah card stock for stamping Riley
Chameleon Color Tone Markers
Chameleon Color Pencils
Sakura black glaze and gold gel pens
Turkey printed embellishment - my stash

Card size  Wide A2 (5.5 x 4.25")

Thanks for stopping by today

Monday, 24 June 2019

Camping Riley Pop-Up Card

Hello my crafty friends

First, today is the first day the Design Team can share sneak peeks of Karen Burniston's new release! The Design Team is linked on the right, so be sure to check them out as I'm sure a lot of them will be posting something with the new release today. I really wanted to share this card though, I'll be back tomorrow with my first sneak peek ... it is such a fun release I didn't know what to play with first!

Today is Masculine Card Monday here on my blog and I'm sharing a card made with Riley (the moose) and his Dress Up Camping Accessories. I added an acetate panel to the front of my card so you get a peek of Riley all dressed up for camping. I also used several of the images from the Camping Accessories stamp set to create my background pattern.


The square on the card front has a Funny Bones Stamp ... kind of perfect, right?


Inside I used the Rockin' Rectangle die set by Karen Burniston as well as a few more images from the Dress Up Riley Camping Accessory stamps.


I like to trim off Riley's head (sorry, Riley) and dress the body - then pop his head back on with foam tape for a little dimension.


That little smore just cracks me up.


I will include a video so you can see the movement you get with the Rockin' Rectangle die.


Remember to check back tomorrow to see what I've made with Karen Burniston's new release for Summer 2019.

Supplies:
Dress Up Riley stamp and coordinating die - Riley & Company
Better Days are Coming - Riley & Company(Funny Bones)
Kraft, black and white card stocks
Beige Astroparche card stock
Chameleon Colored Pencils
Chameleon Color Tone Markers
Chameleon Color Top Markers
1089 Rockin Rectangle Pop-Up - Karen Burniston
Sakura Black Glaze Pen
Dress Up Riley Camping Accessories - stamps and coordinating dies - Riley & Company
Sakura white gel pen
1054 Rectangles Crosshatch - Karen Burniston
1056 Squares Crosshatch - Karen Burniston
1006 Nature Edges (grass and clouds for mask) - Karen Burniston
Heavyweight acetate (.02 ml) - Grafix
Stickles
Bakers Twine

Thanks for stopping by today

Sunday, 9 June 2019

Travellers Journal Page

Hello my crafty friends

Today I'm sharing a fun project that I did for Chameleon Art Products ... a Travel Journal page! I used a pile of different projects for this one, starting with the fun planner dies and stamps by Elizabeth Craft Designs.


I die cut the page from heavy weight card stock then did some stencilling and inking. The COMING SOON Chameleon Fineliners are really cool - I used them to colour the succulent image. A single marker can write in up to 4 colours that blend into each other, simply by swapping the tops.


I love the desert, so used an Instax photo on my page with a frame die by Lynda Kanase. I also adore this stamp set by Stampin' Up with all the different cacti you can make.


The fineliners work really well to colour in detailed images like the succulent on the label, and of course for journaling.


I stamped the 'Because every picture' image with pale ink and went over it with a green finliner that I swapped the top for a blue one for a few seconds. See how the colour changes from blue into green?


The Chameleon Fineliner has a Kickstarter Campaign that goes until June 13. They met their goals within hours (!!!) but there are some good discounts if you are interested in these cool new fineline markers.

Supplies:
Chameleon Color Tone Pencils
Chameleon Fineliner markers
White card stock
Planner Essentials 1 - Elizabeth Craft Designs
Stencil - Clarity Stamps
Photo Frame, Celebrate - Lynda Kanase
Photo Banner (heart border inside photo frame) - Lynda Kanase
Words (remember) - Elizabeth Craft Designs
Succulent Stamps and dies - Lynda Kanase
Cactus stamps - Flowering Desert, Stampin' Up
Patterns 1 - Elizabeth Craft Designs

Thanks for stopping by today

Wednesday, 5 June 2019

Fishing Riley Pop-Up Card

Hello my crafty friends

Today I'm sharing a fun Pop-Up card made with Riley (the moose!), a Funny Bones sentiment and dies by Karen Burniston.

As usual, I kept the front nice and simple because all the fun is on the inside. When I was finished and tidying up I found these three black card stock circles on my stamping area from a different project so I added them to the card front.


Look at the cute scene inside! I used the floating floor die from the House and Fence Pop-Up to animate a pair of evergreen trees and Riley. I chose Dress Up Riley and also the Dress Up Riley Sports stamps to make my fishing moose.


The Dress Up stamps were coloured with Chameleon Color Tone and Color Top markers. Riley himself was stamped in black onto kraft card stock and I simply added colour to his antlers with Chameleon Pencil Crayons. I coloured his hooves with a grey marker and Riley was done - so quick and easy! I also added a black glaze pen to his eye for some sparkle.


Finally, here is a side view so you can seee the dimension a little better.


Supplies:
Basic Dress Up Riley stamp and die - Riley and Company
Dress Up Riley Sports Clear Stamps - Riley and Company
Too Much Happy stamp - Funny Bones, Riley and Company
Kraft and white card stocks
Chameleon Colored Pencils
MISTI - My Sweet Petunia
Chameleon Color Tone markers
Chameleon Color Top markers
Sakura black glaze pen
Sakura white gel pen
1015 House & Fence Pop- Up (Floating Floor die) - Karen Burniston
Green polka dot patterned paper - Lawn Fawn
Other dotted paper - scraps from my stash
1045 Outdoor Edges - Karen Burniston
1038 Tropical Scene - Karen Burniston
1006 Nature Edges - Karen Burniston
1054 Rectangles Crosshatch - Karen Burniston
Black Olive Ink - Your Next Stamp
Wink of Stella
Twine - Stampin' Up
1090 Border Blends Argyle - Karen Burniston

Thanks for stopping by today