Showing posts with label Penny Black. Show all posts

Friday, 2 May 2025

Pop-Up Birthday Card Duo


Welcome to Fun Fold Friday here on my blog! As I continue to pick away at using up my stash, I pulled out this older Paper Pumpkin kit to make a pair of pop-up birthday cards. The card bases in the kit are printed on the front and back, so I cut one apart to get two card fronts. After mounting the printed card panels to white card bases, I stamped a bird onto the panel and the sentiment onto a white fishtail banner. The purple vellum and the sequins were included in the kit.


Inside, I used Karen Burniston’s Twist Flower Pop-Up, which I have really been enjoying. The sentiment was stamped onto a white stitched circle, and after stamping the bird in the upper right corner of the card I stamped it again - without reinking - below the sentiment. Then the circle was adhered to the Twist Flower mechanism. 

I added a leftover patterned strip (from a different set of cards) to bring some more of the pretty scene inside the card then added a sequin to the sentiment and a second bird stamp at the bottom right corner. 


Supplies used:
March 2024 Paper Pumpkin - Memorable Meadows, Stampin' Up
Bird stamps, old papercraft magazine
Anything but Basic Birthday Wishes - MFT Stamps
Twist Circle Pop Up - Karen Burniston
Stitched Circle dies - MFT Stamps
Inside verse - Better with Age, Penny Black

Thursday, 6 March 2025

Six Birthday Cards Using Journal Cards


I'm still trying to build up my stash of Birthday Cards for my Mom's old nursing home. These ones were quick and easy as I used a 12x12" sheet of cut-aparts from Echo Park. They usually measure 3x4", so I matted them with a 3.25 x 4.25" piece of card stock and popped them up with foam tape.

Each of the cards got some sparkle with either Stickles or Pops of Color (like a clear glitter glue but dries raised and shiny/sparkly)


Here is a peek at the inside - they are all the same. I'm pretty sure I shared similar cards last year as I seem to remember purchasing two of these sheets. I would have used a different background paper, but other than that they would be pretty close. They were also donated back then but I doubt very much anyone will remember or care. 😊


Supplies used:
Journal cards - Happy Birthday, Echo Park
Patterned paper (yellow stars is the reverse side) Wish Big, Bella Blvd
Stickles glitter glue
Pops of Color, black - Scrapbook .com
Inside - Better with Age, Penny Black

Saturday, 8 February 2025

Rainbow Dog Birthday Card


I know I've made a lot of cards using these rainbow dog note cards but I saved this poodle one for my friends birthday card. Obviously, she loves poodles!  If you would like to learn more about these rainbow dog note cards, I have a YouTube video HERE

The note card was cut down and the front panel matted with black. Then it was added to a Waffle Flower panel and I popped up a glimmer foiled Happy Birthday with foam tape. The dogs nose got a coating of glossy shimmer, so it's raised and shiny. 


Here is a peek at the inside ...


Supplies used:
White pearl cardstock
Hot foil plate, foil & machine - Spellbinders
Pops of Color - Scrapbook.com
Rainbow packing tape - old, Amazon .ca
Special sentiments - Penny Black
Rainbow dog notecard - amazon. ca
Patterned paper - JJ's Rainbows, Waffle Flower

Friday, 23 August 2024

Pop Up Birthday Card w/ Sheetload


Welcome to Fun Fold Friday here on my blog! I finished off another one of those July Sheetload of Cards (that makes 5 finished out of 8) and made it a pop-up using dies by Karen Burniston. In her newest release there are two Add-Ons for the Lorna Label Pop-Up, and I couldn't wait to play with this one. It's the Just A Note Lorna Add-Ons and it creates this lovely cutaway area in the centre of the Lorna Label Pop-Up. 


OMGoodness, I am going to have so much fun with this. The words can be cut away from the centre if you just want to use the words with their shadow, or you can use the word dies only to create the phrase on it's own. I used gold foil card stock to tie in with the front, but will use something with a little more contrast on my next card. I believe the instructions said it will fit in a 4" deep card (this one is 5x7") so there is even more versatility. Yep - I'm a fan 😊


I stamped the greeting on one of the Short Crosshatch Rectangles (matted with more patterned paper from the package) and added some butterflies die cut from gold foil paper. Sticking with the gold foil theme, I die cut the Happy Birthday to adhere to the pop-up step on the Lorna Label and my card was finished. 


Into my stash with this one ...


Supplies used:
Lorna Label Pop Up - Karen Burniston
Just a Note Lorna Add-Ons - Karen Burniston
Happy Birthday die - Penny Black
Little Etched Butterflies - Paper Rose
Short Rectangle Crosshatch - Karen Burniston
Birthday Greetings - Studio Katia
Patterned paper - Brianna, K & Company (old, from my stash)
Narrow gold foil tape - Amazon .ca
Gold foil paper - Recollections
Floral cluster die - Hand Penned, Stampin' Up
Stardust glitter pen - Sakura
Catherine Pooler coloured inks
Blending sponges - Tim Holtz
Stitched Scalloped circle nesting dies - Tutti Designs
5x7" card bases & envelopes - Ohuhu (Amazon .ca)
Vellum - Stampin' Up


Tuesday, 23 July 2024

Mini Slimline Snowflake Tri-Shutter Card

I plan on making at least one holiday card each month, & this is the one I made for July. Here in Southern Alberta we are in a heat wave ... and my craft room is the warmest room in the house. Obviously I'm not getting a lot done in there these days! We don't have AC so when it gets to be over 30ºC (86ºƒ) the house can get a little uncomfortable. I am happy to sit outside on our back deck, where there is enough shade and a bit of a breeze to cut the heat but I don't haul a bunch of crafting stuff out there to work on.  Having RA and limited mobility - that is waaaaaay too many steps to bring it out and then back in to put away. I'd rather sit and listen to a podcast or audio book. It's also why I didn't do a full video for this card --- it's just too hot!


I wanted to make a fun fold card, so pulled out this Mini Slimline Tri-Shutter die set by Divinity Designs. The card base die can fit through a regular die cutting machine and you don't even need extended pads if you use removable tape. Just run it through on one end, turn the die/cardstock around and run it through the rest of the way. However, I do have a Big Shot Plus that I can use for larger dies like this. If I'm going to cut one using the big machine though, I usually cut a couple more and add the die cut bases in with the die set to use the next time. 

I've had this silver foiled snowflake paper (12 x 12') for a couple of years but realized after I die cut the layers and added them to the white card base, that I covered up the sticker on the back so I have no idea who makes it!

After I finished the stamping and the card was 'finished', I had a look through my small snowflake dies to add a few extra as embellishments. But you know what? I decided that I liked it just the way it was. 😊  One more card for my holiday stash.


Note, the measurements for the matted rectangle inside the card are:  3 x 2.75", and 2.75 x 2.5"

Supplies used:
Mini Slimline Tri Shutter Die Set (with Layers) - Divinity Designs
Patterned paper - unknown
Rainbow Holographic cardstock - Recollections
Snowflake die - Elizabeth Craft Designs
Catherine Pooler coloured inks
Front sentiment - Snowflake Season, Penny Black
Inside Sentiment - Christmas Classics, Stampin' Up


Friday, 31 May 2024

Apple Thank You Card Duo


Last fall I was flipping through an older paper pad and when I saw this 12x12" sheet with the apples - I decided to pull it out and make a couple of teacher appreciation cards for my stash. These ones are a full 6" square - not a size I usually make because of the additional mailing costs for a square card. Since these ones will be hand delivered to our grandkids teachers though, I decided to go ahead with that card size!


I tried to do a pop up inside this first card, and added a window in the front. I can't remember what I did to mess it up (haha) but in the end I made that (sad) little shaker to try & salvage the card. The little Bookworm is from Karen Burniston and he is just too cute. I also added some rainbow holographic cardstock to brighten up the cards since the patterned & cranberry cardstock are very dark.  Below you can see the inside of the first card.


The second card has a large die cut apple, with a stamped sentiment. For some fun, I added the apple on with an Action Wobble spring so it bobs and wobbles. I think that was probably the last time I used an Action Wobble until recently when I've pulled them out again. I seem to go in phases with those things!


Below is the inside of the second card. These two cards were the first ones I pulled out of my card bin to give our daughters for the grandkids teachers, supplemented with the ones I've made recently.


Supplies used:
Apple patterned paper - K & Co (old, I've been hoarding it)
Double Stitched Circle dies - Divinity Designs
Rainbow Holographic cardstock - Recollections
Thanks die - Crafty Meraki
Stardust Glitter Pen
Transparency
Various filler - my stash
Bookworm - Karen Burniston
Black Pen
Sakura white gel pen
Grey Topic marker
Educators Rule stamps - Altenew
Catherine Pooler Inks
Glitter Dots - Ecstasy Crafts
Peel off Border - Ecstasy Crafts
Wink of Stella
Action Wobble
Apple of My Eye stamps & dies - Trinity Stamps
Teacher sentiments - Penny Black
Twine

Wednesday, 29 May 2024

School Themed Sheetload of Cards

I have a note in my planner to make the grandkids their 'Back To School' cards in May. While the end of August sounds like it's a long way off, past experience reminds me how busy things get in the summer and I don't want to be scrambling mid August trying to get those five cards made and mailed/delivered. I decided to pull out the May 2024 Sheetload of cards and some school themed papers and this is what I came up with! I do have a YouTube video as well, which you can find here:  

As I said in the video, once I got the card fronts all done and was deciding how to decorate them I chose to only make two of them into Back To School cards. I didn't want the grandkids to all get such similar cards, so the rest of them are Teacher (and teachers aid) appreciation cards.


I adhered apple stickers to white card stock & fussy cut them out so I could pop them up with foam tape. Since so many come in a package, I added one to each card front and the inside, and will probably add one to the envelopes as well. I liked the look of the stacked washi tape with the apple stickers so each card got the same thing. The kids cards are blank and the others all have a sentiment stamped inside.


Wanting them to be a little different from each other, I decorated the eight cards with four different stamps/dies/placement.


Supplies used:
Patterned paper - School Days, Miss Kate Cutables
Yay die - the Stamps of Life
Thank you die w/ shadow - Simply Thank You, Simon Says Says
Catherine Pooler coloured inks
Label punch - Stampin' Up
Thanks stamp - Biggest Wish, Stampin' Up
Teacher Sentiments - Penny Black
Brother Label Maker
Simply Sentimental Teacher - Trinity Stamps
Apple Stickers - Amazon .ca
Washi tape - Doodlebug


Monday, 27 May 2024

Gold & Green Birthday Card

I wanted to make a card yesterday (Sunday) but my head was still a little woozy so I knew it would have to be a fairly simple one. At times like this, I know I can always make a birthday card to add to my nursing home donation bag. I tried to take a photo of the card several times, but this is one that is just way better in real life.

The embossed Happy Birthday panel was on my stamping table so I started ink blending with sponges, blue & green inks. Then I spied my jar of gold Lunar Paste and thought I'd try ty rub it over the embossed surface. It actually looks quite good in real life, not muddy and blotchy as it does in the photos.

The panel was trimmed and matted with gold and then I added the Happy Birthday which was die cut from the same gold and popped up with foam tape.

Inside I added a white panel that was wrapped with narrow gold tape, matted with the same gold as used on the card front then a sentiment stamped inside.

I thought I'd like to make a Slimline card, or a Father's Day card but a holiday Slimline paper pad caught my eye and I started working on a Christmas card instead. My head is better again today, so I will try to get those finished and then I'd better get moving on Father's Day.

Supplies used:
Embossing Folder - old, likely Sizzix
Blending Brushes - Taylored Expressions
Catherine Pooler coloured inks
Gold Lunar Paste
Gold foil card stock - Recollections
Happy Birthday die - Penny Black
Narrow gold tape - Amazon .ca
Inside stamp - Lots of Birthday2Stamp, the Stamps of Life

Monday, 20 May 2024

Teacher's Aid Appreciation Card


I had to buckle down and make some time for creating, since I make our grandkids their Teacher Appreciation cards. This one is for Olivia's aid, there is a different card for her teacher that I actually made last year. Things always get busy this time of year with the weather warming up so I learned to work ahead for these cards. Obviously my good intentions failed me this year as I neglected to make a card that didn't have the word TEACHER on it! 

The patterned paper is nice and heavyweight, so I was able to add each of the panels to the card with foam tape. It's hard to see in the photos, but it adds some dimension and interest. Since the card will be hand delivered, I don't have to worry about making it light enough to mail. 😊


The Thank You circle die is part of a set I've had for years - it's a 3D Drop Ins die by the Stamps of Life. I thought about using it as intended and make a pop-up inside with the Thank You, but I had already adhered the patterned paper to the card front and the Thank You circle fit so well I went this this instead. I used blending brushes and dye ink to add the colour on the white card stock circle behind the die cut words, then added it to the card front with an Action Wobble. 

See? I go in phases with those and I'm still in an Action Wobble phase. It bobs and wobbles around so it adds some fun to the otherwise simple card.


Here is the inside - more ink blending and a stamped sentiment.


Supplies used:
Patterned paper - School Days, Miss Kate Cuttables (old, from my stash)
Thank You 3D Drop Ins - The Stamps of Life
Action Wobble
Teacher Sentiments - Penny Black
Blending Brushes
Catherine Pooler coloured inks

Monday, 6 May 2024

Floral Cluster Birthday Card


I'm getting closer to using up this paper package! I bought it online a few years ago, but was surprised at how large the patterns were and struggled to use it on cards. I had also purchased the coordinating embellishments and obviously didn't read the description close enough because when they came they were chipboard. Beautiful, but ... chipboard. I find chipboard makes a card too heavy and bulky for mailing so I wasn't use them for the longest time. 

Finally I realized I could peel off some of the back layers and that did the trick. That is what I did for this pretty floral cluster element.  The layout was kind of fun - I haven't done this on a 5x7" card before. I cut the patterned paper into a 4.75" square, then cut it on the diagonal into two equal pieces. These were adhered to a piece of lightweight cardstock cut at 4.75 x 6.75" then I added narrow gold foil tape and wrapped the ends around to the back. That panel was then adhered to my card front.

The scalloped circles were die cut from white card stock (they all cut at the same time).  I inked the three pieces with blending brushes and re-assembled on the card front.  The little Happy Birthday was fussy cut from a leftover sheet in a card making kit.


Here is a peek at the inside, where I used a nice big piece of that patterned paper. 


Supplies used:
Patterned paper - Stamperia
Narrow gold foil tape - Amazon .ca
Chipboard elements - Stamperia
Stitched Scallop Circle dies - Pinkfresh Studios
Happy Birthday - Bee Happy Cardmaking Kit, Paper Rose
Gold Glitter Dots - Ecstasy Crafty
Special Sentiments - Penny Black
Stickles Glitter Glue
5 x 7" card base & envelope

Wednesday, 10 April 2024

Floral Half Shutter Birthday Card


I wanted to have another play with the Half Shutter die set (Divinity Designs) and this is what I came up with. Both the chipboard and patterned paper (Stamperia) I've had for several years but I've been working on using both up and I'm almost there!


Below you can see the card opened up - they stand so nicely for display! I rarely use chipboard ephemera because I find them too bulky for mailing but for these ones I peeled off several layers from the back and that worked out really well.


Below you see the folds a little better ...


I used a favourite stamp set (Penny Black) for the stamped sentiments along with a few more chipboard pieces and Pops of Color for the look of enamel dots.


Supplies used:
Patterned paper & Ephemera, Stamperia
Stitched Ovals - MFT Stamps
More Essential Sentiments - MFT Stamps
Special Sentiments - Penny Black
Pops of Color, snowflake - Scrapbook .com
Catherine Pooler coloured inks

Sunday, 24 March 2024

Butterfly Birthday Card


This is another quick and easy card that started with the patterned paper. I was putting away this (very old) package by Basic Grey and saw an almost A2 size panel with this black & cream print. That's all it took, ha ha.

I trimmed it to 4 x 5.25" and adhered it to the front of a white A2 card then went poking around in a baggie of Tim Holtz ephemera for an element that would work. The butterfly was perfect!  The Happy Birthday is ephemera from Paper Roses Bee Happy cardmaking kit and I fishtailed the left edge and added it to a matter white rectangle with foam tape.

Below is a look at the inside and this card was ready to put in my nursing home donation bag.


Supplies used:
Patterned paper - old, Basic Grey
Butterfly - Tim Holtz Alterations
Happy Birthday ephemera - Bee Happy Cardmaking Card Kit, Paper Rose
Sparkly gem stickers - Dazzles
Inside stamp - Special Sentiments, Penny Black

Wednesday, 20 March 2024

Spring Half Shutter Card


Happy Spring! SOOOO glad that 'officially' Winter is behind us. 😊 Of course, someone should let Mother Nature know since there is a big dump of snow in the forecast. Ug.


Today's card celebrates Spring and is a Half Shutter card using dies from Divinity Designs. I love that all the cutting and scoring is done for you, and the layering dies make adding the patterned paper layers so easy. The front decoration is a cut-apart from Echo Park, matted with Doodlebug patterned paper. I added Pops of Color on the raindrops and on the cloud scallops for some shine.


Above is what the card looks like when it comes out of the envelope, and below you can see the card opened up. It will stand nicely for display for a friend who needs a 'pick me up' .


I used Karen Burniston's Beach Elements for the umbrella and my Stampin' Up cloud punch as well.


In the photo below, you can see the folds a little better.


Supplies used:
Journal Card - Welcome Spring, Echo Park
Patterned paper - Love Notes Petite Prints, Doodlebug
Beach Elements - Karen Burniston
Cloud Punch - Stampin' Up
Dots & Scallops dies - Catherine Pooler
Catherine Pooler coloured inks
Blending Brushes
Pops of Color, Snowflake - Scrapbook .com
Narrow gold foil tape - Amazon .ca
Sentiment - Thinking of You, Penny Black
Dot Stamp - Stamps by Judith

Monday, 11 March 2024

Six Birthday Cards for Donating


I pulled out a Project Life kit and decided to use several of the 4x6" journal cards to make some birthday cards for donating to the nursing home. Several years ago I picked up several Project Life kits for a great deal, knowing I would use them for cards like this ... but I keep forgetting about them! (Project Life kits contain both 4x6" and 3x4" journal cards for pocket scrapbooking.)


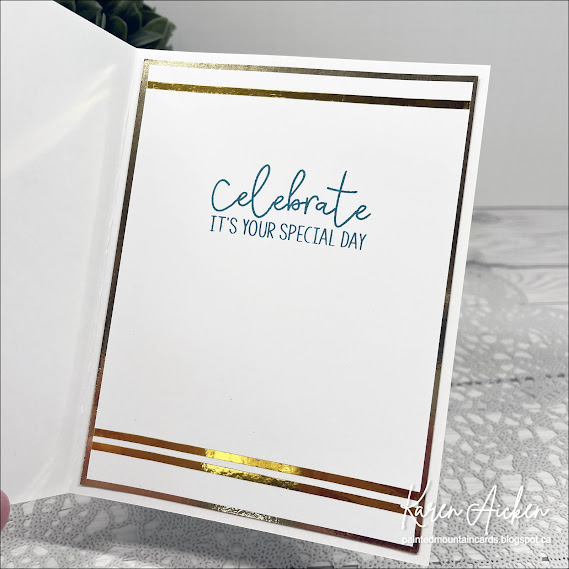
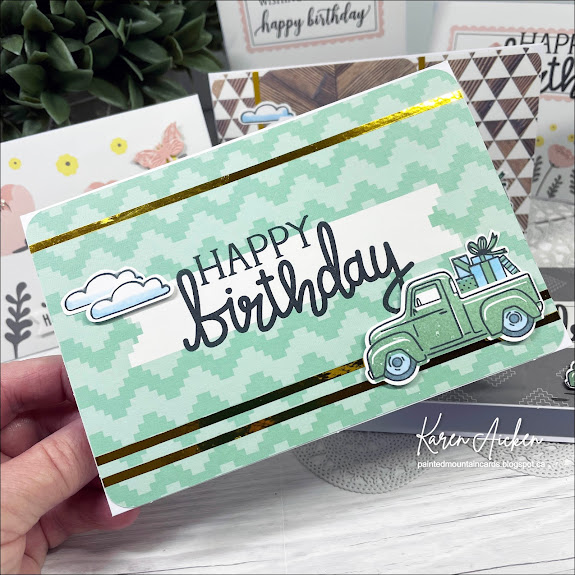
I made three floral cards and three more masculine ones with Stampin' Up's Truckin' Along stamp & punch. The cards are all 6x4" and some have narrow gold foil tape for a little shine. Other's have Stickles glitter glue on them.


PaperSupplies used:
4 x 6" Journal Cards - Project Life (unknown kit name)
Special sentiments - Penny Black
Little Something Sentiments - Catherine Pooler
Gold narrow foil tape - Amazon .ca
Stickles Glitter Glue
Little etched butterfly dies - Paper Rose
Truckin' Along Bundle (punch & stamps) - Stampin' Up
Alcohol markers
4 x 6" card bases
Lots of Birthday-2-Stamp - the Stamps of Life
Catherine Pooler coloured inks