Showing posts with label 4 Panel Pop-Up. Show all posts

Sunday, 7 November 2021

Paper Pumpkin Alternate Cards with a Fun Fold

Hello! I have two more Paper Pumpkin Alternate cards to share from the October kit called Peaceful Christmas. I have a walkthrough of both cards on YouTube:

First up is the 'flat' card. I cut one of the Shaded Spruce card bases in half, which gave me the two green main panels to add to both white card bases. This one was cut with Karen Burniston's Crosshatch Rectangles. I also used it to cut down the Buffalo print rectangle that came in the kit, because I love the detail it gives the edge. The Merry Christmas and Shadow are both by Karen Burniston, and I used one of the SU snowflakes on some layered circles. Since most of the details were given in the video, I'll leave it at that for this card front.


Here is the inside of the card above, using some leftover pieces from my stamping table and one of the red banners from the kit.


Next up is the Fun Fold Card. After embossing the green panel I added the vellum trees etc from the kit to layered ovals as well as some of the snowflake Peel Off stickers.


While I did use dies to cut the tunnel portion inside, you don't need them to create a card like this. It's simply 4 equal panels and you glue down the outer panels to the inside card base as shown in the photo below.  NOTE:  Before adhering the sides to the card base, I die cut an oval from the front for a pee-a-boo feature and decorated the fold of the card with a larger die cut oval and snowflake. The holly leaves were fussy cut from one of the papers in the package.

This blog uses affiliate links whenever possible. This means, that at no cost to you, if you make a purchase through one of my affiliate links that I may receive a small commission from your purchase. I only link products that I own, love and use for my card making!

Supplies:
October Paper Pumpkin, Peaceful Christmas - Stampin' Up
Shimmer Spray
Softly Falling embossing folder - Stampin' Up (retired)
Patterned paper - Feels Like Frost, Stampin' Up (retired)
Stitched Oval - MFT (retired)
Mini Scalloped Oval - MFT (Retired)
Patterned paper - Holiday Bash, Recollections
Snowflake punch - Martha Stewart

Sunday, 29 November 2020

Pop Up Gnome Christmas Card

Hello crafty friends ...

I have a bin called 'In Progress" and when I was poking around I found this card that had been started but never finished or even assembled. So got out a few dies from my stash and got it finished. I have a walk through of this card on YouTube as well. 

I added some layered poinsettias and the Simon Says Gnome. Both gnomes have glossy accents on their noses.

The Pop Up inside was created with the 3D Drop Ins die at the Stamps of Life and I used a YNS die to cut the scalloped square from the centre.I also added another gnome inside.


Since I went over all the details in my video, I'll keep my comments to a minimum here.


Considering this had been sitting in the bin for who-knows-how-long and I can't remember what my original idea was, I was really happy with how this card turned out!

Supplies:
3D Pop Up Drop Ins - Stephanie Barnard, the Stamp software Life
Patterned paper - unknown
Gnome die - Simon Says Stamp
Reverse Scallop Square with Optional Stripes - Your Next Stamp
Card stocks
Snowflake embellishments - Stampin 'Up
Copic marker
Glossy Accents
Shimmer Spray
Poinsettia die - Impression Obsession
Stitched Square die set - Your Next Stamp
Simple Strips Christmas - Taylored Expressions
Simple Strips die - Taylored Expressions
Glitter Dots - Elizabeth Craft Designs
Season of Cheer - Jar of Cheer, Stampin' Up (retired)
Wreath Builder Die Set (small poinsettia) - Stampin' Up
Circle - stash, already cut and not used
Card size - Standard A2 (4.25 x 5.5")

Thanks for stopping by today

Sunday, 23 August 2020

Bright Slimline 4 Panel Pop Up Card


Hello crafty friends ...

I have a video for you if you would like to see this card in action:


The inside piece was cut the same size as the card base, which was 7 x 8.5". Placing the 7" side at the top, I scored it at 1.75", 3.5" and 5.25". I did do a few extra folds but didn't measure those. HERE is a link to a similar A2 card - easy enough to do the same thing with this larger panel. I don't like math, so rarely actually measure when I'm doing cards like this - eyeballing works great for me! 

That is also why I cut the inside panel the same size as the black card base. It's easier to measure, score and cut when the measurements are the same. Once I was ready to adhere it inside the card base I trimmed a little off the sides, top and bottom so I had an even border all the way around. If specific dimensions are important to you, I'd suggest making a template that you can then write down the measurements on it and keep it for future projects. 

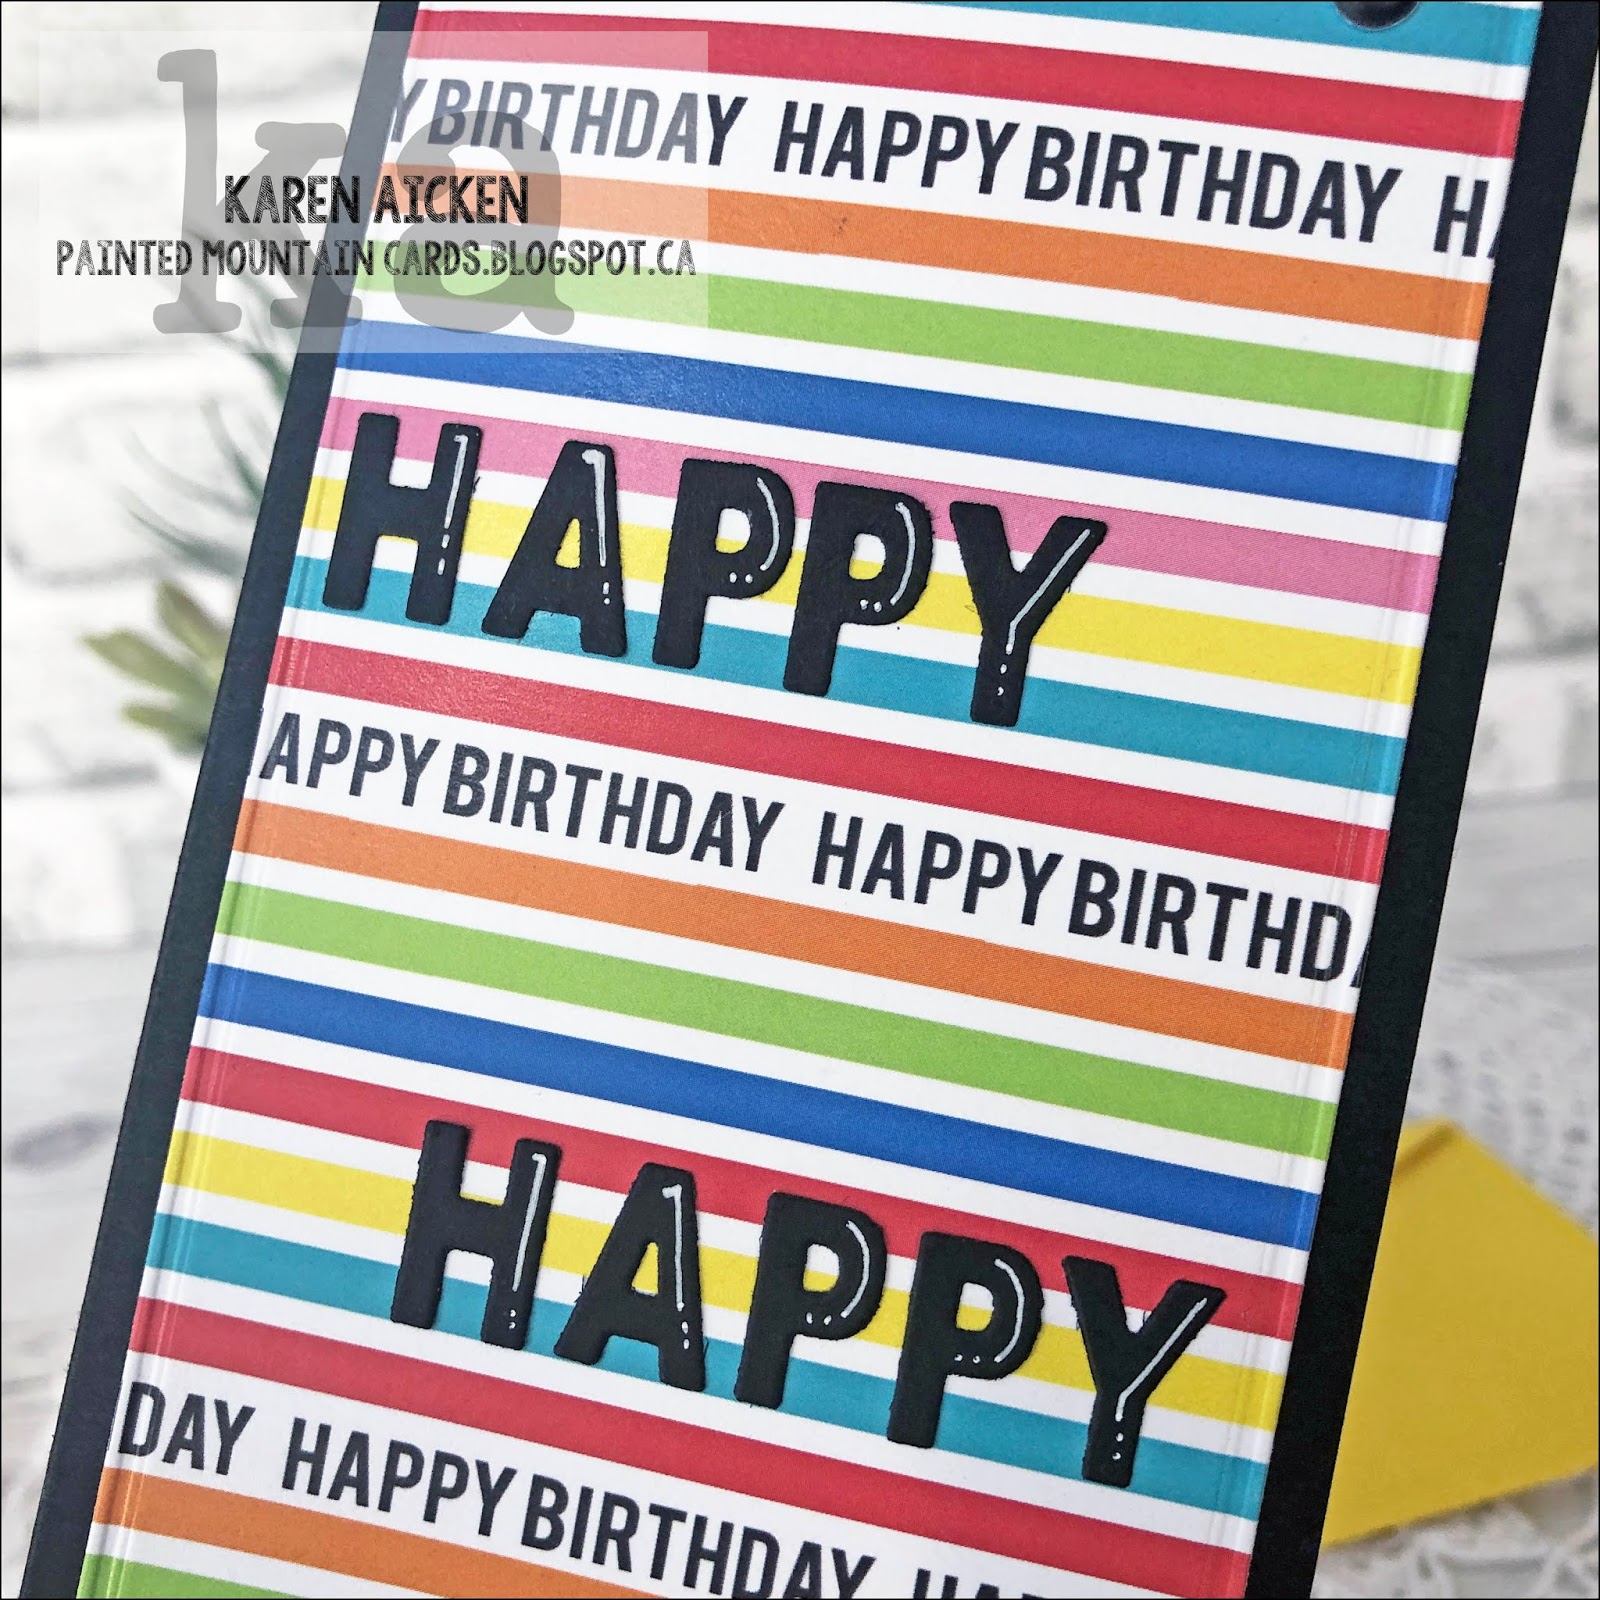
I added some border Peel Off stickers and punched balloons, as well as a signing block with a handwritten sentiment.


Here is another view where you can see the folds a little better.


Supplies:
Card stocks - stash
Patterned paper - Scrapbook Customs
Embossed Edge Nesting Die - Kat Scrappiness
Bold Happy Birthday Word Die Set - Your Next Stamp
Balloon punch - Stampin' Up
White paint pen
Border Peel Off - Elizabeth Craft Designs
Black Fineline Marker
Puffy Dots - Pebbles
Sakura white gel pen

Card size - 3.5 x 8.5", fits in a #10 Business Envelope

Thanks for stopping by today

Friday, 5 June 2020

Five Strawberry Themed Cards


Hello crafty friends ...

There were two sheets of 12 x 12" strawberry patterned paper in the pad I was trying to use up, so I decided to pair them up with these strawberry stamps that I've also had for several years and use up those sheets. Rather than share the cards in three or four different posts, I've just added them all into this one. So - sit back, there are lots of photos!

First up, for Fun Fold Friday here on my blog is a Four Panel Pop Up! The sentiment on the front is from one of the few new stamp sets I purchased in February (before COVID-19 turned the world upside down) and it works perfectly with these strawberries! I also added a few enamel dots.


As I often do, I added an extra fold to the centre of this die. I have a short tutorial on how to do this on an earlier post HERE, if  you are interested.


Finally, a greeting and area to sign our names and this card was finished.


Onto my second Strawberry card today! There were two 12 x 12" pages printed with various mason jars, and I fussy cut a lot of them to use as elements on cards. The colours on this one worked so well with the strawberries on the patterned paper!


I added some fun strawberry 'confetti' - which I had purchased to add to shaker cards. I think they add a nice touch and some texture to the card.


For the third card, I was working with a smaller piece of the strawberry patterned paper, but did have enough to angle it at the top edge. The green grid paper was also in the same paper stack.


I forgot to mention that the insides of the flat cards were all done the same, stamped using my MISTI for even placement and no 'oopses'.


Finally, the balloon card duo. I cut down one of my ombre A2 printed cards to give me two card panels. The soft greens were a good match for the strawberry leaves/stems. The balloon die is from Your Next Stamp! So fun.


I added a Bakers Twine bow to the front of the balloons, and adhered a string behind them that stretches to the bottom of the card but is caught firmly with the popped up fishtail banner.


The heart bling was a 'gift with purchase' from Queen & Company and since these cards are being hand delivered to the residents at my Mom's old nursing home, I didn't have to worry about bulk. I think they are a nice touch, and they catch the light very nicely when you are holding the cards in your hand..


Supplies:
Patterned paper and cut-parts - Dear Lizzy Neapolitan
3D Pop Up Drop In's - Stephanie Barnard, the Stamps of Life
Stitched mini scalloped rectangle - MFT Stamps
White, peach and green card stocks
Big Birthday Balloon die set - Your Next Stamp
Stitched Rectangle dies set - Your Next Stamp
Sakura white gel pen
Berry Confetti - Trinity Stamps
Enamel dots - Stampin' Up
Catherine Pooler Inks
Stitched Fishtail Banners - MFT Stamps
Let's Celebrate - Happy Birthday, Honey Bee
Bakers Twine
Happy Birthday - Pick Me Up, Your Next Stamp
Bling - Queen & Company
Stitched circle dies - MFT Stamps
MISTI - My Sweet Petunia
Strawberries2Stamp and
MoreStrawberries2Stamp - Stephanie Barnard, the Stamps of Life
Sweet Sentiments - MFT Stamps

Thanks for stopping by today

Sunday, 24 May 2020

Pop Up Floral Slimline Card with Butterflies


Hello crafty friends ...

Below is my YouTube video with some details on how I created the card. You can always find my YouTube videos HERE on my YouTube Channel. I'd love to have you subscribe!


I'm excited to share this Slimline card with you today, because it's also a pop up card. I am really liking the Slimline format, but since I also like to make interactive cards I was really happy with how well this worked out!


I used sparkly patterned paper from K & Company, adding extra sparkle and shine with Glitter Dots. Gold Peel Off Corners, and gold Stickles on the pretty YNS Butterflies.


In the photo below you get a better idea of how sparkly the paper is!


Finally, here is a peek at the inside. To make it easier (I don't like math), I cut the patterned paper inside to the same dimensions as the Slimline Card (7 x 8.5") and did all my scoring & added the extra folds and cuts to make it dimensional. When I was happy with that, I simply trimmed off each side and a bit off the top so it would fit inside the card with an even border all the way around. Otherwise, I would have had to figure out the measurements for each scoreline as well as the perimeter.


As I mentioned in the video - this is something I've done before with an A2 card die that I have, and because people have asked how I did that I expect they will also want to know more on how to make it work for a Slimline Card too.

You can see my photo tutorial on how to add the additional folds & cuts HERE,  
and HERE is the link to the Paper Springs video I used. 

The patterned paper I used for my card today is double sided, so I did the markings on the back side (the pattern I wasn't going to have show). In the photo below, you can see the centre fold is on the left  so I'm making the two cuts from the fold up to the vertical line I drew parallel to the inside folds and cutting through both layers at the same time. This is the area that becomes inverted when you attach this piece inside your folded card! NOTE: If you click on the photo it will open up larger in a separate window.


Supplies:
Patterned paper - K & Company
Pink and awhile card stocks
Stamp on back - Riley & Company
Bristol Smooth Card Stock
Gold embossing powder
Zig Clean Color Markers
Water Brush
Nuvo Glitter Pen
Gold Stickles
Simple Strips Background - Taylored Expressions
Simple Strips die - Taylored Expressions
Beautiful Butterflies - Your Next Stamp
Beautiful Butterflies Die Set - Your Next Stamp
Peel Off Photo Corners
Glitter Dots - Elizabeth Craft Designs
White pearl card stock
Hello & There dies - MFT Stamps
Pink vellum
Stitched Scalloped oval die - MFT Stamps
Paper Spring
Butterfly punch - Martha Stewart

Card size - 3.25 x 8.5", fits in a standard #10 Business Envelope

Thanks for stopping by today

Sunday, 29 December 2019

4 Panel Pop Up New Years Card

Hello my crafty friends

I love the foiled bits in this patterned paper package, so pulled it out to make a pop up New Years Card. I kept the front nice and simple, since the patterned paper is so pretty! I added the Happy New Year to a gold pearlized shadow, and a few gems for some shimmer & shine.


Here is a look at the inside with the fun pop up and gold numbers:


I like to have an extra New Years card on hand, in case we are invited somewhere in between Christmas and New Years. I generally don't add the year to these cards so that if I don't need it that year I can hang onto it until next year. When I cut the numbers from the gold shimmer card stock, I also cut a ONE. The end ZERO in 2020 is adhered with removable adhesive so I can peel that off and add the ONE if I don't need the card this year.


I loved this circle burst background die that is included with the 3D Pop Up Drop-Ins die set (which I call a 4 Panel Pop Up) and I was tickled that the Circle Burst stamps and dies from Your Next Stamp work so well with it!


Into the stash with this one for now.

Supplies:
3D Pop Up Drop-Ins - Stephanie Barnard, the Stamps of Life
Happy New Year die - Stephanie Barnard, the Stamps of Life
Navy and white card stocks
Gold pearlized card stock
Number dies - Sizzix BigZ dies by Stampin' Up
Circle Burst stamp - Your Next Stamp
Hexagon dies - Elizabeth Craft Designs]
Jelly Gems - Queen & Company
Patterned paper - Brightly Gleaming, Stampin' Up

Card size - standard A2 (4.25 x 5.5")


Thanks for stopping by today

Friday, 27 December 2019

3D Pop Up Birthday Card

Hello my crafty friends

Now that Christmas is over, I'm ready to play with some different papers and colours.

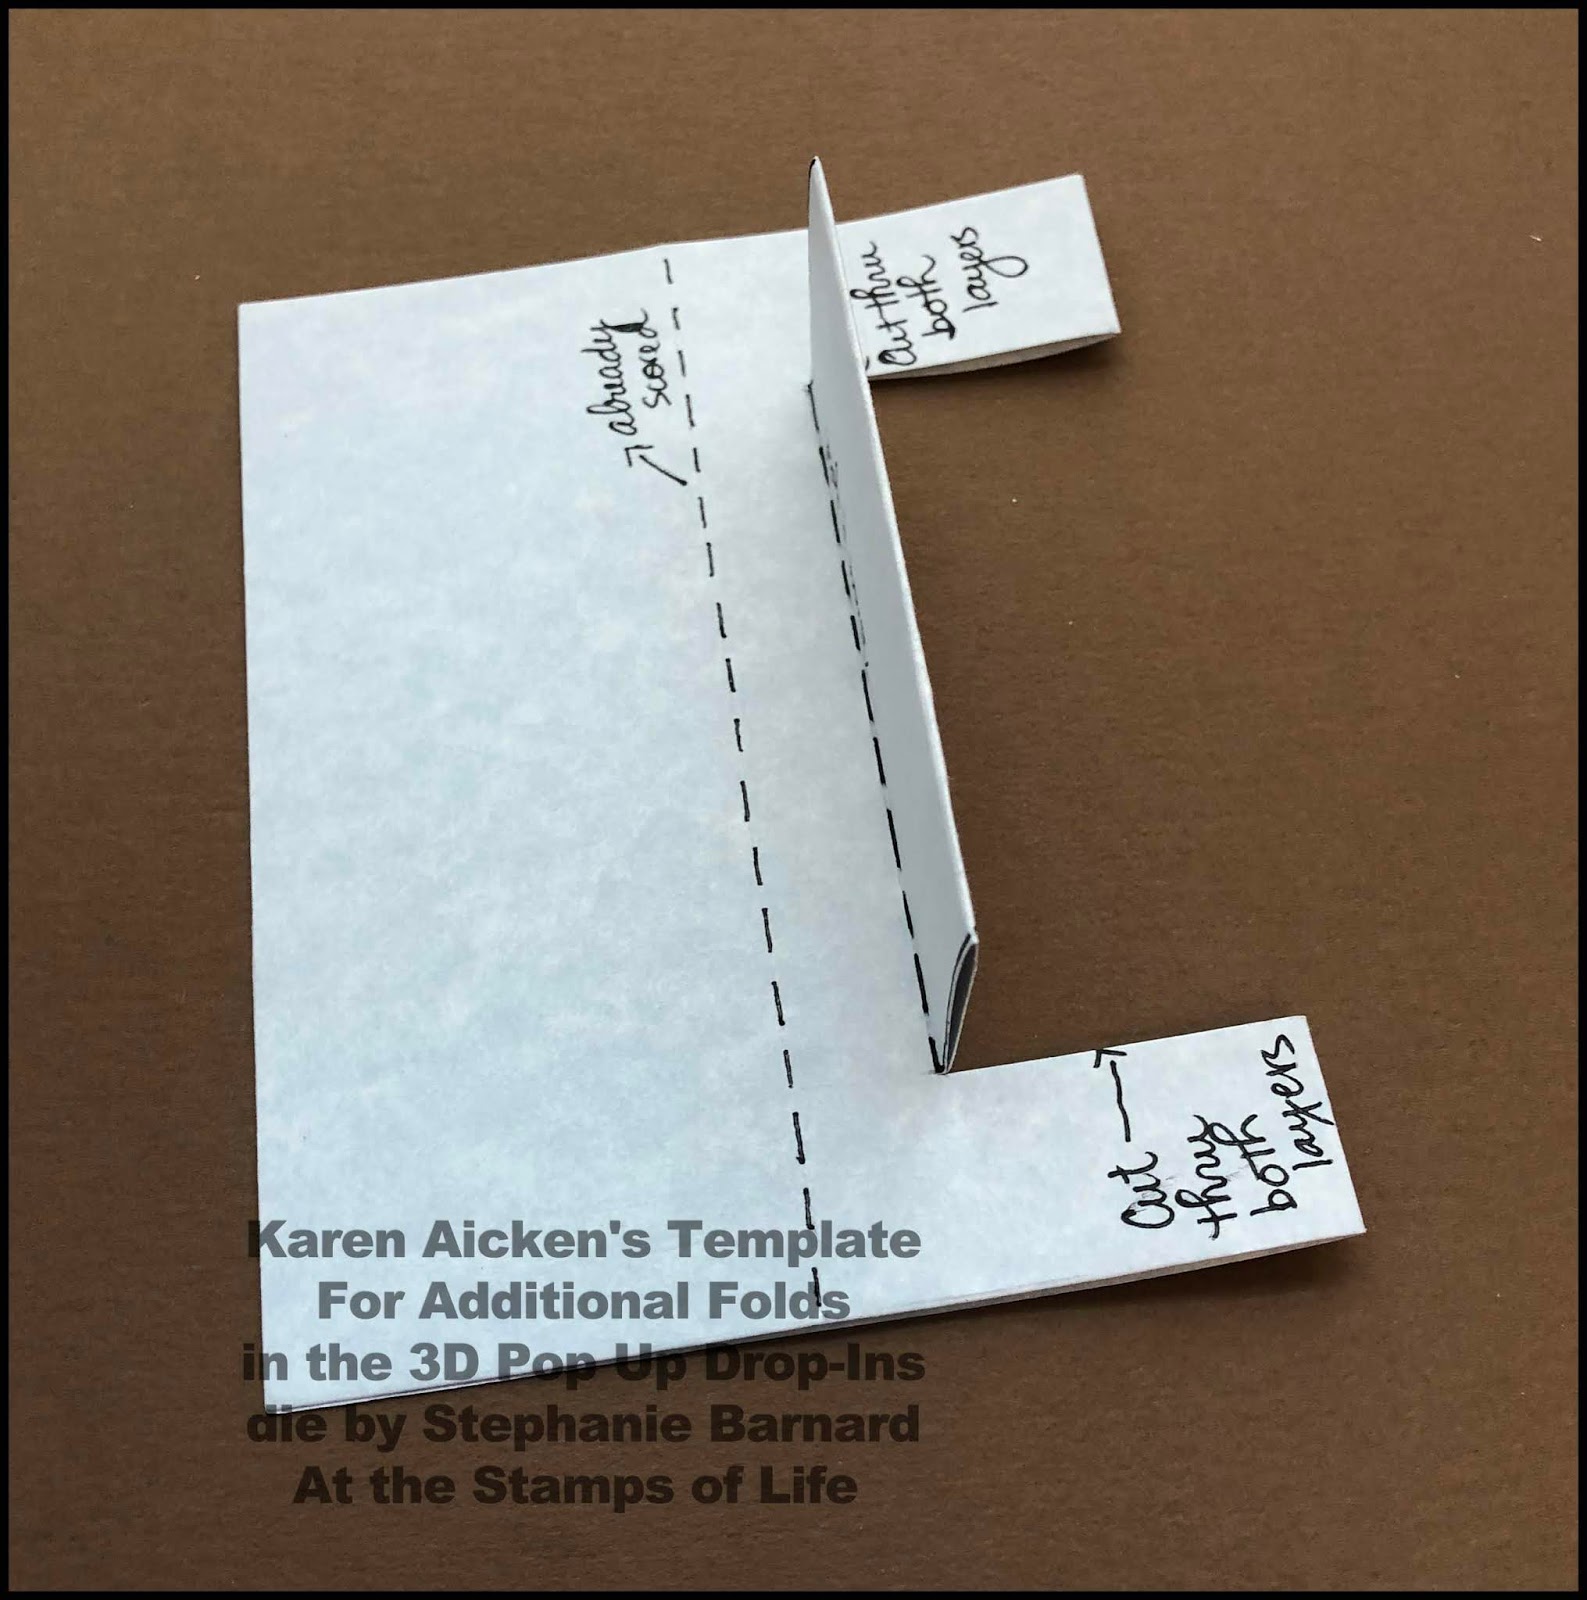
I get a lot of use out of the 3D Pop Up Drop-In die set from the Stamps of Life, but my preferred way to use it is with a couple of extra folds and cuts. One of my followers (Rebecca) asked if I had a template, so with this post I do have one for you. But first the card ... which is for Fun Fold Friday here on my blog.


The stickers have some sparkle on them anyhow, but I added some Stickles for some additional shine.


Here is a peek at the inside - I just love all the dimension you get with these extra folds!


I used some paper and stickers that I picked up last year (or the year before). I'm bound and determined to use up some of what I have here rather than keep adding to my stash. My room is full and it is frustrating to try to find homes for new items. Using up older stuff will give me some space again.

Now for my tutorial:

Step One - Die cut the 3D Pop Up Drop Ins die from whatever card stock or patterned paper you choose for the inside of your card. You can see more details about this die set HERE at the Stamps of Life. NOTE - this is sized to fit inside a standard A2 card with a small border around the outer edge. 

The die cuts the outer edge and scores the two side panels as shown below. I went over the score lines with a black pen so you can see them better.

NOTE - You can click on any of the photos to open them larger in a separate window.


Step Two - Line up the two outer corners and fold the panel in half. Below I show it with what would be the pattern paper design on the outside. Reverse the fold so the design is now on the inside. This starts to train the centre fold. You want to be working on the back side of your patterned paper or card stock so you don't see any pencil marks on your finished card.


Step Three - This is where you will add the additional fold lines. Keep the card in the closed position!  Now if you follow my blog you know I like things to be easy and I don't like math. So I rarely measure things, preferring to eyeball it.  I usually draw a pencil line parallel to the score line, about 1/2" away from that score line. 

NOTE -  I kept the template nice and neat for the photos, and I used a black pen so you can see the lines easier. Feel free to use a pencil and have your line go from the top edge to the bottom edge, 1/2" away from the score line. That's much easier.

Step Four - I have a 6" metal ruler that I use, and it's almost 1" wide. I usually just line that up along the bottom edge of the card, drawing a pencil line from the centre fold up to the pencil line from Step Three. Repeat at the top edge. 

NOTE - you are drawing your lines from the centre fold line, not the outer edges.


Below is the same photo as above, just in a different orientation.


Step Five - Now use scissors and cut through both layers on the two cut lines as shown below. Do Not cut past the score line you created in Step Three

Step Six - score on the line you drew in Step Three, but only between the cut lines. Do Not score above or below this line! This is important to remember if you just drew in your pencil line from the top edge to the bottom edge. You only want to score the line between your two cut lines.


Step Seven - Fold the panel you just cut upwards on the score line, then fold it in the other direction. 


 Step Eight - Carefully open up the card and turn it over to the patterned paper (or good side) and this is what you will have. The pencil lines are in behind.


Step Nine - you now have all the score lines you need, but you will need to reverse the centre fold line between the two narrow strips as shown below. In the photo above the entire centre fold line is a mountain fold. Keep the upper and lower strips as mountain folds, but make the centre area a valley fold. Honestly, it's harder to write out than it is to do it. I did the writing on the front, or good side of this 3D Pop Up Drop-In piece, the fold lines and notes from above are on the back side.


That's it! You have your 3D Pop Up Drop Ins insert with some extra folds and dimension. I made one from scrap card stock and keep it with the die set, so I don't have to think about what I did to make it work the last time. You can also make any notes you want on this template. Adhere it inside a folded card base keeping it centred so there is an even border around all outer edges. You will be adding adhesive to the two outer panels, not the centre ones we were working on. Stephanie Barnard shows you how to do this on her website HERE.  

If you want to add patterned paper to your pop up insert, simply measure each section you wish to cover and then decide on how much of a card stock border around the edge you want. Cut your pieces accordingly. I don't have measurements for you as I generally just wing it and decorate different areas each time. Often the scraps of patterned paper I have sitting on my stamping table determine where I will add patterned paper. There are lots of samples over at the Stamps of Life, and in their gallery there.

TIP:  Be careful what size of element you add to the interior centre folds as you probably don't want them to stick out of the card perimeter. Check each one before adhering permanently!

Supplies:
3D Pop Up Drop In - Stephanie Barnard, the Stamps of Life
Pink, white and yellow card stocks
Patterned paper and coordinating stickers - American Crafts
Baby powder (to brush onto the sticker backs to remove tackiness)
Stitched scalloped rectangle die - Your Next Stamp
Stitched rectangle die - Your Next Stamp
Simple Strips Birthday stamp and coordinating die - Taylored Expressions
Happy Birthday - LJD Birthday Greetings, MFT Stamps
Nuvo Drops
Stickles

Card size - Standard A2 (4.25 x 5.5")


Thanks for stopping by today