Showing posts with label Accordion Cards. Show all posts

Friday, 30 August 2024

Rainbow Birthday Accordion Card


Welcome to Fun fold Friday here on my blog! I'm really late posting today - I had a Tetanus shot yesterday, and the trouble with having an autoimmune disease (Rheumatoid Arthritis) is that vaccines set up a doozy of an immune response. Lots of pain meds and I'm finally able to sit with my laptop to get this posted. Whew. Today I'm sharing a fun card using dies -and stamps!!- by Karen Burniston! I have a walkthrough of my card on YouTube:  


Apparently the Fancy Label Accordion is one of Karen B's most popular die sets, and her last release included both the Fancy Solid Frame dies and Tree Add-Ons. So fun! Below you can see the card closed and how it will look coming out of the envelope.


She also has a selection of stamps that go perfectly with her new release and I used the birthday set for this card. The front has "Make A Wish" and the back has a white label which is where we can sign our names. I was impressed at how well the stamps stamp, too!


I cut the Fancy Label Accordion four times, using the Tree Add-On's for the centre two panels. 


For a little something extra, I added the Happy Birthday on a separate strip - which I adhered to the left and right tree panels. I took my time placing it inside the card so it wouldn't stick out past the edge of the card when it's all closed up.


The card folds up surprisingly flat, and while it will likely need an extra stamp for thickness it won't have to go as a 'parcel'. I really had fun making this happy card and look forward to more playtime with these dies.

 
Supplies used:
Fancy Label Accordion - Karen Burniston
Fancy Solid Frame -  - Karen Burniston
Patterned paper - JJ's Rainbows, Waffle Flower
Tree Add-Ons (for the Fancy Label Accordion) - Karen Burniston
Birthday/Belated Sentiments - Karen Burniston
Dot stamp - Stamps by Judith


Tuesday, 4 June 2024

Desert Themed Father's Day Card

I meant to share this card yesterday for Masculine Card Monday on my blog .. but time completely got away from me. 

I knew I wanted to use this SW themed patterned paper pad for hubby's card and when I was looking through my fun fold die sets I spied this Zig Zag die set. This time I reversed the way the circles fold though, with the back circle sliding over the front one and I was really happy with that. I'll do it again for sure.  The die makes the score lines at the same time it cuts and I just folded the left circle to the back and the right circle to the front. That gave me the overlapping effect. 


The decorative elements were die cut from another sheet of paper in the pad, and I also pulled out an older stamp set with some desert flora & fauna to stamp on the plainer pieces.

Supplies used:
SL Circle ZigZag Cardshape Essentials - Studio Light
Patterned paper - Golden Desert, Prima
SW stamps - Bohemian, Michaels
Blending sponges
Catherine Pooler coloured inks
Happy Father's Day - Karen Burniston
Tie-Riffic - Reverse Confetti
Alcohol markers


Tuesday, 5 March 2024

Cake & Candles Pop Up Card


I have my set up for 'card photo & videos' on our dining room table - but we were having houseguests for the week and I knew we'd be eating our meals in there. So I had to take it all down, but then had to scramble to take photos of this card. 

I made it for a friend - I had already made her a special card that has disappeared into the universe somewhere. When I went to get it ready to add with her gift - I couldn't find it ANYwhere. Sheesh. I made her another one and if I ever find the first - I'll be ahead for next year. 😂

I took these photos outside - but the holographic cardstock just doesn't show up like it does under my camera set up. The front features a scalloped oval stamped with a birthday cake & sentiment. It was popped up with foam tape then I cut the daisy row several times from Karen Burniston's Twist Flower Pop Up using Rainbow Holographic cardstock. I tucked the daisy's under the scalloped oval, trimming the extra daisy's as needed. Oh, how I wish you could see the shine from those daisy's!


My card base started as a 12 x 5" piece of teal card stock, scored down the centre at 6". That gave me a 6 x 5" folded card. For my first play with Karen Burniston's Birthday Candle Add Ons, I decided to try adding it directly inside my card. It is intended to work with the Fancy Label Accordion (which looks REALLY cool) but I knew I had to try it this way at least once. I do love to share different ways and looks you can get from your dies, since they are an investment.


In the photo below, you can see the score line on the left side of the Add-On. (You can click on a photo to open it up in a separate window if you wish to see them larger.) I scored it on each side, right on the end of the curve then worked all the folds of the Birthday Candle Add On so it would work easily inside the card. 

Opening the card up flat and lining up the center score lines of both the card and the Add On, I added glue to the outside of those two score lines and adhered them inside the card keeping those centre fold lines lined up. I did let the glue set for a minute or two before I re-worked the folds and then I could decorate the Add On piece. I like that it opens up flat for adding the candles & decorating or you could get those added after you've worked the folds and before you adhere it inside your card.


Since I wanted a little more sparkle, I added more of the rainbow holographic daisy's behind the Add On and Stickles glitter glue to the candle flames. The lines and dots on the candles were drawn over with a Sakura Stardust pen for subtle shimmer.  I added borders on each side & from the Border Blends Trims die set (Karen Burniston). The sentiments were stamped and punched out before adding to the card then I added a few more of the leftover daisy's. The larger daisy's were trimmed from the daisy border - easy peasy.


People always turn this type of card over to view it from the top - so here is a photo showing that view!


Supplies used:
Birthday Candle Add Ons - Karen Burniston
Border Blends - Trims, Karen Burniston
Sakura Stardust pen
Daisy's - Twist Flower Pop Up
Yellow and green markers
Stickles glitter glue
Heartfelt Hexagon stamps and punch - Stampin' Up
Words inside - Cake Fancy, Stampin' Up
Lacy Ovals - Waffle Flower


Monday, 4 December 2023

Snowflake Zig Zag Card


Today I'm sharing another holiday card and this one uses the Circle Zig Zag die set by Studio Light.  I knew I wanted to use it with 'scenic' patterned paper and I'm so happy with how this turned out!


I love the prints on this patterned paper, but after working with it for awhile I am finding a few issues. It's coated, so if you stamp on it you have to allow for drying time so your ink won't smear. I just used dye inks, but one could also heat emboss their sentiments.  

The paper is also really thin so glue lines show through and it has a tendency to buckle or wrinkle. Things to keep in mind! I didn't want to add a signing block inside, since I love how the scene sort of flows across the card. So instead I added one to the back, using the included layering dies in the set.


I added die cut snowflakes as well as a large iridescent snowflake and the sentiment was hot foiled. I love how nicely this card will stand for display!


Having been asked how many cards I make I thought it would be fun to keep track this year. Many of my posts include more than a single card or project and below is my tally. 

Card Tally for 2023
January - 53 cards
February - 56 cards
March - 55 cards
April - 32 cards
May - 43 cards
June - 34 cards
July - 56 cards
August - 106 cards
September - 61 cards
October - 51 cards & 5 Tags
November - 46 cards
December so far - 3 cards

I decided to cancel the subscription that provided linked thumbnails to what products I used on my cards. It was costing me out of pocket each month, so I’m back to listing what I used with a few affiliate links included.

Supplies:
SL Circle Zig Zag Card Shape Essential die set - Studio Light
Tasteful Labels - Stampin' Up
Perfect Sentiments Holiday Hot Foil Plate - Pinkfresh Studios
Perfect Sentiments Holiday die - Pinkfresh Studios
Pink foil - Cotoure Creations
Mirror Rectangle Hot Foil Plate - Pinkfresh Studios
Sentiment - Christmas Feeling, Penny Black
Catherine Pooler inks
Snowflake Mini die set - Divinity Designs
White pearl card stock scraps
Large Iridescent snowflake - Wonderful Snowflakes, Stampin' Up

Monday, 9 October 2023

Halloween Accordion Card


As soon as I saw Karen Burniston's Fence Add-On for the Landscape Accordion, I knew exactly how I wanted to use it first. I haven't made a Landscape Accordion in awhile and when I was die cutting this one I remembered how much I like it. The two add-ons are brilliant - there is this fence (which comes with flower accessory dies) and a cupcake one. I'm itching to play with the Cupcake Add-On next!


Below is how the card looks coming out of the envelope. I love that Happy Halloween oval, which actually has a bat below the words. Since I was using cute elements to decorate the card, I covered up the bat with the spider ephemera piece. I also added punched clouds that have some doodles on them.


Below is the back of the card. I cut the fence four times, twice for each accordion panel. Then I could sandwich the tab in between the fences for a clean look on the back side.


Here is the card fully open, and how it will be displayed. I generally only make 2 page accordions as they can take up a lot of room! This one is about 10" across when open. While the Landscape Accordion card would normally fit in a #8 envelope (Mini Slimline sized) - the clouds stick up too much so I used an envelope sized for a 4x6" photo instead. I decorated the flap with Washi Tape.


Some of the pieces I used were stickers and not ephemera. Those were attached to white card stock then fussy cut which makes them nice and sturdy and you can easily use foam tape behind them for dimension!

Having been asked how many cards I make I thought it would be fun to keep track this year. Many of my posts include more than a single card or project and below is my tally. 

Card Tally for 2023
January - 53 cards
February - 56 cards
March - 55 cards
April - 32 cards
May - 43 cards
June - 34 cards
July - 56 cards
August - 106 cards
September - 61 cards
October so far - 16 cards

I decided to cancel the subscription that provided linked thumbnails to what products I used on my cards. It was costing me out of pocket each month, so I’m back to listing what I used with a few affiliate links included.

Supplies:
Landscape Rectangle Accordion - Karen Burniston
Fence Add Ons - Karen Burniston
Short Rectangles Crosshatch - Karen Burniston
Halloween Charms - Karen Burniston
Ovals Crosshatch - Karen Burniston
Cloud punch - Stampin' Up
Patterned paper  & stickers - Doodlebug Designs
Elements - Doodlebug Designs
Purple fine line marker

Tuesday, 7 March 2023

Birthday Accordion Card & Slider Box


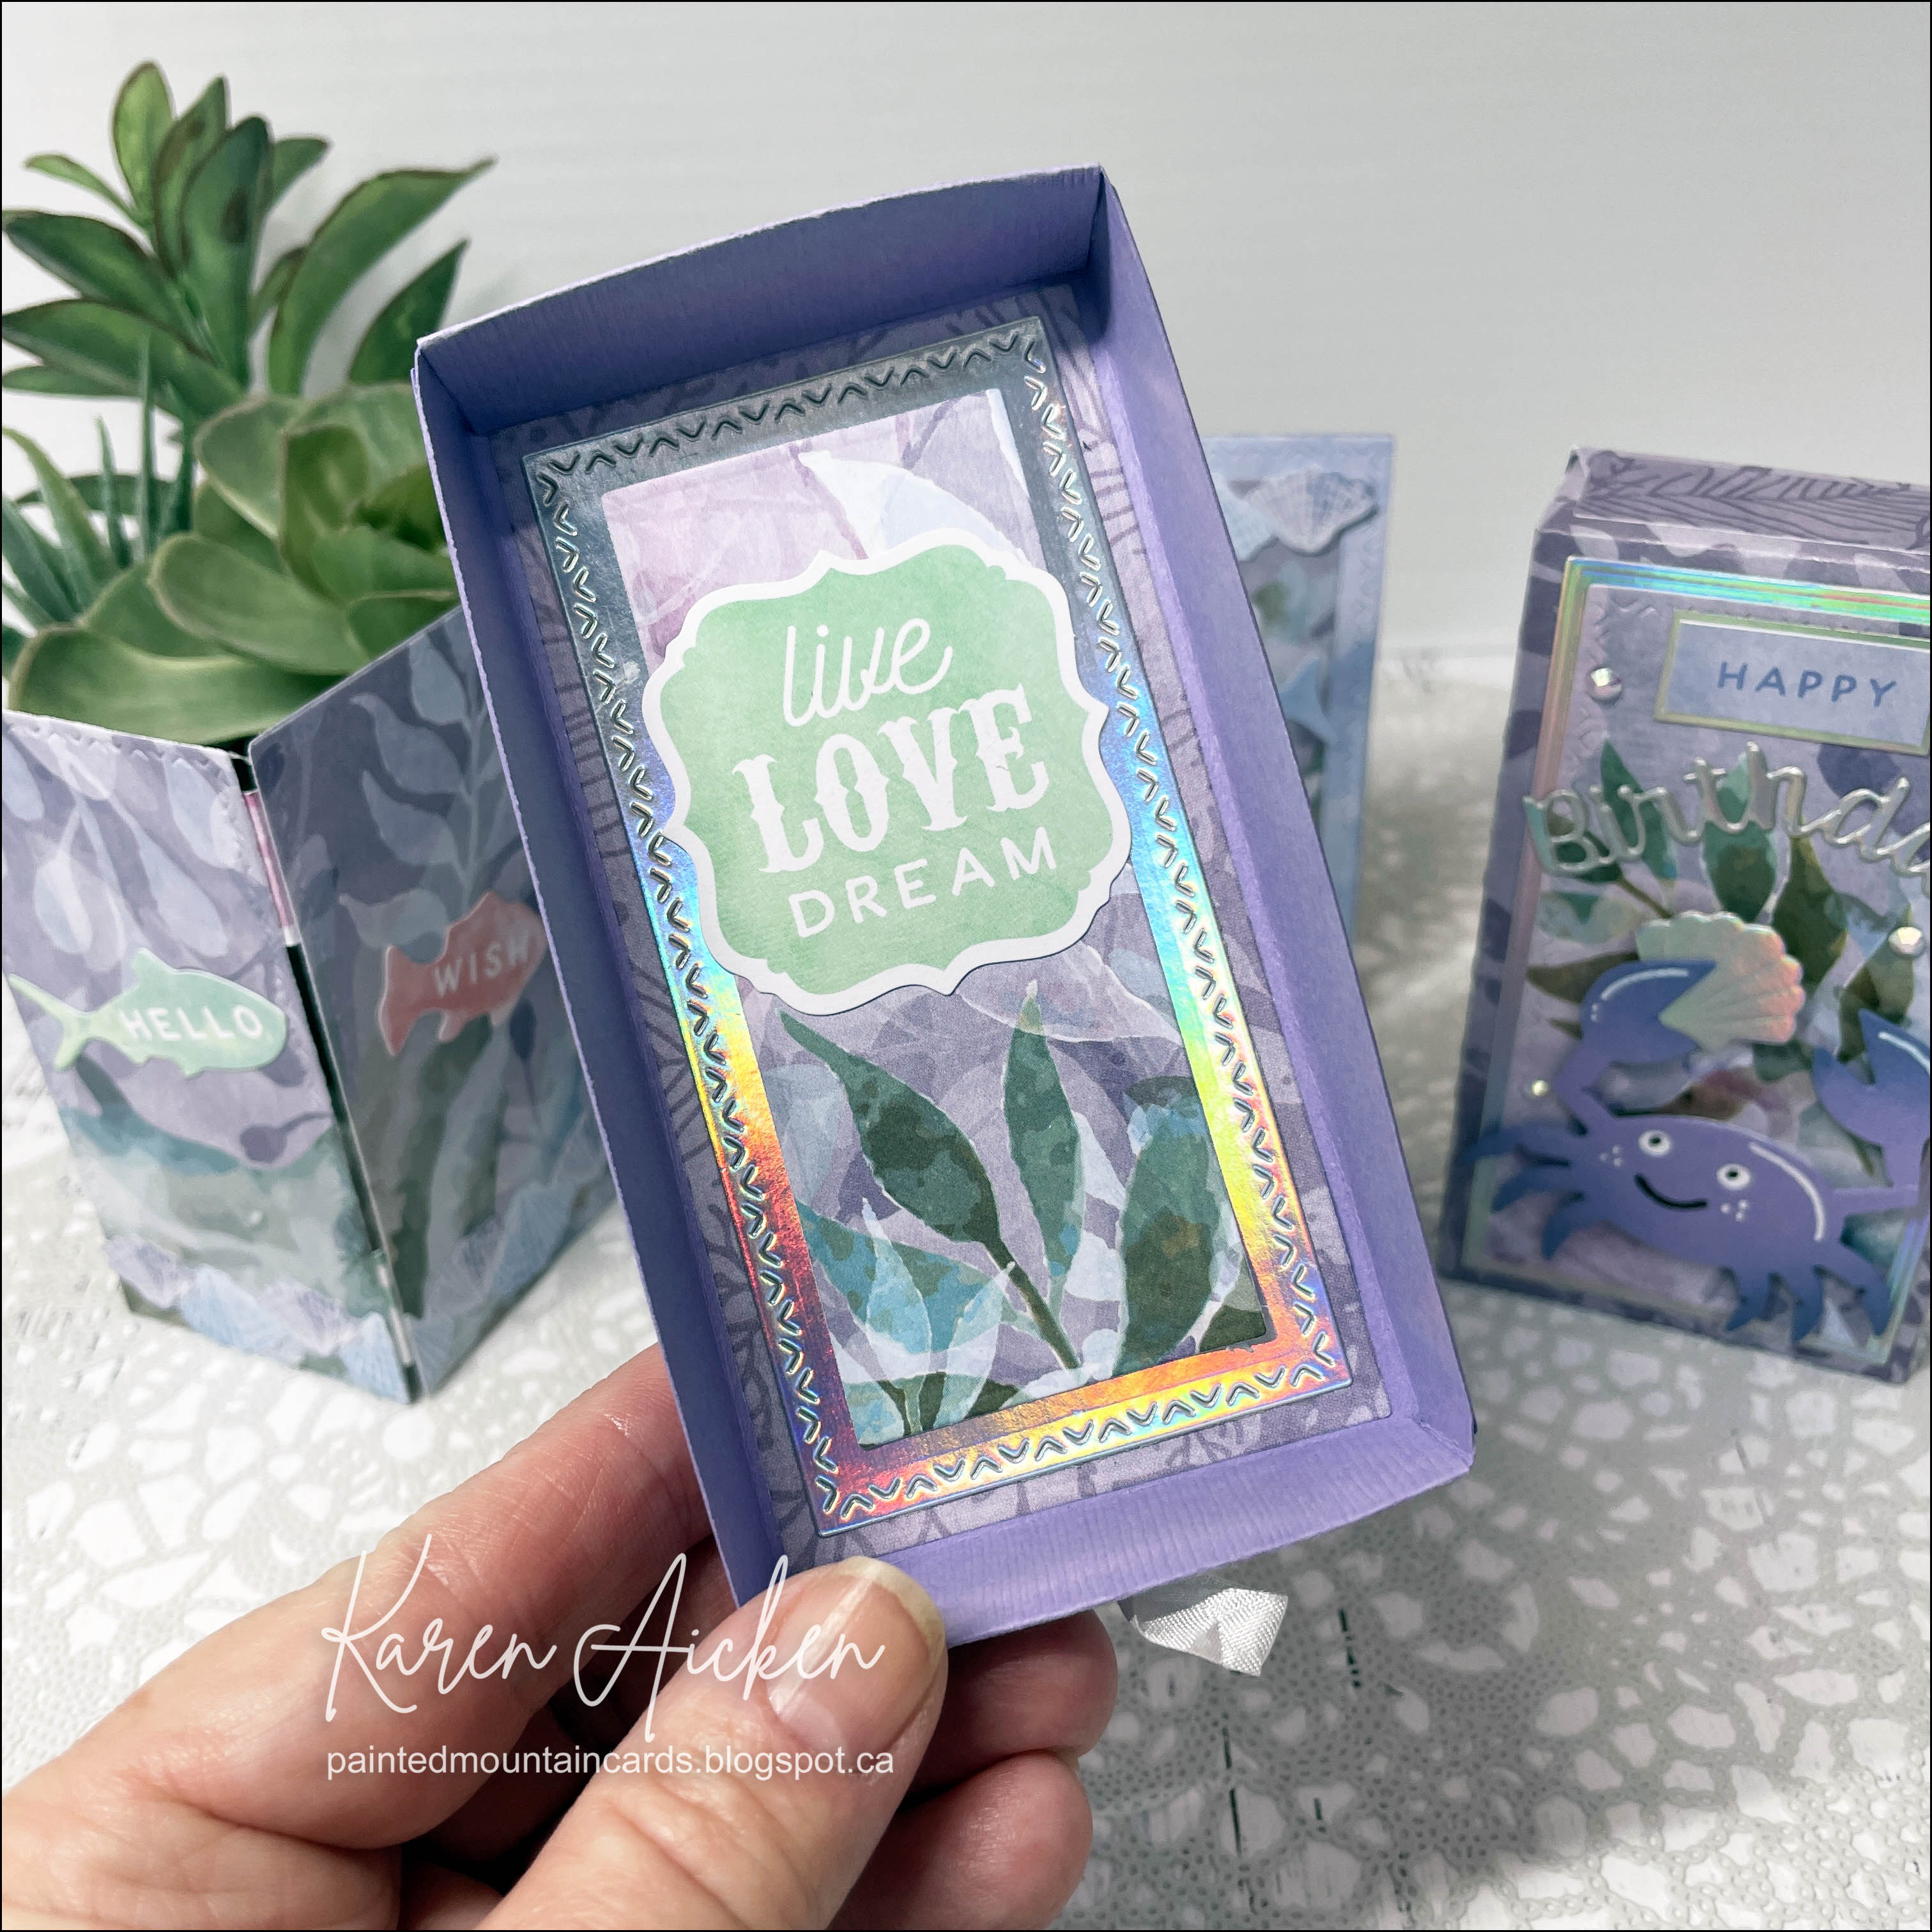
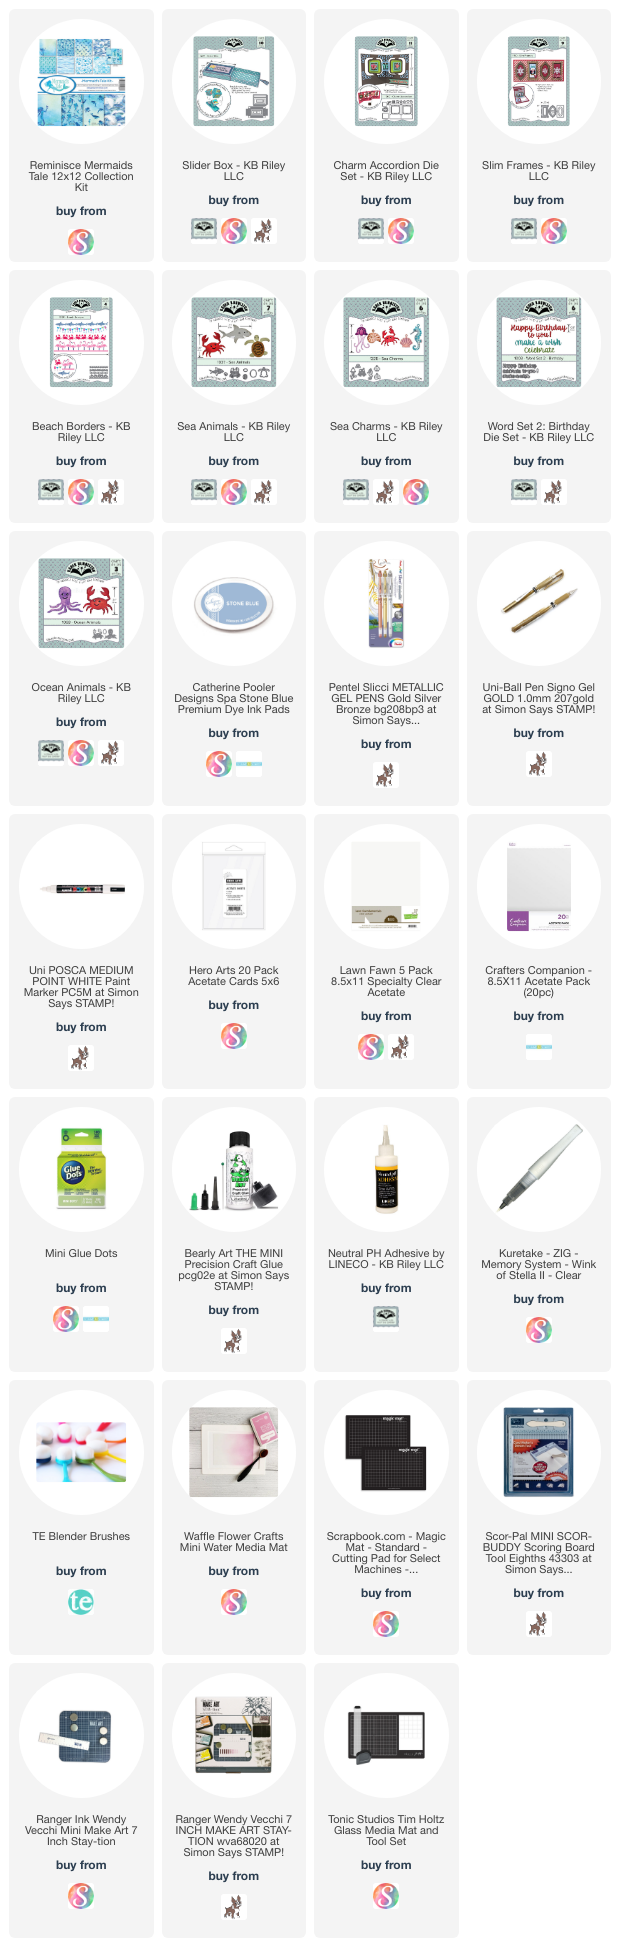
It's time for Karen Burniston's Designer Challenge for March, with the theme:  "VACATION!" - where do you want to go? Beach? Mountain Cabin? Farm Livin'?" While I am not a beach girl - I chose to make an ocean themed project today. I started with the Slider Box and some pretty patterned paper from my stash. Then I chose a bunch of dies by Karen Burniston for my project, and they are all linked below.


The Rainbow Holographic cardstock adds a lot of shimmer and shine. I love a bright red crab, but went with soft purple for this one. Those little crabs from the Beach Borders are SO darn cute.


Using the decorator rectangles from the Slider Box with hinges from the Charm Accordion I  created an accordion card that folds up inside the box. It's a fun surprise when you slide the box open.


Using one of the frames from the Slim Frames I created a little shaker on the accordion card front, but I snipped two crabs from the border and adhered them down inside the shaker with the dream word sticker. So they don't move around when you shake the frame.


This is the bottom of the box, which is revealed when you remove the accordion card.


The back side of the card has some stickers from the same package as the patterned paper, but I had to use adhesive as they didn't stick well on their own.

I know just who this is going to for her birthday!

The rest of the Design Team is linked on the right side of my blog and I hope you will check out what they came up with for the challenge. Karen Burniston will have her post tomorrow (Wednesday) on her BLOG.

Late last year I was asked how many cards I make but I didn't have a clear number. Since many of my posts include more than a single card or project, I thought it would be fun to keep track this year. 

Card Tally for 2023
January - 53 cards
February - 56 cards
March so far - 15 Cards

Additional Supplies:
Purple textured cardstock - Bazzill
Crinkle seam binding - Stampin' Up
Rainbowow Hollographic cardstock - Recollections
White cardstock
Blending Brushes
Gems - Stampin' Up
Staedtler fine liner markers
Black sharpie
Alcohol markers

This blog uses affiliate links whenever possible. This means, if you make a purchase through one of my affiliate links that you pay the same amount but I may receive a small commission from your purchase. I only link products that I own, love and use for my card making and not every link below is an affiliate one! 😊


Friday, 16 September 2022

Sewing Themed Landscape Accordion Card


Hello my crafty friends and welcome to Fun Fold Friday here on my blog. Today I'm sharing a Mini Slimline Accordion card using several dies by Karen Burniston. This card was sent to one of my friends who does amazing things with a sewing machine. 😊


The Sewing Charms are part of her new release and I added them to a Landscape Rectangle Accordion. I like that this die set creates a Mini Slimline sized card!


I didn't take a photo, but I wrote my personal message on the back side, which you can't see when the card is displayed. 


This blog uses affiliate links whenever possible. This means, that at no cost to you, if you make a purchase through one of my affiliate links that I may receive a small commission from your purchase. I only link products that I own, love and use for my card making and not every link below is an affiliate one! 😊

Any supplies I'm unable to link are listed at the very bottom of my post.

Additional Supplies:
Matte silver cardstock - stash
Navy cardstock 
Copic marker
Sequins - old Paper Pumpkin kit
Black fine point marker
White cardstock

Tuesday, 12 July 2022

Ice Cream Charm Accordion Card


Hello my crafty friends.  In keeping with our families tradition to have ice cream on a certain day in July ... here is another ice cream themed card!  If you'd like to read more about this tradition, I will add the details below the photos. 

For this card I pulled out several dies by Karen Burniston, and some cheerful plaid patterned paper from my stash. The ice cream cones are from the Sweet Treats Charms - simply snipping off the hanging hole lets you create embellishments instead of charms. I added some glitter to the ice cream portions, and also to the dangling heart. 


The Charm Accordion comes with a die that cuts four jump rings, I cut mine from the same pink card stock as the card base but only needed one for this card.. I added a little clear drying glue to the ends but I don't find they separate with regular card handling. You could also use a metal jumping or even twine or embroidery floss!


Here is what it looks like from the back ...


When my Mom was a little girl, there was always a July parade in their town. Afterwards her dad, my Grampa, would take her to the drugstore for an ice cream soda. She continued the tradition with my brother and I, on a special day in July she would take us for ice cream. And I did that with our kids too - bringing my Mom along. We always made sure she had ice cream on that day. 

Now that she has passed, we continue the tradition - raising an ice cream cone to her in a toast and our grandkids think it's a great tradition! I also send my family ice cream themed cards to celebrate.

This blog uses affiliate links whenever possible. This means, that at no cost to you, if you make a purchase through one of my affiliate links that I may receive a small commission from your purchase. I only link products that I own, love and use for my card making and not every link below is an affiliate one! 😊

Any supplies I'm unable to link are listed at the very bottom of my post.


Additional Supplies:
Patterned paper - Plaid Tidings, Stampin' Up (retired)
White card stock - Accent Opaque Digital Super Smooth (Amazon .ca)

Monday, 23 May 2022

Mini Slimline Accordion for Father's Day


Hello my crafty friends and welcome to Masculine Card Monday here on my blog. Today I'm sharing a Father's Day card using several different dies by Karen Burniston. The card base uses the new Landscape Rectangle Accordion, and I made it a 2 Page card with an additional solid page.

While it was fun, and something I wanted to try - I'm not too crazy about the solid page with a two page accordion. It works SO much better with a three page, as you can see HERE. But sometimes you have to try things out ...


The solid panel gives you space to decorate and add a signing block. I pulled out some older papers from my stash which always makes me feel good to use up.


The white area makes a great signing block...


The Hooray die cut was outlined with a grey marker after adhering it to the card, to create a shadow.


Below is the top view ...


***NOTE:  To create the solid back panel, cut cardstock to 6.5 x 3.5". Score 1/2" down the short left edge. Add adhesive to the 1/2" flap and adhere it to the end of your accordion, then add your decorative panels. This helps hide the seam.***

This blog uses affiliate links whenever possible. This means, that at no cost to you, if you make a purchase through one of my affiliate links that I may receive a small commission from your purchase. I only link products that I own, love and use for my card making!

Any supplies I'm unable to link are listed at the very bottom of my post.


Additional Supplies:
Brown cardstock
Patterned paper - 6 x 6" pad from Studio Calico (discontinued)
White card stock - Accent Opaque Digital Super Smooth (Amazon .ca)

Friday, 20 May 2022

Sympathy Accordion Card


Hello my crafty friends and welcome to Fun Fold Friday here on my blog!  Today I'm sharing a sympathy card made with Karen Burnisotn dies, combining the new release with previously released sets.  I have a walkthrough of my card on YouTube:   


This card was actually sent to Karen B to show in her classes. Students love to see lots of ideas for using the different sets and the Design Team likes to be sure she has new things to show. 😊

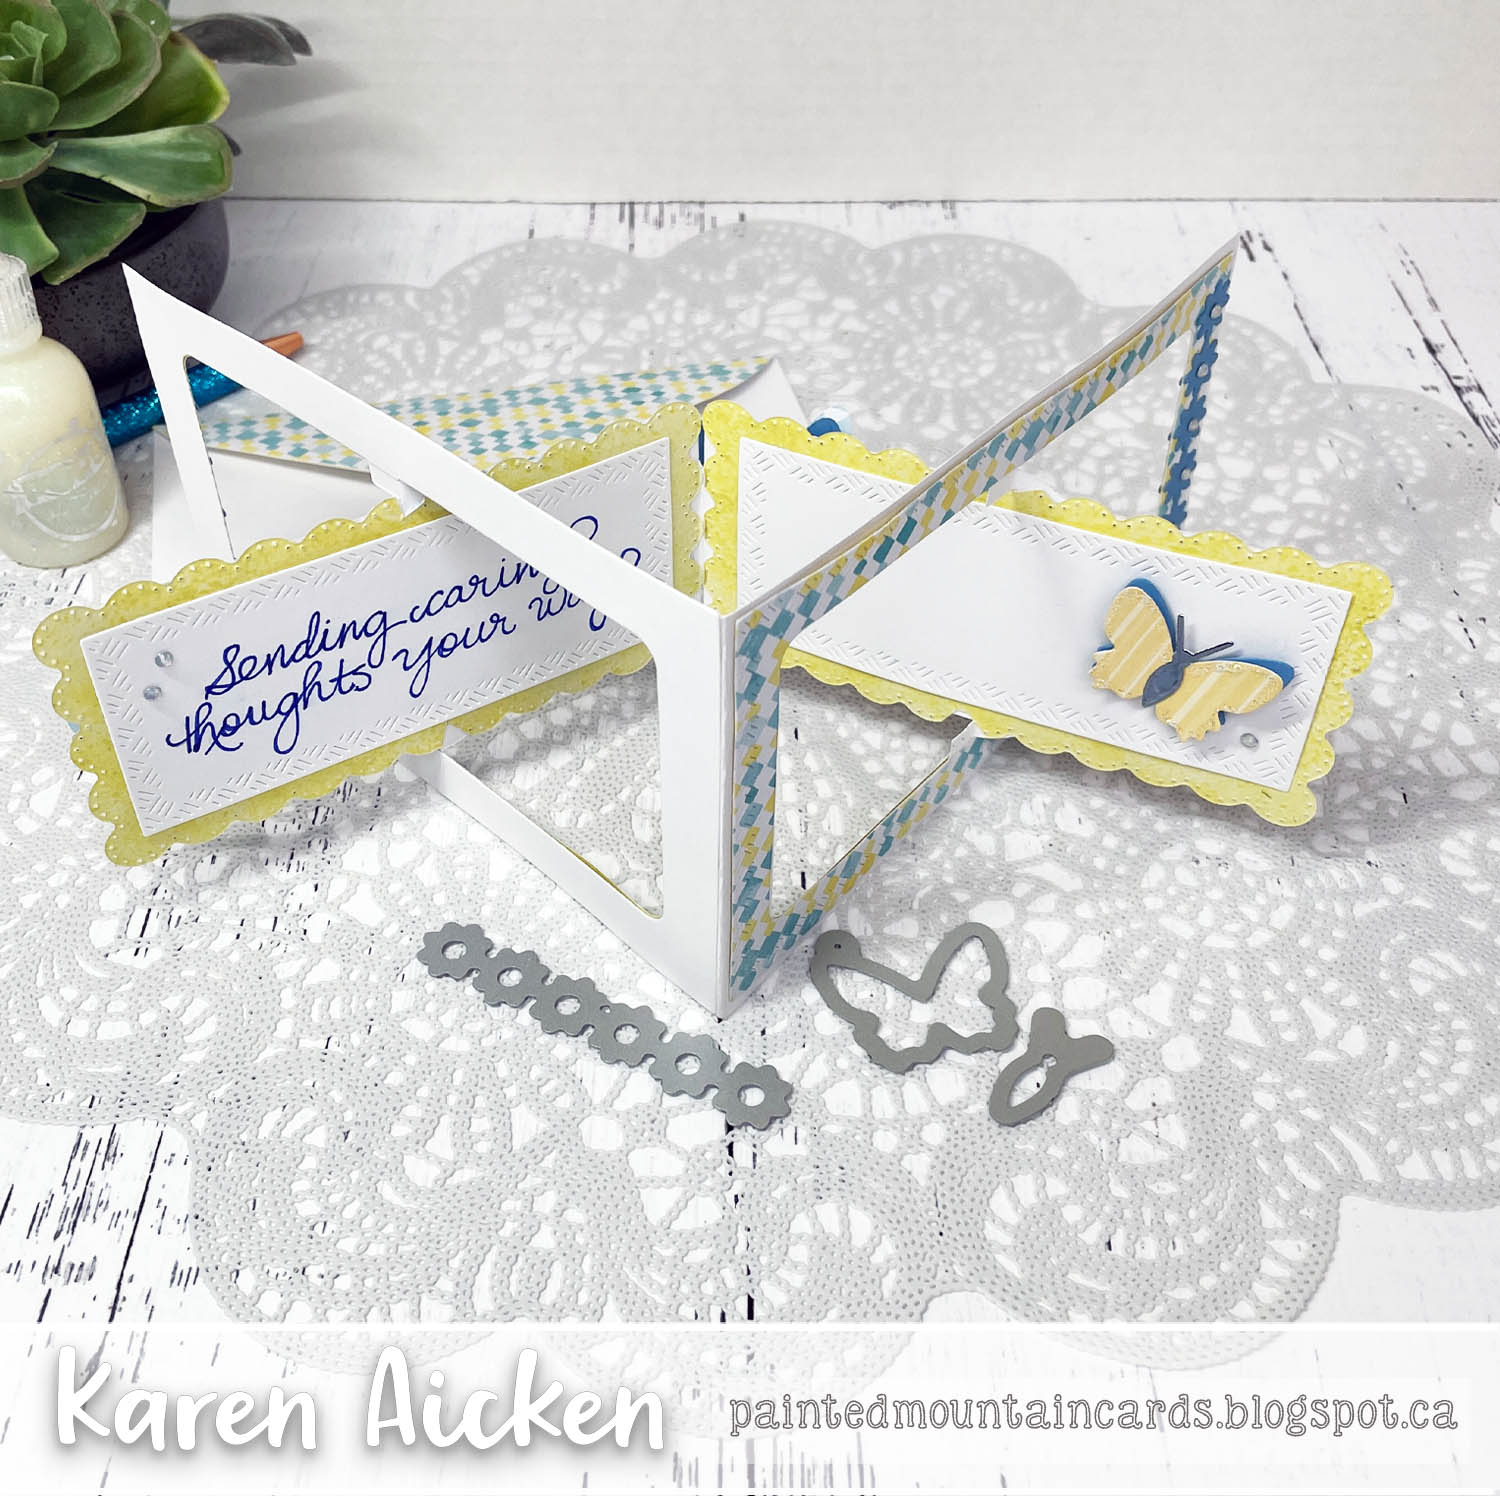
The With Sympathy fits perfectly on the new Landscape Rectangle Accordion, and it was die cut from a blue mirror card stock. I added layered butterflies from the new Flutter Charms, and the Thinking of You comes from Word Set 10 Thinking Of You. It was die cut from blue and from white card stock, and the two were layered together with the blue layer off-set a little for a shadow look.


The pretty scalloped rectangles are from the new Short Rectangles Crosshatch, cut from the double sided patterned paper. I adhered the scalloped pieces to the back of the inner accordion panels so the pattern shows through on the front side and the paler, yellow pattern is on the back. NOTE  -- I did snip away the scallops from the hinge portion of the accordion so they didn't impede the hinges.  Then I layered another of the Short Rectangles Crosshatch on top, cut from white card stock. The sentiment was handwritten and I added another layered butterfly on the right side. 


The layered butterflies were created by die cutting the solid butterfly twice. Once from blue card stock and once from a coordinating patterned paper scrap. They were layered together with a little thin foam tape just in the centre so the wings have some lift. The butterfly body was cut from a scrap of the blue mirror card stock and finally, the top layer was outlined with Stickles.


This blog uses affiliate links whenever possible. This means, that at no cost to you, if you make a purchase through one of my affiliate links that I may receive a small commission from your purchase. I only link products that I own, love and use for my card making!

Any supplies I'm unable to link are listed at the very bottom of my post. 

Since I couldn't link the blue mirror card stock I used on this one, I linked others that I also have and would work just as well.


Additional Supplies:
Blue fine point marker
Patterned paper - Water Colours, Sizzix (retired)
Blue card stocks - stash
White card stock - Accent Opaque Digital Super Smooth (Amazon .ca)