Showing posts with label Easter Cards. Show all posts

Monday, 8 April 2024

Pop Up Easter Card


I thought I was finished sharing Easter Cards, but found these photos in the folder and I don't want to hold onto them until next year. So HERE I my final Easter Card of 2024!  ðŸ˜Š The front has patterned paper and a large ephemera piece the front. I kept it nice and simple because all the fun is on the inside!


I used the Lorna Label die set inside, which is an updated version of one that Karen Burniston had out years ago. I've talked about the differences between the versions in previous posts and I believe Karen addresses them in her assembly video. I am so happy that the Lorna Label Pop Up is back!


I added her Happy Easter & shadow and some butterflies from the Flutter Charms set. The bottom 'step' of the pop up is perfect for tying ribbon around! I also added (yet another) bunny border across the patterned paper seam - I love those bunnies.


A stamped sentiment on a scalloped signing block that was cut using KB's Short Crosshatch Rectangles.


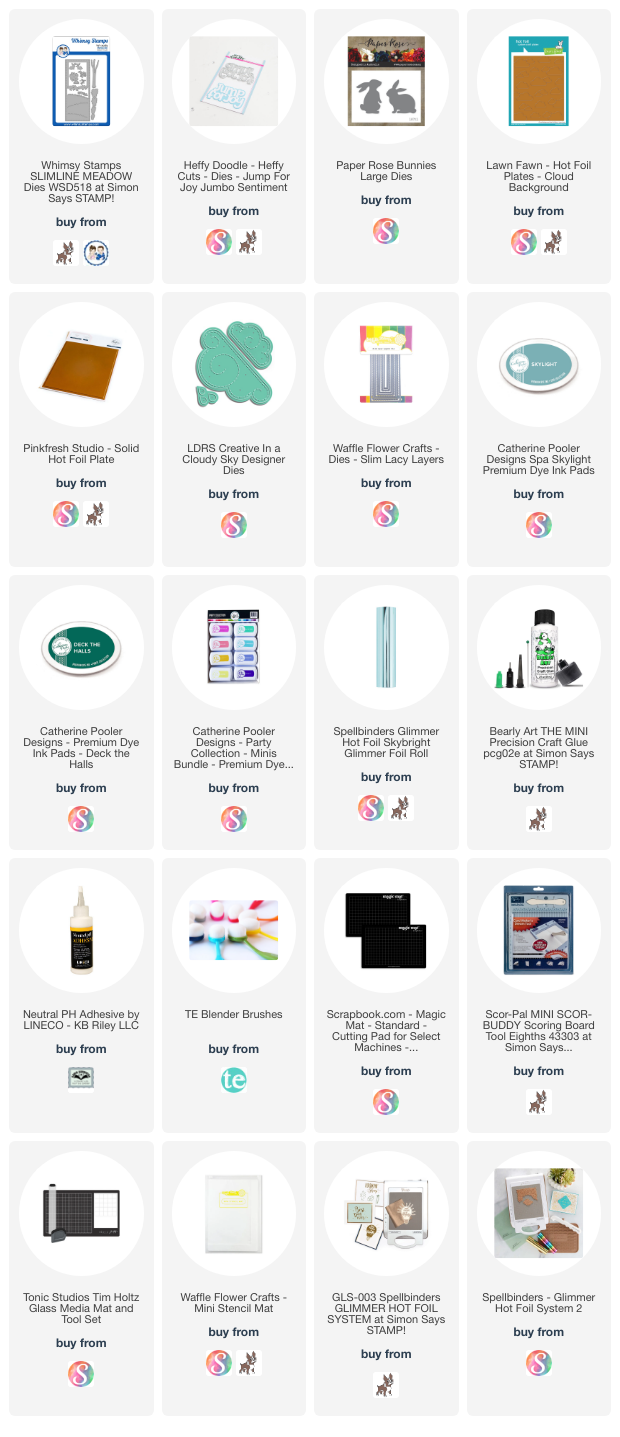
Supplies used:
Lorna Label Pop Up - Karen Burniston
Happy Easter - Karen Burniston
Easter Borders - Karen Burniston
Flutter Charms - Karen Burniston
Short Rectangles Crosshatch - Karen Burniston
Patterned paper - Springtime, Authentique
Ephemera - Easter, Echo Park
Pink Bunny Patterned paper - unknown, probably Echo Park
Wink of Stella
Black Pen
Seam Binding
Pops of Color - Snowflake, Scrapbook .com
Rainbow Holographic cardstock - Recollections
Sentiment inside - Big Bold Easter - Taylored Expressions
Catherine Pooler coloured inks
Blending brushes - Taylored Expressions
Dot stamp - Stamps by Judith
5 x 6.5" Card base & envelope - Michaels

Wednesday, 27 March 2024

Easter Card with Plaids


Today I'm sharing a final Easter card for 2024. I'm also slightly horrified to say that I didn't actually get any in the mail - first time in over 30 years! Easter seemed to sneak up on me this year and I completely missed mailing them in time. I guess that means I now have all the cards I will need for Easter 2025! Sheesh. 

We are meeting friends for dinner over the Easter weekend so at least I can hand deliver their cards. Hmmmm - maybe I should make some Happy Spring type cards and send those out instead. Something to think about.  Anyhow, I wanted to use some of my older 6x6" Easter papers, so combined three of the prints on this 5x7" card. I added a large ephemera piece to the front with thin foam tape and the cute bunny border (Karen Burniston) across the bottom paper seam.

I also added Wink of Stella to the bunny for some sparkle.


Here is a peek at the inside - the Happy Easter piece is more ephemera from my stash. I inked it with blending brushes and dye inks.


Another bunny border across the bottom, this time inked with the same colours as the Happy Easter above it. The plaid patterned paper on the inside is from an older 12 x 12" paper pad so I didn't have to piece it.


Supplies used:
Patterned paper on front - Echo Park
Patterned paper inside - Springtime, Authentique
Ephemera - Easter, Echo Park
Easter Border dies - Karen Burniston
Blending brushes - Taylored Expressions
Catherine Pooler coloured inks
Black pen
Wink of Stella
5 x 7" Card and envelope

Monday, 25 March 2024

Springtime Pop Up Card


I still have Easter paper & cut-aparts in my stash - the same ones I've been using for several years. I won't buy new ones until I can use these up ... and I'm actually (finally!) making a dent in that basket. Today's card features a 4x4" cut-apart with patterned paper and a die cut butterfly on the front. In fact, this card ended up being quite a stash buster!


Inside I used the 'new' Lorna Label Pop Up die set by Karen Burniston. The Lorna Label was one of my favourite pop up dies waaaaaay back when it came out and, and I'm soooooo happy she brought it back. This time it's a 'glue in' instead of a 'cut in' which means you can add it into different sizes of cards without worrying about having the inner piece fitting through your die cutting machine. That also reduces the bulk of your finished card which is always a good thing. You can add the die cut piece anywhere you want along the fold, and it's just all the way around a great updated set. 

For my card today, I added it to a side folding card which is something I used to do with the old set too. I love to share different ways you can use your die sets, since they are an investment. 


The stamped sentiment was punched out and added to the left side of the card so I would have room to sign our names on the right.


The flower elements were already in my Easter bin - likely die cut for a different project one year and not used. So I added them to this card and then a couple more of those die cut butterflies. The butterflies were lightly inked with dye inks and a blending brush and I added some sparkle with Pops of Color (a thick glitter glue).


... One more look ...


Supplies used:
Patterned paper & cut aparts, Doodlebug
Patterned paper - Love Notes Petite Prints, Doodlebug
Black glaze pen - Sakura
Cloud punch - Stampin' Up
Scallop circle - Divinity Designs
Blending Brushes
Catherine Pooler coloured inks
Pops of color, Snowflake - Scrapbook .com
Sentiment - Egg-cement Easter Sentiments, CC Designs
Hexagon punch - Stampin' Up
Rainbow Holographic card stock - Recollections


Thursday, 21 March 2024

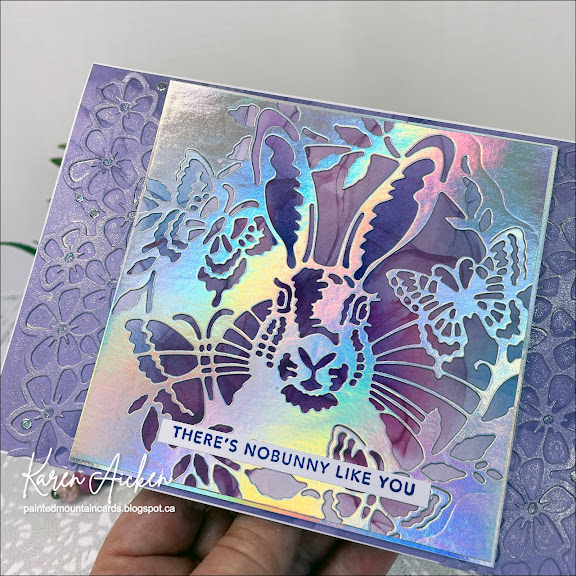
Butterflies & Bunny Easter Card


I am terrible at sizes when I order online - in my mind, whatever is on the screen is the size I want it to be in my head. 😂. This Butterfly Bunny die is a perfect example - even when I read that the size was 5x5", in my head that was smaller. So I resisted playing with it, but finally decided this was a good time to actually USE it. 


I cut a 5.5 x 5.5" piece of the Rainbow Holographic card stock and die cut the Butterfly Bunny from the centre. Then I trimmed it down to 5x5", cutting a little at a time off each edge until I was happy with it. It was then backed with a same sized piece of the patterned paper. Since there wasn't a lot of contrast I went over the bunny with a blending brush and dye ink. 

To prepare my card front, I added a 2nd piece of the patterned paper cut slightly smaller than the card base so I would have a bit of the white card base showing on the outer edges. The floral borders were cut from more of the patterned paper (with double sided adhesive added) and adhered along each side, trimming to fit. Then I rubbed the borders with champagne ink for a little shine. The Butterfly Bunny piece was then adhered on the front with thin foam tape.


I had done a top folding card with the intention of adding a pop up inside, however, I liked the front so much that I let it be the feature of the card.

Here is a peek at the inside, nice and simple ...


Supplies used:
Butterfly Bunny die - Creative Expressions
Rainbow Holographic card stock - Recollections
Patterned paper - Gilded Inks, Recollections
Slimline floral border dies - Scrapbook .com
Champagne Mist Ink - Stampin' Up
Pops of Color, Snowflake - Scrapbook .com
5 x 7" Lacy Layers dies - Waffle Flower
Blending Brushes
Catherine Pooler coloured inks
Inside sentiment - Impression Obsession
Mini Strips Easter - Taylored Expressions
5 x 7" card base and envelope

Sunday, 17 March 2024

Easter Mini Slimline


Today I'm sharing a quick and easy Mini Slimline card for Easter. I had a quick peek through my Easter bin and I'm getting closer to using up the patterned paper and ephemera in there! I actually don't need many Easter cards this year since I made so many last year. Which mean I won't be able to make much of a dent in that bin in 2024, so no new Easter paper pads for me. 

I cut the bunny print paper with a scalloped Mini Slimline die (Waffle Flower) and added it to a heavy weight card base. The ephemera was popped up with foam tape and I added some Wink of Stella and Glitter Dot stickers for a little sparkle.


Below is a peek at the inside, where I added two new die sets by Karen Burniston - the Easter Borders and the Happy Easter (with shadow!) Colour to both was added with a blending brush and dye inks.


Supplies used:
Patterned paper - Echo Park
Ephemera - Easter, Echo Park
Mini Slim Lacy Layers - Waffle Flower
Easter Borders - Karen Burniston
Black pen
Blending Brushes - Taylored Expressions
Catherine Pooler coloured inks
Peel Off stickers - Ecstasy Crafts
Happy Easter - Karen Burniston


Friday, 15 March 2024

Happy Spring Pop Up Card


Welcome to Fun Fold Friday here on my blog!

Today I'm sharing an Easter card made with some dies by Karen Burniston, including the Lorna Label Pop Up which is a re-release of a die she had years ago through Elizabeth Craft Designs. It was one of my favourite dies back then ... it 'cut into' the inner card but this new one is a 'glue in' and I like it much better. It fits in lots of different card sizes because you don't have to worry about fitting the card through your die cutting machine!


I also used her Easter borders, Happy Spring and Happy Easter too. I love how bright and happy this card is!


One more look ...


Supplies used:
Lorna Label Pop Up - Karen Burniston
Easter Border dies - Karen Burniston
Happy Spring die - Karen Burniston
Happy Easter - Karen Burniston
Patterned paper - Love Notes, Doodlebug Designs
Stitched oval - MFT Stamps
Inside stamp - Big Bold Easter, Taylored Expressions
Stickers - Mrs. Grossmans (OLD, from my stash)
Water Brush

Thursday, 6 July 2023

Rainbows, Rubber Boots and Butterflies!


Each week I've been sharing an Paper Pumpkin Alternate card made with the March 2020 kit called No Matter The Weather. I actually finished the kit back in March but spread out sharing the cards so my posts didn't all end up looking the same, since I used the same rainbow patterned paper for a lot of the alternate cards. Today I'm sharing a shaker card made with items from the kit and my craft room. I think this is one of my favourites!


Using Karen Burniston's Happy Spring attached to the back of the shaker, I added some fun spring type filler and created my shaker with the rainbow frame. On top of the acetate, I added a couple of stencilled butterflies and one of the colourful rubber boot pieces from the Paper Pumpkin kit.


Here is a look at the inside, using patterned paper and gold foiled elements from a retired Stampin' Up package. I thought this sentiment was perfect for the card and I can send this out for Happy Mail next year anytime in the Spring!


Having been asked how many cards I make I thought it would be fun to keep track this year. Many of my posts include more than a single card or project and below is my tally. 

Card Tally for 2023
January - 53 cards
February - 56 cards
March - 55 cards
April - 32 cards
May - 43 cards
June - 34 cards
July so far - 4 cards

Additional Supplies:
5 x 6.5" card base and envelope - Michaels
March 2020 Paper Pumpkin kit "No Matter The Weather", Stampin' Up
White cardstock
Shaker filler - from my stash
Brown fine marker
Patterned paper inside - Over the Rainbow, Recollections
Abstract Beauty Ephemera - Stampin' Up
Thinking of You - Tucked In, PTI

This blog uses affiliate links whenever possible. This means, if you make a purchase through one of my affiliate links that you pay the same amount but I may receive a small commission from your purchase. I only link products that I own, love and use for my card making and not every link below is an affiliate one! 😊

Thursday, 15 June 2023

Paper Pumpkin Alternate Flip Card Duo for Spring

Each week I've been sharing my alternate cards using the March 2020 Paper Pumpkin kit called No Matter The Weather. For these ones I made two nearly identical cards using the 5 x 7" Flip Mechanism by Sam Calcott. In her assembly video she mentioned being able to use the double flip as a single, and I just had to try it out. I still made larger cards - these ones are 5 x 6.5" because I wanted to use the umbrella patterned paper and it was in a 6 x 6" paper pad. 

I have a walkthrough of my cards on YouTube:


Folding the stitched circle pieces in half (from the kit) I stamped PULL on them and added them to the side you would pull to flip the rain boot piece over. I did one that pulls to the right and one that pulls to the left and I cannot decide which one I prefer. 😊

Inside the cards I stamped the rain boots and greenery, as well as a lovely Easter sentiment that I've had for a couple of years. I love the size of it!

... one more look ...

I'll be back next week with another alternate project with this kit.

 If you would like to see Sam's assembly video, click HERE.


Having been asked how many cards I make I thought it would be fun to keep track this year. Many of my posts include more than a single card or project and below is my tally. 

Card Tally for 2023
January - 53 cards
February - 56 cards
March - 55 cards
April - 32 cards
May - 43 cards
June so far - 19 cards

Supplies: (NOTE our internet has been either intermittent or out completely, so I'm not able to add the linked thumbnails for this post. I am not even sure if it will even post  - I've been trying since the 15th! 😳 Eventually it will get sorted out though)

No Matter The Weather Paper Pumpkin kit, March 2020 (Stampin' Up)

5 x 7 Flip Mechanism - Sam Calcott, Made to Surprise

Patterned paper - Blank Canvas, 1st Edition (old, from my stash)

White cardstock

Umbrella patterned paper, 6 x 6" Spring - Echo Park

Pull stamp - Paper Pumpkin Feb 17, Many Happy Birthdays (Stampin' Up)

Spring Sentiments - Elizabeth Craft Designs

5 x 6.5" Card blank and envelope - Michaels

Alcohol markers

Slimline ATC Windows Die - Whimsy Stamps

Catherine Pooler inks: Date Night, Do Si Do, In the Park, Aquatini

Nuvo Glaze - Tonic Studios

Wink of Stella

Thursday, 1 June 2023

Paper Pumpkin Alternates, Easter Card Trio


Yes, I'm still sharing Easter cards. 😊  I had been working on this Paper Pumpkin kit in early Spring and thought I would make some of them into Easter cards. A few I sent out this year and the others I will hold onto until next year.  Between the daffodils and the bunny ... I couldn't help but make Easter cards!


The inside sentiments are Mini Strips (stamp and die) by Taylored Expressions. I did the inside of all three cards the same.


I'll be back next week with another alternate project with this kit!

Having been asked how many cards I make I thought it would be fun to keep track this year. Many of my posts include more than a single card or project and below is my tally. 

Card Tally for 2023
January - 53 cards
February - 56 cards
March - 55 cards
April - 32 cards
May - 43 cards
June so far - 3 cards

Additional Supplies:
No Matter The Weather Paper Pumpkin kit, March 2020
5 x 6.5" card base and envelope - Michaels
Patterned paper - Blank Canvas, 1st Edition (old, from my stash)
Rainbow Holographic Cardstock - Michaels
Happy Easter to You - io (Impression Obsession) 
Alcohol markers
White cardstock

This blog uses affiliate links whenever possible. This means, if you make a purchase through one of my affiliate links that you pay the same amount but I may receive a small commission from your purchase. I only link products that I own, love and use for my card making and not every link below is an affiliate one! 😊

Thursday, 18 May 2023

Paper Pumpkin Alternate (#1) Pop Up Easter Card

I know Easter is behind us, but I had been working on this Paper Pumpkin kit in February and thought I would make some of them into Easter cards. A few I sent out this year and the others I will hold onto until next year.  Between the daffodils and the bunny ... I couldn't help but make Easter cards!


I had been able to purchase an unopened March 2020 Paper Pumpkin Kit "No Matter The Weather" and brought it down to Arizona with us to work on. I had held onto it long enough, and ended up having a lot of fun putting my cards together. This one is has Karen Burniston's Paper Frames Pop Up inside.

The patterned paper that I used is also one that I have had for MANY years. Back when I purchased it (don't even remember where) I must have really loved it & it was a screaming deal, because I bought TWO of them. Sigh.  

Since I had been working on using up some of my older Easter stash, I added three fuzzy chick stickers inside the card. They are just SO darned cute, and that package is finally used up.

Whenever I give someone a card with the Paper Frames Pop Up, they turn it to view from the top. So now I make sure to take a photo showing that view also ...


I'll be back in a week or two with another Paper Pumpkin Alternate card using this kit ...

Having been asked how many cards I make I thought it would be fun to keep track this year. Many of my posts include more than a single card or project and below is my tally. 

Card Tally for 2023
January - 53 cards
February - 56 cards
March - 55 Cards
April - 32 Cards
May so far - 30 Cards

Additional Supplies:
No Matter The Weather Paper Pumpkin kit, March 2020
Patterned paper - Blank Canvas, 1st Edition (old, from my stash)
5 x 7" Card blank and envelope
White cardstock 
Happy Easter - Photo Play
Sentiment inside - io  (Impression Obsession
Stickers - Jolee's Boutique
Alcohol Markers

This blog uses affiliate links whenever possible. This means, if you make a purchase through one of my affiliate links that you pay the same amount but I may receive a small commission from your purchase. I only link products that I own, love and use for my card making and not every link below is an affiliate one! 😊

Monday, 24 April 2023

'Jump for Joy' Slimline Card


This is one of those cards that I wish I'd taken a short video of, as the foiling looks so pretty in person. To my eye, the photos look rather lifeless as compared to how it looks in real life! I know Easter is behind us, but I had this idea and didn't get a chance to make it to send out for Easter 2023. So now I'm ahead for next year 😂.  This whole card started with Lawn Fawn's cloud hot foil plate and Spellbinders reverse foil plate. I am going to really enjoy the foiled clouds ... just need some more time to play with it.

The Slimline background is a die set by Whimsy stamps, and as I was creating the scene I just kept pulling things out to add to it. The Jump For Joy seemed to be perfect to use with those bunnies. It comes with a shadow die, but I didn't use this time. It was cut from a leftover piece of mirrored card stock for additional shine.


Inside I used a scalloped die to cut white cardstock, inked the edges and stamped a sentiment. Then I added a few more die cuts to dress it up a little and my card was done.


Having been asked how many cards I make I thought it would be fun to keep track this year. Many of my posts include more than a single card or project and below is my tally. 

Card Tally for 2023
January - 53 cards
February - 56 cards
March - 55 Cards
April so far - 26 Cards

Additional Supplies:
Shimmer Spray
Mirrored card stock - Mirri Damask, Hunky Dory
White cardstock
Easter sentiment - Verses Stamps

This blog uses affiliate links whenever possible. This means, if you make a purchase through one of my affiliate links that you pay the same amount but I may receive a small commission from your purchase. I only link products that I own, love and use for my card making and not every link below is an affiliate one! 😊

Thursday, 6 April 2023

Spring Cascade Card


One of the dies I received for my late February birthday was this Cascade Card die set. It's by Creative Crafts but they refer to it as a Zig Zag Stepper Card, ha ha. I had looked at it previously but when I saw it was on sale for a great price, I decided to buy it. I love a die set that comes with all the layering pieces! There were no directions or card samples on the Craft Stash US website, so I just sort of crossed my fingers.

It arrived with no instructions or guidance but I figured it would be fairly self explanatory - which it was.  I was mindful of the direction of both the dies and the papers so I wouldn't end up with upside down tulips on one side. But when I went to assemble it, it appears that the left panel should have been cut from the underside of the paper to get the tulip print to show.

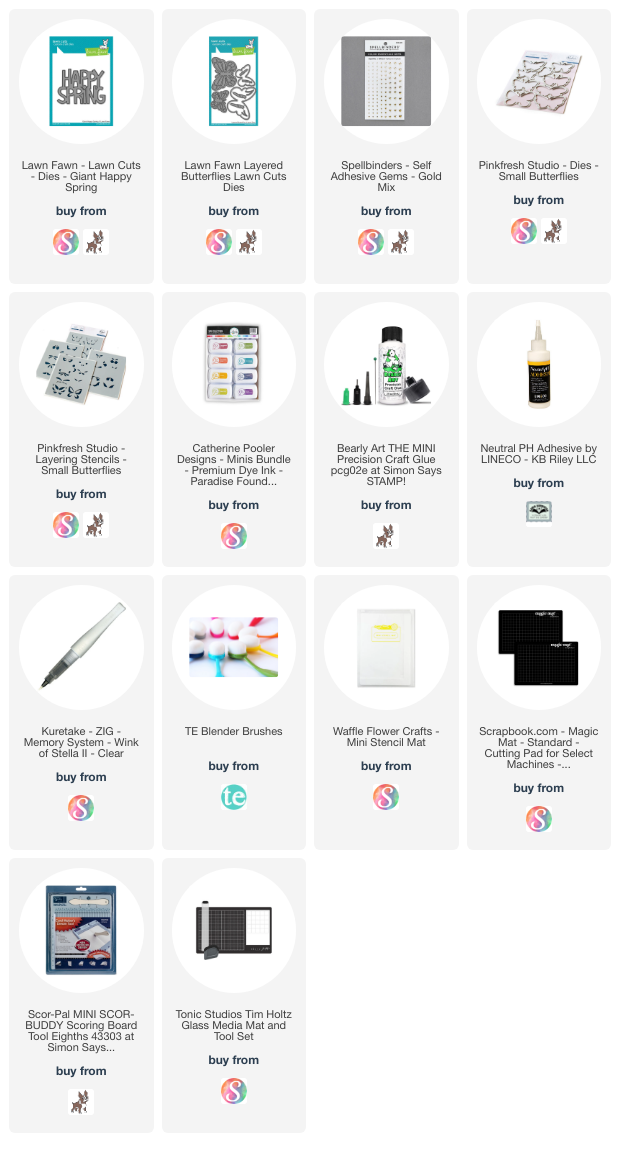
Initially disappointed, I realized that it probably would have been too busy and using the softer print on the reverse side of the tulips made for a more pleasing card. I added the Giant Happy Spring (cut a couple of times from white cardstock so it would be sturdy) and some Pink Fresh Studio butterflies, then had to figure out what to put on the front.

Finally I opted for one of the layering dies and tulip paper for the left side, then I added one of Lawn Fawns layered butterflies. I adhered adhesive only along the outer butterfly sides so the card would still have movement. The other butterflies are stencilled and die cut (Pinkfresh Studios).


On the back side I added a stamped white panel (3 x 4") across both sides and another butterfly. While it's hard to see in the photo, I also added a strip of the tulip paper across the bottom of that white panel and one on the envelope flap. 


I know that most people would have made this from cardstock and used the included layers to add the patterned paper, but I wanted to try it this way with my first play. I'm quite happy with how it turned out and it stands nicely for display. It's also nice and lightweight and will mail for a single stamp!

We had been in Arizona and I was able to order from Craft Stash US ... but I don't know if they ship to Canada. I'm guessing that Canadians would order from their UK site? I'm set with new fun fold dies for several months now, so I won't be needing to find out! 😂

Card Tally for 2023
January - 53 cards
February - 56 cards
March - 55 Cards
April so far - 10 Cards

Additional Supplies:
Zig Zag Stepper Card die set (I call it a Cascade Card) - Creative Crafts (Craft Stash US)
Sentiment - Verses (wood mount)
Patterned paper - Flowering Fields, Stampin' Up
Shimmer Spray
Fine Point Brown Marker
5 x 7" envelope

This blog uses affiliate links whenever possible. This means, if you make a purchase through one of my affiliate links that you pay the same amount but I may receive a small commission from your purchase. I only link products that I own, love and use for my card making and not every link below is an affiliate one! 😊