Showing posts with label Gnomes. Show all posts

Friday, 2 February 2024

'You Are My Sunshine' Pop Up Card


Welcome to Fun Fold Friday here on my blog!

Today I'm sharing my 10th card made with Paper Roses' BEE HAPPY card making kit. For this one I pulled out Karen Burniston's Circle Charm Pop Up which is another one of my favourite KB dies. I also brought in some gold foiled bee stickers from my stash and Glitter Dots for a little sparkle. 


Using the included circle dies in the set, I cut one from acetate and then a second circle frame, snipping off the side tabs as I only needed the tabs for the front piece. These tabs are what connects the circles together as Karen Burniston explains in her assembly video. I added two gold foiled bee stickers and three Glitter Dots to the acetate and I like how they look like they are floating. The ephemera and sentiment were in the BEE HAPPY kit.


Supplies used:
Dots & Scallops Dies - Catherine Pooler
White pearl cardstock
Acetate
Gold foiled bee stickers - Amazon .ca
Glitter Dots - Ecstasy Crafts

Thursday, 18 January 2024

Honey Bee Card for Happy Mail


Today I'm sharing the eighth card using Paper Roses "Bee Happy" cardmaking kit. I know I have been posting a lot of cards with this kit lately, but I wanted to USE the kit and not just make a couple of cards and then put it away. I've done that before, and you know the saying "out of sight, out of mind?" Yeah. I don't want to pull out a half used kit in 3 years and wonder why I didn't just use it up at the time. Ha.

The foiled bee sticker is from my stash, and was attached to white card stock then fussy cut. That way I could pop it up with foam tape. I also added a little colour with alcohol markers and was happy with how it turned out.

The main panel actually uses a paper from Basic Grey that I've had for years. It worked so well with the kit I pulled it out to use with the cards. After embossing with the honeycomb embossing folder I rubbed gold Lunar Paste over the panel with my finger. It's hard to capture the shimmer in photos.


Below is a peek at the inside, where there is lots of room to write a personal message.


One more look ...


Supplies used:
Honeycomb Frenzy embossing folder - Sizzix
Stickles glitter glue
Narrow gold foil tape - Amazon .ca
Gold Lunar Paste
Gold foiled bee sticker - Amazon .ca
Alcohol markers

Tuesday, 9 January 2024

Wobbling Gnome Card


This is the 5th card I'm sharing made with the Bee Happy cardmaking kit by Paper Rose. The background panel was trimmed to fit my wide A2 card, then I embossed it with the honeycomb folder.  


The gnome element was attached with an Action Wobble so he bobs and wobbles around - so fun! I added some Stickles glitter glue onto the gnome for some sparkle and then a few glitter dots on the card as well.


Here is a peek at the inside - I added some paper strips and a stamped sentiment with a foiled bee sticker. There is a sticker on the envelope as well.


 One more look ...


Supplies used:
Embossing folder - Honeycomb Frenzy, Sizzix
Stickles glitter glue
Nuvo Glaze
Action Wobble
Fluttering By Sentiments - Waffle Flower
More Essential Sentiments - MFT Stamps
Catherine Pooler inks
Glitter Dots - Ecstasy Crafts
Foiled bee stickers - Amazon .ca
Dots & Scallops Rectangles - Catherine Pooler

Friday, 5 January 2024

'You Are The Sweetest' Pop Up Card


Welcome to Fun Fold Friday here on my blog!

Today I'm sharing the 4th card made with Paper Roses' cardmaking kit "Bee Happy".  The layout is based on the August '23 Sheetload of Cards and I used some of the punch out ephemera on a die cut label to decorate the front.


Inside there is another ephemera decorated label that pops up when the card opens. I used the Twist Flower Pop Up die set by Karen Burniston, which is quickly becoming my new favourite pop up die. There is lots of room to write a personal message when I send this off for Happy Mail.


The flower centers are sparkly because I added Stickles glitter glue, and then I added a few glitter dots and a small bow made with bakers twine. 

Note - the twine was too bulky for this small element, so I unwound two strands from the cut piece which gave me a thinner twine to use. I kept the remaining piece to add to another card another day.


This little gnome was added to the left side and the right side was left blank so I can write in that area.


Supplies used:
Nested Hexagon dies - Pinkfresh Studios
Narrow gold tape - Amazon .ca
Stickles
Nuvo Glaze
White pearl cardstock
More Essential Sentiments - MFT Stamps
Glitter Dots - Ecstasy Crafts

Thursday, 4 January 2024

Gnome & Sunflowers Slimline Card

 
This is the third card I'm sharing made with the Bee Happy cardmaking kit from Paper Rose. As you can see, this one is a Slimline card and will be perfect to send out for Happy Mail! The lower patterned paper as well as the mat inside uses the leftover Basic Grey paper that I used on an earlier card with this kit. 

The circle dies and the 'hi' are from Picket Fence Studios - a great die set for Slimline cards that I get a lot of use out of. Colour was added to the 'hi' using alcohol markers.


The elements were attached with both thin and regular height foam tape for a little dimension, and I added some Stickles & Glitter Dots for shine.  


Here is a peek at the inside. The gold foiled bee sticker was adhered to white cardstock and fussy cut. That way I could add it to the fishtail banner with thin foam tape. I left lots of white space to write a personal message.


Supplies used:
Stickles
Nuvo Glaze
Gold foil bee stickers - stash
Slimline die cutting system - Picket Fence Studios (Word & Circles)
Black gem stickers - Dazzles
Alcohol markers

Wednesday, 12 January 2022

Gnome Love Valentine


Hello my crafty friends!  Last week I shared a pair of Mini Slimline cards featuring this cute 'She-Gnome' die and said that I made three of them. I cut the die from three coordinating patterned papers - including a red VELVET one, and Kraft cardstock then reassembled them alternating the papers. That gave me three She Ghome's to use and I used that third one on today's card.

Click HERE to see the Mini Slimline Valentine cards if you are curious! I just loved the red velvet paper and in the photo below you get a better look at it. You can always click on the photo to enlarge it if you want more details!


The background was mostly created with scraps and journal cards from a variety pack by Doodlebug designs. This card is larger than A2 ... it's a 4 x 6" card that fits in an A6 envelope for mailing. 

Here's a peek at the inside ...


This blog uses affiliate links whenever possible. This means, that at no cost to you, if you make a purchase through one of my affiliate links that I may receive a small commission from your purchase. I only link products that I own, love and use for my card making!

Any supplies I'm unable to link are listed at the very bottom of my post.

Additional Supplies:
White card stock - Accent Opaque Digital Super Smooth (Amazon .ca)

Thursday, 6 January 2022

Mini Slimline Gnome Valentine Cards

Hello my crafty friends!  Today I'm sharing two Mini Slimline Valentine cards, and I made them in both of the most popular Mini Slimline sizes!  The red card base is 3.5 x 6" and the white card base is 3.25 x 6.25". I took a photo from the back side so you could see the difference. Both of these sizes fit in a #8 envelope or as they are sometimes referred to a 6-3/4 envelope. Those are readily available in Canada and the US.


Since I will be using lots of older products on my cards in 2022 I thought I would start with the new items on my cards. The resin hearts from Doodlebug are new in my craft room, and it's funny how a small item like that can inspire me to pull out older papers etc. Since I'm counting anything purchased in the past 6 months as NEW, the She Gnome (linked below) is also new as I got her back in October. 

So the hearts inspired me to pull out the patterned paper/sticker package from Doodlebug that I've had for a couple of years and I was happy to see that it's still available to link for you. This is sort of a random package so you may not receive the exact same papers etc as I did - but then again you might! 

I cut the She Gnome from three different patterned paper scraps, red VELVET paper from the Doodlebug package, then some Kraft cardstock for the braids and pale pink cardstock for the noses. Then I re-assembled the gnomes so I had three different ones and saved one of them for a card I'll share next week. I took some close-ups in the hopes you can see how pretty the red velvet paper is.
 

The labels I used on both cards are meant for scrapbooking. They came on a 12 x 12" sheet in the package and I just punched them out to use on my cards. Can't get much easier than that!


Here is the inside of the cards, decorated with more patterned paper bits and pieces. These are 6x6" scraps that I didn't have a cover sheet for so I don't know who makes them. But I always hang onto smaller scraps of pretty paper like this as I know I can use them at some point.

The red card features the Happy Valentine's Day die by Karen Burniston, cut from red mirror cardstock. The stamped words are by Waffle Flower which is included in the Sending Love stamp set from Waffle Flower and fairly new to my craft room. 

This blog uses affiliate links whenever possible. This means, that at no cost to you, if you make a purchase through one of my affiliate links that I may receive a small commission from your purchase. I only link products that I own, love and use for my card making!

Any supplies I'm unable to link are listed at the very bottom of my post.

Additional Supplies:
White card stock - Accent Opaque Digital Super Smooth (Amazon .ca)
Peel off border sticker - Stamp On It

Tuesday, 16 November 2021

Mini Slimline Holiday Gnomies card


Hello! I'm back today with another card featuring some new products at Your Next Stamp. The Design Team is showcasing the new products over six days. This is day three of the showcase and prize details are lower down on my post.

This Mini Slimline Diagonal die is so fun, with the different sizes of openings. There are a couple of different Gnomie sets available at YNS and these Christmas ones are a great addition. I added mine over the new Holly Berry Circle Die. First I die cut the circle from white card stock, then die cut the Holly Berry Circle. It doesn't cut the outline, just the holly & berry openings and stitched line. You can get some fun looks with this die!


Inside I added some stencilling with the new Holiday Stripes Stencil and images from the Holiday Gnomies 

Comments left through November 21/21 at midnight EST will be entered in a draw to win a $25.00 YNS egift card.  1 winner will be pulled from comments left on Your Next Stamp Blog as well as the designer's blogs.  1 winner will be pulled from comments left on YNS Instagram and Designer's Instagram too.   The 2 winners will be announced on November 22/21  and will be posted on the Your Next Stamp Blog and the Instagram winner will be tagged there.


This blog uses affiliate links whenever possible. This means, that at no cost to you, if you make a purchase through one of my affiliate links that I may receive a small commission from your purchase. I only link products that I own, love and use for my card making!

Any supplies I'm unable to link are listed at the very bottom of my post    

Additional Supplies:
Burgundy and green card stocks - stash
Grey Copic marker

Tuesday, 12 October 2021

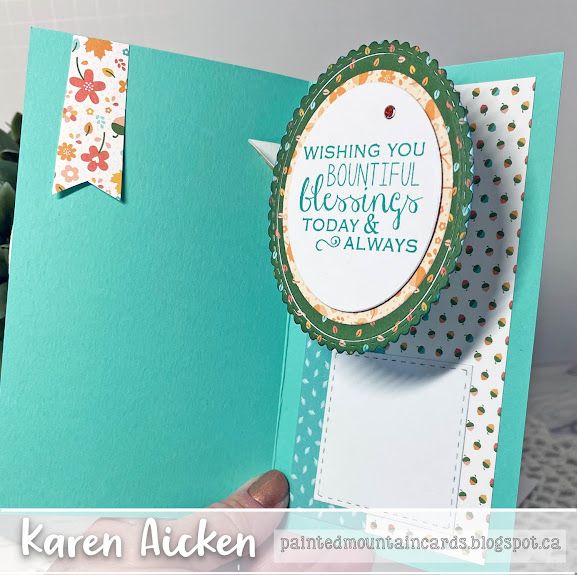
Fall Gnome Pop Up Thanksgiving Card


Hello!   Today I'm sharing a Mini Slimline card that is also a Pop Up. I have really enjoyed my Gnome die from Simon Says Stamp that is now several years old. Since I find they are very versatile, I decided to order the other gnome dies they offer and this is the first time I've played with the She-Gnome.  I nestled her among some fall leaves and added a woodgrain oval frame from Hero Arts.

While I didn't do a full walkthrough of this card, I did do a quick video so you can see the card 'in action' in this YouTube video

I added glossy accents to her nose, so it is raised and shiny. Wink of Stella made the hearts and her braids sparkle as well.


Here is a peek at the inside, where I used Karen Burniston's Katherine Label Pop up for the stamped and layered oval.


... one more look ...


This blog uses affiliate links whenever possible. This means, that at no cost to you, if you make a purchase through one of my affiliate links that I may receive a small commission from your purchase. I only link products that I own, love and use for my card making!

Supplies:
Give thanks - Reverse Confetti (retired)
Orange glitter dots - Elizabeth Craft Designs (out of stock)
Grey copic marker
Thanks for stopping by

Thursday, 16 September 2021

Birthday Gnomies Mini Slimline Card

Hello! Today both the new website and the new release at Your Next Stamp are LIVE!!! We are celebrating with an Instagram Hop & a sale, and I have all those details later in my post. I have a video showing all the new products that are being released on YouTube:

For my card share today, I used several different new release products to create a Mini Slimline Birthday card.


Inside my card, I added some stencilling with the Birthday Confetti Stencil and a sentiment from the new Birthday Greetings.  I also added the stencilled balloons to the envelope to dress that up a bit.


We are celebrating the arrival of 11 new stamp sets and 3 new die sets in the YNS Store. Plus, we are adding stencils to the line up! 

Join in our INSTAGRAM HOP, leaving comments as you go, for your chance to win one of three $20 gift certificates to the Your Next Stamp Store.  The Instagram Hop starts at the Your Next Stamp Instagram page and continues on... 

This blog uses affiliate links whenever possible. This means, that at no cost to you, if you make a purchase through one of my affiliate links that I may receive a small commission from your purchase. I only link products that I own, love and use for my card making!

Additional Supplies:
Ohuhu Alcohol Markers
Miri ombre metallic card stock - Hunkydorycrafts.io.uk

Thanks for stopping by

Thursday, 9 September 2021

Christmas Slimline With Gnomes

Hello!  I was crazy about these Slimline Patterned Paper Pads from Whimsy Stamps as soon as I saw them. My friend Frances used one first, I was intrigued & checked them out. Of course it took awhile for my order to arrive in Canada but I have been enjoying them since they arrived. I chose a winter one for my Christmas Card today in non traditional colours and die cut it using a Pierced Slimline Rectangle die to add interest to the edges. Then I added some of the new Tiny Gnomes by Karen Burniston.

The iridescent snowflake is from Stampin' Up, I embossed the sentiment with clear embossing powder, and silver metallic card stock for the tiny jingle bells.


Here is the inside, with a fun Gnome sentiment stamp and everything that is available is linked below for you. I also used the leftover piece of iridescent snowflake on the inside, and some pale stencilling to resemble banks of snow.


... one more look ...


This blog uses affiliate links whenever possible. This means, that at no cost to you, if you make a purchase through one of my affiliate links that I receive a small commission from your purchase. I only link products that I own, love and use for my card making!

Additional Supplies:
Various card stock scraps
Gray Crayola marker
Black pen

Thanks for stopping by