Showing posts with label Newtons Nook. Show all posts

Saturday, 29 March 2025

Four SW Themed Pop Up Cards


I pulled out an older paper pad and decided to use two of the sheets to make four 5x7” Birthday Cards. Two use the Katherine Label Pop Up and the remaining two use the Twist Flower Pop Up - both die sets by Karen Burniston.


I love that the patterned paper has gold foiled bits! I wanted to keep the fronts nice and simple, so die cut ovals then stamped them before popping them up with thin foam tape.


Here is what the inside looks like using the Flower Twist Pop Up, and I chose one of these to go to a friend earlier in the month.


… and these two use the Katherine Label Pop Up. Both of these die sets are favourites, and looking at the labels on the right side of my blog you can see I have used the Katherine Label Pop Up NINETY times, and the Twist Flower Pop Up TWENTY THREE times. That makes me happy!


There was some leftover patterned paper, so I used those on A2 cards and will share those another day.


Supplies Used:
Patterned paper - Desert Dream, Recollections (old from my stash)
Katherine Label Pop Up - Karen Burniston
Twist Flower Pop Up - Karen Burniston
Ovals Crosshatch - Karen Burniston
Happy Birthday Many Ways - Catherine Pooler
Cultivated Cacti - Newtons Nook
Stickles glitter glue
Inside Out Birthday - Catherine Pooler
5x7” card bases & envelopes - Ohuhu (Amazon .ca)

Monday, 22 July 2019

Cactus Birthday Peek A Boo Card

Hello my crafty friends

Today is Masculine Card Monday here on my blog and I'm sharing the one and only 'Peek-A-Boo' card I'll ever make. While I was very happy with how the card turned out, when I showed hubby and he couldn't open it properly TWICE I started having doubts about it. Apparently you have to hold these cards 'just so' or they don't slide properly. I don't want to have to send directions with a card - people should be able to open a card on their own, without instruction. I would be hand delivering this one, so I could walk our SIL through the process, but I found that very frustrating.

While this is not a new idea, nor is it Jennifer McGuire's - she did post a video late last year with a great tutorial and very concise measurements and directions. I used her video to create the card. Then when it all sorta came apart when hubby tried to open it I went back to YouTube and used Glenda Cairns** idea of adding a sliding belly band. Works much slicker, but our son-in-law wasn't able to open it without my input so this style of card is definitely a fail in my book. 

This is the front of the card, and you can see the cactus and 'happy birthday' through the window.


When you open the card, a panel slides over the first image in the window and reveals a second image. For this card, it was a different potted cactus with the words 'looking' sharp!'.


Below you can see the second panel sliding over the first. This card works really well IF YOU HOLD IT PROPERLY, but otherwise the layers separate easily and the recipient could be left with something he/she has no idea how to reassemble.


Below you can see Glenda's belly band idea and if nothing else, it holds all the layers together so it doesn't all come apart. It was a great fix for that.


** You can see Glenda's 2016 YouTube Video HERE

Supplies:
Grey, white card stock
Cactus stamps - Newton's Nook
Dashing rectangle dies - Elizabeth Craft Designs
Happy Birthday - MFT Stamps
Patterned paper - Scrapbook.com
Celebrate 3D Drop-ins, Stephanie Barnard - Sizzix & The Stamps of Life
Label punch - Stampin' Up
Cactus and Pot dies - Concord & 9th
Enamel dots - Echo Park
Copics

Thanks for stopping by today

Saturday, 18 August 2018

C4C448 Toucan Hello Sketch Card

Good morning friends

It's Saturday and that means a new challenge at the Crazy4Challenges Blog.  Our August hostess is Anja de Regt, and our guest designer is Connie VanLoosen.

Anja's challenge this week is a sketch challenge:


This is such a fun sketch - and so easy to dress up or dress down. I will use this one again for sure. For my challenge card today I used Karen Burniston's Crosshatch oval die set, nesting two of the ovals together and cutting an oval frame from patterned paper. It was popped up on a white oval with foam tape.


The Toucans are so cute! I coloured them with Intense pencils, but the ink did not blend very well at all with the card stock I used. I added a die cut 'hello' and stamped only the 'there' from a 'hello there' stamp set for my greeting. Then I felt the white oval needed something else, so I added a layered heart from the Katherine Label Pop-Up and some Nuvo Crystal Drops.


Here is a peek at the inside - t
he toucan inside hides the sunglasses printed on the journal card.


Check out the C4C blog to see how the Crazies have been inspired by the challenge. We'd  love to see your take on it, so be sure to stop by the Crazy 4 Challenges blog and link up your creations. If you are uploading to an online gallery, please use the keyword C4C448.


Supplies:

White, red and black card stocks
1054 Rectangles Crosshatch - Karen Burniston
1055 Ovals Crosshatch - Karen Burniston
Patterned paper - Carta Bella
Derwent Inktense Pencils
Water brush
Toucan Party stamps - Newtons Nook
Sakura white gel pen
Wink of Stella
1052 Word Set 6 Summer - Karen Burniston
'There' - MFT Stamps
Enamel Accents
1011 Katherine Label Pop-Up (hearts) - Karen Burniston


Thanks for stopping by today!

Wednesday, 8 August 2018

Southwest Sympathy Bridge Card

Good morning friends

Today's share is a sympathy card I made for a friend.


I made a Bridge Card (or U Card) and added a water coloured image for the decorative panel. Love these cactus images from Newton's Nook.


More stamping on the back ...


These cards fold flat for mailing and this one fit in a standard A2 envelope.


Supplies:
White card stock
Patterned paper - Recollections
Cactus/cup stamp - Newtons Nook
Crayola markers & a water brush
Nuvo Crystal Drops
With Sympathy stamp - Verve
Stamps on back - the Stamps of Life

Thanks for stopping by today

Thursday, 2 August 2018

Three Thank You Cards

Good morning friends

I love these solid stamps by Newton's Nook, so used them here for my first thank you card today. The stamps were inked with markers rather than an ink pad.


The thanks was die cut from recycled stamp packaging. I always liked the pretty backing card that came with Verve Stamps and saved them to re-use on my projects.


My next card started as a CHA 'make & take' at the Marvy Uchida booth. That is where I fell in love with the Marvy LePlume II markers I use so often. When I got home, I die cut the stamped & coloured piece into a circle and added a brown circle frame and a stamped & die cut banner. The whole thing was popped up on a woodgrain background stamped card base.


Next is just a sweet and simple Thank You card using a puffy sticker bell jar shaker sticker from my stash. A die cut thanks, doily and pale pink panel and the card was finished.


Since I was running low on thank you card these ones went into my stash.

Supplies for Cactus Thank You Card:
Pink and white card stocks
Cactus stamps - Newtons Nook
Kleenex box
Thanks die - Lawn Fawn
Marvy lePlume II markers
Dashing Rectangle dies - Elizabeth Craft Designs
Stickles


Supplies for Rustic Thank You Card:
Water colour paper
Image - Art Impressions
Marvy lePlume II Markers
White and brown card stocks
Stitched frame circle die - MFT Stamps
Woodgrain background stamp - Stampin' Up
MISTI
Fun foam
Banner stamps and dies - Stamps Of Life
Distress Oxide Inks


Supplies for Bell Jar Thank You Card:
Pink card stock's
Wonky stitched rectangle dies - MFT Stamps
Doily - Stampin' Up
Sticker - K & Company
Thanks die - Lawn Fawn

Thanks for stopping by today


Friday, 1 June 2018

Coffee Lovers Blog Hop Card #7 (Cactus and Coffee Spiral Circle Pull Card)

Good morning friends


It's Flip-It Friday here on my blog and today's share uses an old favourite (retired) die set to make a Z-fold card for the Coffee Lovers Blog Hop.

There were lots of random circles on my stamping table from making Circle Charm Pop-Up cards, either off-cuts or they were not needed for the card I was working on. They layered so nicely on the Spiral Circle Pull Card I decided to use several of them on my card today.


The 'hello' die is from Karen Burniston's new release, which will be shipping this week! I picked up the cactus & cup stamps last year and have been enjoying them again for the hop.


Notches hold the card closed until the recipient pulls the sides to open the card and I left the white circle blank as an area to write a note and sign our names.


I have - yet again - been amazed at the inspiration on this hop. Thank you to all the sponsors and participants - it's been a fun week!

Supplies:
Spiral Circle Pull Card - Karen Burniston (retired)
Patterned paper - Recollections
Pink, yellow and white card stocks
Cactus stamps - Newtons Nook
Water Colour Crayons - Stampin' Up
Water brush
Wink of Stella
Word stamps - Letter It (Ranger)
Enamel hearts - Doodlebug
1047 Upsy Daisy Pop-Up (banner) - Karen Burniston - shipping early June 2018
Banner punch - Stampin' Up
1052 Word Set 6 - Summer (hello) - Karen Burniston - shipping early June 2018

Thanks for stopping by today

Wednesday, 30 May 2018

Coffee Lovers Blog Hop Card #5 (Cuppa Cactus Birthday Card)

Good morning friends


Today I have another card for the Spring & Summer Coffee Lovers Blog Hop!

This card was a lot of fun to make, and it is totally a stash buster card! There was a leftover piece of patterned paper and I wanted to use it up. In fact, everything used were scraps etc, inducing the twine bow and banner scraps.

I added a die cut Celebrate - the font makes it easy to curve so I had it follow the line of the banners. This red Soft Finish Card Stock from Elizabeth Craft Designs is so bright! I've actually used it a fair bit as it perfectly matched a patterned paper stack I was also trying to use up. Love these 'cactus in a mug' stamps too.


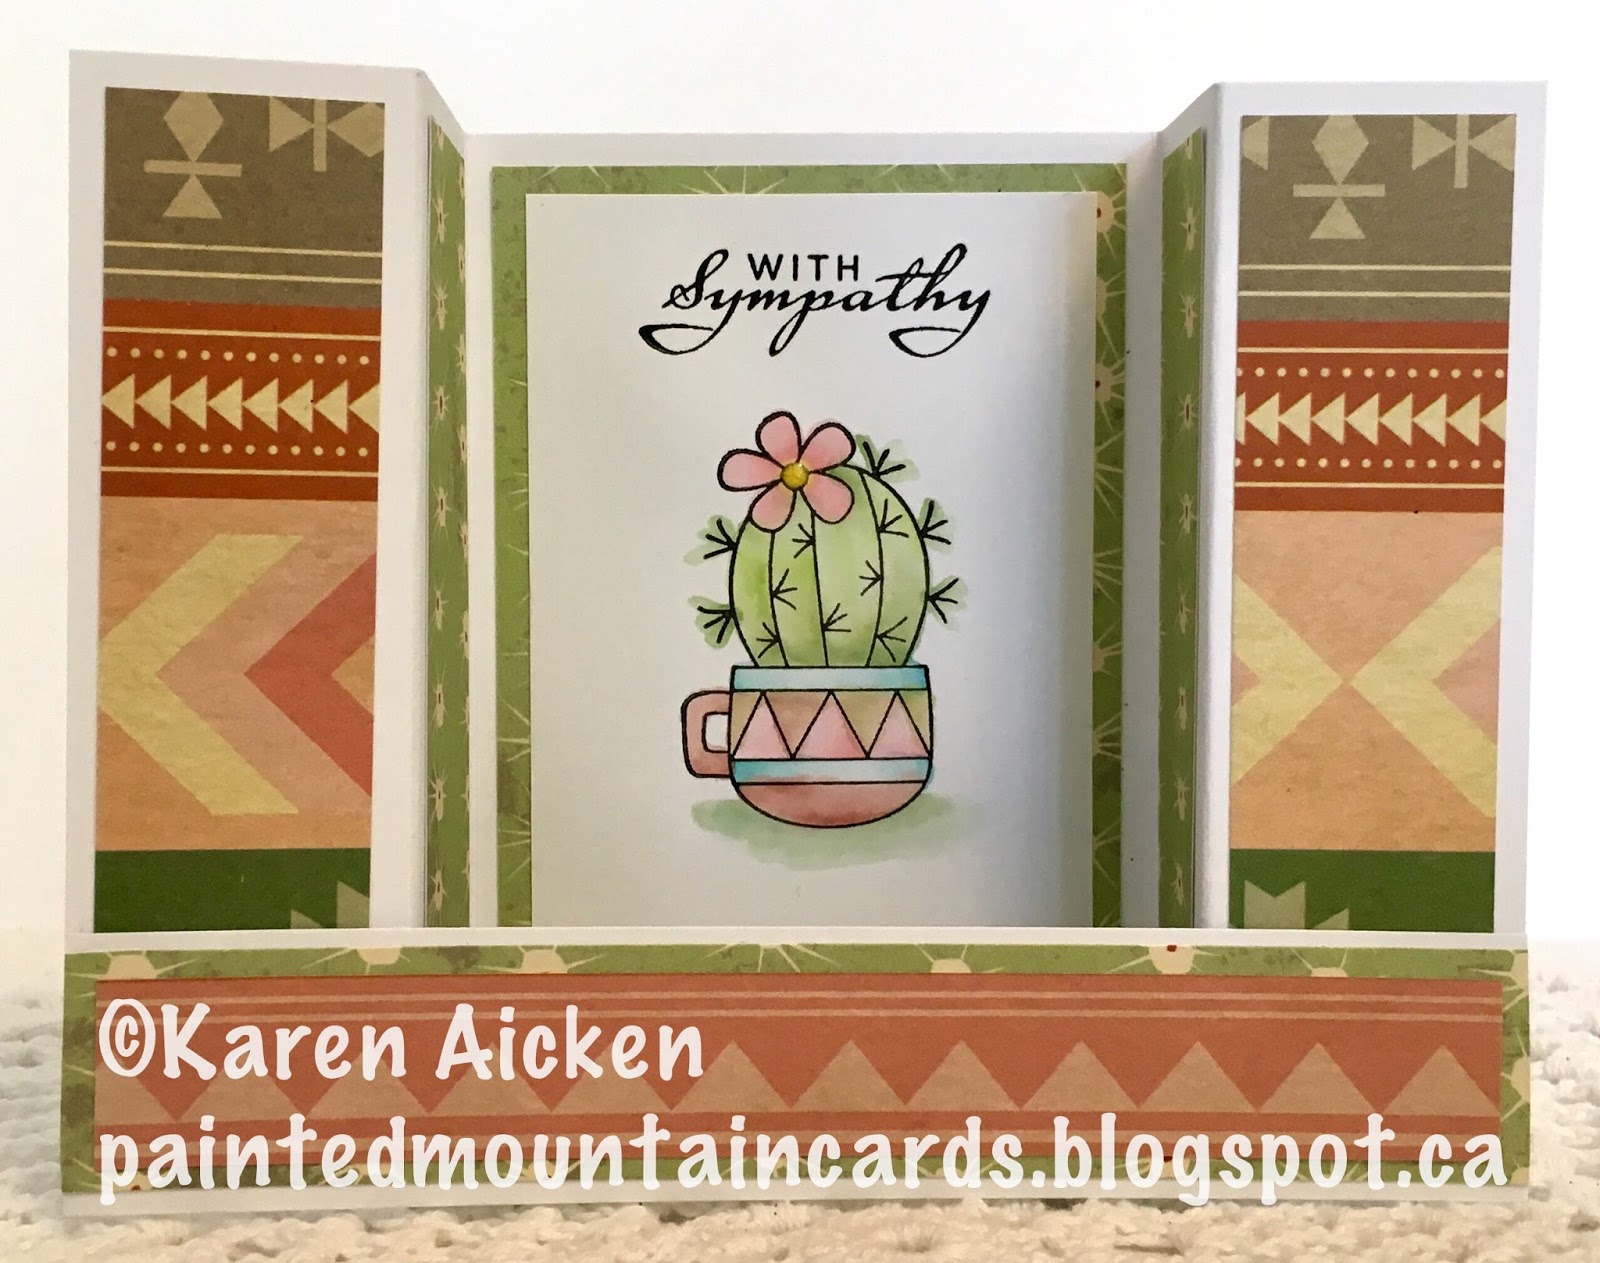
Inside I made a Pop-Up with another of my early Spring purchases, the Happy Birthday 3D Drop-ins by Stephanie Barnard.


How cute is this butterfly tag? It was a 'free with purchase' treat and I just adore it. The banner patterned paper piece was also a 'free with purchase' from a different retailer. I love it and promptly ordered two more sheets. Ha! Yes, I am a marketers dream.  The sweet banners were cut for a different project that I didn't end up needing - they were actually in a couple of smaller pieces but I pieced them at the top of my card and dressed them up with some Nuvo Crystal Drops.


Finally, a side view so you can see the pop-up a little better.


My stamping table looked so much better after this card was done and all those bits and pieces were used up. I love to use things up!

I'll be back tomorrow with another card for the Coffee Lover's Blog Hop ... and I hope you are enjoying the inspiration.

Supplies:
Dashing Rectangle dies - Elizabeth Craft Designs
Stitched Mini Scallop Rectangle dies - MFT Stamps
White, blue, teal, orange card stocks
Stitched circle dies - MFT Stamps
Stickles
Nuvo Crystal Drops
Stitched Circle Scallop Frame - MFT Stamps
Red soft finish card stock - Elizabeth Craft Designs
Cactus cup - Newtons Nook
Marvy LePlume II Markers
Sakura white gel pen
Happy Birthday 3-d Drop-Ins - Stephanie Barnard (Sizzix)
Banner die - Taylored Expressions
Butterfly Tag - Taylored Expressions (freebie with purchase)!!!
Black fine point marker

Thanks for stopping by today
SaveSave