Showing posts with label Picket Fence Studio. Show all posts

Monday, 2 September 2024

September 2024 Sheetload of Cards

Well this is exciting - not only is it time for a new Sheetload of Cards, this month it is based on one of my video's AND I am the Guest Designer!  I have a walkthrough of my cards on YouTube as well:  

The original video is still one of my most popular, which makes me happy. You can find it HERE if you are curious.  It makes three Mini Slimlines with three sheets of 6x6 patterned papers and NO leftover pieces! 

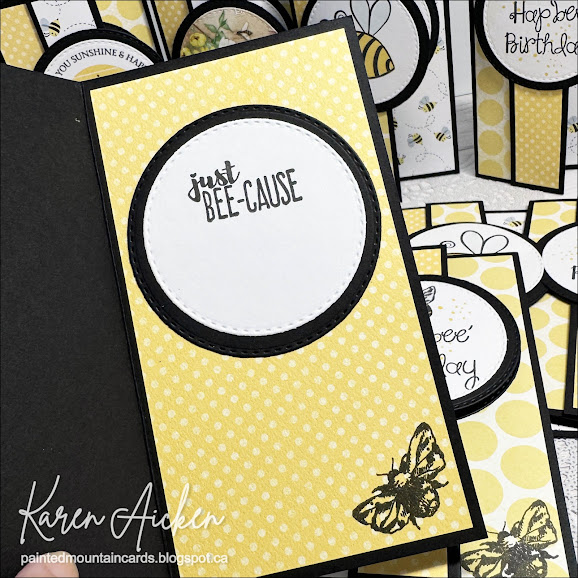
The September 2024 Sheetload yields twelve cards and uses three 12x12" sheets of patterned paper. Again, there are no leftover pieces. I did change up the images and greetings so I wouldn't have twelve identical cards, and while most of the birthday ones will be donated to my Mom's old nursing home - I think they are cute and will be keeping one or two for my stash. 

Again, I'm holding onto summer because I am NOT ready for cooler weather. So I made my cards with a Bee theme. Some will be sent out for Happy Mail and the rest are birthday cards. (All the supplies are listed below.)

I had fun making these up and have some ideas for using this Sheetload again without the fold flap, instead using the left strip and the center strip combined on the card front. 🤷‍♀️


I hope you will check out the PLAYLIST and see what Alicia and the rest of the creative team made with this month's Sheetload.  It is also linked in the description of my YouTube video. 


Supplies used:
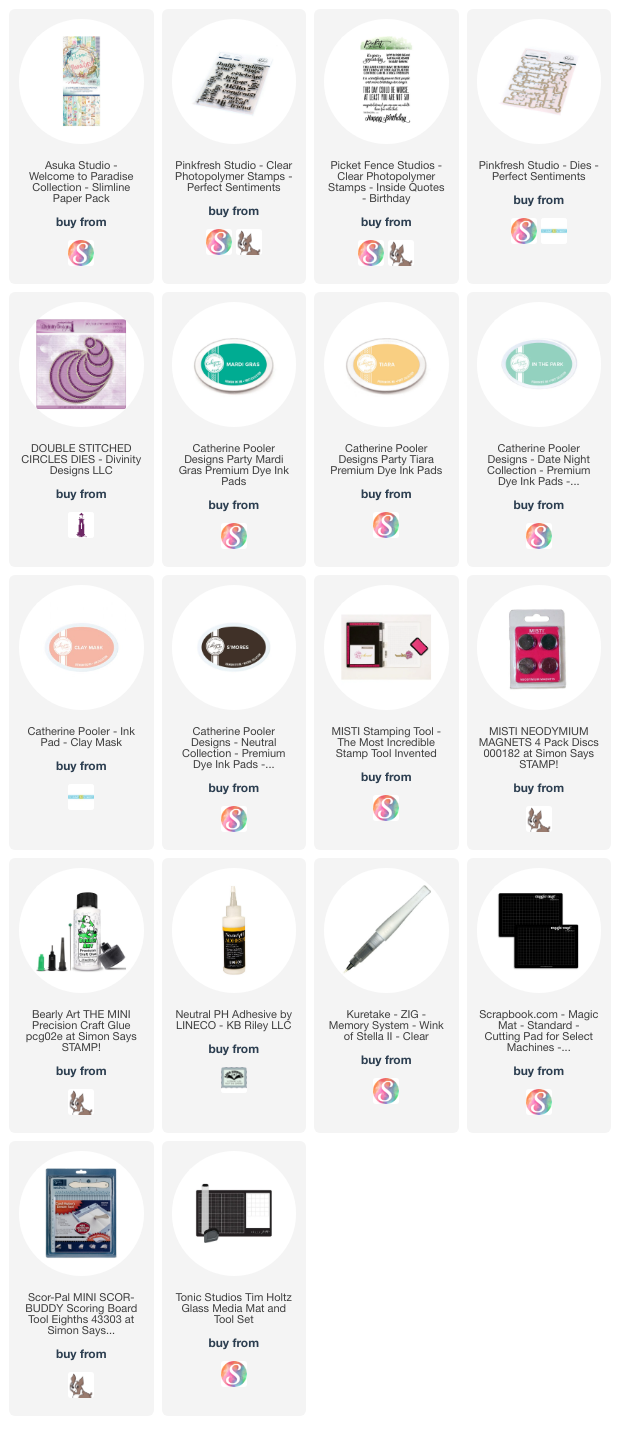
September 2024 Sheetload of Cards - Call Me Crafty Al
Patterned papers:  Mellow Yellow Dot - Bo Bunny
Treasure Hunt - American Crafts
Busy As A Bee - Echo Park
Double Stitched Circle dies - Divinity Designs
Little Book of Bees - Hunkydory
Honey Bee - Stampin' Up
I Bee Fierce - Picket Fence Studios
Bee4Me - the Stamps of Life
Dots peg stamp - Stamps by Judith
Comic markers
Wink of Stella
Bees sentiments - Elizabeth Craft Designs
Pops of Color - Scrapbook .com


Tuesday, 14 May 2024

May 2024 Sheetload of Cards


Today I'm sharing my cards using the May 2024 Sheetload of Cards. I have a walkthrough of my cards on YouTube, as well as five bonus cards using the leftover patterned paper pieces!  


I forgot to take photos of the bonus cards to share here on my blog though. Below is a photo of the inside and all the cards were done the same.

This was another fun Sheetload - I think it would be beautiful done with sparkly Christmas cards, with metallic border strips. 

You can find the May 2024 Sheetload of cards HERE.


Supplies used:
Patterned paper - Pebbles, All The Cake line
Inside Sentiment - Here Comes Birthday Wishes, Picket Fence Studios
Outside sentiment - Merry Messages, Lawn Fawn
Circle Punch - Stampin' Up
Dots embossing folder - Sizzix (old)
Rainbow Holographic cardstock
Front sentiment - Twice the Wishes, MFT Stamps
Inside sentiment - HBD4HSN - The Stamps of Life

Wednesday, 7 February 2024

Slimline Sympathy Card Duo


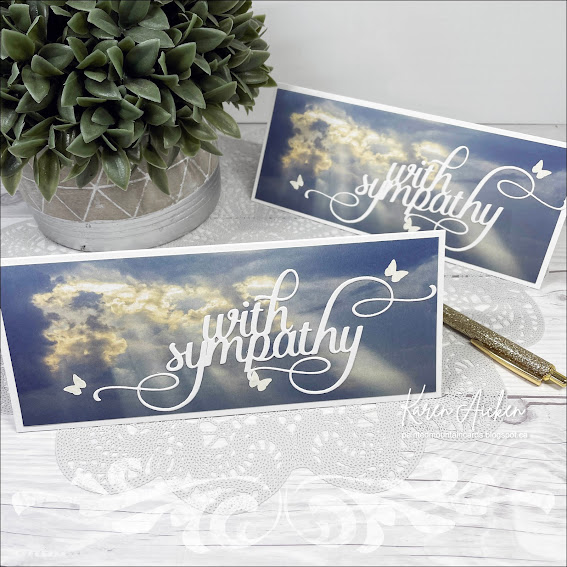
I had been flipping through some of my Slimline paper packages to see what would work with the Grassy Grove forest die (see the last card I made with that die HERE). When I saw this beautiful cloud piece with the sun rays streaming through - I knew I wanted to make it into a sympathy card. Since there were two of the same prints in the package, I ended up making two cards.

I like butterflies on a sympathy card, so I pulled out an older punch that punches the tiny butterflies as well as a medium sized one. Adding three of the tiny butterflies to each of the card fronts, I gave them a bit of shimmer with Wink of Stella.


Inside, I stamped the sentiment on a scalloped panel, and added a medium butterfly that was inked with the same blue ink & a blending brush. Then I added two more butterflies using the negative punched piece as a stencil.  


Supplies used:
Patterned paper - Glorious Sky Slimline Paper - Whimsy
Slim Oversized With Sympathy die, Picket Fence Studios
Butterfly Punch - Martha Stewart (old)
Wink of Stella
Slimline Lacy Layers - Waffle Flower
Wink of Stella
Sentiment - Inside Out Sympathy, Catherine Pooler
Small blending brushes
Catherine Pooler coloured inks

Thursday, 4 January 2024

Gnome & Sunflowers Slimline Card

 
This is the third card I'm sharing made with the Bee Happy cardmaking kit from Paper Rose. As you can see, this one is a Slimline card and will be perfect to send out for Happy Mail! The lower patterned paper as well as the mat inside uses the leftover Basic Grey paper that I used on an earlier card with this kit. 

The circle dies and the 'hi' are from Picket Fence Studios - a great die set for Slimline cards that I get a lot of use out of. Colour was added to the 'hi' using alcohol markers.


The elements were attached with both thin and regular height foam tape for a little dimension, and I added some Stickles & Glitter Dots for shine.  


Here is a peek at the inside. The gold foiled bee sticker was adhered to white cardstock and fussy cut. That way I could add it to the fishtail banner with thin foam tape. I left lots of white space to write a personal message.


Supplies used:
Stickles
Nuvo Glaze
Gold foil bee stickers - stash
Slimline die cutting system - Picket Fence Studios (Word & Circles)
Black gem stickers - Dazzles
Alcohol markers

Wednesday, 11 October 2023

Gourd Trifold Slimline Card


I was excited to see these gourd dies in one of Lawn Fawn's recent releases - so fun to see something different than just pumpkin dies. I have been hoarding saving this patterned paper for YEARS and thought it was time to use some of it for this card. This Slimline card is a trifold, and has an aperture cut in the front using dies from Picket Fence Studios.  Above is what the card looks like coming out of the envelope.


Below you can see the first side opened and the remaining little scene is revealed. I lined up the gourds on that panel so they are hidden by the ones on the front panel when the card is closed.


Finally, here is the card fully opened.


NOTE:  I do have a larger die cutting machine so I was able to create the card base in one piece. I cut a 12 x 8.5" piece of green cardstock, then scored down the 12" side at 4" and 8" for the trifold base. Then I cut the window from the first panel since the machine can handle the 8.5" width.

If I didn't have a larger machine, I would have made the card base in two pieces. The front could be cut at 4.5 x 8.5" scoring it at 4" and giving you a 1/2" tab to attach to the second piece. The window would be cut from that piece then the tab attached to the remaining base. The second base would be 8 x 8.5" scored at 4". Then just decorate it as desired!

Having been asked how many cards I make I thought it would be fun to keep track this year. Many of my posts include more than a single card or project and below is my tally. 

Card Tally for 2023
January - 53 cards
February - 56 cards
March - 55 cards
April - 32 cards
May - 43 cards
June - 34 cards
July - 56 cards
August - 106 cards
September - 61 cards
October so far - 18 cards

I decided to cancel the subscription that provided linked thumbnails to what products I used on my cards. It was costing me out of pocket each month, so I’m back to listing what I used. affiliate links included.


Supplies:
Patterned paper - K & Co (OLD, from my stash)
Slimline Die Cutting System dies - Picket Fence Studios
Big Shot PLUS
Circle dies - Hero Arts
Catherine Pooler Inks
Blending brushes - Taylored Expressions
Cloud mask - All Night Media (old)
Narrow gold tape - Amazon
Stitched Gourds - Lawn Fawn
Washi tape
Blending sponge
Give Thanks Sentiments - Catherine Pooler
Twine
Glitter Dots - Ecstasy Crafts


Tuesday, 20 June 2023

Sealife Slimline Wiper Card


I just adore this Slimline paper pad, so pulled it out again and had the idea to use the 5 x 7" Wiper die set with it to create a Slimline sized Wiper card. It worked perfectly - and since I have a number of different Slimline paper pads, I will be doing this again! NOTE: Since the dies are larger than the paper I used removable tape to line up the die so it didn't shift when going through my die cutting machine.


It's hard to see in the photos, but I added a number of clear enamel dots for a litlte shine and they resemble water bubbles. The stamped and die cut sentiment was popped up with foam tape.


Below is the back side, with a humorous sentiment and some stamped images. I added the same images to the envelope as well. 


Using a small stitched circle die and a scrap of the patterned paper, I cut the circle in half and stamped PULL on either side. These were attached to each side where the recipient would pull to reveal the wiper that is hidden inside. I have watched non card makers when they receive a wiper card and they aren't sure how to get it open, so this solves that problem. Ha.

Having been asked how many cards I make I thought it would be fun to keep track this year. Many of my posts include more than a single card or project and below is my tally. 

Card Tally for 2023
January - 53 cards
February - 56 cards
March - 55 cards
April - 32 cards
May - 43 cards
June so far - 21 cards

Additional Supplies:
Pull stamp - Paper Pumpkin February '17 Many Happy Birthday's (Stampin' Up)
Gems/resin dots - No Matter the Weather Paper Pumpkin kit (Mar 2020), Stampin' Up
Seas the Day stamp - Stampin' Up
White cardstock
5x7" Wiper Card - Sam Calcott, Mixed Up Crafts

This blog uses affiliate links whenever possible. This means, if you make a purchase through one of my affiliate links that you pay the same amount but I may receive a small commission from your purchase. I only link products that I own, love and use for my card making and not every link below is an affiliate one! 😊

Monday, 27 March 2023

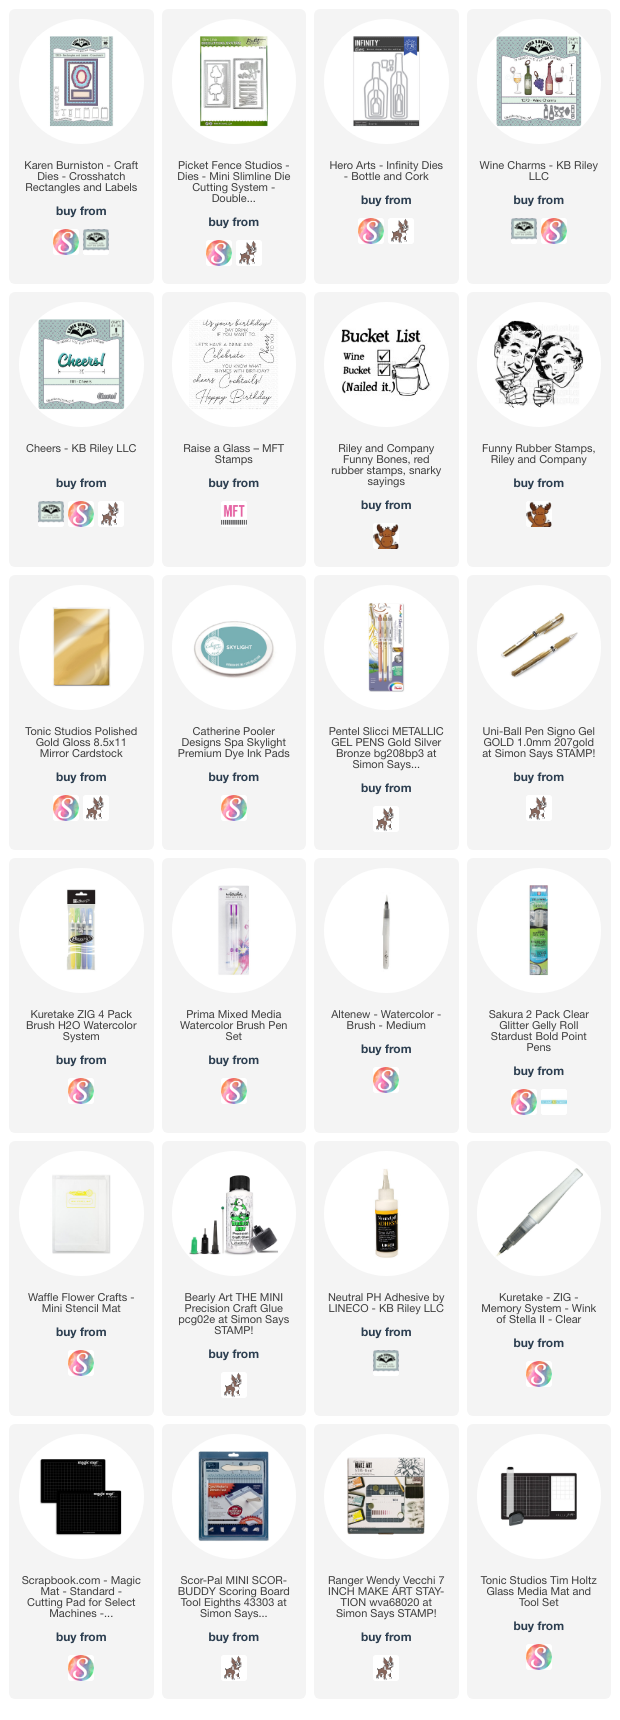
Mini Slimline Wine Themed Shaker Card Duo


I had so much fun making these cards! I needed one for a friend whom we were meeting for dinner, and decided to make a second one to have on hand. The wine bottles were die cut from a coated cardstock and then coloured with an alcohol marker. The coated paper came from a paper pad and I had pulled it out to set aside as I didn't really like it to use for cards. But it worked perfectly for these wine bottles! 

After colouring the die cut bottles with a tealish alcohol marker, I spritzed them with shimmer spray which made the marker run. I loved the mottled look it gave the bottles.

I created infinity shakers (also called edge-to-edge shakers, or full front shakers) by wrapping acetate around the Mini Slimline panel and attaching it at the back with strong tape after adding the filler. Then I mounted the shakers to green card bases.


The stamps are from both Riley & Company and MFT and I added some to the envelopes as well.


The second card has Karen Burniston's CHEERS across the front.


Having been asked how many cards I make I thought it would be fun to keep track this year. Many of my posts include more than a single card or project and below is my tally. 

Card Tally for 2023
January - 53 cards
February - 56 cards
March so far - 39 Cards


Additional Supplies:
Card Size - 3-1/4 x 6-1/4
Patterned paper - Photo Stack, DCWV (old - from my stash)
Transparency
Various sequins & filler - stash
Alcohol markers
Shimmer Spray
Rainbow holographic cardstock - Recollections
White cardstock

This blog uses affiliate links whenever possible. This means, if you make a purchase through one of my affiliate links that you pay the same amount but I may receive a small commission from your purchase. I only link products that I own, love and use for my card making and not every link below is an affiliate one! 😊

Tuesday, 21 March 2023

Teacup Shaped Card


Today I'm sharing the third card in my monthly series "Shaped Card". I enjoy making shaped cards but I find I am so busy using the other goodies in my craft room and making pop ups ... that I forget to make shaped cards. This series should allow me to make at least twelve shaped cards by the end of 2023. 😊

I started with this cute teacup die from Trinity Stamps and some older patterned paper from my stash. At first I made the card from white card stock but it didn't feel sturdy enough for me. I cut the shapes again using patterned paper and added them over the white card base. You can see in the photo below I trimmed away the fold on the patterned paper pieces so there would be no extra folds in the crease.


NOTE:  I trimmed a tiny bit from the bottom edge of the inside, which helps the card to stand nicely for display.

This card fits perfectly into a standard A2 envelope for mailing. 😊


Having been asked how many cards I make I thought it would be fun to keep track this year. Many of my posts include more than a single card or project and below is my tally. 

Card Tally for 2023
January - 53 cards
February - 56 cards
March so far - 34 Cards

Additional Supplies:
Pink cardstock
Kraft cardstock
White cardstock
Patterned paper - Blank Canvas, 1st Edition
Floral sticker - K & Company

This blog uses affiliate links whenever possible. This means, if you make a purchase through one of my affiliate links that you pay the same amount but I may receive a small commission from your purchase. I only link products that I own, love and use for my card making and not every link below is an affiliate one! 😊

Monday, 30 January 2023

Scottie Birthday Card


It's Masculine Card Monday here on my blog! I had been flipping through this older paper pad, which is by Sizzix and it's a 6 x 12" size. I was trying to decide if I liked this particular pattern or the reverse side of the paper, and realized it would make a great masculine card to donate to my Mom's old nursing home. I was also able to use up one of the leftover narrow strips in the paper pad on this 5 x 7" card.

I added the black punched Scottie dogs and the black sentiment on the front and stamped a greeting inside.


A couple of times recently, I was asked how many cards I make but I didn't have a clear number. Since a lot of my posts include more than a single card or project, I thought it would be fun to keep track this year. 
2023 Tally:  52 Cards

Additional Supplies
Patterned Paper - Fox Tails, a  6 x 12" pad by Sizzix (old, from my stash)
5 x 7 Card and envelope
White cardstock
Black cardstock
Scottie punch - Stampin' Up

This blog uses affiliate links whenever possible. This means, if you make a purchase through one of my affiliate links that you pay the same amount but I may receive a small commission from your purchase. I only link products that I own, love and use for my card making and not every link below is an affiliate one! 😊

Monday, 23 January 2023

Mini Slimline Birthday Cards


It's Masculine Card Monday here on my blog, and today I'm sharing a set of 5 Mini Slimline cards I made to donate to my Mom's old nursing home.

 
As usual, my cards started with the patterned paper. This is an older package by Sizzix that is actually sized at 6 x 12". The papers are double sided and I had pulled it out to have a flip through to remind myself of the patterns. I was inspired to use some of the smaller pieces and also die cut some panels with a Picket Fence Studios die. Then I sat and played with the pieces until I was happy with the layouts.


The insides are all done the same, again using an older stamp set from the Stamps of Life and my MISTI. 

A couple of times last year, I was asked how many cards I make but I didn't have a clear number. Since a lot of my posts include more than a single card or project, I thought it would be fun to keep track this year. 
2023 Tally:  44 Cards

Additional Supplies
Patterned paper - Fox Tails 6 x 12" Sizzix
White cardstock
Lots of Birthday2Stamp - the Stamps of Life
Black fine point marker

This blog uses affiliate links whenever possible. This means, if you make a purchase through one of my affiliate links that you pay the same amount but I may receive a small commission from your purchase. I only link products that I own, love and use for my card making and not every link below is an affiliate one! 😊

Friday, 13 January 2023

Dog Themed Gatefold Card


It's Fun Fold Friday here on my blog! This card started out as a Gatefold, but I went off the rails a bit. 😂  After creating the teal gatefold card base, I grabbed a water coloured looking notecard from my stash. I cut the front away from the solid white back with a stitched rectangle and did the stamping. Then I realized the panel was going to be pretty big for my card base.


While I could have created a 5 x 7" gatefold card instead, I decided to persevere and this is what I came up with. I love the dog image from Picket Fence Studios, and the funny sentiment is from Riley & Company - their Funny Bones line. I had ordered several Funny Bones stamps back in early November. 


Inside is where you can see the teal gatefold. I also added a magnetic closure! One magnet is on the front and the bump is hidden with a heart sequin. The corresponding magnet is under the dog bone on the right flap.


The inside center panel was adhered with a cardstock spring - these are from Sam Calcott - she uses them in several of her videos. I used a long one down the centre of the panel so it has some movement.

I hadn't kept track of which of her many video's I got it from, so spent some time yesterday morning searching through them to find a link for you. Whew - here it is!  


A couple of times last year, I was asked how many cards I make but I didn't have a clear number. Since a lot of my posts include more than a single card or project, I thought it would be fun to keep track this year.
2023 Tally:  23 Cards

Additional Supplies:
White cardstock
Water coloured looking note card - Hobby Lobby
Small Magnets - K&J Magnetics
Teal cardstock
Paw Print - Dog Happiness, Frantic Stamper
Brush Markers

This blog uses affiliate links whenever possible. This means, if you make a purchase through one of my affiliate links that you pay the same amount but I may receive a small commission from your purchase. I only link products that I own, love and use for my card making and not every link below is an affiliate one! 😊


Thursday, 22 December 2022

'Get Your Fat Pants Ready" Easel Card


Hello my crafty friends! I've been having fun creating Easel Cards lately, so I have another 5 x 7" one to share today. I got this humorous stamp set from Scrap 'n Stamp Canada and have been using it a fair bit as well. I have it linked below for you but it may now be retired. I went over all the details in my YouTube Video:


The patterned paper is an older pad from Michaels. This cute polar bear scene was actually just along the bottom edge of one of the 12 x 12" sheets in the package so I added it to the front of my Easel Card and used the top part for the decorative panels.


The 'bumper' was created with one of the border strips on a sheet from the package and is popped up with foam tape.


Additional Supplies:
5 x 7" card and envelope
Patterned paper - Holiday Bash, Recollections
Sentiment inside - Hero Arts (old)

This blog uses affiliate links whenever possible. This means, if you make a purchase through one of my affiliate links that you pay the same amount but I may receive a small commission from your purchase. I only link products that I own, love and use for my card making and not every link below is an affiliate one! 😊

Thursday, 15 December 2022

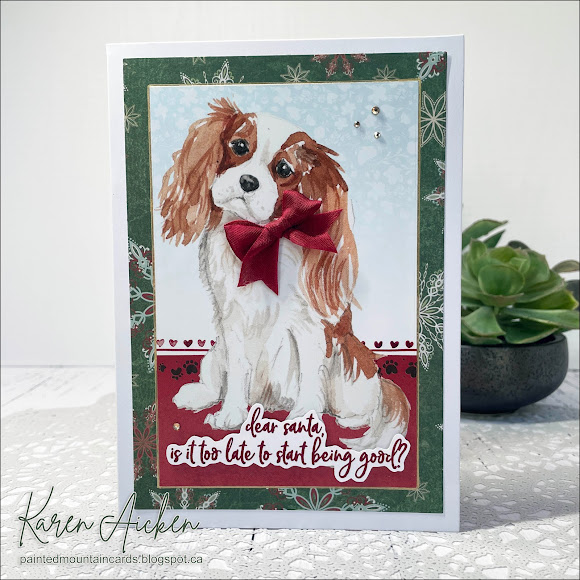
Dog Themed Humorous Holiday Cards


Hello my crafty friends. Today I'm sharing a pair of dog themed pop up holiday cards. The dog panels came from Hunkydory's 'Little Book Of Muddy Paws', and while they aren't actually Christmas themed I thought with the red background on these prints they would work.


This is the first card, and I added a red seam binding bow along with some bling. The funny sentiment is from Picketfence Studios, but may not be available any longer. I love it though!


Inside I used the Katherine Label Pop Up and the new Hexagons Crosshatch - both dies by Karen Burniston. Since there are three identical panels of each dog print in the pack, I was able to use two on each card and still have one of each left for other cards!


The second card got some gold gel pen detailing...


... and the inside was done the same. The inside sentiments are from the Perfect Sentiment Holidays stamp and die and they are linked below.


Additional Supplies:
Dog panels - Little Book of Muddy Paws, Hunkydory
5 x 7" Card and Envelope
A7 Rectangle dies - Waffle Flower
Patterned paper - Holiday Wonder, Hobby Lobby (old)
Seam Binding

This blog uses affiliate links whenever possible. This means, if you make a purchase through one of my affiliate links that you pay the same amount but I may receive a small commission from your purchase. I only link products that I own, love and use for my card making and not every link below is an affiliate one! 😊