Thursday, 10 January 2019

Baby Themed Pop-Up Gift Card Holder and Matching Tag

Good morning friends

I'm back today with a cute tag and matching Gift Card holder.


For the tag I used Lynda Kanase's Tag with Phrases. Since the slot die is separate, I chose not to use it this time, instead using heavy & sparkly patterned paper and a journal card/cut apart for decoration. The tag die was cut twice, once from the sparkly paper and once from pink card stock. I added some bling and off-set the back tag with foam tape.  The cut apart was added with foam tape, and I added a fussy cut strip of hearts to add as well. The foam tape gave the tag dimension as well as lots of weight to hang nicely on the gift bag handle.


I used the same paper stack for the Pop-Up Gift Card Holder - another die set by Lynda Kanase for Sizzix. The paper scrap with the "M" on it was serendipity, as this was going to a baby whose name started with M.  We also gave her the little unicorn stuffy.


I actually made a 'belly band' to hold this Pop-Up Gift Card Holder closed. I love how easy it is to change up the look of this holder! Once again, this is not the gift card we enclosed, I just use this one for photos.


The patterned paper is by DCWV and I find it usually cracks along any fold lines. It seems to be the same with all of their papers.  I reinforced all the folds on the back side with cellophane tape so it would stand up to the opening and closing that people do with a pop-up. Seemed to do the trick.


I aded another couple of cut-parts and a fussy cut flower that you can see when the gift card is removed for use.


Supplies:
Card, Gift Card Holder Pop - Up - Lynda Kanase (Sizzix)
Patterned paper - DCWV
White card stock
Tag Pocket with Phrases - Lynda Kanase (Sizzix)
Bling
Bakers Twine
Seam Binding

Thanks for stopping by today

Wednesday, 9 January 2019

Thank You Scalloped Card

Hello my crafty friends

Today's share is a Thank You card, made using this pretty scalloped card base by Stephanie Barnard for Sizzix.


The Circle Thank You is from a different set, and here I layered it with a white stitched circle, stitched fishtail banners and some punched sprigs. The Sprigs and the letters got some white gel pen highlights.


I used the same stitched circle die as on the front, for our place to write a message and added two more punched sprigs.


I really need to replenish my Thank You card supply, so this one is for the stash.

Supplies:
Green and white card stocks
Scallop Card Drop-Ins - Stephanie Barnard, the Stamps of Life & Sizzix
Patterned paper - Jen Long, Sizzix
Dashing Rectangle dies- Elizabeth Craft Designs
Stitched Fishtail Banner dies - MFT Stamps
Stitched circle dies - MFT Stamps
Thank You 3-d Drop Ins - Stephanie Barnard, the Stamps of Life & Sizzix
Sprig Punch - Stampin' Up
Sequins
Sakura White Gel Pen

Thanks for stopping by today

Tuesday, 8 January 2019

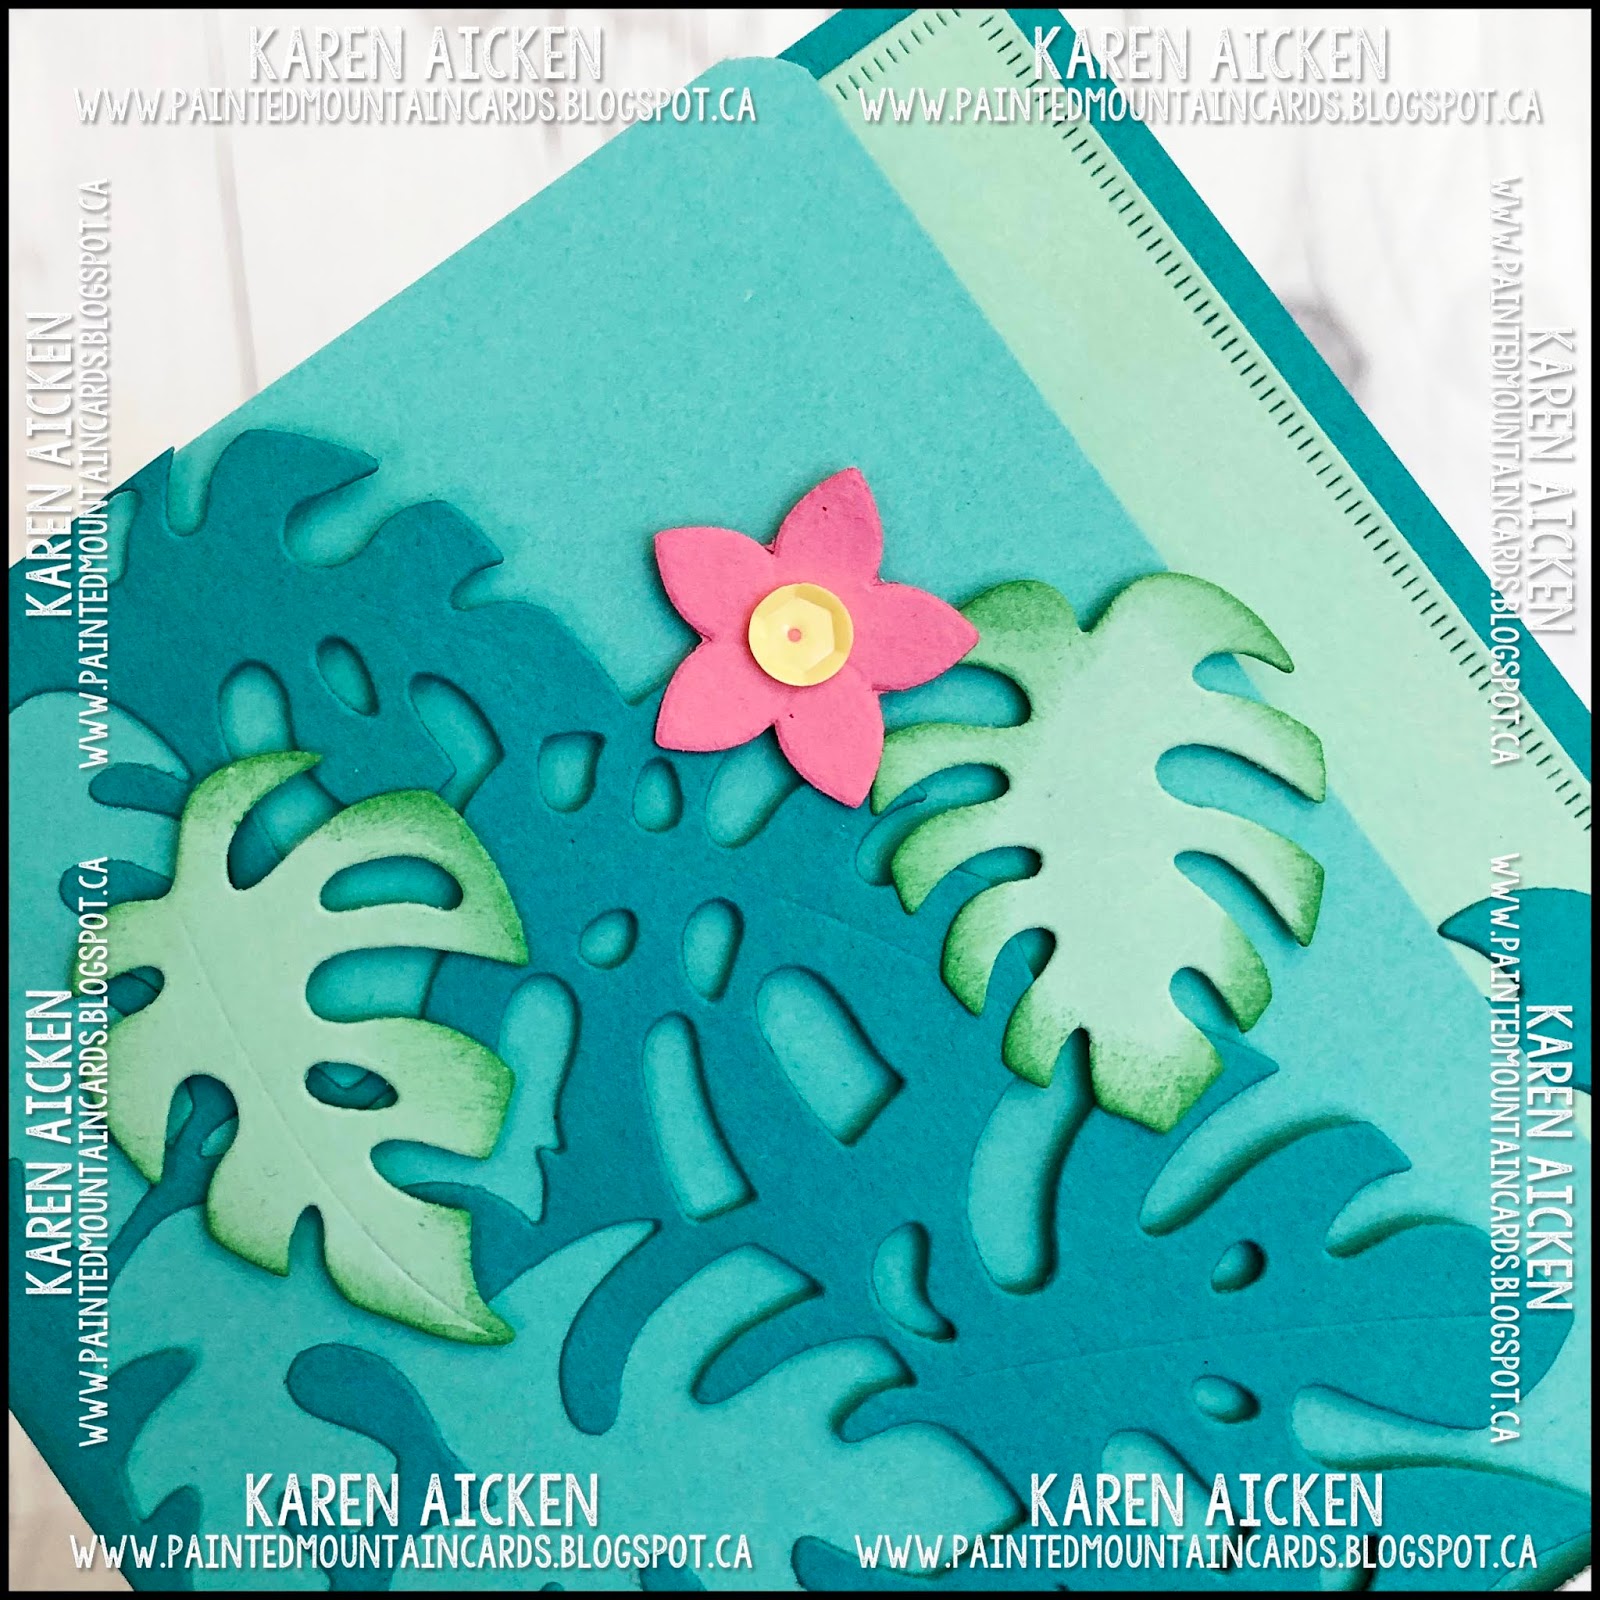
Tropical Birthday Card

Hello my crafty friends

This Tropical Leaves Card Front die by Lynda Kanase for Sizzix had been on my Wish List for a long time, and when it popped up on a Black Friday sale I added it to my collection. This is the first time I've used the die so I kept my card fairly basic. Even basic, it turned out great! This one is going to be fun!


I added yellow sequins to the flower centres, which catch the light and give it a bit of sparkle.


Inside I wrote 'Have a Wonderful Day!" with a black marker.


Last year I gave our daughters a big stack of Birthday cards and they loved them. If I don't end up donating this card to my Mom's nursing home, I will put it aside for one of our daughters Birthday Card stacks.

Supplies:
Tropical Leaves Card Front - Lynda Kanase TROPICOOL COLLECTION, Sizzix
Blue, green, white and pink card stocks
Dashing rectangle dies - Elizabeth Craft Designs
Stitched Fishtail Banner die - MFT Stamps
Happy Birthday stamp - MFT Stamps
Sequins
Black marker
Corner Chomper - We R Memory Keepers

Thanks for stopping by today

Monday, 7 January 2019

Eight Bright Balloon Birthday Cards

Hello my crafty friends

I make a lot of Birthday Cards. I'm donating at least 25 Birthday cards each month to my Mom's nursing home, and I make the Birthday Cards that our grandkids take to birthday parties. I also love balloons. Funny, I tell my family I love balloons on a regular basis and they have yet to pick up on that fact and bring me balloons. Ha. Anyhow, I resisted this MFT Blueprints #26 die set for long enough and finally added it to my craft room in November. These are the first cards I made with it:


It's a basic design that is perfect for making multiple cards and I love the bright cheerful colours in the patterned paper. For the nursing home donations I work on 4 months at a time. So I will put two of these cards into each bag. That way there aren't a whole bunch of the same card being opened at the same time by the residents. These cards are handed out at the monthly Birthday Party in the atrium at the nursing home.


Note to self  - use double sided adhesive on the thin white pieces. I didn't, and it was a little fiddly glueing down the thin bows and balloon strings. Impressive at how well they cut with the dies though!


The nice big 'Celebrate' is a die by Karen Burniston ... it was perfect to use with the balloons. The insides were stamped onto a rounded stitched rectangle die and I added a fishtail banner to each one as well. The MISTI makes the stamping a breeze and I especially love it for stamping multiples like this.


I will have fun with this Blueprints set working on Birthday cards and I'm so glad to have it now! Because you know, I love balloons!

Supplies:
Blueprints #26 - MFT Stamps
Patterned paper - Tailored Expressions
1067 Celebrate - Karen Burniston
White sharpie marker
Double Stitched Rounded Rectangles - Divinity Designs (formerly Our Daily Bread Designs)
MISTI - My Sweet Petunia
Words inside - Picture Perfect Birthday, Stampin' Up

Thanks for stopping by today

Sunday, 6 January 2019

Teal and Yellow Striped Birthday Card Trio

Hello crafty friends

Today's share is a trio of Birthday Cards made using bright and happy colours. I have loved this package of SU patterned paper but it's been hanging around for too many years and I was bound and determined to finish it up for my donation cards.


I used the Striped Panel Insert die by Your Next Stamp for the fun background. There are lots of ways to use this die and I had fun alternating a couple of different ways on these three cards. Since I used a Your Next Stamp background die, I am also entering these cards into the Fun Friday Challenge #104 over at Your Next Stamp.


The paper flowers I've had in my stash for awhile, and they have large black resin gems in the centres. For mailing I pop them off and add something else in the centre but since these will be hand delivered to residents at my Mom's nursing home, I left the gems on. I also added a couple that had been popped off and saved from a different project. I like how the black makes the other colours POP.


The card interiors were all done with the same stamps.


Supplies:
Stitched Stripe Panel Insert die- Your Next Stamp
Patterned paper - Stampin' Up
Yellow, white, teal and black card stocks
Paper flowers - Recollections
Stitched rectangle dies - Elizabeth Craft Designs
Banner punch - Stampin' Up
Stamps - Stampin' Up
Clear embossing powder
Flat sequins - Verve

Thanks for stopping by today

Saturday, 5 January 2019

C4C465 Peeking Owl Birthday Pop-Up Card with Matching Gift Card Holder

Hello my crafty friends

Welcome to a new year, a new month and a new challenge at the Crazy4Challenges Blog. I am the hostess for January 2019 and our Guest Designer is my friend and Design Teammate Kelly Booth. 

I had fun thinking of the challenges for this month, making them generic enough that they would suit everyone. Here is my challenge for this week:  What is your favourite card type to make? Pop-up? Shaker? Birthday? One Layer? Make one!

My favourite card type would be Interactive. But I also really enjoy making Birthday Cards and cards with Windows ... so I combined them all to make a masculine Birthday card.


The window has acetate behind the stitched frame, and I added a couple of sprigs from Karen Burniston's Autumn Elements. That die set stays close to my stamping table because I use it so often.


Sorry for the colour cast on the photo below, which shows the card as it is opening.


When the card is fully open, the leafy wreath and Happy Birthday sentiment spin down and fully into view. I used the Spinner Square Pop-Up by Karen Burniston for the mechanism.


The filigree owl was not my favourite of the stamp & die set when I saw it online, but now I am really liking it. It was die cut from brown card stock and adhered to kraft, then fussy cut.

On the far right of the Spinner Square, I fussy cut the spinner rectangle to follow along the leaf lines on the wreath.


I made a coordinating Gift Card holder as well, using Lynda Kanase's Pop-Up Gift Card Holder.


I decorated the front with bakers twine and a few die cut leaves from the Autumn Elements with white sketchy lines drawn on with a gel pen.


The set has a die for the front and the Pop-Up inside and it goes together quick and easy. The gift card pictured is one I use for photos, and not the one we actually gifted.


When you remove the gift card, you see a stitched circle which is the fallaway piece from the card front window. I like that it visually ties the card to the Gift Card Holder.


Check out the C4C blog to see how the Crazies have been inspired by the challenge. We'd  love to see your take on it, so be sure to stop by the Crazy 4 Challenges blog and link up your creations. If you are uploading to an online gallery, please use the keyword C4C465.

Supplies:
Brown, tan and kraft card stocks
Owl, Still Night stamps and dies - Stampin' Up
Treeline die - Tim Holtz, Sizzix
Patterned paper - Paper Studio
Acetate - Hero Arts
Stitched circle frame - MFT Stamps
1042 Spinner Square Pop-Up - Karen Burniston
1059 Autumn Elements - Karen Burniston
Wreath - Katelyn Lizardi, Sizzix
Happy Birthday Day stamp - MFT Stamps
Copic Marker
Bakers Twine
Card, Gift Card Pop-Up - Lynda Kanase (Sizzix)
5-1/2" Square card


Thanks for stopping by today

Friday, 4 January 2019

Pink and Green Flip-It Thank You and Scalloped Thank You Card

Hello my crafty friends

It's Fun Fold Friday here on my blog, and I have a pair of Thank You cards to share. One is a Flip-It card and the other has a pretty scalloped card base.


This Fancy Edge Flip-It's die set is exclusive to the Stamps of Life and I think it makes such a pretty card! I was trying to use up an older paper pad so paired it with pink card stock. The Thank You is from Karen Burniston and I cut it twice, slightly offsetting one layer for a shadow effect.


I added layered punched butterflies and some sparkly Glitter Dots.


I just love a shaped card base! This card has a green card base and the Thank You was die cut from pink card stock. Even though this was going through the mail, the soft seam binding bow allowed it to go through the mail for a single stamp. I did add a piece of card stock inside the envelope to protect the knot from poking through the envelope.


This card got some sequins instead of the Glitter Dots.


I wrote my note inside, on the pink scalloped area.


Supplies:
Fancy Edge Flip-Its (exclusive) - Stephanie Barnard, the Stamps of Life (retired)
Stitched square dies - Elizabeth Craft Designs
Patterned paper - K & Company
White, pink and kraft card stocks
Butterfly punch - Stampin' Up
1066 Thank You - Karen Burniston
Holographic circle stickers - Stampendous
Stickles

1066 Thank You - Karen Burniston
Patterned paper - K & Company
Green and pink card stocks
Card, Scallop with Thanks Sentiments - Stephanie Barnard, the Stamps of Life and Sizzix
Seam binding
Sequins
Butterfly punch - Stampin' Up

Thanks for stopping by today

Thursday, 3 January 2019

Hooray Birthday Tags

Hello my crafty friends

I have a set of tags to share today, perfect for dressing up a birthday gift. I used the Tag Pocket with Phrases by Lynda Kanase for Sizzix for my tag bases. While the tags are bright and cheery, I kept them mostly white so they would match with lots of different wrapping papers or gift bags.


First I wrapped the bottom tag edges with two different washi tape designs. I love the cut-away words from Lynda's Photo Frames, so pulled out the HOORAY from her Celebrate Photo Frame set and die cut it from the tag above the Washi Tape rows. Then I backed the word with a rectangle of black card stock to make the word pop.


The Photo Frame set includes a set of stamps, so I used the Happy Birthday on a popped up label. The balloons and swirly-do come from Karen Burniston's Explosion Card. Alternatively, you could add stickers, punches or images fussy cut from patterned paper. Blue, Red and Yellow Nuvo Crystal Drops were added for some additional colour.


I like my gift tags nice and sturdy, but instead of die cutting the tags from heavyweight card stock, I cut each tag twice from regular white card stock. That way I could wrap the ends of the Washi Tape to the inside of the front and back tags, as well as back the cut-away HOORAY with black card stock and everything was sandwiched neatly between the two tags which were adhered together back to back. The great thing about die cutting the tags, is that the edges will always match up perfectly!

The back side was stamped but I didn't add a traditional 'to & from' instead choosing the 'Just For You' words. There is room above to write a name and below for the grandkids to sign their names if they wish.


These tags are going to our daughter's for when the grandkids go to birthday parties!

Supplies:
Tag Pocket with Phrases - Lynda Kanase (Sizzix)
White black, yellow, orange, turquoise and green card stocks
Washi tape - stash
Photo Frame, Celebrate - Lynda Kanase (Sizzix)
MISTI - My Sweet Petunia
Fine Point Markers
Card, Pop-Up Gift Card Holder (label) - Lynda Kanase (Sizzix)
1069 Explosion Pop-Up (Balloon and Swirly-Do) - Karen Burniston
Sakura White Gel Pen
Bakers Twine
Nuvo Crystal Drops

Thanks for stopping by today

Wednesday, 2 January 2019

Butterflies and Smiles Card

Hello my crafty friends

As soon as it was released, this sweet butterfly background die was on my Wish List. I managed to add it to my collection in November and had to try it out right away. All the butterflies cut the wings only - they remain attached at the body. So fun!


I alternated either one or two Nuvo Crystal Glitter Drops to the centre of each butterfly for some shimmer and shine. The set also comes with separate butterfly wings and body so I cut three from coordinating patterned paper scraps with black bodies and adhered them to the card front as well.


Here is a peek at the inside ...


... with a strip of butterflies with raised wings. There is still plenty of room to write a note inside too.


Supplies:
Blue and black card stocks
Butterfly Cover Die - Pink & Main
Patterned paper - DCWV
Stitched Banner - MFT Stamps
Smile - Paper Smooches
Nuvo Crystal Drops
Sequins

Thanks for stopping by today

Tuesday, 1 January 2019

Karen Burniston January 2019 Designer Challenge

Happy New Year!


We are starting off the New Year with a BANG ... specifically, Karen Burniston's Designer Challenge. The first one of 2019 and the theme is "NEW: try something new to you. Is it a technique? A color scheme? A style (cute? grungy?) Here's your chance to usher in the new year with something new."

With a theme of new, and the first day of a brand new year, a Happy New Years card was the first thing I thought of doing. But I didn't have a need for one, so rather than make a card just to make a card, I decided to try a NEW-TO-ME technique using the Snowman Twist Circle. This was based on Karen Burniston's amazing card and accompanying video for her November 2019 Designer Challenge. I will link the video at the end of the post.

I kept the front fairly simple, using a NEW sheet of patterned paper that I couldn't resist purchasing. I'm still amazed I only picked up the one 12 x 12" sheet and not more because I love nature images like this. I added the large Happy Birthday and a single brown tree as a lead in ...


Here is the card as it is opening, and you can see there are a bunch more trees inside.


Fully open, the card displays a little 'forest' with a deer silhouette in the background.


I used the Crosshatch Rectangles as a framed area for my sentiment. With all the roundness in the background paper I wanted to break that up with some straight edges.


The deer is from the Outdoor Scene die set, which is another set that stays out on my stamping table all the time because I reach for it so often.


Finally, for those that like to pin card fronts and insides together ... here you go!


I hope you will check out what the rest of the Design Team came up for this Designer Challenge - their blogs are all linked on the right. Karen Burniston will have her project and a group post tomorrow (Wednesday) on her BLOG.

If you want to check out Karen Burniston's complete 'how to' video for her card that inspired mine, click HERE.

Supplies:
Kraft, brown and tan card stocks
Patterned paper - Carta Bella
1012 Snowman Twist Circle Pop-Up - Karen Burniston
1062 Evergreen Pivot Panel - Karen Burniston
1045 Outdoor Scene - Karen Burniston
1030 Happy Birthday - Karen Burniston
1054 Rectangles Crosshatch - Karen Burniston
Word stamp - Papertrey Ink
Marvy Marker

Card size - 4-1/4 x 5", fits in a standard A2 envelope.


Thanks for stopping by today