Wednesday, 13 April 2022

'Enjoy the Little Things' Birthday Card


Hello my crafty friends.  Today's card is one that was based on the January Sheetload of cards, which in turn was based on a Mojo Monday sketch. 😊  I pulled out a bunch of older items for this one, the only new items I used are the yellow sequins & the 'glitter glue'!

The bee element is actually a cut apart from the same paper pad, but I dressed it up with some Pops of Colour for shimmer and shine. The sequins don't show up well in the photos but they are nice and sparkly too.


Here is a peek at the inside ...


 This blog uses affiliate links whenever possible. This means, that at no cost to you, if you make a purchase through one of my affiliate links that I may receive a small commission from your purchase. I only link products that I own, love and use for my card making!

Any supplies I'm unable to link are listed at the very bottom of my post.



Additional Supplies:
Patterned paper & cut aparts  - Spring Fling, Pebbles (old from my stash)
White card stock - Accent Opaque Digital Super Smooth (Amazon .ca)

Tuesday, 12 April 2022

Peony and Butterfly Pop Up Card


Hello my crafty friends. Today's card combines both older items and new goodies to my craft room. Lisa Horton Crafts have some great Slimline products out - but I am particular about my card sizes and haven't invested in any of that product line because of that. However, when I saw this Wild Peony set, I knew it would work on a variety of sizes and ... yep ... 'Add To Cart'. Ha. The Wild Peony set is a 3D embossing folder with a COORDINATING DIE ❤️!!   There are other designs in the line, but I just chose this one and I am crazy about it and so happy I bought it.

I did the die cutting first, cutting that large bloom from white card stock. It easily lined up inside the embossing folder, and after running it through my machine I was in awe of how pretty it was. Using blending brushes and Catherine Pooler Inks, I added some colour then knew I wanted to add it to a card right away. I spritzed it with Shimmer Spray for some shimmer & shine, and set it aside to dry.

The alcohol ink looking paper is a 12 x 12" pad from Michaels that I've had since last year and I adhered the papers to a 5 x 6.5" card base. Those cards and envelopes are also from Michaels and I've had them for years. I love that they came with envelopes in the perfect size.


The pretty label is a leftover piece from an older Paper Pumpkin kit, and you probably recognize the butterflies by now - they are the ones from Pinkfresh Studios.  On it's own, I think this would be a lovely card but you know I had to do something inside too ...

Here I used the same patterned paper with the Butterfly Pop Up from Spellbinders. This time I didn't add the detail layer - just the solid butterfly layer and of course the butterfly body.


The butterfly body was cut from a leftover piece of pink mirror card stock and then I added a few more of the lightly stencilled butterflies.This card has lots of dimension from those additional butterflies, yet folds down nice and flat for mailing.

It's hard to see in the photo, but I stamped the sentiment on a scalloped circle, then added the stamped and die cut CHEERS. While they are both glued flat down, you still get some dimension from the look.


I actually have a couple of people in mind for this card, which makes me think I should make another one. Or two. 😊  

This blog uses affiliate links whenever possible. This means, that at no cost to you, if you make a purchase through one of my affiliate links that I may receive a small commission from your purchase. I only link products that I own, love and use for my card making!

Any supplies I'm unable to link are listed at the very bottom of my post.


Additional Supplies:
White card stock - Accent Opaque Digital Super Smooth (Amazon .ca)
Shimmer Spray

Patterned paper - Guilded Ink, Recollections
5 x 6.5" Card and envelope - Michaels
Grey fine point marker - stash
Fancy Sentiment Strip - leftover from a retired Stampin' Up Card kit

Monday, 11 April 2022

Mountain Scene Slimline Z-Fold Card


Hello my crafty friends and welcome to Masculine Card Monday here on my blog. Today's Birthday Card uses dies from Divinity Designs with some scenic patterned paper.  The photo above shows what the card would look like coming out of the envelope, and below shows it fully open.


I used all but the smallest piece of this 12 x 12" patterned paper sheet! Since I felt that the papers needed a little contrast, I added the hawks cut from black card stock. 

The Hey You & shadow dies are from Picket Fence Studios and they fit perfectly across the card front.


Since you can see the middle section when the card is closed, I used one of the patterned paper panels on it, but also decorated the back side of the front flap with a stamped and matted oval.

This blog uses affiliate links whenever possible. This means, that at no cost to you, if you make a purchase through one of my affiliate links that I may receive a small commission from your purchase. I only link products that I own, love and use for my card making! NOTE:  for some reason the thumbnail image of the Slimline Z Fold Card With Layers will NOT show up, even with several edits but the link should still work and the photos are fine on the DD website.

Any supplies I'm unable to link are listed at the very bottom of my post.


Additional Supplies:   
Rust, brown and yellow card stocks - stash
White card stock - Accent Opaque Digital Super Smooth (Amazon .ca)

Friday, 8 April 2022

Floral Bouquet Birthday Card Duo


Hello my crafty friends! Today I'm sharing a card duo using these lovely bouquets from Pinkfresh Studio.  They are from the Joyful Bouquet set - I used the Washi Tape & coordinating die, but there are stamps & layering stencils as well. After adhering the Washi Tape to white card stock, I ran it through with the die and that gave me the large bouquet and lots of smaller floral groupings - all with bits of gold foiling. 


I cut two repeats of the Washi Tape and what I didn't use on these cards I stored in clear pockets in a zippered binder for another day. The backgrounds are actually cut from a set of boxed note cards and envelopes that I've had in my stash for a couple of years. Since they are printed on the front and the back, I usually cut them apart so I have four A2 sized panels to work with instead of two A2 folded cards. Then I can add them to my own white card bases. For these cards I used the back panels to decorate the inside of my cards, as you can see in the photos below.

Since this first card is going to a friend, I wanted it to be a Pop Up and used Karen Burniston's Paper Frames Pop Up die set.  


You can see more of the Washi Tape elements on the pop up labels as well as a stamped sentiment.


The second card is going into my stash, although I do have someone in mind for it.


Inside the second card, you can see another one of those card panels, a couple more floral elements, a stamped sentiment and a stamped & die cut greeting. I was so happy with how these cards turned out, and that I finally used some of those pretty boxed note cards that have been sitting around!


This blog uses affiliate links whenever possible. This means, that at no cost to you, if you make a purchase through one of my affiliate links that I may receive a small commission from your purchase. I only link products that I own, love and use for my card making!

Any supplies I'm unable to link are listed at the very bottom of my post.


Additional Supplies:
Circle stickers - Dazzles
Boxed cards & envelopes - Hobby Lobby (old, from my stash)
White card stock - Accent Opaque Digital Super Smooth (Amazon .ca)

Thursday, 7 April 2022

Trio of Humorous Birthday Cards


Hello my crafty friends.  Yesterday I shared a trio of birthday cards that I made for a friend who had asked if I made cards with humour. Today I'm sharing the remaining three. I had ordered this fun donkey stamp set from Whimsy Stamps as I plan on making more funny cards in the future and these donkeys crack me up.

Here is the first card. I pulled out some patterned paper - a 6 x 6" pad I've been working on the past few months. In fact, I've almost used it up! I liked that the colours are bright and cheerful, but more on the masculine side.


The second card uses a layout I haven't done in awhile. It works for an A2 sized card - taking a 4" square of patterned paper and cutting it in half on the diagonal. 


Finally, here is card number three...


I added little puffy dots from Pebbles as they don't add a lot of bulk in case my friend wants to mail the cards rather than hand deliver them.


All in all, this was a fun project and has me looking to use my humorous stamps more in the future!

This blog uses affiliate links whenever possible. This means, that at no cost to you, if you make a purchase through one of my affiliate links that I may receive a small commission from your purchase. I only link products that I own, love and use for my card making!

Any supplies I'm unable to link are listed at the very bottom of my post.


Additional Supplies:

Red cardstock scraps - stash

Make a wish - MFT Stamps

Puffy Dots - Pebbles

White card stock - Accent Opaque Digital Super Smooth (Amazon .ca)

Wednesday, 6 April 2022

Mini Slimline Birthday Cards with Humour


Hello my crafty friends.  Today I'm sharing three humorous birthday cards I made for a friend. He had asked if I made Birthday Cards with funny sentiments because he had people he would send them to if I did. I realized that I not only like those kinds of sentiments - I have a number of sets in my collection that I rarely use! That was the inspiration I needed to make him a set of six cards for his birthday. Here are the first three cards and I'll share the remaining three tomorrow.


I pulled out a 6 x 6" patterned paper pad by Whimsy, then just had fun rooting around in my stash for what else would work. These cactus dies and clear stickers were perfect!


Card number two ... the Fun Faces from Your Next Stamp matched the smiling faces on the patterned paper, so I added them to fishtail banners.


And finally, card number three. I added the number 3 with a green marker as I thought the word three was a little hard to read on the sentiment.


Since my friend lives in Arizona, I thought the cactus theme was a good one for these three cards.

This blog uses affiliate links whenever possible. This means, that at no cost to you, if you make a purchase through one of my affiliate links that I may receive a small commission from your purchase. I only link products that I own, love and use for my card making!

Any supplies I'm unable to link are listed at the very bottom of my post.


Additional Supplies:
Clear stickers - old, from my stash
Card stock scraps - stash
White card stock - Accent Opaque Digital Super Smooth (Amazon .ca)

Tuesday, 5 April 2022

Garden Bench Pop Up Mother's Day Card


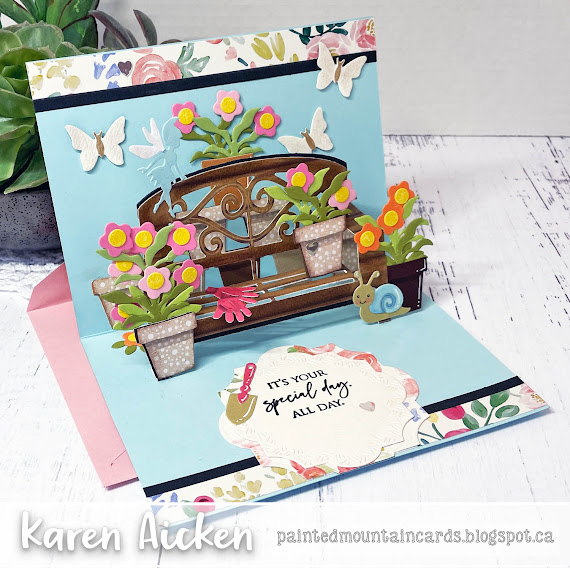
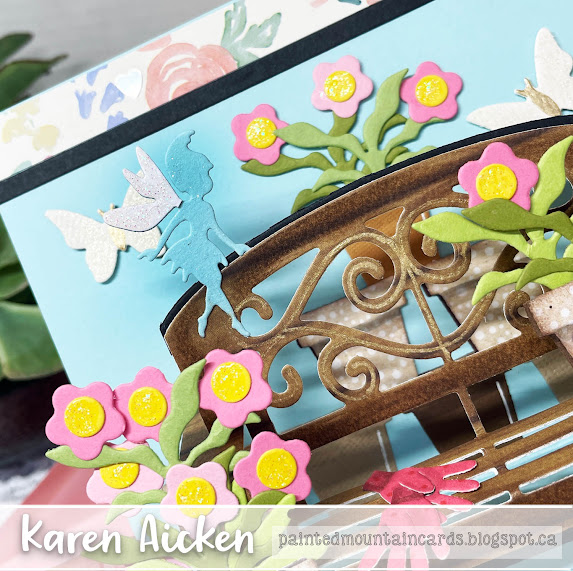
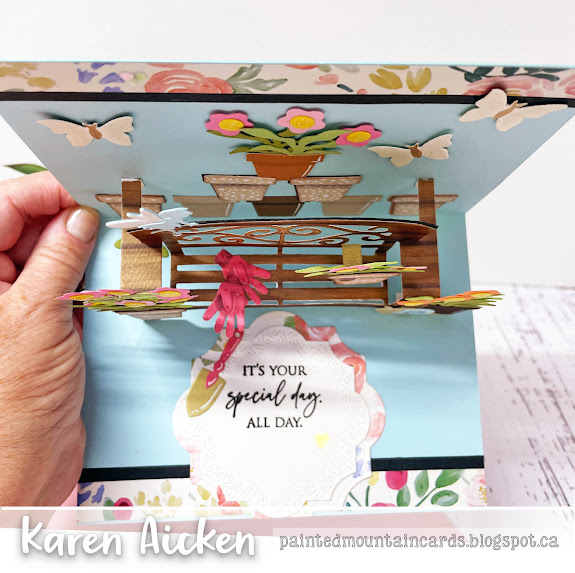
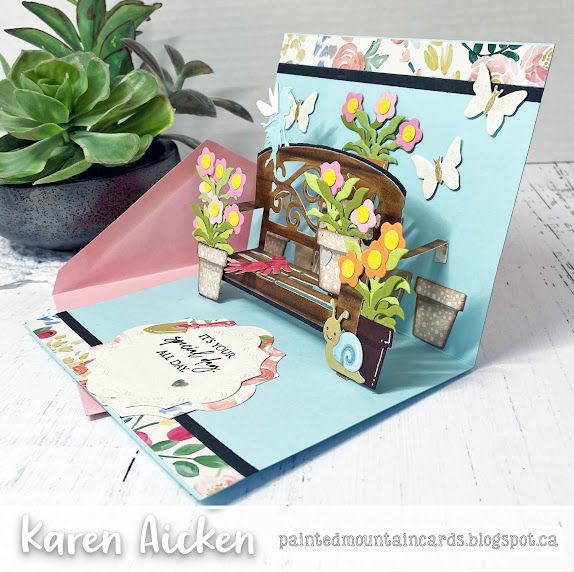
Hello my crafty friends. It's time for Karen Burniston's April Designer Challenge, where she challenged her Design Team to create a project with 'Flowers'. This time of year I'm craving 'green growing things' so I enjoyed creating a Pop Up card for our eldest daughter for Mother's Day. The front is nice and simple (but still sparkly!) because all the fun is on the inside ...


I did a walkthrough of my card on YouTube with all the details:   


The little fairy from the Garden Charms shows up better in real life than in the pictures so I added a close up shot below.


The Garden Bench Pop Up comes with little pop up dies that can be used to add pillows (the pillow die is included in the set) but I used one of them to pop up the little flower pot on the bench. I used mostly the Garden Charms and the Backyard Charms and you can see the stacked flower pots behind the bench. NOTE:  A few of the flower pots were die cut from recycled stamp packaging that I'd been saving. 

This card is larger than A2, it measures 6 x 4.5" but the Garden Bench can fit in a wide A2 card (5.5 x 4.25"). I just prefer to make something other than A2 sized cards after so many years of making them.


One more look ...


I have the rest of the Design Team linked on the right side of my blog, and I hope you will check out what they came up with for the challenge. Karen Burniston will have her post tomorrow (Wednesday) on her BLOG.

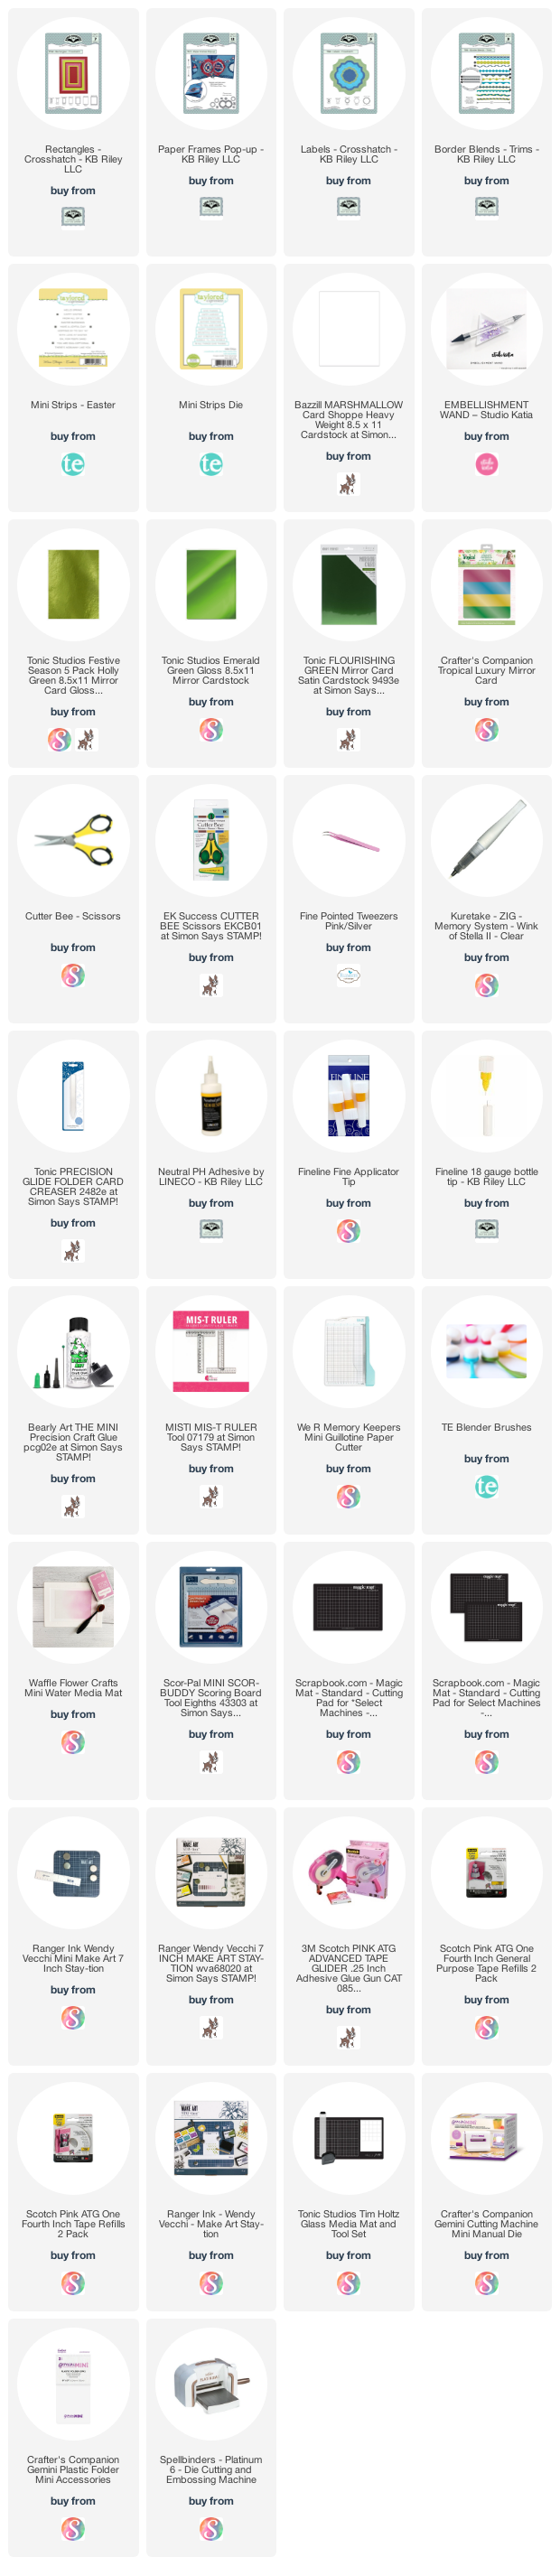
This blog uses affiliate links whenever possible. This means, that at no cost to you, if you make a purchase through one of my affiliate links that I may receive a small commission from your purchase. I only link products that I own, love and use for my card making!

Any supplies I'm unable to link are listed at the very bottom of my post.


Additional Supplies:
Various cardstock scraps
Patterned paper, stickers etc - Flower Market, Carta Bella (discontinued)
Blue cardstock - stash 
Alcohol markers - generic, from Amazon
Hero Arts stamp packaging (recycled)
White card stock - Accent Opaque Digital Super Smooth (Amazon .ca)

Monday, 4 April 2022

Pop Up Card for Passover


Hello my crafty friends. Today I'm sharing the card I made for our middle daughter and her family, who will be celebrating Passover. I have a walkthrough of this card on YouTube:  


Inside I used the Paper Frames Pop Up and Border Blends Trims. The stickers are 3-d, but I did pull them apart and replaced the foam tape with thin foam tape to cut down on the bulk. Even though I'm hand delivering the card, It was pretty chunky with all the foam tape.


This die creates such a dynamic looking card. It does take a little patience to do the folding, but remember that Karen Burniston has assembly videos for all of her pop up dies and you can always refer to those for help. The die gives you impressions for the fold lines and the packaging photo is a great reference as well.


 This card is an A2 sized, but a wide A2 - which I enjoy. Just a different look from the 'same old same old'.  Folded, the card is 5.5 x 4.25" and fits in a standard A2 envelope!.

NOTE:  I am linking a couple of different green mirror card stocks below for you. I keep most scraps and small pieces of specialty papers and just grabbed one of those for my card.

This blog uses affiliate links whenever possible. This means, that at no cost to you, if you make a purchase through one of my affiliate links that I may receive a small commission from your purchase. I only link products that I own, love and use for my card making!

Any supplies I'm unable to link are listed at the very bottom of my post.


Additional Supplies:
Patterned paper - Floral Clusters With Leaves, Hobby Lobby
Scrap of mint dot patterned paper - Hobby Lobby
Stickers - 3d Flower Clusters - Paper Studio (Hobby Lobby)
Fine Point markers - Chameleon
Tiny butterfly sticker - stash
White card stock - Accent Opaque Digital Super Smooth (Amazon .ca)

Saturday, 2 April 2022

April 2022 Sheetload of Cards


Hello my crafty friends. It's the 2nd of the month and that means it's time for a new Sheetload of Cards! I'm on the Sheetload YouTube Collaboration Team, so I have a walkthrough of my cards on YouTube:   


If you follow me, you might be surprised to see that I made something other than Birthday Cards. I absolutely LOVED this month's Sheetload, and took the opportunity to make a bunch of Easter Cards so I'll have enough to send to some friends as well as three of the Grandkids (the other two celebrate Passover). But ... when I was finished the Easter Cards, I decided to go ahead and make 'half a sheet load' and there are four birthday cards at the end of my post. 😊

Since I was using the printed Happy Easter & Happy Spring sentiments, the white sentiment panel looks a little blah. The patterned paper I added in that spot measures 2.75" x .75" and I was able to use up a bunch of small scraps from the 6 x 6" paper pad. It's several years old and there are lots of bits and pieces in there.

Inside, there are white panel with a stamped sentiment and that measures 4.25 x 3". It just gave the back of the card some stability by adding the panel. You know I don't like 'wussy' cards bases!


Now for the Birthday Cards, which will be donated to my Mom's old nursing home. I added some birthday ephemera from Echo Park and a stamped greeting.


The inside of all four cards are the same ...


This blog uses affiliate links whenever possible. This means, that at no cost to you, if you make a purchase through one of my affiliate links that I may receive a small commission from your purchase. I only link products that I own, love and use for my card making!

Any supplies I'm unable to link are listed at the very bottom of my post.


Additional Supplies:
DSP - Echo Park or Photo Play, old from my stash
Doily's Stampin' Up (likely retired)
Big Bold Easter - Taylored Expressions (retired)
Happy Easter To You - Impression Obsession
Joyful Easter - Impression Obsession
White card stock - Accent Opaque Digital Super Smooth (Amazon .ca)
Yellow cardstock