Monday, 14 February 2022

Three Mini Slimline Valentine Pop Up Cards


Hello my crafty friends.  Today I'm sharing three Mini Slimline cards that are also Pop Up's and I have a walkthrough of the cards on YouTube:  


I started with this Mini Slimline die (Heart Sunburst) and Doodlebug's Patterned Paper and embellishments 'Just a Note'. I've been having a lot of fun with those lately! Actually, I finished all three card fronts and when I was looking through the patterned papers I saw the one that had an entire 12 x 12" sheet of tags. That is what inspired the pop ups inside.


I decorated the insides with strips of patterned paper, and created simple box pop ups to add the tags to. The printed tags are 2 x 4", and they looked a little lost on their own. So I cut 1 x 4" strips from other patterned papers and adhered them offset behind the printed ones. I liked those much better. I also added some white gel pen highlights on the tags.
 

The second card has a strip of striped paper, and one of the larger embellishments on the included sticker sheet. 


The fun thing about sunburst dies, is that you can use the fallaway pieces as well. In the first card, I used the fallaway pieces from this music card to fill in the openings. For the music card, I used the pink fallaway pieces, alternating the colours for a different look. 
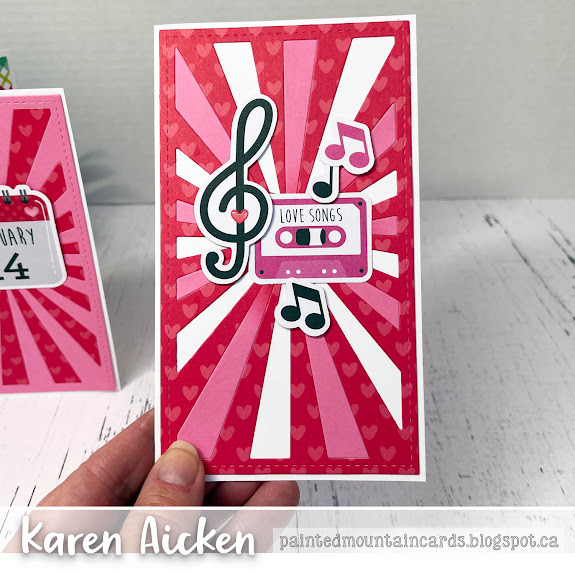


One more look ...


This blog uses affiliate links whenever possible. This means, that at no cost to you, if you make a purchase through one of my affiliate links that I may receive a small commission from your purchase. I only link products that I own, love and use for my card making!

Any supplies I'm unable to link are listed at the very bottom of my post.

Additional Supplies:
Pink card stock - stash
White card stock - Accent Opaque Digital Super Smooth (Amazon .ca)
Rainbow packing tape - old, but originally from Amazon .ca

Sunday, 13 February 2022

Slimline Bandaid Card


Hello my crafty friends! This Slimline card is one I made for a friend, sort of a private joke. 😂. I was excited when Whimsy Stamps released this Big Boo Boo Slimline die as I knew I would get a lot of use out of it. Apparently I wasn't alone, as it sold out right away.

After die cutting the bandaid from the same light peach card stock as the card base, I inked it up with a wide blending brush & Catherine Pooler dye ink then spritzed it with water. Dropping a cloth on top helps pick up the excess water and still leaves you with the same splotched look you get with Distress Oxide inks.

I added the word OUCH with Karen Burniston's alpha die and added white gel pen highlights. Then the whole piece was attached to a light peach Slimline card base. Finally, I added two more die cut bandaids because I just couldn't resist.

On the inside, I added alpha stickers to a Slimline die by Rubbernecker, and two of the Fun Faces from Your Next Stamp.  I have a number of alphabet sheets that have come included in sticker books and paper packs that I rarely use, so I'm hoping to change that and use some of them up.


This blog uses affiliate links whenever possible. This means, that at no cost to you, if you make a purchase through one of my affiliate links that I may receive a small commission from your purchase. I only link products that I own, love and use for my card making!

Any supplies I'm unable to link are listed at the very bottom of my post.


Additional Supplies:
Light peach care stock - stash
White card stock - Accent Opaque Digital Super Smooth (Amazon .ca)

Friday, 11 February 2022

Slimline Pop Up Anniversary Card


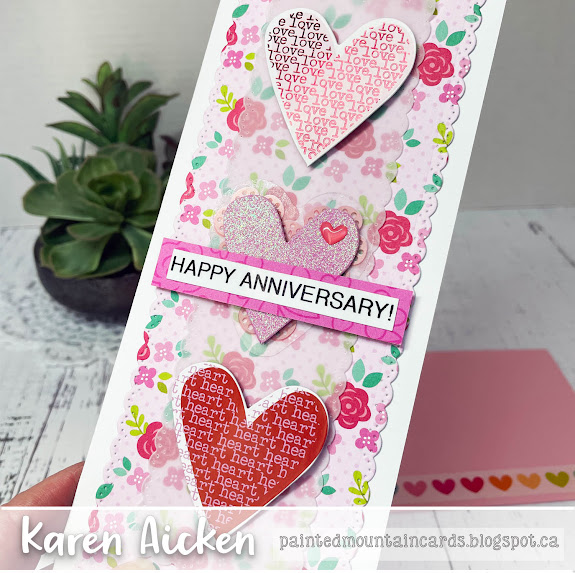
Hello my crafty friends and welcome to Fun Fold Friday here on my blog. Today I have a Slimline Anniversary card that is also a Pop Up! I have all the details in a YouTube video as well: 


The dimensional heart stickers came in a single package and I have had them in my stash for YEARS. Time to use them up and since all three fit on the front of a Slimline, and this is for a special occasion - I used all three of them for this card. I added a scalloped vellum rectangle behind the heart stickers to soften the bright patterned paper a bit.

The Happy Anniversary was created with a label maker and added to a scrap of patterned paper from the same package as the floral print and I added a Doodlebug heart too. 
There had actually been a gem on the heart but I peeled it off and replaced it with the resin heart as it's much flatter for mailing than the gem was.


Here is a peek at the inside. The Katherine Label Pop up animates a sweet scalloped heart, and I dangled one of the expanding hearts from the new Heart Collage Pop Up below the heart. {Those details are in the video.} I love the extra movement from this idea, yet it folds up completely flat for folding!


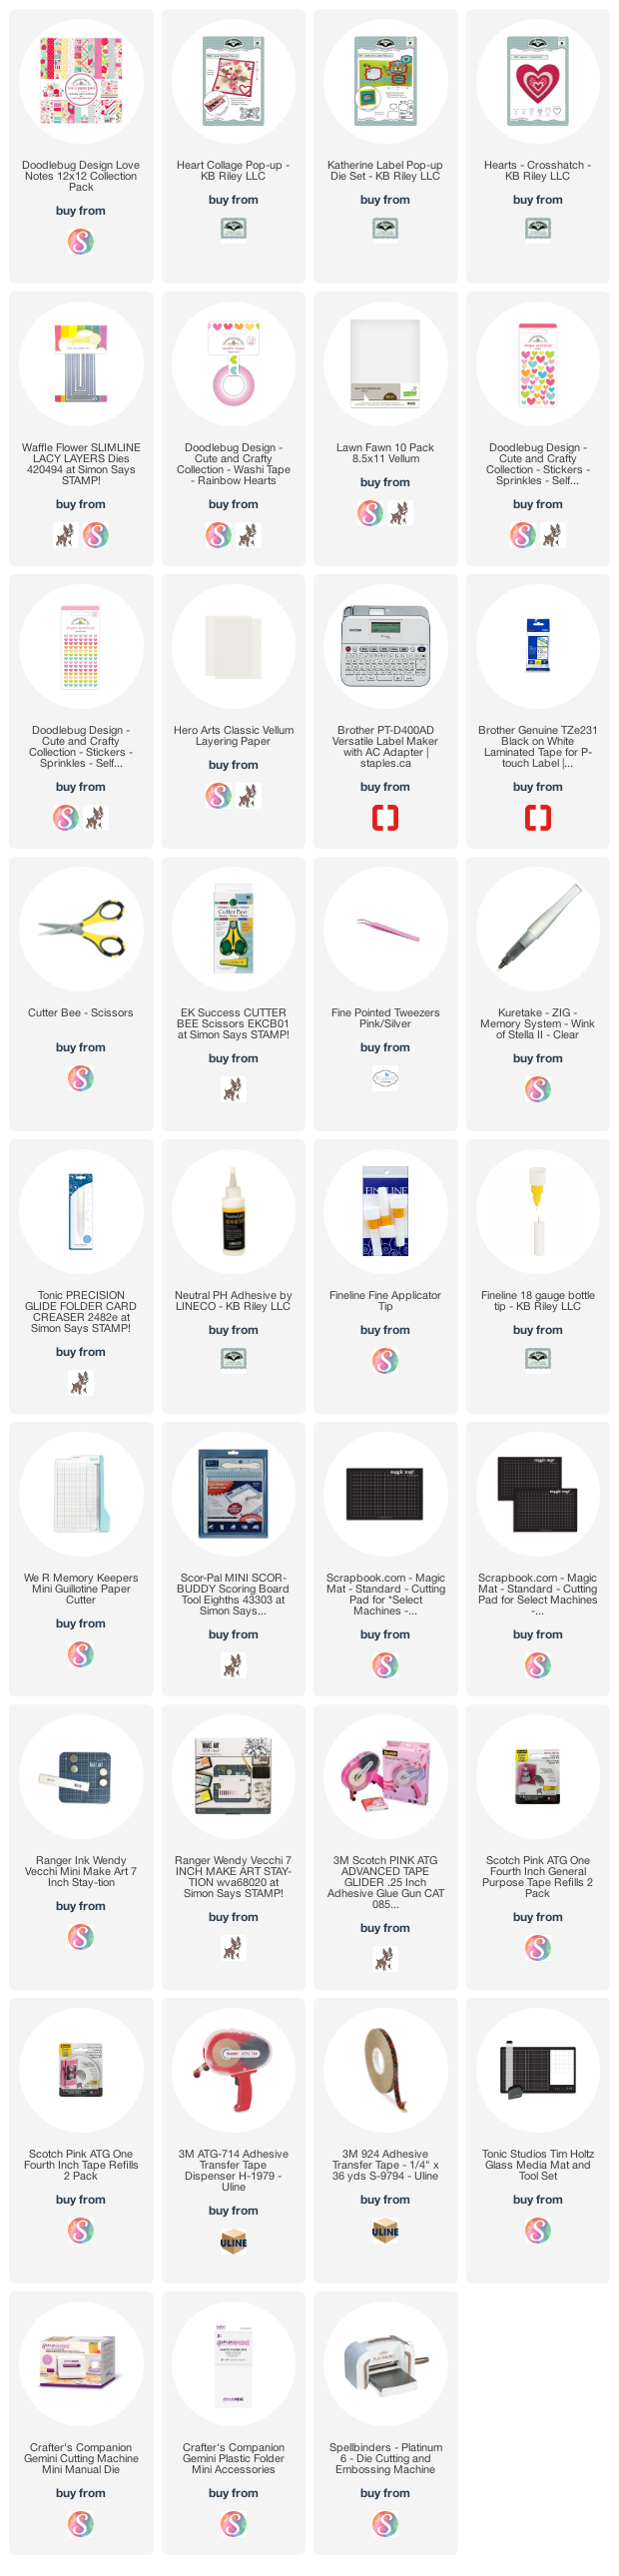
This blog uses affiliate links whenever possible. This means, that at no cost to you, if you make a purchase through one of my affiliate links that I may receive a small commission from your purchase. I only link products that I own, love and use for my card making!

Any supplies I'm unable to link are listed at the very bottom of my post.

Additional Supplies:
Heart Stickers - Me and My Big Ideas
White card stock - Accent Opaque Digital Super Smooth (Amazon .ca)

Thursday, 10 February 2022

Dangling Charms St. Patrick's Day Card


Hello my crafty friends!  Today I'm sharing a Slimline card I made with the latest release from Karen Burniston. The new Happy St. Patrick's Day die cuts as a single piece and there is a shadow included as well as two shamrocks you can cut from a coordinating card stock and add on top of the ones that cut with the Happy St. Patrick's Day words. I cut the shadow from gold mirror card stock - which looks great in real life, but is nearly impossible to photograph.

After trimming down one of the Slimline papers from Whimsy Stamps, I die cut two Labels Crosshatch from it. One near the top edge and one near the bottom. The Good luck charms were die cut and assembled, then dangled behind the openings. This panel was then attached to a white card base and I further decorated the openings with metallic stickers.


The charms dangle and move around when you tilt the card - just another fun way to use the charms.


Inside I added one of the fallaway labels onto a larger gold one and a white panel to add a sentiment greeting.


... one more look ...


This blog uses affiliate links whenever possible. This means, that at no cost to you, if you make a purchase through one of my affiliate links that I may receive a small commission from your purchase. I only link products that I own, love and use for my card making!

Any supplies I'm unable to link are listed at the very bottom of my post.


Additional Supplies:
Green Circle stickers - Dazzles (my stash)
Bakers Twine
Green card stock scraps - stash
White card stock - Accent Opaque Digital Super Smooth (Amazon .ca)

Wednesday, 9 February 2022

Rainbows & Hearts Happy Mail


Hello my crafty friends!  I am just SO happy with how this card turned out  - I love it when a card ends up looking like it did in your head. I have been using this rainbow packing tape for a couple of years. It does take care and patience (lots of patience) as well as a willingness to surrender to a few wrinkles or puckers as you add it to white card stock. It is packing tape, after all and stretches and buckles. 

Normally I add rows of it to a letter sized sheet of card stock, then cut it into various width strips to have on hand to add a pop of colour to my projects. For this card though, I backed the Scalloped Heart background die from Studio Katia with a slightly smaller whole piece ... not strips. 

Then, I made a little shaker using the Hearts Crosshatch by Karen Burniston, filling the shaker with cute filler from Kat Scrappiness.  Everything that is available is linked below for you.


Here is a peek at the inside, with a sentiment from Gina K - same set was used for the small sentiment on the card front. I added a single rainbow from the shaker filler, and two different width's of the packing tape strips I keep on hand.

Looking forward to sending this out for Happy Mail!

This blog uses affiliate links whenever possible. This means, that at no cost to you, if you make a purchase through one of my affiliate links that I may receive a small commission from your purchase. I only link products that I own, love and use for my card making!

Any supplies I'm unable to link are listed at the very bottom of my post.


Additional Supplies:
Rainbow packing tape - Amazon.ca 
White card stock - Accent Opaque Digital Super Smooth (Amazon .ca)

Monday, 7 February 2022

Cool Cats Shaker Card


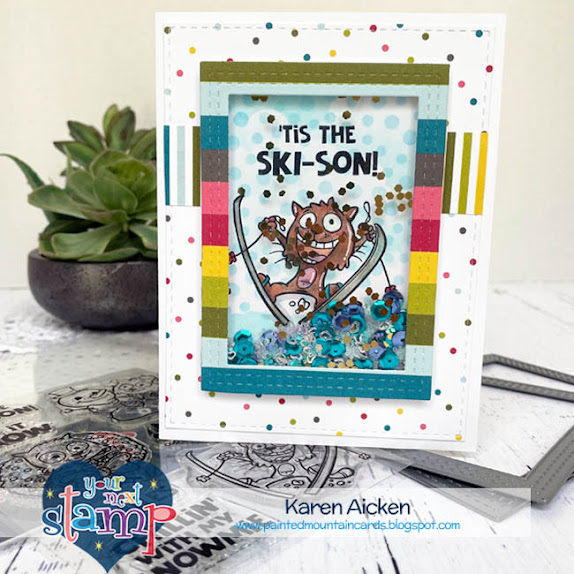
Hello my crafty friends!  Your Next Stamp is putting the spotlight on this adorable stamp set "Cool Winter Cats' ... and I just had to make a colourful shaker with it. The background was stencilled with both puffy clouds and 'snowballs' using YNS stencils. After stamping I coloured the skiing cat with Chameleon coloured pencils.


I haven't added a sentiment to the inside yet - just a strip of patterned paper and another skiing cat image ... that way this could also be a winter Birthday Card when I go to send it. Or I will save it until next Christmas. Nothing like being ahead of the game! 😊 Whoever I send it too, I expect they will enjoy shaking the snowy filler around.

This blog uses affiliate links whenever possible. This means, that at no cost to you, if you make a purchase through one of my affiliate links that I may receive a small commission from your purchase. I only link products that I own, love and use for my card making!

Any supplies I'm unable to link are listed at the very bottom of my post.


Additional Supplies:
Various shaker filler - stash
Chameleon Coloured Pencils 
White card stock - Accent Opaque Digital Super Smooth (Amazon .ca)

Tweet Valentine Wishes Mini Slimline


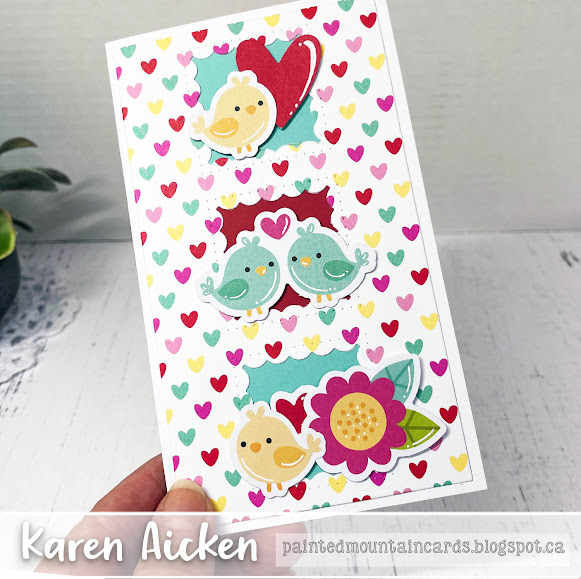
Hello my crafty friends!  Today I'm sharing a 'tweet' Mini Slimline Valentine card that uses papers and elements from Doodlebug Design. I have really been enjoying this 'Love Notes' collection! The Slimline die with the three windows is from Taylored Expressions and is one I use a fair bit. I love how easy it is to customize. 

Here I backed two of the windows with light teal card stock and the centre one with red - all of them scraps.  Then I just layered on the embellishments with thin foam tape to keep the bulk down. There are white gel pen highlights, and of course I went over the eyes with a black glaze pen for sparkle and shine.


I didn't add a sentiment to the front, so this card doesn't have to be for Valentine's Day. On the inside, the rainbow heart and strip were leftover packing tape pieces from another card I made last month. So in addition to using up scraps, I was able to use up those leftover bits too. Yeah!

Finally one of the sweet resin hearts which I am also enjoying and this card was finished.

If I don't send it out for Valentine's, I can hang onto it and be ahead for next year and add a sentiment to the front at that point. Or I can send it out in February for Happy Mail!  I added a white panel inside for stability, cut with a Mini Slimline die set from Kat Scrappiness (linked below) - and you can see the nice embossed edge you get. 


This blog uses affiliate links whenever possible. This means, that at no cost to you, if you make a purchase through one of my affiliate links that I may receive a small commission from your purchase. I only link products that I own, love and use for my card making!

Any supplies I'm unable to link are listed at the very bottom of my post.


Additional Supplies:
White card stock - Accent Opaque Digital Super Smooth (Amazon .ca)

Sunday, 6 February 2022

Slimline Love You & Roses


Hello my crafty friends! I have had this patterned paper for awhile and was inspired to create this Slimline card for Valentine's Day. The red polka dot is the reverse side of the blooms, and I added the pretty flowers from the April Blessings Box at Divinity Designs. I added White Peel-Off Border Stickers but the shine they give don't show up in the photos. The word dies are from Karen Burniston. 

The mirrored hearts also give the card lots of sparkle!


Here is a peek at the inside, with matted layers and another one of the pretty roses. I haven't added a sentiment or greeting inside yet, but will when I go to send the card. There is a chance I won't need this until next year so I wanted to wait before adding a sentiment.


This blog uses affiliate links whenever possible. This means, that at no cost to you, if you make a purchase through one of my affiliate links that I may receive a small commission from your purchase. I only link products that I own, love and use for my card making!

Any supplies I'm unable to link are listed at the very bottom of my post.


Additional Supplies:
White card stock - Accent Opaque Digital Super Smooth (Amazon .ca)
Peel off border sticker - Stamp On It

Friday, 4 February 2022

Scrap'N Stamp Tracey Hey Inspiration Hop


Hello my crafty friends!  I'm excited to a part of this Inspiration Hop put on by Scrap'n Stamp, celebrating a new line  - Tracey Hey - available in the shop. I created two projects for the Hop, a Fold Flap Slimline and a Shutter Card and I have all the details on YouTube


First up is the Fold Flap Slimline - I went over all the measurements in the video - and this adorable Be A Warrior stamp set. 


The Lion was stamped on Bristol Smooth cardstock, and I did the colouring with Zig Clean Color markers and a water brush. The eyes and nose are shiny because of a black glaze pen and there are white gel pen highlights. After fussy cutting the lion out, I added it to a stencilled oval then to the card front along with a stamped sentiment strip. It's hard to see in the photos but the lion also got a spritz with shimmer spray.

Here is a peek at the inside - were I used the remaining sentiments on the stamp set onto an inked oval. 


My second card uses the Lawn Fawn Shutter Card and Shutter Card Add On set - also available at Scrap'n Stamp.  I am loving this die set - and for today's card I didn't use any patterned paper (gasp!) but instead went with mirror card stock for lots of shimmer and shine.


You slide off the belly band, which is decorated with the seahorse from the Sea You Later stamp set. The sequins were added to resemble bubbles. 


Below is what the card looks like in the open position, with two more images from the stamp set and the sentiment is revealed as the shutters pull back. These images were coloured the same as the lion, on Bristol Smooth cardstock with Zig Clean Color Markers and a Water Brush. I added some Wink of Stella too.


Since there wasn't room to add a signing block on the inside, I added a decorative panel on the back with more images from the Seas The Day stamp set and some ink blending.


Here is the list for the Inspiration Hop! Hop along, be inspired and have fun! There is also a chance to win a Tracey Hey stamp set at each stop along the hop.  Make sure to leave us some way to get in touch with you if your name is chosen from the comments!

Karen  (you are here!)


This blog uses affiliate links whenever possible. This means, that at no cost to you, if you make a purchase through one of my affiliate links that I may receive a small commission from your purchase. I only link products that I own, love and use for my card making!

Any supplies I'm unable to link are listed at the very bottom of my post.


Additional Supplies:
Shimmer Spray
Apple Green Card Stock

Thursday, 3 February 2022

Heart Window Mini Slimline Card


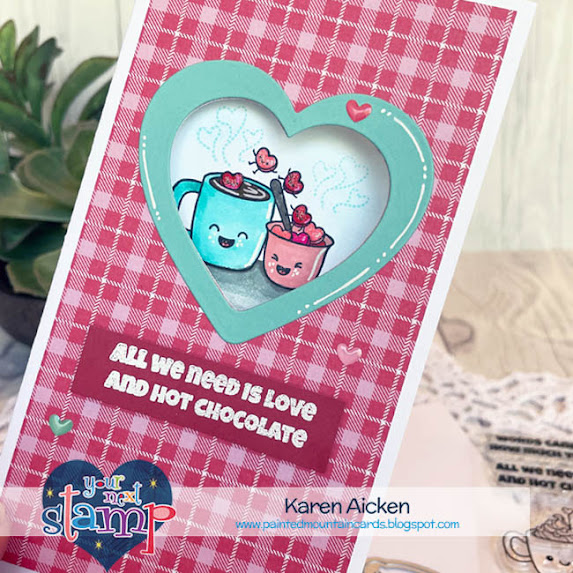
It's time for another Fun Friday Challenge at Your Next Stamp and this time the challenge is "Plaid - Use plaid on your creation."  Since there are some fun new goodies in the Your Next Stamp store, I used the Hot Cocoa Cutie stamp set and created a Mini Slimline card with a window.

After adhering the panel of plaid patterned paper to my white card base, I cut a window using the 2nd largest heart in the Stripe-Tastic Heart Die set. I saved the fallaway hearts for another project. Then I die cut the same heart centred inside the largest die to create the aqua cardstock frame and adhered that around the heart shaped window.

The sentiment was heat embossed onto a scrap of red card stock and adhered with thin foam tape.


Below is what the card looks like inside ...


Our challenges always come with 2 ways to win:

#1 – Would you like the chance to win a YNS stamp set? Leave a comment on the Your Next Stamp Blog by February 9th, 2022 at midnight EST to be entered in the random drawing. Want more entries in the drawing? Leave comments on YNS’ IG and FB pages too!

#2 – Would you like the chance to win a YNS store e-gift card? Play along with the challenge! Link up your creation on the YNS BLOG by February 17th, 2022 at midnight EST to be entered in the random drawing to win a $15.00 YNS gift certificate. If your creation contains YNS products and you are the random winner then you receive an extra $5.00. 

This blog uses affiliate links whenever possible. This means, that at no cost to you, if you make a purchase through one of my affiliate links that I may receive a small commission from your purchase. I only link products that I own, love and use for my card making!

Any supplies I'm unable to link are listed at the very bottom of my post.

Additional Supplies:
Plaid patterned paper - unknown (old, 6x6" pad with no cover sheet)
Red card stock scrap - stash
White card stock - Accent Opaque Digital Super Smooth (Amazon .ca)