Wednesday, 23 December 2020

Woodland Pop Up Christmas Card Duo


Hello crafty friends ...

Today I'm sharing a pair of Pop Up Christmas cards that feature both new and older items from my stash.,

I have a walkthrough of my cards on YouTube HERE.

I had just received my (first!) online order from Michaels, which included these adorable chipboard stickers. Sitting on my stamping table were the two pop up inner cards and since the new embellishments worked perfectly, I decided to finish off both cards.

The first card has a stitched snowflake, a gold foil JOY, snowflake and border strip as well as these cute work boots.


The inner card was die cut from this pretty birch tree patterned paper. There were two of them in my 'in progress' bin that had been die cut many years ago using Karen Burniston's Pop 'n Cut die system.


I added a little more gold, two more of the chipboard stickers and a stitched rectangle for a signing block.


The second card uses another one of those chipboard elements on the front - this time a dog dressed up for the holidays.


I added the dog to an embossed scalloped panel, then also added some snowflakes and a different JOY cut from gold foil card stock. I have loved using those little snowflake embellishments this year, and added one to the dogs ear as well as the snowflake panel.


Inside is the second die cut inner card from the same patterned paper as the card above.


I loved getting these pop ups into cards and using up some older items from my stash. I also loved getting those pretty new embellishments and am proud of myself for cracking into the package and USING some right away instead of hoarding them because 'they are new and too nice to just use up'. Ha.

Supplies:
Card #1
Pop up inner card already cut and in my 'in progress bin'
Birch tree patterned paper - unknown
Various card stocks
Patterned paper - Winter Wonderland, Recollections (old)
Deer etc chipboard stickers - Recollections
Pop 'n Cut Wavy Label (BigZ extended) - Karen Burniston
Gold foil card stock - Stampin' Up
Stitched Snowflake dies - Lawn Fawn
Stitched Sentiment Strip - Kat Scrappiness
Gold Fever Confetti - Studio Katia
Woodgrain Patterned paper - Necessities -  Wood, My Minds Eye
Joy die - unknown - possibly MFT Stamps
Stickles
Card size:  4-1/2 x 6" (trimmed 6" length down a little)

Card #2
Pop up inner card already cut and in my 'in progress bin'
Birch tree patterned paper - unknown
Card Stocks - stash
Patterned paper - Winter Wonderland, Recollections (old)
Chipboard stickers - Recollections
Pop 'n Cut Wavy Label Insert (BigZ Extended) - Karen Burniston
Gold foil card stock - Stampin' Up
Woodgrain Patterned paper - Necessities - Wood, My Minds Eye
Stickles
Stitched Mini Scalloped Rectangle Dies - MFT Stamps
Snowflake embossing folder - Stampin' Up. ?????
Shimmer Spray
Snowflakes - stash
Joy die - Taylored Expressions
Snowflake embossing folder - Stampin' Up
Mini MISTI - My Sweet Petunia
Sentiment - Traditional Sentiments, Kaisercraft
Tasteful Label Dies - Stampin' Up
Card size - A2 (4.25 x 5.5")

Thanks for stopping by today

Tuesday, 22 December 2020

Deer and Wreath Slimline Holiday Card


Hello crafty friends ...

Today I'm sharing another Christmas Slimline card and this one uses some sweet chipboard elements I recently ordered from Michaels. It's been over a year since I've been in a Michaels and I was getting antsy for some new crafty goodies. Our COVID numbers were going up and up though, so I didn't want to go into a store (I'm immune compromised) and put myself at risk just for something I wanted but certainly didn't NEED. So I tried their on-line ordering (which is fairly new to Canada) and opted for shipping rather than curbside pick up. I didn't order very much but these chipboard beauties were in there and I couldn't wait to play with them.


This card is also a sneak peek of my New Years Resolution ... which is to use my embossing folders more. I love the look but never think to use them. I hope to change that for 2021.


Inside is a stamped greeting and a couple of candy cane elements that were snipped from a 12" border strip.


Supplies:
Chipboard stickers - Recollections
Double Pierced Hills - Your Next Stamp
Card stocks - stash
Snowflake embossing folder - Elizabeth Craft Designs
Subtle embossing folder - Stampin' Up
Shimmer Spray.  :-)
Stickles
Silver cord
Simple Strips Christmas - Taylored Expressions
Simple Strips Die - Taylored Expressions
Snowflake embossing folder - Stampin' Up
Candy Cane embellishment, cut from a K & Co border sticker
Mini MISTI - My Sweet Petunia
Words inside - Traditional Sentiments, Kaisercraft
Card size - 3.5 x 8.5", fits in a #9 or #10 Business Envelope.

Thanks for stopping by today

Monday, 21 December 2020

Slimline Card with Reindeer and Trees

Hello crafty friends ...

When I was flipping through this 12 x 12" paper pad for something else, I saw this sheet with the lovely deer & tree border print on it and knew it would work great for a Slimline card. Since I only used the bottom portion of the sheet - the part with the border on it - I could use the remaining green holly pattern inside the card.  I have a walkthrough of my card on YouTube HERE.  

I die cut the border from the rest of the paper using a nested die set by Kat Scrappiness, then I spread some Wink of Stella onto the trees and floral wreath around the deer necks. For some additional sparkle, I added a few of those tiny iridescent snowflakes.


Inside I made a Pop Up and added both die cut trees and deer.


I have a video tutorial showing how to make a simple box pop up HERE.

Today is the 21st of December ... the shortest day of the year. I love this day, because from here until June the days start getting longer again. Yeah!!!

Supplies:
Card stock - various, stash
Patterned paper - K & Company (old, from my stash)
Wink of Stella
Snowflake embellishments - Stampin' Up
Border Stickers - K & COmpany
Banners Pick A Punch - Stampin' Up
Embossed Edge Nesting Slimline Dies - Kat Scrappiness
Words - Hero Arts (old)
Gold and white pearl card stocks
Leaping deer die - Elizabeth Craft Designs
Mini MISTI - My Sweet Petunia
Sentiment on front - Snowglobe Sentiments, MFT Stamps
Trees - Peaceful Pines, Stampin' Up (retired)
Small deer die - In The Meadow, Paper Trey Ink
Card size:  8.5 x 3.5", fits in a #9 or #10 Business Envelope

Thanks for stopping by today

Sunday, 20 December 2020

Skating Dog Holiday Card


Hello crafty friends ...

I had SO much fun making this card! There is just something about rainbow colours that is appealing to me these days and I have to say I will be using them a LOT in the New Year. The background die on this card is called Skating Pond by Hello Bluebird and this was first time using it and of course I had to pair it with this fun skating dog image from Your Next Stamp! The happy skater is adhered with a mini Action Wobble so he bobs and wobbles around on the card front which is always fun.


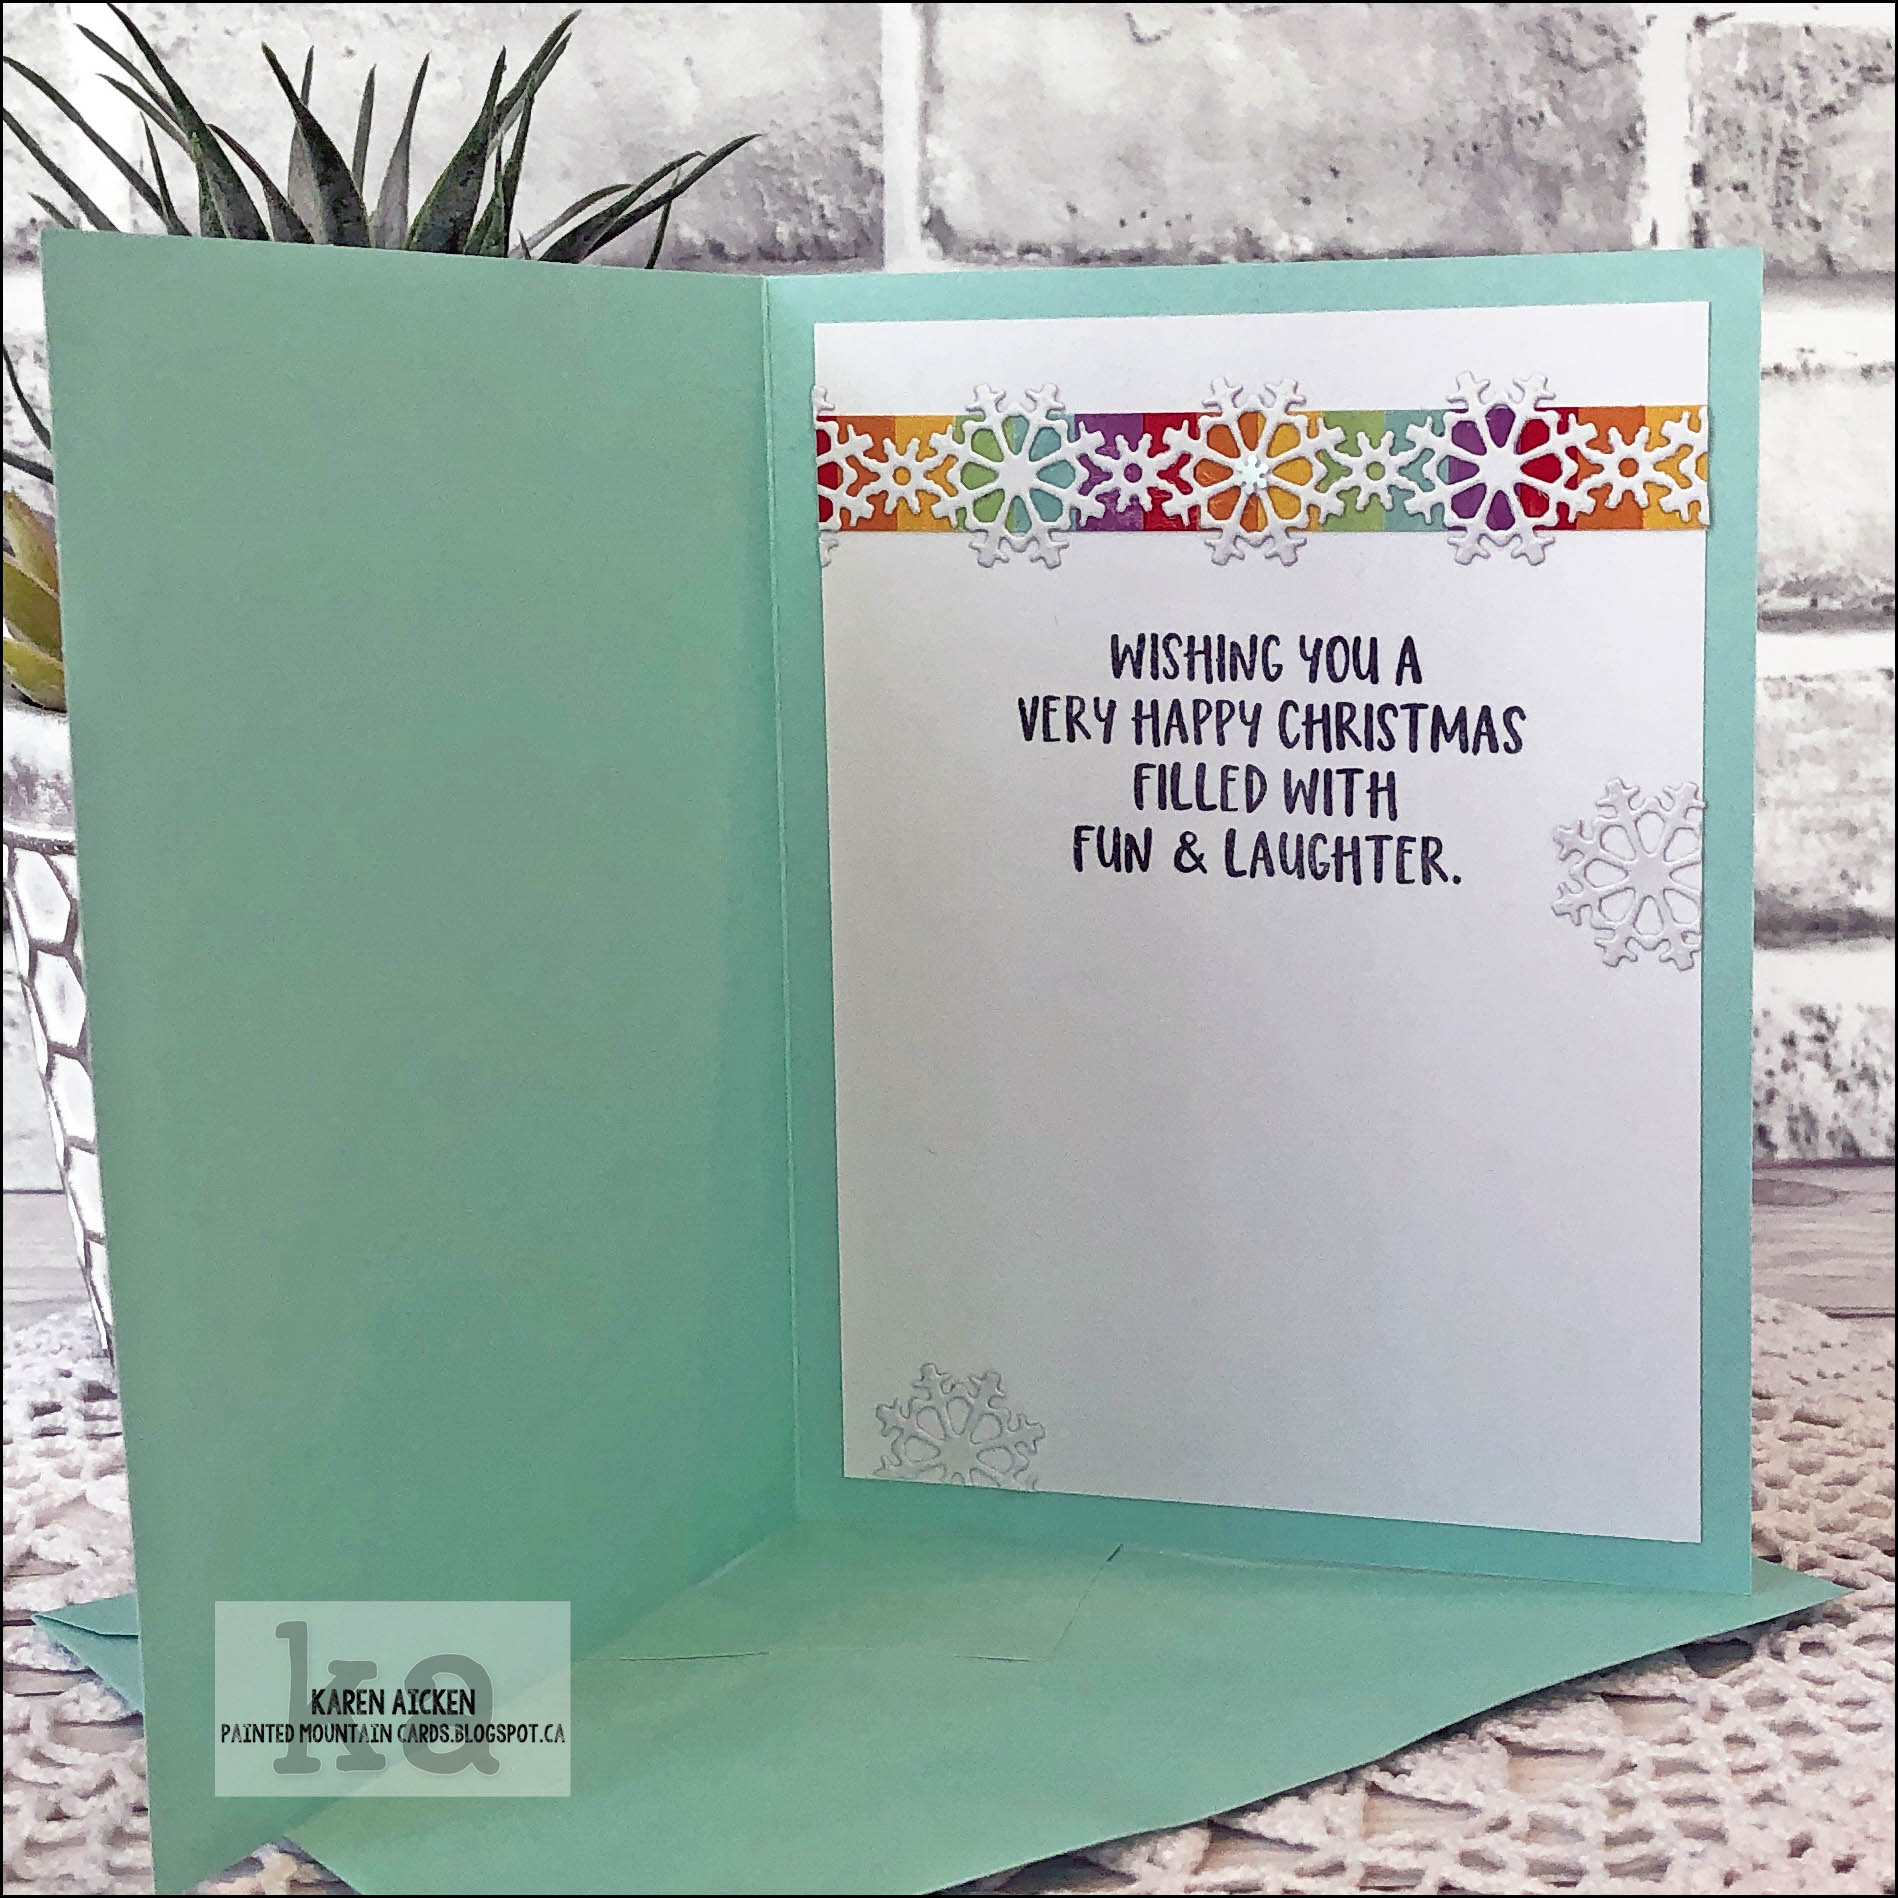
Here is a peek at the inside - and I used another rainbow strip and this lovely Snowflake Border die from YNS. The snowflakes on the front and the extra ones on the inside were cut from the Snowflake Border as I had die cut two of them.


Yep - rainbows just make me happy!


This is a larger than A2 sized card but you can see that the A2 sized Skating Pond Background die can still work perfectly!


Supplies:
Skating Pond Scene - Hello Bluebird
White card stock
Taylored Expressions Blending Brushes
Shimmer Spray
Paw-liday Pups - Your Next Stamp
Paw-liday Pups Die Set - Your Next Stamp
Mini MISTI - My Sweet Petunia
Black Olive Ink - Your Next Stamp
Subtles Embossing Folder - Stampin' Up
Ohuhu Markers
Sakura white gel and black glaze pen
Snowflake Border Die - Your Next Stamp
White pearl card stock
Rainbow packing tape - Factory
Mini Action Wobble
Snowflake embellishments - Stampin' Up
Aqua Card and Envelope - Michaels
Words - October 2020 Paper Pumpkin, Stampin' Up
Card size - 5 x 6.5", fits in the included envelope

Thanks for stopping by today

Saturday, 19 December 2020

Vintage Slimline Christmas Card Trio


Hello crafty friends ...

Recently I made a pair of Slimline Christmas cards that used some larger embellishments from my stash that I'd had for years. They were too big to fit on an A2 card and were probably meant to work on a 12 x 12" scrapbook page. Well they work perfectly on Slimline cards, so I pulled out three more from my stash and made this trio of Slimline cards for the holidays.

First up is this Santa image ... I added him to a gold pearl panel that was matted with white and tucked the stamped greeting under one of his boots.


Here is a peek at the inside of the Santa card, with some border stickers and more of the gold pearl card stock as well as a stamped sentiment.


For the second card, I added the snowman to a snowy patterned paper panel and added the greeting just under the pom pom on his hat. All three of the 3-d embellishments were adhered with thin foam tape, and I added some Stickles to all three as well.


The sparkly candy canes were cut form another 12" border sticker from my stash.


Here is the inside of the Snowman Christmas card, and the Christmas Tree card below was done exactly the same.


Finally, we have this pretty old fashioned Christmas tree. I used the same patterned paper as on the snowman above, matting it on a different paper from the paper pad. Both the Snowman and the Christmas tree cards also got some of those iridescent snowflakes from Stampin' Up added to the front. The cards are nice and sparkly, but of course that is very hard to photograph.


I even found some winter themed business envelopes in with my holiday stash so they are perfect for these Slimline cards!

Supplies:
Card stocks - various, stash
Red and gold pearl card stocks
Crumpled tissue - stash, done many years ago
Large ephemera - K & Company
Wink of Stella
Mini MISTI - My Sweet Petunia
Season Greetings - Scenic Season, Stampin' Up (retired)
Words inside - More Merry Messages, Stampin' Up (retired)
Border Stickers - K & Company (stash)
Subtle embossing folder - Stampin' Up
Patterned paper - K & Company (old, from my stash)
Snowflake embellishments - Stampin' Up
Banners Pick A Punch - Stampin' Up
Embossed Edge Nesting Slimline dies - Kat Scrappiness
Holiday Stamp - Hero Arts??
Stickles
Card sizes - all, 3.5 x 8.5", fits in a #10 Business Envelope

Thanks for stopping by today

Friday, 18 December 2020

Poinsettia Trio Slimline Card


Hello crafty friends ...

I was so happy with how this card turned out! I bought this stamp & coordinating die set from Stampin' Up - was it last year? The year before? At any rate, I know I loved it when I bought it but I didn't get nearly enough playtime with it before the holidays were over. On a whim I wanted to see if the pretty poinsettia die would work on a Slimline card and was thrilled with how well it would work. I immediately had to make a card with the dies!


The dies in this bundle are very creative, and the poinsettia ones come with two parts that you can use independently or together. One of the dies cuts the poinsettia into the card stock - which you can see I did for the top and bottom blooms on the red panel. The white card stock underneath shows through the petal openings. The other die is an outline die and lines up around the edges of the poinsettia. So for the middle bloom, I first cut the poinsettia into a piece of scrap white card stock, then ran it through again with the outline die. That gave me the pretty outline poinsettia which I adhered in the centre of the red panel. Those details are much more impressive in real life!

It's hard to see in the photos, but I also gave this card a blast with my shimmer spray - but kept the shimmer from the bottom left of that middle bloom up to the top right. Then I added a couple of white gel pen dots and pretty confetti for more holiday sparkle. The greeting is one of the Taylored Expressions Simple Strips and it was popped up with foam tape.


Inside I added a stamped greeting and holly from the coordinated stamp set, matting the white layer on some plaid paper in holiday colours.


Dies are such an investment and I like to purchase ones that are timeless or can be used for multiple themes etc. This set falls into the first category and is one that will work for Christmas cards for many, many years. It's so easy to change up the look just by changing the number of poinsettias you include on a card, how you layer them, how you cut them and the colour/pattern you choose to work with. Yep - this card just makes me happy and I loved getting this set out again.

Supplies:
Various card stocks - stash
Peaceful Poinsettia Bundle - Stampin' Up (retired)
Simple Strips Christmas - Taylored Expressions
Simple Strips Die - Taylored Expressions
MISTI - My Sweet Petunia
Plaid patterned paper - Pinecone Lodge, Recollections
Water brush
Majestic Confetti - Studio Katia
Shimmer Spray
Sakura Gold Gel Pen
Card size: 3.5 x 8.5", fits in a #9 or #10 Business Envelope

Thanks for stopping by today

Thursday, 17 December 2020

Hot Chocolate Pouches

Hello crafty friends ...

I did something different this year for the grandkids! I have mentioned before that the Christmas Season starts for our family on December First. I usually give the Grandkids a holiday book and new PJ's on December First along with a hand made card. This year I gave them holiday MASKS instead of book, and made these cute Hot Chocolate Pockets instead of the cards. (Olivia and Ethan got a reindeer mask, Zachary, Ilai and Alma got Snowman Masks). 

I had been poking around  and found a video from Bourbon Creek Crafts, and she had made these hot chocolate pouches and once I saw that she used Business Envelopes for the pocket themselves I had to try it myself!! I have a walk through on YouTube for you as well.


I chose the patterned paper pad because it had papers that would work for both girls and boys, and had fun poking around my Christmas embellishment bin for random elements that would work to decorate the pouches.  


Each pouch contained a packet of hot chocolate, a candy cane for stirring, and a cello sleeve with 4 chocolate squares for a little somethin' somethin'. I make a lot of these chocolate sleeves over the holidays, and talk about them in my video.


It was fun to go stash diving to decorate these pouches/pockets and I got to use up a bunch of stickers etc as well as leftover labels and circles that were just sitting around.

Supplies:
Video from Bourbon Creek Crafts - HERE
#10 Business envelopes (sealed and cut in half, so you get two pouches from each envelope.
Patterned paper - Holiday Bash, Recollections.
3/4" circle punch - Stampin' Up
Chipboard Stickers - Santa Stops Here, Bella Blvd
Joy Banner - Cricut Cut (from stash, done many years ago)
Felt poinsettia sticker- stash
Labels and circles etc - from 'the stash'
Scraps of white pearl card stock
Sakura black glaze pen
Stickles
Hot chocolate packet
Candy cane
Mini Swiss Chocolates
2 x 10" Cello bag (trimmed down in length)
Snowflake embellishments - Stampin' Up
Washi Tape

Thanks for stopping by today

Tuesday, 15 December 2020

Vintage Sleigh Ride Christmas Card


Hello crafty friends ...

I'm sharing another holiday card today, created with some fun supplies from Your Next Stamp. With Christmas coming up, I thought you might like to see how you can make a Christmas card fairly quickly! This is also a good one for those that aren't keen on colouring.

I added red patterned paper to my card base, then die cut one of the Stitched Rectangle Frames from a sparkly brown patterned paper and set that aside. NOTE - these Stitched Rectangle Frames were featured in Jennifer McGuire's FAVOURITE DIES video in 2020!!!

I stamped the sweet image from Sleigh Ride onto cream card stock using a brown ink. I also stamped a sentiment from the set onto a strip of cream card stock and fishtailed one end. The edges of the sentiment strip were inked with the same brown ink.

I dabbed the same brown die ink onto my glass mat, picked up the colour with a water brush and quickly painted the area outside the sleigh image. Because the inks are dye based I took care not to use a lot of water and to keep the painting slightly away from the stamped line. See? Quick and easy! The cream panel was adhered behind the frame which was then popped up on the red card front with thin foam tape.

The sentiment panel was also adhered with thin foam tape and I added three red Gumdrops from The Perfect Blend Gumdrop package.


I kept the inside fairly simple, adding a stamped cream panel over a sparkly red patterned paper one. The image behind the sentiment is second generation stamping - the first image was stamped onto the envelope then without reinking I stamped it again over the words. This gave me a softer, lighter impression.


There is lots of dimension and sparkle to my card today yet it was quick and easy to create. Sometimes we need those quick cards this time of year!

Supplies:
Sleigh Ride - Your Next Stamp
Stitched Rectangle Frame Die Set - Your Next Stamp
The Perfect Blend Gumdrops - Your Next Stamp
Card stocks - various, stash
Patterned paper - I Believe, My Minds Eye
Banners Pick A Punch, Stampin' Up
Mini MISTI - My Sweet Petunia
Wink of Stella
Shimmer spray
Music patterned paper - Echo Park (OLD, from my stash)
Water brush
Card size - wide A2 (5.5 x 4.25")

Thanks for stopping by today

December Sheetload Birthday Cards (and a Holiday Gift Card Holder!!)


Hello crafty friends ...

Since I like to share mostly holiday projects in December I have added a Christmas Gift Card Holder below the Birthday Cards. I finished my December Sheetload of cards last week but didn't want to wait until the New Year to share them ... this month's Sheetload is another winner! I have a walk through of my cards on YouTube HERE

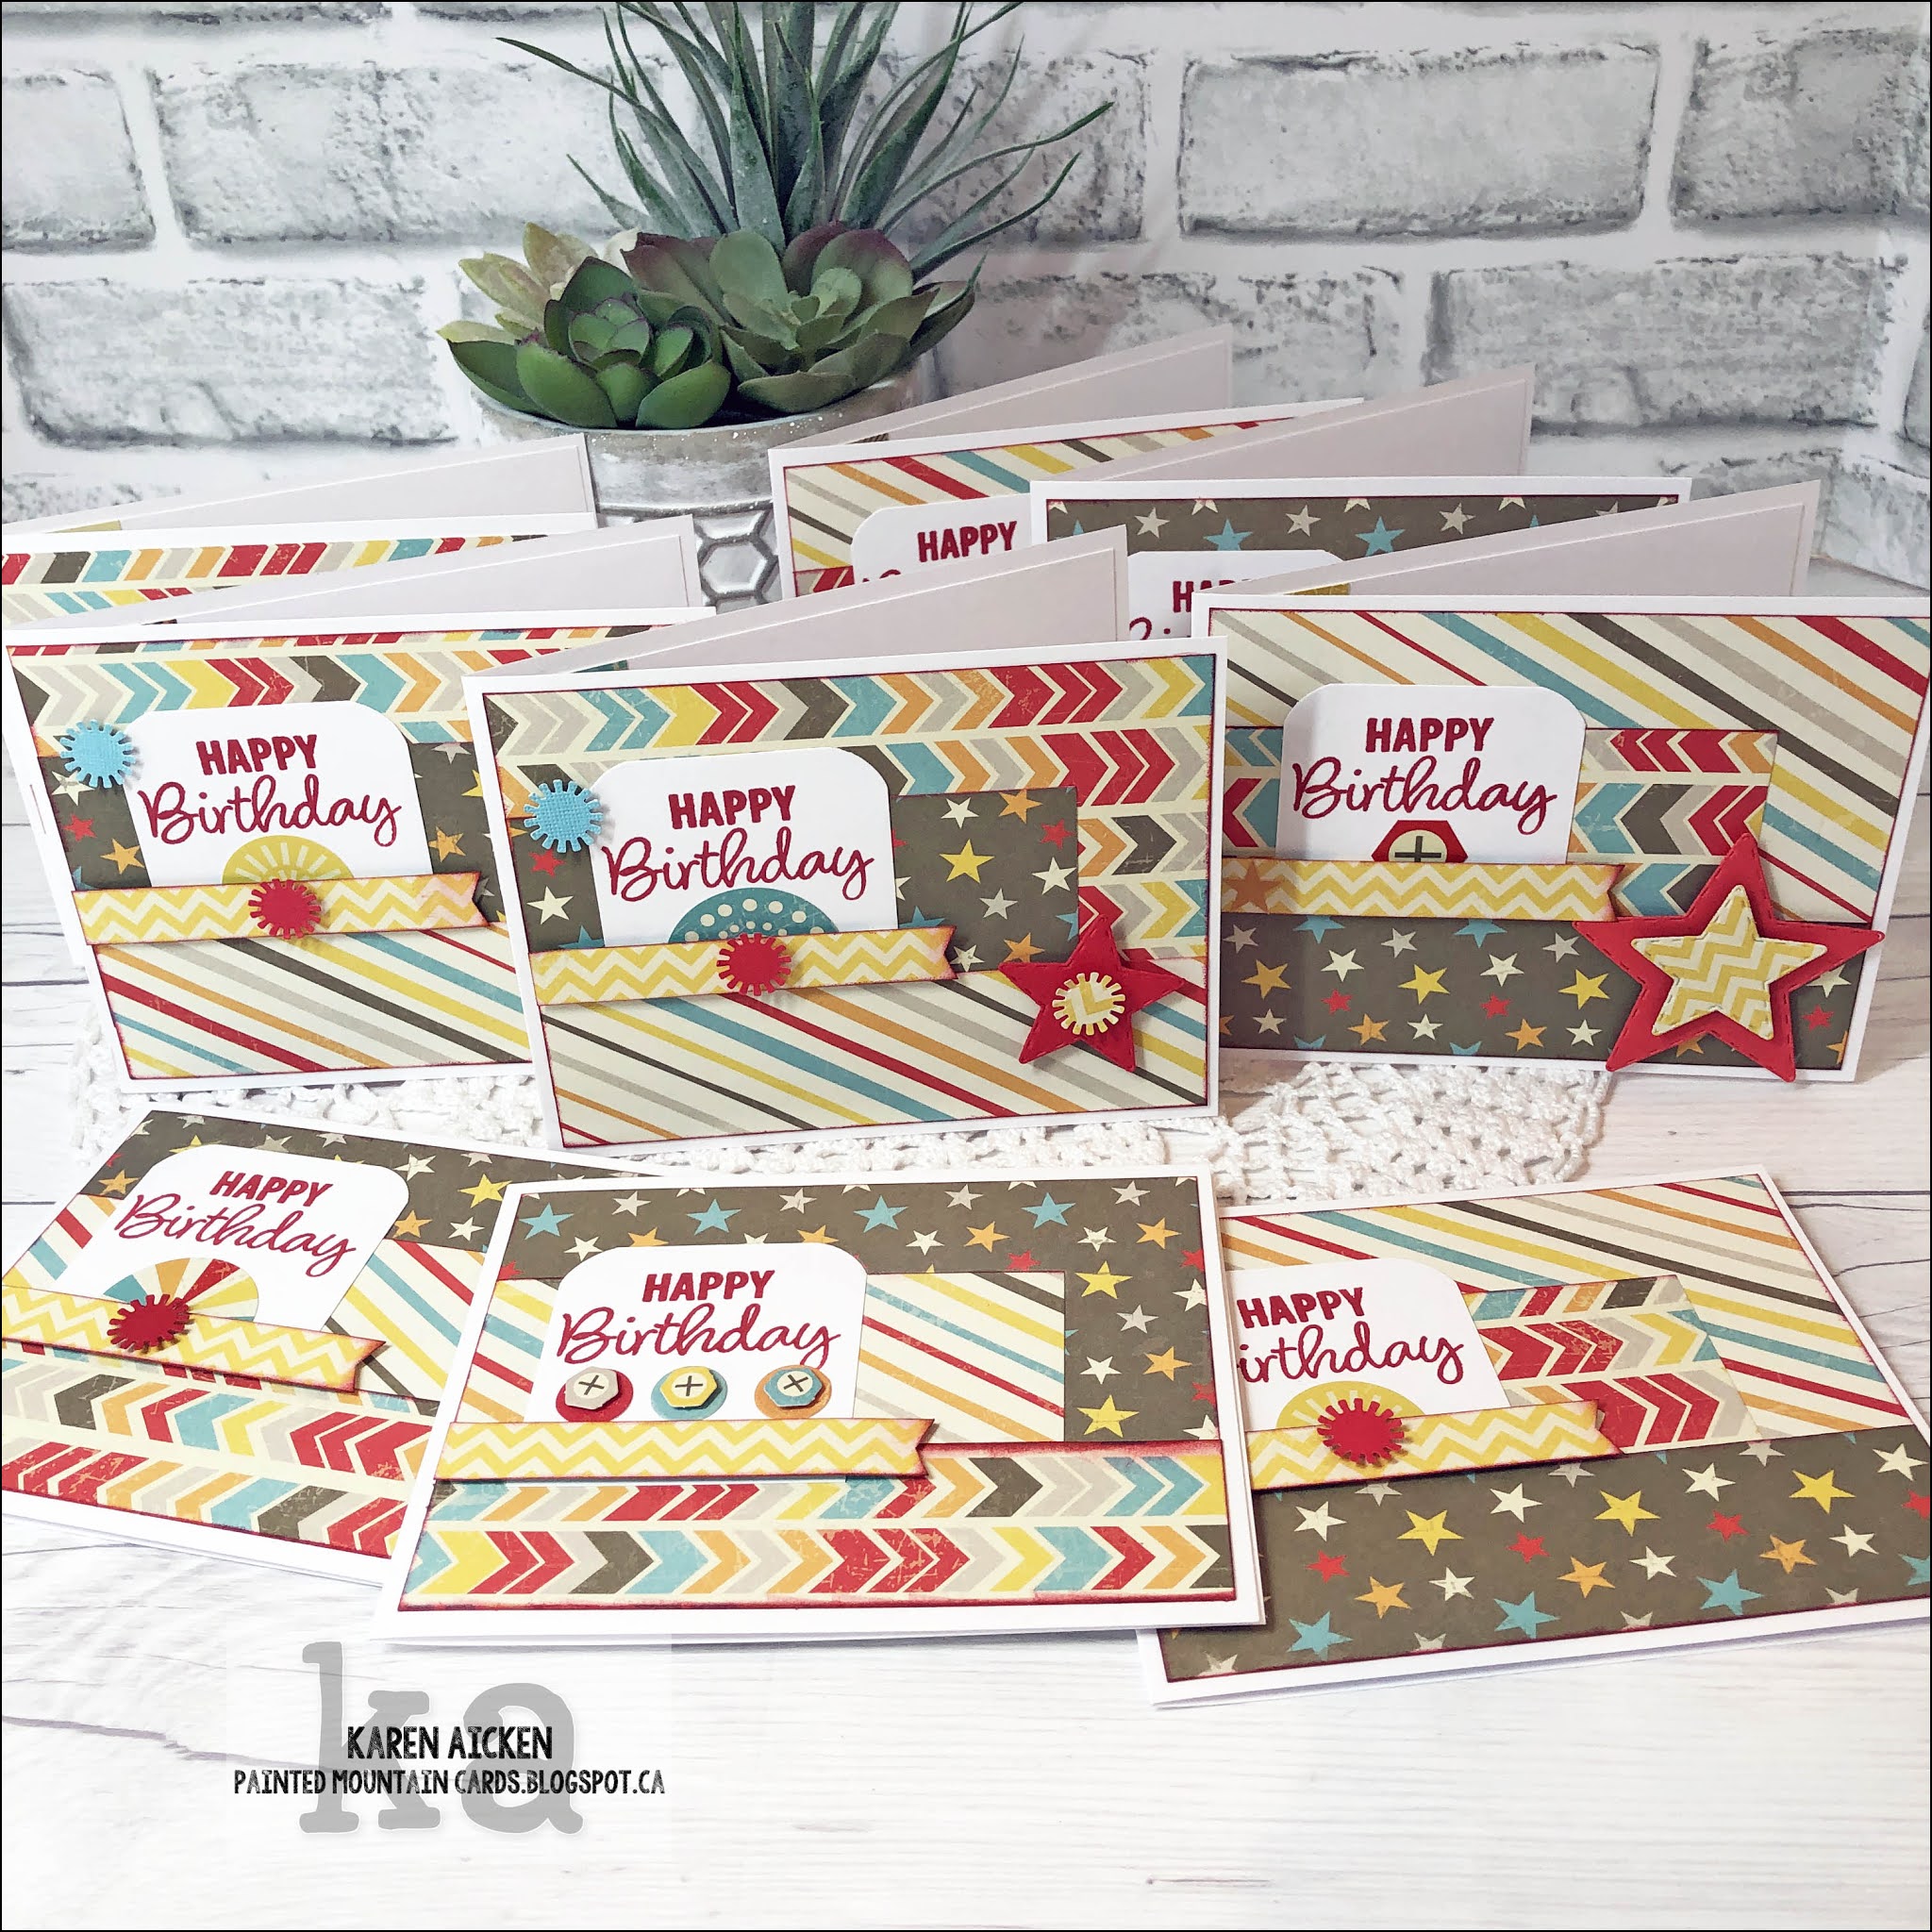
The first three Birthday Cards were done pretty close to the sketch, although I chose not to add a fish tail banner popped up on foam tape rather than the punched border tucked into the bottom panel.


I made all nine into Birthday Cards, as I donate 25 Birthday Cards a month to my Mom's old nursing home. Each month I like to include some feminine, some masculine and some generic and I think these ones are both masculine and somewhat generic. The next three cards got some punched sunbursts and die cut stars.


The final three have layered stars. I also included some of the stickers included in the paper package.


I used my MISTI for all the stamping, and all the interiors are done the same.


As I mentioned above, I have holiday projects to share in December so I'm also going to share a Gift Card Holder! This is an A2 sized mug shaped card by Trinity Stamps and there is a piece that cuts slots to insert a Gift Card holder as well. I used some sparkly patterned paper from my stash.


I made this one for my brother, who works shift work. He has to drive right by a McDonald's on the way out of his neighbourhood and often swings into the drive through for a coffee for his drive to work. 

The label on the left is where we wrote a message to him, and the snowflakes were in my stash. I don't know where they came from but they were likely Cricut cut many years ago.


I packaged this up in a clear cello envelope which just adds to the shimmer and shine.


Supplies:
Sheetload of Cards:
December 2020 Sheetload of Cards Video, Call me Crafty Al
Card stocks
Patterned paper and stickers - Boy Crazy, My Minds Eye
Banners Pick A Punch - Stampin' Up
Sentiment on front - Large Birthday, Technique Tuesday
Mini Misti - My Sweet Petunia
Stitched Star dies - the Stamps of Life
Starburst punch - unknown
Inside stamp - Super Duper - Stampin' Up (retired)

Card size (all) - Standard wide A2, 5.5 x 4.25"

Mug Shaped Gift Card Holder:
Coffee Mug Card die - Trinity Stamps
Patterned paper - I Believe, My Minds Eye
Tasteful Labels - Stampin' Up
Glitter card stock - Stampin' Up
Snowflake - stash - ECD???
Shimmer Spray
Small Snowflakes - Cricut?  Stash.
Stitched circle - MFT Stamps
Card Size - ~Standard A2 and fits in an A2 envelope.

Thanks for stopping by today

Monday, 14 December 2020

Penguin Duo Christmas Slimline Card

Hello crafty friends ...

Today I'm sharing a Christmas Slimline card that is actually a remake of a pop up card I made for my Mom. She saved a lot of the cards I'd made for her, which means a lot ... and this was on one of them. I have kept those cards long enough that now it's time to make a decision when I pull one out ... keep it (why??), toss it (yikes!), or see what can be re-used (ahhhh).

As the card had been a Katherine Label Pop Up, I pulled off the label and added it to this Slimline card. Those penguins are just too cute! (both the Katherine Label and the Penguins are die sets by Karen Burniston).


Inside the card I used a couple of different Slimline dies, a die cut heart and a stamped sentiment & tree.


It felt good to re-use this decorated Katherine Label piece, in fact there were two on the card and I have saved the other, simpler one to use on another card another time. I went through my blog posts and found the original card in case you would like to see it.  Click HERE!

Supplies:
Slimline Pull Tab dies - Heffy Doodle
1016 Winter Animals - Karen Burniston
1011 Katherine Label Pop Up (labels) - Karen Burniston
1151 Crosshatch Long Rectangles - Karen Burniston
1021 Sleigh Pop Up (wreath) - Karen Burniston
1151 Slim Frames (heart) - Karen Burniston
Various card stocks - stash
Wink of Stella
Banners Pick a Punch - Stampin' Up
Simple Strips Christmas - Taylored Expressions
Simple Strips die - Taylored Expressions
Stitched snowflake dies - Lawn Fawn
Sakura white gel pen
Words inside - Jar of Cheer, Stampin' Up (retired)
Stickles
Card size - 3.5 x 8.5", fits in a standard #10 Business Envelope.

Thanks for stopping by today