Thursday, 21 May 2020

Hugs and Scooter Birthday Card


Hello crafty friends ...

I've been a fan of the Photo Booth series at Your Next Stamp for awhile now, so when this Photo Booth All Smiles set was released in February, I had to add it to my collection. With all that is going on in the world, I thought this image was fitting as I send my family and friends a virtual hug. For today's card, I added the cute hugging critters to a cheerful Birthday Card.

I paired it with the hugely popular Cloud Panel Die, backing it with acetate which I do quite often with background dies. I like the shine!


The scooter was fussy cut from a journal card in a paper stack I was trying to use up, as was the word strip at the bottom of the card. The grass edge die helps to ground the scooter.


Finally, here is a peek at the inside:


Supplies:
White & green card stock
Stitched Rectangle die set - Your Next Stamp
Cloud Panel Die - Your Next Stamp
Makeup Brushes
Catherine Pooler Inks
Grass Edge Die - Your Next Stamp
Acetate
Scooter Sticker etc - Dear Lizzy Neapolitan, American Crafts
Patterned paper - Dear Lizzy Neapolitan, American Crafts
MISTI - My Sweet Petunia
Photo Booth All Smiles  - Your Next Stamp
Photo Booth All Smiles Die Set - Your Next Stamp
Copic markers
Sakura black glaze and white gel pens
Stitched Fishtail Banners - Your Next Stamp
Pick Me Up (Happy Birthday) - Your Next Stamp
Tiny Stapler - Tim Holtz
Whatnot Sentiments Set 12 - Your Next Stamp
Fine point Sharpie marker

Card size - Standards A2, 4.25 x 5.5"

Thanks for stopping by today

Wednesday, 20 May 2020

"Wow! It's Your Day" Slimline Birthday Card

Hello crafty friends ...

Today I'm sharing my Inspiration Team post for i-crafter, using some fun new products that were released on May 1st. I made a Slimline Birthday Card that is decidedly masculine. I started with the panel, stamping it three times with one of the Half Tone Dot stamps and black ink. Then I used blending brushes and the Cosmic Flare stencil with kraft ink for some additional 'texture' and 'action'.

The Comic Words die set has several letters included that allow you to make different words such as WOW, BAM, BOOM, MOM, DAD etc. etc. They cut with the outline die as well, which is really fun. I cut the WOW  and action balloon from both red and black card stocks, choosing the black outline and the red letters. It also comes with the fun 'splat' which I stamped in black and die cut with the coordinating die. The words were written with a black pen, and I added some black Nuvo Drops as well.


Finally, here is a look at the inside. I used the Cosmic Flare Stencil again at the top and bottom, and the CELEBRATE! was done with my label maker.  I used the leftover WOW letters & outlines  from the front inside so they are the reverse colours. I was so happy with how the inside looked when I was done, and there is still lots of room to write a message!


Supplies:
222042 Comic Half Tone Dots - i-crafter
222093 Cosmic Flare Stencil - i-crafter
222041 Comic Words - i-crafter
Kraft, white, red and black card stocks
Copic marker
Fun foam
Black marker
Sakura white gel pen
Nuvo Drops
Brother Label Maker
Taylored Expressions Blending Brushes

Card size - 3.5 x 8.5", fits in a standard #10 Business Envelope

Thanks for stopping by today

Tuesday, 19 May 2020

Southwest Themed Family Room Pop Up Card


Hello crafty friends ..

Remember you can always see my interactive cards in action, HERE on my YouTube Channel!


After I was finished making the Family Room Pop Up card for our Anniversary, I thought it would be fun to make another one to send out to a friend. Always a fan of desert imagery, I chose this paper pad from my stash and this is what I came up with!


I carefully positioned the pillow dies onto one of the patterned papers to isolate little cacti for their decorations, and the pink cactus print is pearlized and catches the light.


I did the same thing with the picture frames from the Memory Charms. I have been itching to use the TV set from the Memory Charms, so this was the perfect opportunity.


Such a fun die set for the times we are in right now, right?

Supplies:
White and pink card stocks
Patterned paper - Cute Cute Cacti - DCWV
1099 Family Room Pop Up - Karen Burniston
1108 Memory Charms - Karen Burniston
Copic marker
Gold gel pen
Brother label maker
Black pen
Stickles
Glitter Dots - Elizabeth Craft Designs

Card size - Standard A2 (4.25 x 5.5")

Thanks for stopping by today

Monday, 18 May 2020

Birthday Cake Peel Off Birthday Card


Hello crafty friends ...

It's Masculine Card Monday here on my blog and today I'm sharing a Birthday Card made with bits and pieces from my stash. The Birthday Cake is a Peel Off from Elizabeth Craft Designs, adhered to water colour paper and painted with water based markers and a wet brush. After fussy cutting it out, something must have distracted me and it never did make it onto a card.

I pulled it out, and also a chevron patterned journal card from a Project Life kit. The ombre panel is from a printed note card. Since they are printed front and back, I generally cut them in two so I have two panels, and one of these was set aside for another project.

The sentiment is from Taylored Expressions Simple Strips Birthday with the coordinating die. I love that with a single stamping, and a single pass through my die cutting machine, I have a whole bunch of Birthday Sentiments to use!  A few Black Nuvo Drops and a glitter pen and my card front was done.


Here is a peek at the inside ...


This card will be donated to my Mom's old nursing home!


Supplies:
White and black card stocks
Cake Peel Off - Elizabeth Craft Designs
Zig Clean Colour Markers
Water Brush
Journal Card - Becky Higgins, Project Life
Ombre A2 card - Hobby Lobby
Simple Strips Birthday - Taylored Expressions
Simple Strips die - Taylored Expressions
Shite embossing powder
MISTI
Wishing you... stamp - Dark Room Door
Catherine Pooler Inks
Nuvo Drops
Spectrum Noir Glitter Pen

Thanks for stopping by today
Sunday, 17 May 2020

Birthday Card Duo


Hello my crafty friends ...

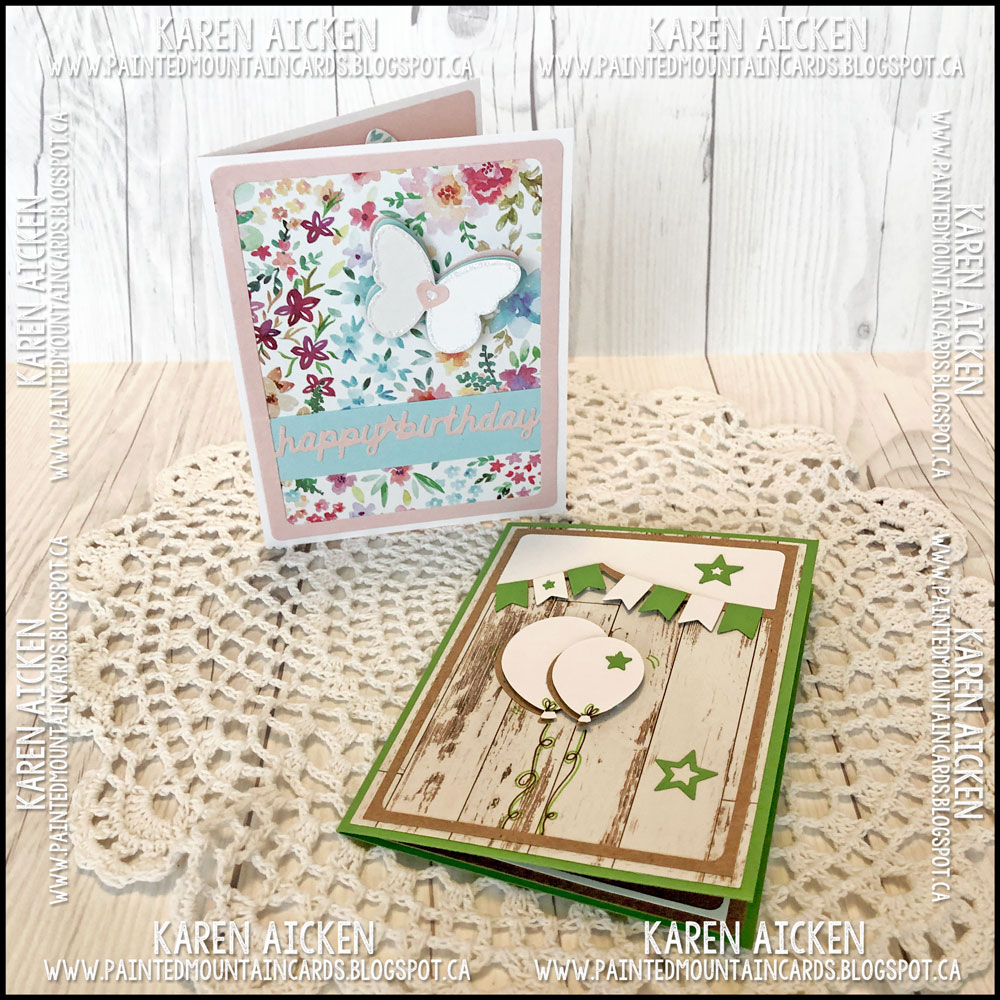
Today I'm sharing a pair of Birthday cards, that I made last year and didn't get posted. I had been playing with the Card With Script Words Drop Ins die set by Stephanie Barnard and some patterned paper that was already sitting out on my stamping table.

First up is the masculine card:


The Banner Drop-Ins is an extra that works with the die set and I was happy with how well it does work! I added some punched balloons as well.


Here is a peek at the inside. The white frame and Happy Birthday all cut together as a single piece.


Next up is the ladies card, with a rainbow of layered butterflies.


The Happy Birthday cuts with the frame as a single piece, but there wasn't enough contrast to see the words through the patterned paper. So I added a strip of blue card stock behind the words.


Here is a peek at the inside of the butterfly birthday card.


Supplies:
Floral patterned paper - Park Lane
Woodgrain patterned paper - stash
Pink, Blue, Green White and Kraft card stock
Card Front with Script Words Drop-Ins - Stephanie Barnard
Butterfly die - Lawn Fawn
Stickles
Inside stamp - Stampendous
Balloon Punch - Stampin' Up
Banners Drop Ins - Stephanie Barnard

Card sizes - both, standard A2 (4.25 x 5.5")

Thanks for stopping by today

Saturday, 16 May 2020

'Gnomes in Pots' Slimline Card


Hello crafty friends

Gnomes are all the rage these days, and I couldn't resist this cute set from Riley & Company. Here I used them in combination with Karen Burniston's Flower Pot Pop Up die set for a cheery Slimline card. First I created the 'scene' panel by blending dye inks onto a white panel with the Taylored Expressions Blending Brushes. The masks were created from white copy paper, either torn (for the ground & grass) or cut (for the clouds).


There are three Gnomes in the set, and I used all three of them on the card front. The pots were cut from kraft card stock, then dipped and dragged through puddles of Distress Oxide inks. 


Finally, here is a peek at the inside, with another blended 'scene' and pot with a peeking Gnome.


If you are interested, here is a photo of the inside panel, the hand made paper masks and the blending brushes. I used Catherine Pooler inks for most of the blending - I love those inks!


Supplies:
1010 Flower Pot Pop Up - Karen Burniston
Large Gnomes - Riley & Company
Kraft, pink, red, yellow and white card stocks
Distress Oxide inks
Catherine Pooler inks
Handmade masks
1006 Nature Edges - Karen Burniston 
Copic markers
Sakura white gel pen
1052 Word Set 6 Summer (hello) - Karen Burniston
Stickles
Twine - Stampin' Up
Moose Sayings Two - Riley & Company

Card size - 3.5 x 8.5", fits in a standard #10 Business Envelope

Thanks for stopping by today

Thursday, 14 May 2020

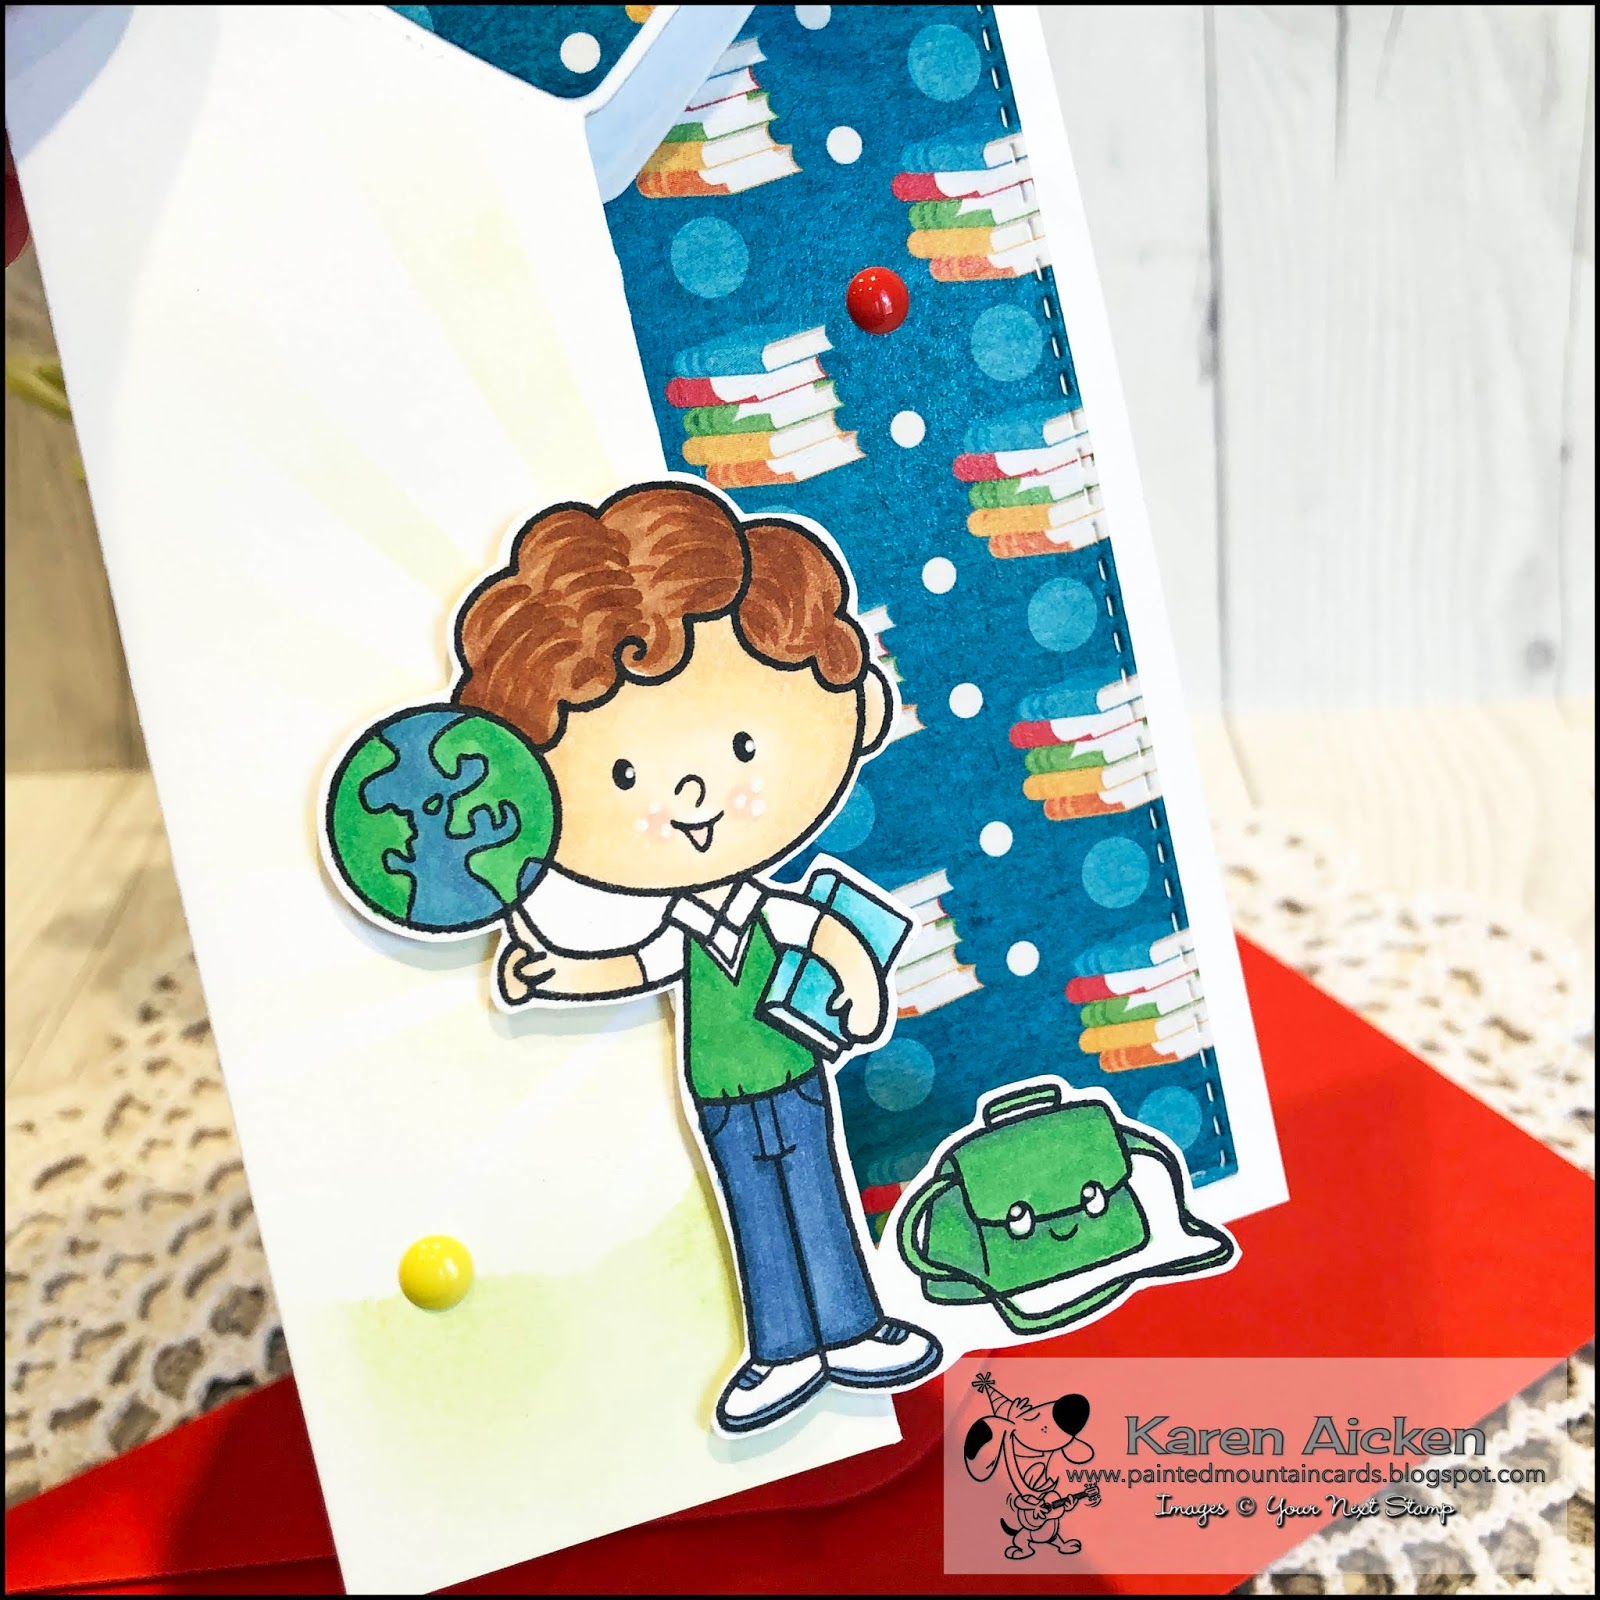
Teacher Thank You Slimline Card


Hello crafty friends ...

It's time for a new Challenge at Your Next Stamp - the Fun Friday Challenge #139 has a theme of Fun Folds.

The Fun Friday challenges come with two chances to win prizes!!
Comment on the YNS BlogInstagram or Facebook pages for a chance to win a free stamp set. Comment on all three to increase your chances, but comments must be left by May 20th 2020. The winner will be announced on May 22nd on the YNS Blog.

More details about the prizes at the end of my post

Remember you can always see my interactive cards in action, HERE on my YouTube channel!


As I said in the YouTube video - I love that Your Next Stamp has such great images for boys! So many companies just have cutsie girl images - which I also enjoy but with three Grandsons I need BOY stuff too!


The Fun Friday Challenge #139 runs through May 28th 2020 at midnight. One random participant will win a $15 gift certificate to the Your Next Stamp store.  If YNS stamps or dies are the focal point then the winner receives an additional $5 gift certificate for a total of $20!!  The winner will be announced on the YNS Blog the Sunday after the challenge closes. Check it all out on the Your Next Stamp blog HERE. 

Supplies:
MISTI - My Sweet Petunia
Coptic markers
Sakura White Gel Pen
Patterned paper - School Days, Miss Kate’s Cuttables
Slimming Stitched Rectangle - Trinity Stamps
Cosmic Flare Stencil - i-crafter
White card stock
Tiny heart sticker - Mrs. Grossmans
Blending Brushes - Taylored Expressions

Card size - 3.5 x 8.5”, fits in a #10 envelope

Thanks for stopping by today

Balloon Bouquet Wiper Card


Hello crafty friends ...

Today I'm sharing another Wiper Card, this one uses the new Happy Birthday Wiper Insert by i-crafter. I made this card last November (!!) so Lynda would have it for the i-crafter launch at Creativation in January. I didn't want to show it on my blog until the die set was available and since it is in the May release I can finally share it!


I added a balloon bouquet to the card front, inking the edges of the balloons and adding white highlights with a gel pen.


Remember you can always see my interactive cards in action HERE, on my YouTube Channel


This card started as a 5 x 5" square card. I made the inside, with the patterned paper layers and the Happy Birthday Wiper Insert. Then I got to work on the balloons and got everything secured inside. At that point I realized the balloons stuck out of the sides when the card was closed - clearly a lack of planning on my part. Not one to just toss a card, I added wider panels to the front and back and was pleased with how it looked!


For the Happy Birthday element I cut the white shadow layer from both white card stock and white fun foam, then adhered the inked Happy Birthday to those layers for a nice thick embellishment.


I specifically chose the colours of this card because they are the i-crafter colours and I wanted it to look good as a booth sample. I was thrilled that Lynda also showed it in the May Release Preview Video this month - it obviously held up well.

Supplies:
222054 Happy Birthday Wiper Insert - Lynda Kanase, iCrafter
Aqua, white and green card stocks
Patterned paper inside - Picture Perfect, Queen & Company
Sakura white gel pen
Fun foam
Seam binding

Card size - 6 x 5", fits in a 5 x 7" envelope

Thanks for stopping by today

Wednesday, 13 May 2020

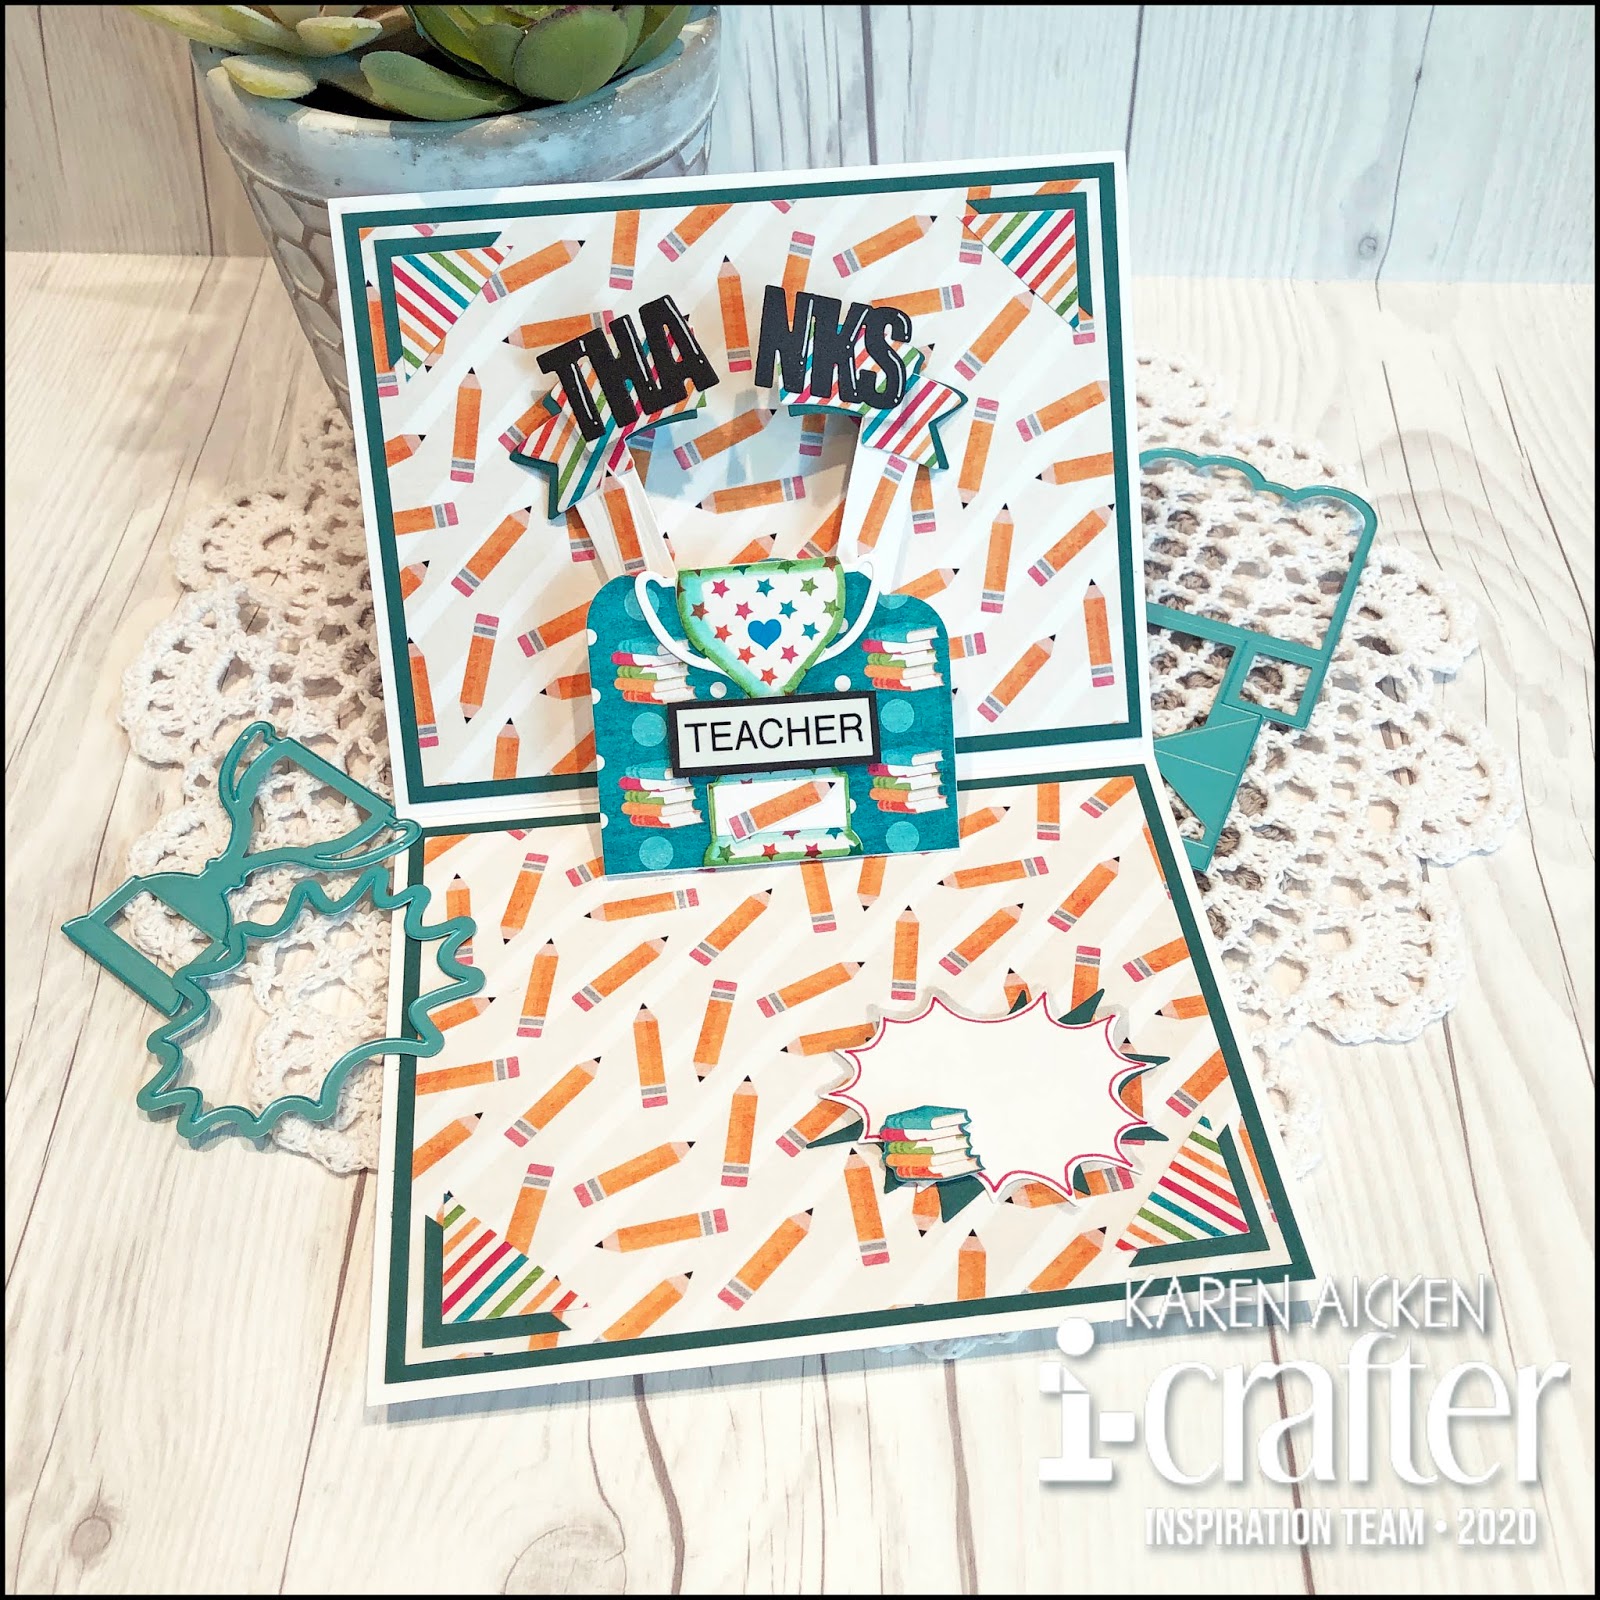
Pop Up Teacher Thank You Card


Hello crafty friends ...

Since our Grandkids teachers are still working and teaching (via Zoom) I thought I would make some Teacher Thank You Cards for them to give their teachers.

Remember you can always see my interactive cards in action, on my YouTube Channel HERE.


Last month's i-crafter release included the Carly Alphabet and it's such a cute font and size it's one I'll be reaching for time and time again.


This month i-crafter is releasing another Wiper Insert - this one is the Happy Birthday Wiper Insert. Since I've already made two Birthday Cards using it, I wanted to share how versatile it can be by combining the arms and THANKS from the previously released Pop Up Wiper Card. All the Wiper Inserts work well with each other (a question I'm often asked).


Another new item being released this month is the Comic Words and here I used one of the splats as a signing block.


Also new this month is the Best Dad die set ... and I used the Trophy from that set for my teacher element. The word TEACHER was done with a label maker.  I also added a tiny blue heart sticker to the centre of the trophy.


Tomorrow I have another i-crafter Wiper Card, and I'll be sharing another one next week!

Supplies:
222054 Happy Birthday Wiper Insert - i-crafter
222011 Pop Up Wiper Insert - i-crafter
222049 Best Dad die set - i-crafter
222041 Comic Words - i-crafter
222009 Alphabet Carly - i-crafter
White card and Envelope - Michaels
Patterned paper - School Days, Miss Kate’s Cutables
Teal, White and black card stocks
Copic markers
Brother Label Maker
Sakura White gel pen
Fine Point Marker
Water Brush
Seam Binding
Nuvo Drops

Card size - 6-1/2 x 5”

Thanks for stopping by today

Tuesday, 12 May 2020

Fancy Gatefold Anniversary Card


Hello crafty friends ...

When I was reorganizing my craft room recently, I also took the time to go through my 'In Progress' bin. So many cards in there, that just need a greeting and some finishing touches! This one caught my eye and since I needed to make an Anniversary card for our daughter & hubby I figured I would use that as my card base. It was likely Cricut cut many years ago, and has a matching envelope.

Remember you can always see my interactive cards in action, HERE on my YouTube Channel!


The gold Peel-Off stickers were in my stash. In fact, they were my Mom's so it was nice to be thinking about her while using them.


Inside I added layered hearts and a matted sentiment strip. The little blue flowered rectangle had been cut when I did the card base and layers, and was stored in with the card.


Supplies:
Cricut Cut Gatefold Card and Envelope - my stash
Heart dies - Hero Arts
Sakura Gold and White Gel pens
Simple Strips Background - Taylored Expressions
Simple Strips Die - Taylored Expressions
Blue and white card stocks
Gold Peel Off’s - stash
Seam binding
Stitched Nested Label Dies - Stampin’ Up

Thanks for stopping by today