Tuesday, 9 March 2021

To-Tail-Ly Awesome Slimline Card


Hello! I'm on the Crafty Meraki Blog today with this To-tail-Ly Awesome Slimline Card. I just adore these cute foxes in Crafty Meraki's To-Tail-Ly Awesome stamp set and used one with the included tree stump for my card today. The colouring was done with Prismacolor pencils and blended with mineral spirits and a blending stump. 


Once I had my fox & stump coloured and adhered to the ink blended circles, I needed something to fill all the empty space on the Slimline card front. The Crafty Hive Slimline Die was the perfect die to accessorize my card! I lay a few different colours of card stock scraps over the die and ran it through my die cutter, which gave me these cute rainbow coloured hexagons! After inking the edges, I popped them up on my card with foam tape and added shimmer with a Wink of Stella Pen. 

The sentiment was stamped onto white card stock, matted with turquoise and snipped apart to adhere as shown.


Finally, here is a peek at the inside. I die cut the Crafty Hive Slimline Die from white card stock to use as a stencil and lightly brushed colour onto the white panel inside. I'm storing that piece with the die, as I can use it multiple times before the card stock breaks down from the inks. Lots of room to write a note to whoever I send this card to for Happy Mail and it's sure to make someone smile with all the happy colours.


"Crafty Meraki is a tribe of women who are all creators but more importantly, love helping others in any way we can! 

Meraki (may-rah-kee) a verb, or adverb, a Modern Greek word, derived from the Turkish “Merak” (Labor of love, to do something with pleasure), is applied to tasks, usually, creative or artistic tasks, but can be applied to any task at all. Meraki means to do something with passion, with absolute devotion, with undivided attention.

Crafty Meraki was born out of a vision to help creators do what they love doing the most- to create!"


Supplies:
To-Tail-Ly Awesome - Crafty Meraki
Crafty Hive Slimline Die - Crafty Meraki
Circles - Hero Arts
Prismacolour Pencil crayons
Gamsol
Blending Stump
Card stocks - stash
Black glaze pen - Sakura
Wink of Stella
Taylored Expressions Blending Brushes
Cloud mask - Heffy Doodle
Wink of Stella
Card size - 3.5 x 8.5", fits in a #9 or #10 Business Envelope

Thanks for stopping by today

Monday, 8 March 2021

Peony Easter Tag

Hello! I'm back today with another Easter Tag. I have nine white gift bags lined up in my Craft Room, that I have been filling with Easter Goodies for our family ... the grandkids, our kids and my brother. This is the tag I'll be tying onto our eldest daughter's bag because she loves peony's!

I started with the Love Slimline Tag by Crafty Meraki, and cut it twice from white card stock. One was embossed with this planks embossing folder and swiped with a sponge & brown ink then they were adhered together for sturdiness. The peony was die cut from a couple of different card stock scraps and then I inked the edges of each layer. It's really easy to put together - I was pleased!


I tucked in one of the vellum doily's and a couple of punched sprigs, then added the Happy Easter which is from Karen Burniston's Easter Charm die set. To add some sparkle, I added Wink of Stella and a little pink bling.

I still have a few more tags to share between now and Easter!

Supplies:
Love Slimline Tag - Crafty Meraki
Peony dies - Stampin' Up
Card stocks
Shimmer Brush Pen
Vellum Doily
Wood Plank 3-D Embossing Folder - Stampin' Up
Taylored Expressions Blending Brushes
Sprig Punch
Shimmer Spray
1078 Easter Charms (Happy Easter) - Karen Burniston
Seam Binding
Bling (stash)

Thanks for stopping by today

Sunday, 7 March 2021

More February Paper Pumpkin Alternate Cards


Hello!  Today I'm sharing my final cards with the February Paper Pumpkin kit ... cards nine through fourteen! I have a walkthrough of all six of these cards on YouTube as well. 


First up is a Slimline that is not only a Pop Up, but I also got to use some bits and pieces from a previous Paper Pumpkin kit!


The printed flowers were in the November Paper Pumpkin Kit. They were meant for Christmas cards, but at the time I wanted to save them to use on Birthday cards. The colours matched and this was a good opportunity to use them.  The gold foiled label was leftover from the September kit and again - they worked really well with the golf laser cut doily included in this kit. 


For the Pop Up inside, I did a simple box pop up. While I didn't have a tutorial done at the time I was filming the video, I have one done and filmed now so will get it posted next week. They are one of my favourite ways to add something floating inside your card. I added one more flower to the Pop Up portion and one below it as well. 


Card #10 uses a shimmery laser cut panel from a 12 x 12" sheet of various images I picked up on the Stampin' Up Clearance Rack earlier this year. I also added a couple of fussy cut flowers from the Flowers & Field paper pack. I also used one more of the gold rimmed labels from the September kit.


Inside is more of the same patterned paper and fussy cut flowers around a stamped greeting.


Card #11 is an Easter card and I used several different products on this one. The  green striped panel was cut from one of the card bases, and the doily and flower cluster came in the Paper Pumpkin kit.

I used a very old bunny die by Tim Holtz (a BigZ die), cutting it from white card stock then giving the bunny a spritz with shimmer spray so it's nice and sparkly. The butterflies were punched out of paper & card scraps from the kit and the flowers were fussy cut from the Flower & Field patterned paper. The eggs come from Karen Burniston's Easter Charms ... I just trimmed off the hanging holes.


Inside the card is more of the Flower & Field patterned paper and a few more items from the Easter Charms Set - including the sweet Happy Easter! 


Card #12 is another pop up using a die set by Karen Burniston ... the Katherine Label Pop Up. The front is similar to the sample given in the instructions and pretty much identical to the card fronts I did in my first video. 


Inside I added more of the Flower & Field patterned paper and the Pierced Bloom dies. Oh, I am going to LOVE these SU dies!


You get lots of lift and action with the Katherine Label Pop Up, which is always fun. Especially since it's so easy peasy to assemble.


Now for card #13 ... I thought this might be my last card so was trying to use up a bunch of the odds and ends I had leftover from the kit and the other cards.


Here is a peek at the inside, with more stitched rectangles, a stamped greeting and punched butterflies. This one will be going into my stash.


Finally - here is card #14 and this one really did use up the last of the bits. I penned the Happy Birthday onto the last of the kit labels and added a few fussy cut flowers & the final floral cluster from the kit.


Inside I have more stitched rectangles, a fussy cut flower and a stamped greeting. This Birthday Card and #10 with the bird laser cut will be donated to my Mom's old nursing home.


Supplies - everything was included in the Paper Pumpkin kit except.......

Card #9 - Slimline Card
Tasteful Texture embossing folder
November Paper Pumpkin Kit (flower)
Gold outline label - September Paper Pumpkin kit
Card stocks
Patterned paper - Field & Flowers, Stampin' Up
Birthday Blowout - Poppy Stamps
Sequins
Card size - 3.5 x 8.5", fits in a #10 Business Envelope


Card #10 - Bird & Vines Birthday Card
Shimmer laser die cuts - Stampin' Up
Blueprints #13 - MFT Stamps
Patterned paper - Field & Flowers, Stampin' Up
Cool Tag Banner Sentiments - Your Next Stamp
Gold outline label - September Paper Pumpkin
Card size - Standard A2, 4.25 x 5.5"


Card #11 - Easter
Easter Elements BigZ die - Tim Holtz
Shimmer Spray
Patterned paper - Field & Flowers
Blueprints #13 - MFT Stamps
Stitched rectangle die - Elizabeth Craft Designs
1078 Easter Charms - Karen Burniston
Butterfly Punch - Martha Stewaret
Mini Strips Easter - Taylored Expressions
Mini Strips die - Taylored Expressions
Card size - Standard A2, 4.25 x 5.5"


Card #12 - Pop Up Birthday Card
Card stocks
Patterned paper - Field & Flowers, Stampin' Up
1011 Katherine Label Pop Up - Karen Burniston
Tasteful Labels - Stampin' Up
Crayola marker
gold gel pen - Sakura
Stickles
Pierced Blooms die set - Stampin' Up
Card size - Standard A2, 4.25 x 5.5"


Card #13 - Floral Burst
Patterned paper - Field & Flowers, Stampin' Up
Tasteful Labels - Stampin' Up
Gold gel pen
Blueprints #13 - MFT Stamps
Cool Tag Banner Sentiments - Your Next Stamp
Butterfly punch - Martha Stewart
Shimmer spray
Wink of Stella
Card size - Standard A2, 4.25 x 5.5"


Card #14 - Clean & Simple
Patterned paper - Field & Flowers
Stitched Rectangle - Elizabeth Craft Designs
black marker
Large Birthday - Technique Tuesday
Wink of Stella
Card size - Standard A2, 4.25 x 5.5"

Thanks for stopping by today

Friday, 5 March 2021

Easter Egg Tag


Hello! Today I'm sharing one of the Easter Tags I'll be tying onto small white gift bags for our Grandkids. I filled the bags with Easter goodies ... so I didn't want the bags to be too big and have their parents annoyed with the amount of sugar in them. Ha.  This tag is for Ethan ... because he loves BLUE!


I used the Love Slimline Tag by Crafty Meraki for my tag base, and then the cute Easter Love stamp set and coordinating die from Your Next Stamp. 

After die cutting the tag, I stamped it in various colours of ink using a border stamp. I actually cut two tags and glued them back to back as I like my tags to be nice and sturdy. I have made a couple of other Easter/Passover tags and will be sharing them in the coming weeks.


Ohuhu Markers
Black glaze pen - Sakura
Shimmer brush pen
Stitched Circles - MFT Stamps
Taylored Expressions Blending Brushes
Card stocks - stash
Banners - Pick A Punch - Stampin' Up
Rainbow Packing Tape - Amazon.ca
Bakers Twine

Thanks for stopping by today

Thursday, 4 March 2021

Heart Balloon Mini Slimline Card

Hello! It's time for another Fun Friday Challenge at Your Next Stamp and #159 is "What do you consider lucky? Include it on your creation and make a note of the lucky item you included when you post your creation." 

I am lucky (and always grateful) to have the unconditional love and support of my family. To represent that love, I added a heart to my card!


This is a Mini Slimline Card and I used the new Happy Cat for the fun image. I think this is one of my favourite sets from the new release, and I'm not even a cat person! I have left the inside blank so I can write a personal note when I go to send this card.


NOTE:  You may recognize the glittered heart ... I made three of them for the August 2020 New Release video and used one on THIS CARD.  The other two have been sitting on my stamping table waiting to get used. I still have one left, but will have to get that on a card soon too. Oh, and I also went around the edges of the heart on this card, with a grey Copic marker which gives it a rounded look.

Our challenges always come with 2 ways to win:

#1 - Would you like the chance to win a YNS stamp set? Leave a comment on the Your Next Stamp BLOG by March 10 2021 at midnight EST to be entered in the random drawing. Want more entries in the drawing? Leave comments on the YNS Instagram and Facebook pages too!

#2 – Would you like the chance to win a YNS store e-gift card? Play along with the challenge! Link up your creation on the Your Next Stamp Blog challenge by March 18 2021 at midnight EST to be entered in the random drawing to win a $15.00 YNS gift certificate. If your creation contains YNS products and you are the random winner then you receive an extra $5!

Supplies:
Black Olive Ink - Your Next Stamp
Happy Cat - Your Next Stamp
Happy Cat die  - Your Next Stamp
Grass Tuft die - Your Next Stamp
Rainbow Heart die set - Your Next Stamp
Whatnot Sentiments 4 - Your Next Stamp
Tropical Paradise Gumdrops - Your Next Stamp
Photo Booth (stamping on envelope) - Your Next Stamp
Karin Water Colour Markers
Water Brush
Water colour paper
Mini MISTI - My Sweet Petunia
Glitter card stocks - Stampin' Up
Cloud mask - Heffy Doodle
Taylored Expressions Blending Brush
String
Black fine point marker
Wink of Stella
Black glaze pen - Sakura
Copic marker
White embossing powder
Patterned paper - Oh So Ombre, Stampin' Up

Card size - 3.5 x 6", fits in a #8 envelope

Happy Cat Mini Slimline Gift Card Holder


Hello! Today is the day ... the New Release is live in the Your Next Stamp online store and the Design Team is having an Instagram Hop with a chance to win prizes! I have details near the end of my post. This is such a fun release and I invite you to check it all out on YouTube! 


For my project today, I used the new Happy Cat stamp and coordinating dies to create a Mini Slimline sized Gift Card Holder.

To create this Gift Card Holder, cut your card stock to 10.5 x 6", and score down from the long side at 3.5 and 7". Measure 2.5" up from the bottom left corner of the left edge and make a pencil mark. Cut on the diagonal from the 3.5" score line to your pencil mark and fold to the inside.

Adhere to the centre panel along the bottom and short edge, which creates the pocket to hold your Gift Card. The sentiments are included in the Happy Cat set!


Speaking of shopping ...


While this is an Instagram Hop, I will add the links here in case you are on Instagram and want to comment for a chance to win a $20.00 YNS e-gift card!


Supplies:
Black Olive Ink - Your Next Stamp
Happy Cat - Your Next Stamp 
Happy Cat die set - Your Next Stamp
NEW gumdrops - Your Next Stamps
Water colour card stock
Karin Water Colour Markers
Water Brush
Black glaze and white gel pen - Sakura
Rainbow Packing Tape - Amazon.ca
White embossing powder
Banners Pick A Punch - Stampin' Up
1/8" Quick Strips - the Stamp Market
Wink of Stella
Mini MISTI - My Sweet Petunia
Oval (leftover from another project)
Card size - 3.5 x 6", fits in a #8 envelope

Thanks for stopping by today

Wednesday, 3 March 2021

Hugs For You Mini Slimline Card

Hello! I'm on the Crafty Meraki Blog today with my weekly Design Team Post and today's card is a Mini Slimline card. After white heat embossing the Floral Hugs stamp onto water colour paper, I used Jane Davenport Water Color Markers and a water brush to paint the image.  The panel was trimmed to be slightly smaller than the teal matting layer & card base and it was popped up with a full panel of fun foam. 


Since I usually decorate the insides of my cards too, I added coordinating teal and white panels, stamping along the outer edge of the white one with the Floral Hugs image and yellow ink before adhering them inside the card.


I spattered a little diluted black ink and added a few Majestic sequins from Studio Katia. Stickles glitter was also added to a few flowers for a little more shimmer & shine. The 'For You' comes with the Floral Hugs and I white heat embossed it on a scrap of the same teal card stock as the mat and popped it up with thin foam tape. My Mini Slimline card today measures 6 x 3.5" and fits in a #8 envelope.


"Crafty Meraki is a tribe of women who are all creators but more importantly, love helping others in any way we can! 

Meraki (may-rah-kee) a verb, or adverb, a Modern Greek word, derived from the Turkish “Merak” (Labor of love, to do something with pleasure), is applied to tasks, usually, creative or artistic tasks, but can be applied to any task at all. Meraki means to do something with passion, with absolute devotion, with undivided attention.

Crafty Meraki was born out of a vision to help creators do what they love doing the most- to create!"


Supplies:
Floral Hugs - Crafty Meraki
Water colour paper
Mini MISTI - My Sweet Petunia
Water Brush
Jane Davenport water colour markers
Yellow finalize marker
Blending Brushes
Shimmer Spray
Stickles
Card stocks - stash
Fun Foam
Majestic Confetti - Studio Katia
Card size - 6 x 3.5", fits in a #8 envelope

Thanks for stopping by today

Tuesday, 2 March 2021

Happy Spring Slimline Card

Hello!  I'm back today sharing another card that features the NEW RELEASE at Your Next Stamp. The Design Team is sharing sneak peaks until Thursday, when the release goes live in the Your Next Stamp online store. We will be celebrating on Thursday with an Instagram Hop. As usual with a YNS release, you have a chance to win a prize and I have more details at the end of my post.

I might have gasped when I saw this lovely stamp set called Cute Blooms and couldn't wait to play with it. I white embossed the tulips & jug on water colour paper then added colour with Karin water colour markers and a water brush. I love the detail that the YNS dies have - see how it even cut out the area between the two tulips and inside the jug handle? 

The new Slim Geometric Panel Die was die cut twice ... once from adhesive backed vellum and once from the soft yellow card stock. The two panels were adhered together then it was attached to the soft yellow car base.

I white embossed the sentiment on a strip of water colour paper then used the same markers and a water brush to apply the colour.


I used one of the new Slim Stitched Rectangles inside the card. With the same floral stamp as I used on the card front, I stamped around the top edge of the panel with yellow ink and added one full image in the lower right corner. The edges were inked with a blending brush and yellow ink and then I adhered the panel inside the card. 


One more look - I'm just SO pleased with how this card turned out!


Now for the prize information.  Each preview day, comments left on the Your Next Stamp Blog and Your Next Stamp Instagram will be selected to win one of the sets being showcased! Winners will be announced the day after each preview day.

Supplies:
Slim Geometric Panel Die - Your Next Stamp (NEW RELEASE)
Cute Blooms - Your Next Stamp
 (NEW RELEASE)
Cute Blooms Die Set - Your Next Stamp
 (NEW RELEASE)
Slim Stitched Rectangles - Your Next Stamp (NEW RELEASE)
Magical Pastel Gumdrops - Your Next Stamp
Mini MISTI - My Sweet Petunia
Vellum
Card stocks - stash
Karin Water Colour markers
Water colour card stock
Stitched Mini Scalloped Oval die - MFT Stammps
Wink of Stella
Taylored Expressions Blender Brushes
Narrow seam binding - Stampin' Up
Card size - 3.5 x 8.5", fits in a #10 Business Envelope

Thanks for stopping by today

March 2021 Sheetload of Cards


Hello! YAY - it's time for another Sheetload of Cards and this month's sketch is another winner.  It yields nine cards and calls for two 12 x 12" sheets of patterned paper. I have linked Call Me Crafty Al's video below, where you can download your Sheetload of Cards sketch  & cutting guide. I am one of the Sheetload of Cards YouTube collaborators and I have a walkthrough of my cards on YouTube. 


Today is the day all of the collaborators (YouTube, Blogs, Instagram) are sharing their creations and I can't wait to see what they came up with. It's so fun to see how each of us use our own supplies and create cards that are so different from each others. I will have their information linked below as well. 

All of my cards are Birthday Cards that will be donated to my Mom's old nursing home. I used my MISTI stamping tool to quickly stamp both birthday sentiments at a time onto the die cut circles so that made things go quite fast. 


All of the cards are the same inside, with a stamped greeting on a white panel that had been punched with the Sprig Punch.


Because I wanted to share an alternate - the Sheetload of Cards come with measurements for creating a single card if you choose - I made a boy's Birthday card for my stash.


It's fun to change up the sketch to work for your needs and supplies!


Here is a peek at the inside of my alternate:


Find out how to download the March 2021 SheetLoad of Cards, here: https://youtu.be/7fJOFmr5w8E


If you create cards using this month’s SheetLoad, make sure to use the following hashtags: #SUYSMar2021 #showusyoursheetload

Get more details on how to “Show Us Your SheetLoad”, here: https://youtu.be/8r6JbbGfWmo


Make sure to check out all of the SheetLoad collaborators!

YouTube Team:

   Call Me Crafty Al / Alicia: https://www.youtube.com/callmecraftyal/videos

   Project39 Mini Albums / Debbie: https://www.youtube.com/c/Project39MiniAlbums/videos

   Karen Aicken / Karen: https://www.youtube.com/channel/UCKOxgY7H_ooBinWEh0FOWvQ/videos

   Creative Chelsey / Chelsey: https://www.youtube.com/channel/UCszCS397ptot3vJdvLCirTg/videos

   Bourbon Creek Crafts / Beth: https://www.youtube.com/bourboncreekcrafts/videos

   Fresh and Renewed with Teresa / Teresa: https://www.youtube.com/c/FreshandRenewedwithTeresa/videos

   Cool Cakes and Crafts with Amalia / Amalia: https://www.youtube.com/user/petunia10466/videos


Blog Team:

   Airbornewife Stamping / Pam: http://airbornewifestamping.blogspot.com

   Stamp with Sandie / Sandie: http://stampwithsandie.blogspot.com/


Instagram Team:

   @deneen03 / Deneen: https://www.instagram.com/deneen03/

   @lizzies_happy_mail / Elizabeth: https://www.instagram.com/lizzies_happy_mail

   @scrpbkgrl / Lisa: https://www.instagram.com/scrpbkgrl/

   @fuzzyslippersdesigns / Moriah: https://www.instagram.com/fuzzyslippersdesigns/

   @craftaholicmomma / Stacy: https://www.instagram.com/craftaholicmomma/


************************************************************************


*************MARCH Hashtags / Mentions for Instagram********************

#SUYSMar2021 #SheetLoadOfCards #SheetLoadCollabTeam #ShowUsYourSheetLoad @callmecraftyal

*********************************************************************


Supplies for the nine cards:
March 2021 Sheetload of Cards - Call Me Crafty Al
Crosshatch Circles - Tutti Designs
Stitched Circle - MFT Stamps
Mini MISTI - My Sweet Petunia
LJD Birthday Greetings - MFT Stamps
Patterned paper - Cute Cute Cacti, DCWV
Scalloped Border die - MFT Stamps (old, likely retired)
Sprig punch - Stampin' Up
Inside stamp - Happy Birthday, Everyone, Stampin' Up (retired)

Single card:
March 2021 Sheetload of Cards - Call Me Crafty Al
Patterned paper & Cut aparts, Dragon Tails - Doodlebug Designs
1/2" Quick Strips - Stamp Market
Card stocks - stash
Heart Stickers - Mrs. Grossmans
Wink of Stella
Inside stamp - Large Birthday, Technique Tuesday
Card size - all, Standard A2 (4.25 x 5.5")

Thanks for stopping by today

Mini Slimline Cupcake Pop Up Birthday Card

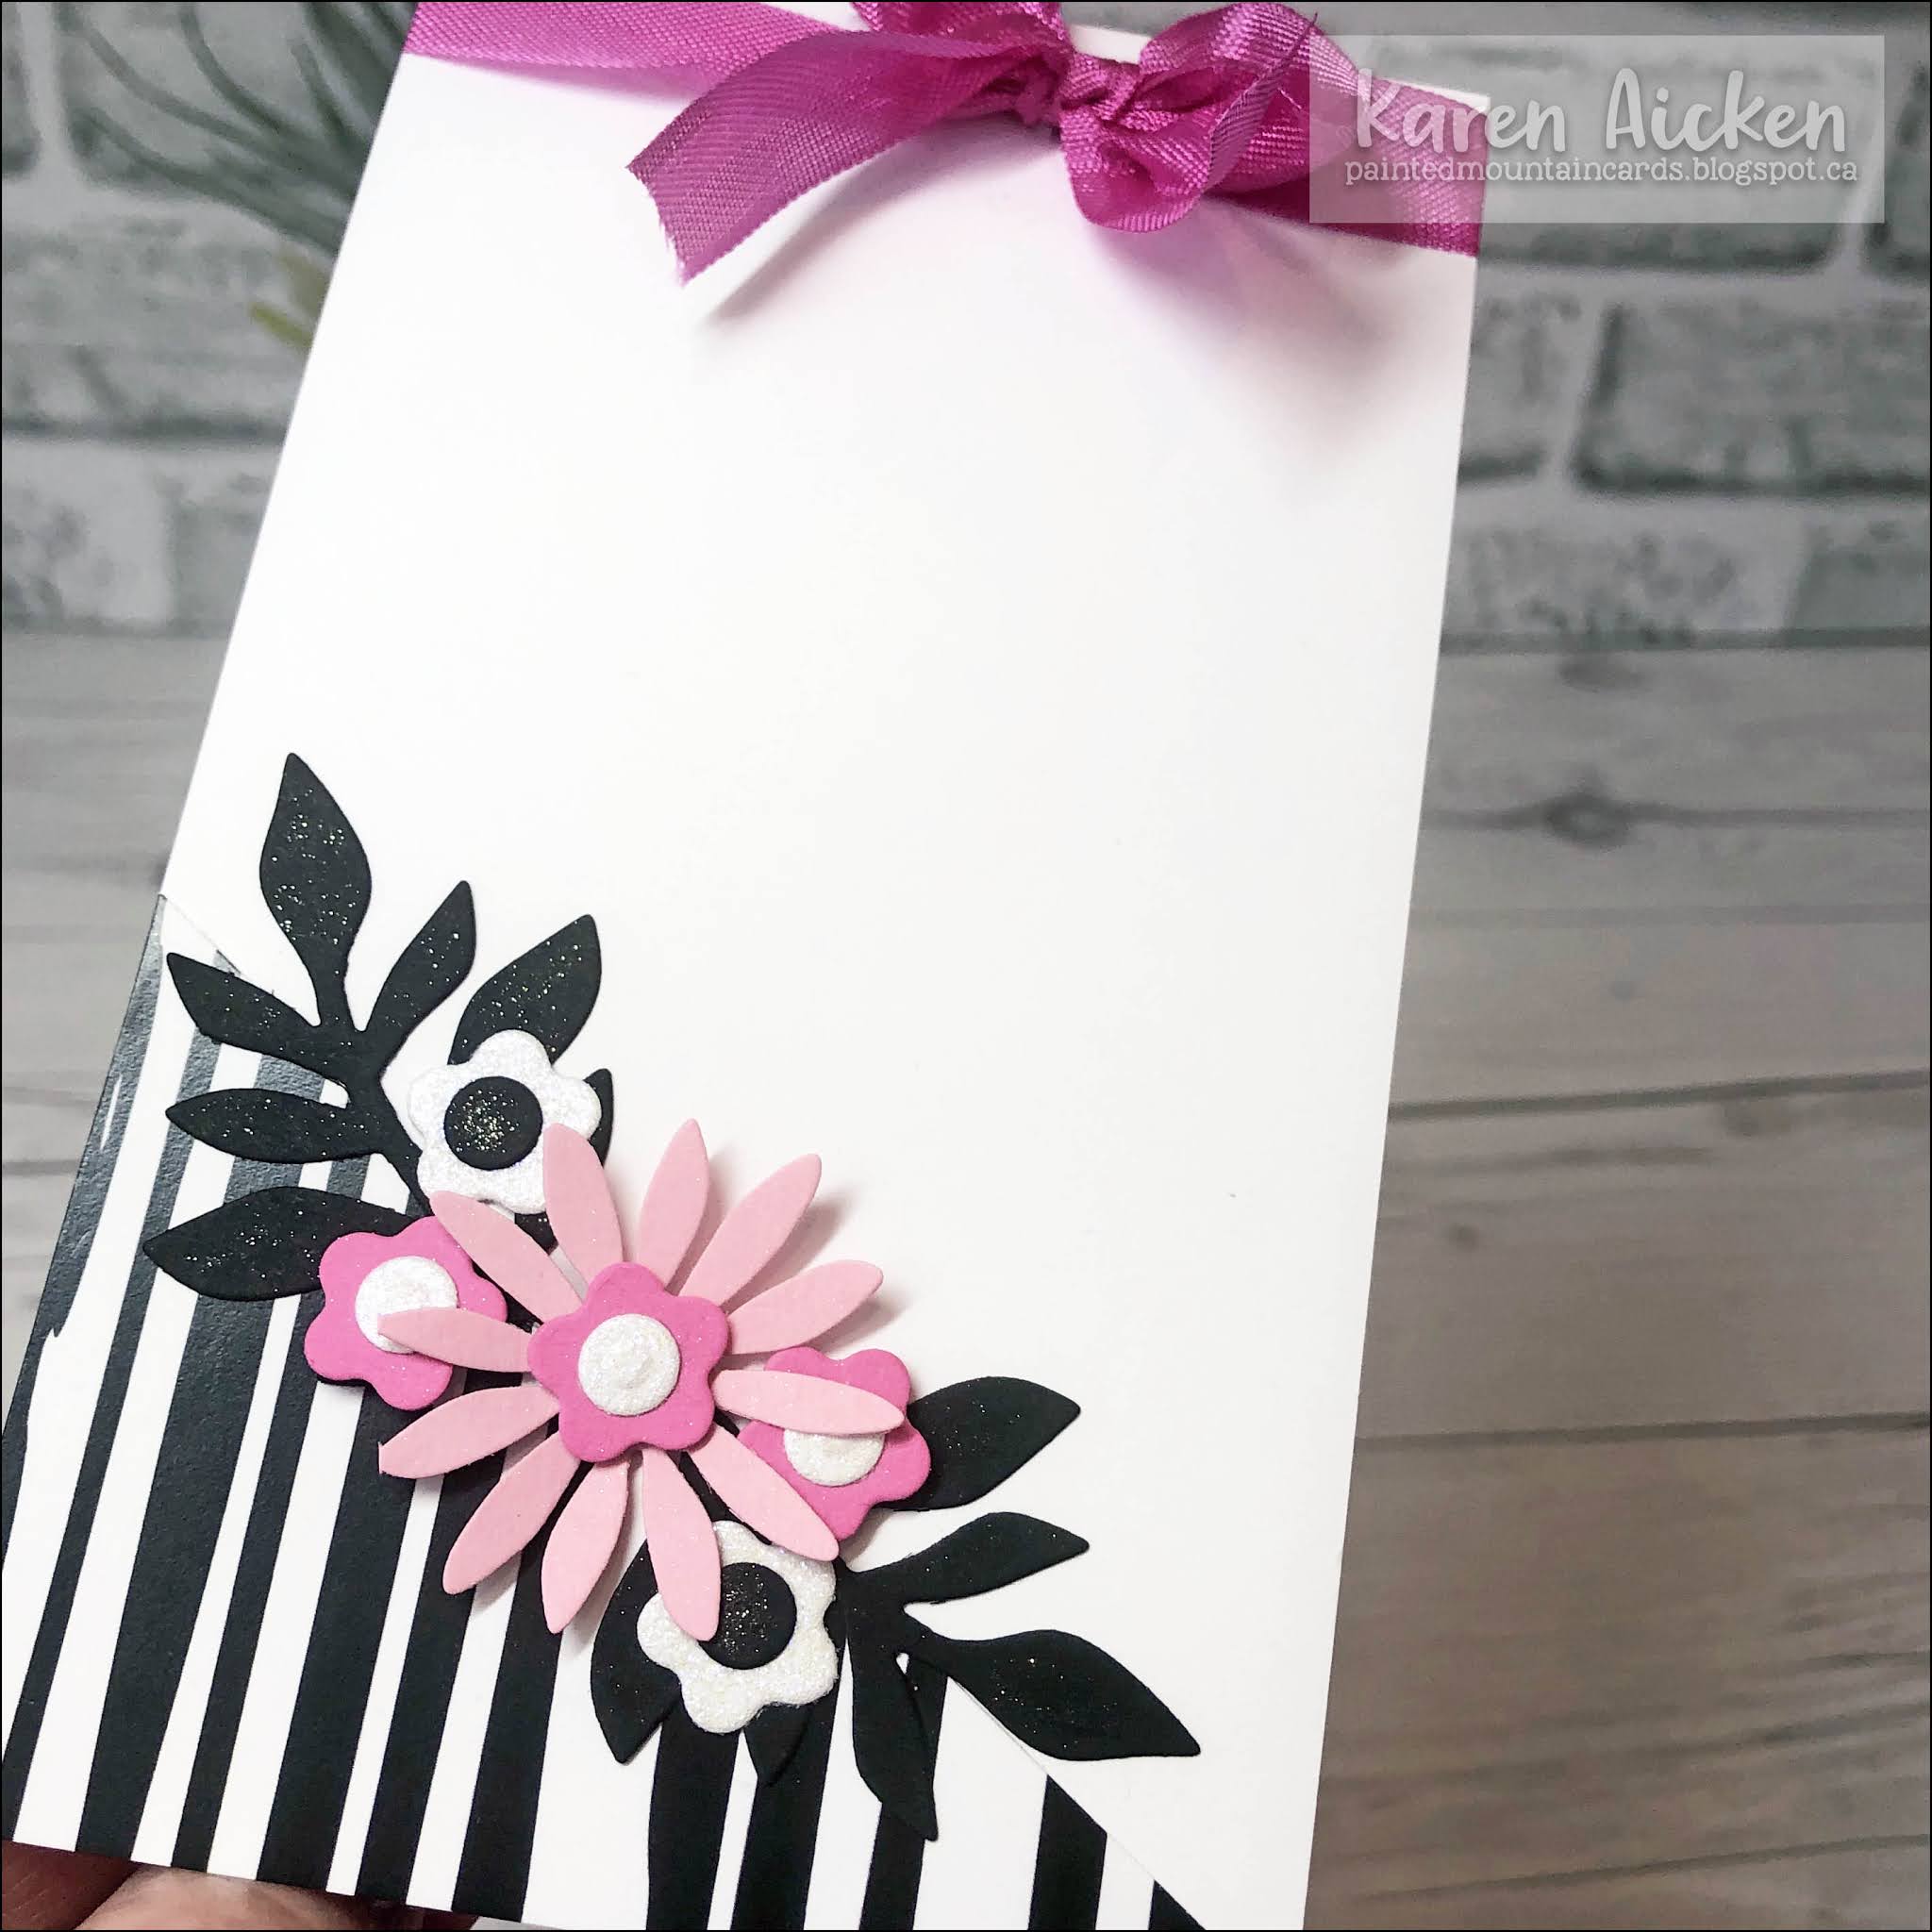
Hello! It's time for Karen Burniston's Designer Challenge, and she challenged her Design Team to create a project using "Black, White and a Pop Of ....".  I chose PINK to be my "Pop Of" and made a top fold Mini Slimline with the Cupcake Pop Up. I have a walkthrough of my card on YouTube since it's always more fun to see these cards 'in action'.

I started my card with a 3.5 x 12" piece of white card stock, scoring it in the centre at 6" which gave me the top fold Slimline card of 3.5 x 6". I added a diagonal strip of black and white patterned paper and  a spray of blooms from the Flower Pot Pop Up. The pink card stock was all scraps from my stash and I added white glittered card stock as well. The pink seam binding was added after the card was complete, as I generally work on the insides of my Pop Up cards first then finish with the front.


The black card stock was all given a spritz with my shimmer spray so it has a lovely sparkle!


Inside, I used the Cupcake Pop Up! It BARELY fit into the 3.5" card width but I took my time lining up the die's alignment nubs with the inside score line and I was careful when adhering the inner card to the outer card so as not to damage those narrow strips on either side of the pop up base. I admit to holding my breath a couple of times, ha ha - but it worked and I was tickled!


Inside I added a couple more of the black and white patterned paper strips and then some flowers & vines from the Flower Pot Pop Up. I was able to use up several scraps of pink card stocks for the flowers! The little bow is intended to go across the cupcake liner, but I chose to add it to the upper right corner.

The cupcake icing was cut from white glitter card stock and the black cupcake liner was spritzed with shimmer spray.


The Thinking of You was die cut twice, once from pink card stock and once from black. Then the pink one was layered over the black, offsetting for a bit of a shadow.


As shown in my video, I used patterned paper and the Envelope Punch Board to create a coordinating envelope.   

I hope you will check out what the rest of the Design Team came up with for their 'Pop Of ...'  - their blogs are linked on the right. Karen Burniston will have her project on her blog tomorrow (Wednesday).

Supplies:
1008 Cupcake Pop Up - Karen Burniston
1010 Flower Pot Pop Up - Karen Burniston
1102 Word Set 10 Thinking of You - Karen Burniston
1003 Word Set 2 Birthday (celebrate) - Karen Burniston
Card stocks - stash
Patterned paper - Black & white & Rainbow 6 x 6" pad, Studio Katia
Shimmer spray
Envelope punch board
Patterned paper for envelope - Totally Girl, My Minds Eye
Card size - 3.5 x 6", fits in a #8 envelope but I did use my Envelope Punch board and patterned paper from my stash to create an envelope.

Thanks for stopping by today!