Saturday, 8 December 2018

C4C464 Sketch Holiday Cards for the Grandkids

Good morning friends

It's Saturday and that means a new challenge at the Crazy4Challenges Blog. Our December  hostess is Frances Byrne. We only do challenges for the first two Saturday's in December to allow everyone time to celebrate the holidays or just relax and take a break from challenges. Traditionally this second challenge in December is a sketch challenge, allowing you to choose any one of the wonderful sketches we have shared throughout the year.

I chose Sketch C4C461, which was Joanne's sketch for November. That sort of surprised me, as I LOVE Raquel's sketch #C4C452 and have used it a lot so I expected to pull that one out again. 


I needed to make Christmas cards for three of our Grandkids (the other two celebrate Hanukkah and I have already shared their cards) so I actually made three cards for the challenge today. Two of them use the sketch and the third is a Z-Fold card.


Oh, how I love Doodlebug Designs. The stickers just seemed to work so well with this sketch! This is Ethan's card - he loves blue.


I loved that the papers have kraft accents, as that allowed me to use kraft card stock which is perfect for boys.


 Zachary loves green and black, so he is getting a card with lots of green. No black though - it just didn't look very good so I went with more kraft.


The striped border is also one of the stickers, I adhered it to white card stock then to the die cut circles to match the sketch.


The final card is a Z-fold card for Olivia. I absolutely loved this 12 x 12" paper stack at Michaels and have really been enjoying it for holiday cards this year. The mermaid & unicorn pattern was the only one I wasn't crazy about - but it worked out SO perfectly for Olivia's card I was amazed. 7 year old girls are all about unicorns and mermaids this year ... and Olivia's cardiologist often refers to her as a Unicorn (because of the 'special' way she reacts to her meds and treatments. She is the only kid with Pulmonary Hypertension who has reactions like that so they are never quite sure what is going to happen when they change her dosage or meds.)


The cut-parts were included in the paper stack, so I trimmed several out and added them to the front with glitter and gold Peel-Off snowflake stickers in gold.


Check out the C4C blog to see how the Crazies have been inspired by the challenge. We'd  love to see your take on it, so be sure to stop by the Crazy 4 Challenges blog and link up your creations. If you are uploading to an online gallery, please use the keyword C4C464.

Supplies:
White, blue and kraft card stocks
Patterned paper - Doodlebug
Stitched circle dies - MFT Stamps
Stamp - MFT Stamps
Stickers - Doodlebug
Stickles
Inside:

Green and White card stocks
Stitched circle dies - MFT Stamps
Stickles
Stickers - Doodlebug
Dashing Rectangle dies - Elizabeth Craft Designs
Stamp - MFT Stamps

Blue, white and pink card stocks
Patterned paper - Recollections
Snowflake Peel-Off stickers - Elizabeth Craft Designs
Stickles
Dashing Rectangle dies - Elizabeth Craft Designs
Sakura white gel pen

Thanks for stopping by today

Friday, 7 December 2018

Elegant Christmas Treat Holder and Gift Card Holder

Good morning friends

It's Fun Fold Friday here on my blog, and today I'm sharing a Pop-Up Gift Card Holder with a matching Treat Pouch. Sometimes I like to give a little somethin' somethin' to someone when their gift is a Gift Card, so this new Treat Pouch die set by Lynda Kanase is going to get a lot of use. They are both from Lynda's new Gift and Gather Collection. I chose some pretty snowflake patterned paper with gold foiled bits for holiday shimmer and shine paired with white glitter paper and gold foil card stock.

I have lots of ideas for the Pop-Up Gift Card Holder too ... what a fun way to give someone a Gift Card! Note, the gift card in the photo is an old one I use for blog photos, and not the card we will actually be gifting.

Here is the front of the Pop-Up Gift Card Holder, with these beautiful lacy looking roses.


I cut the shadow (or base) layer from white glittered card stock, and the overlay from red patterned paper that had Sizzix Double Sided Adhesive applied to the back. I also used the shadow (or base) layer from one of the sentiments that come with the dies, cut from gold foil. Since it was too short to extend the amount I wanted it to on either side of the flowers, I snipped it in half and added one half to each side of the Gift Card holder front, then popped up the glittery flowers with foam tape to hide the cut line.


Here is a look at the inside, with the Pop-Up area for the Gift Card.


The 'For You' was die cut from the red patterned paper that had Sizzix Double Sided Adhesive on the back. After adhering it to the glittered label shape, I saved all the fall-away pieces for the Treat Holder shown below. The lacy looking piece on either side of the 'For You' is actually the phrase 'Thanks' and it also comes with the Pop-Up Gift Card Holder. I simply covered the word portion with the glittery 'For You'. I love getting more mileage from my dies this way and using them in different ways.


I also like to mix and match my dies so the label where we will sign our name came from Lynda's Treat Pouch die set.


Here is a photo of the Gift Card Holder and the pretty Treat Pouch ...


You can put all kinds of treats in the Treat Pouch, this one holds Hershey Nuggets.


To make the 'For You' tag, I sandwiched a loop of Bakers Twine between two of the label shapes. I added Sizzix Double Sided Adhesive to the back side of the white glittered card stock and die cut the For You from it then adhered it over the gold frame. The red inlay pieces came from the 'For You' on the Pop-Up Gift Card Holder above!


Since this is a coordinating set, I used the same roses and papers on the Treat Pouch as I did on the Gift Card Holder.


Finally a photo of the Treat Holder from the back side. Simply untie the ribbon to pour out the little goodies inside.


Supplies:
Treat Pouch - Lynda Kanase (Sizzix)
Patterned paper - DCWV
Sizzix Double Sided Adhesive
Glitter paper - Stampin' Up
Gift Card Holder Pop-Up - Lynda Kanase (Sizzix)
Gold foil card stock - Stampin' Up
Snowflake Peel-Off's - Elizabeth Craft Designs
Ribbon
Bakers Twine

Thanks for stopping by today

Thursday, 6 December 2018

Pine Sprig Lever Card

Good morning friends

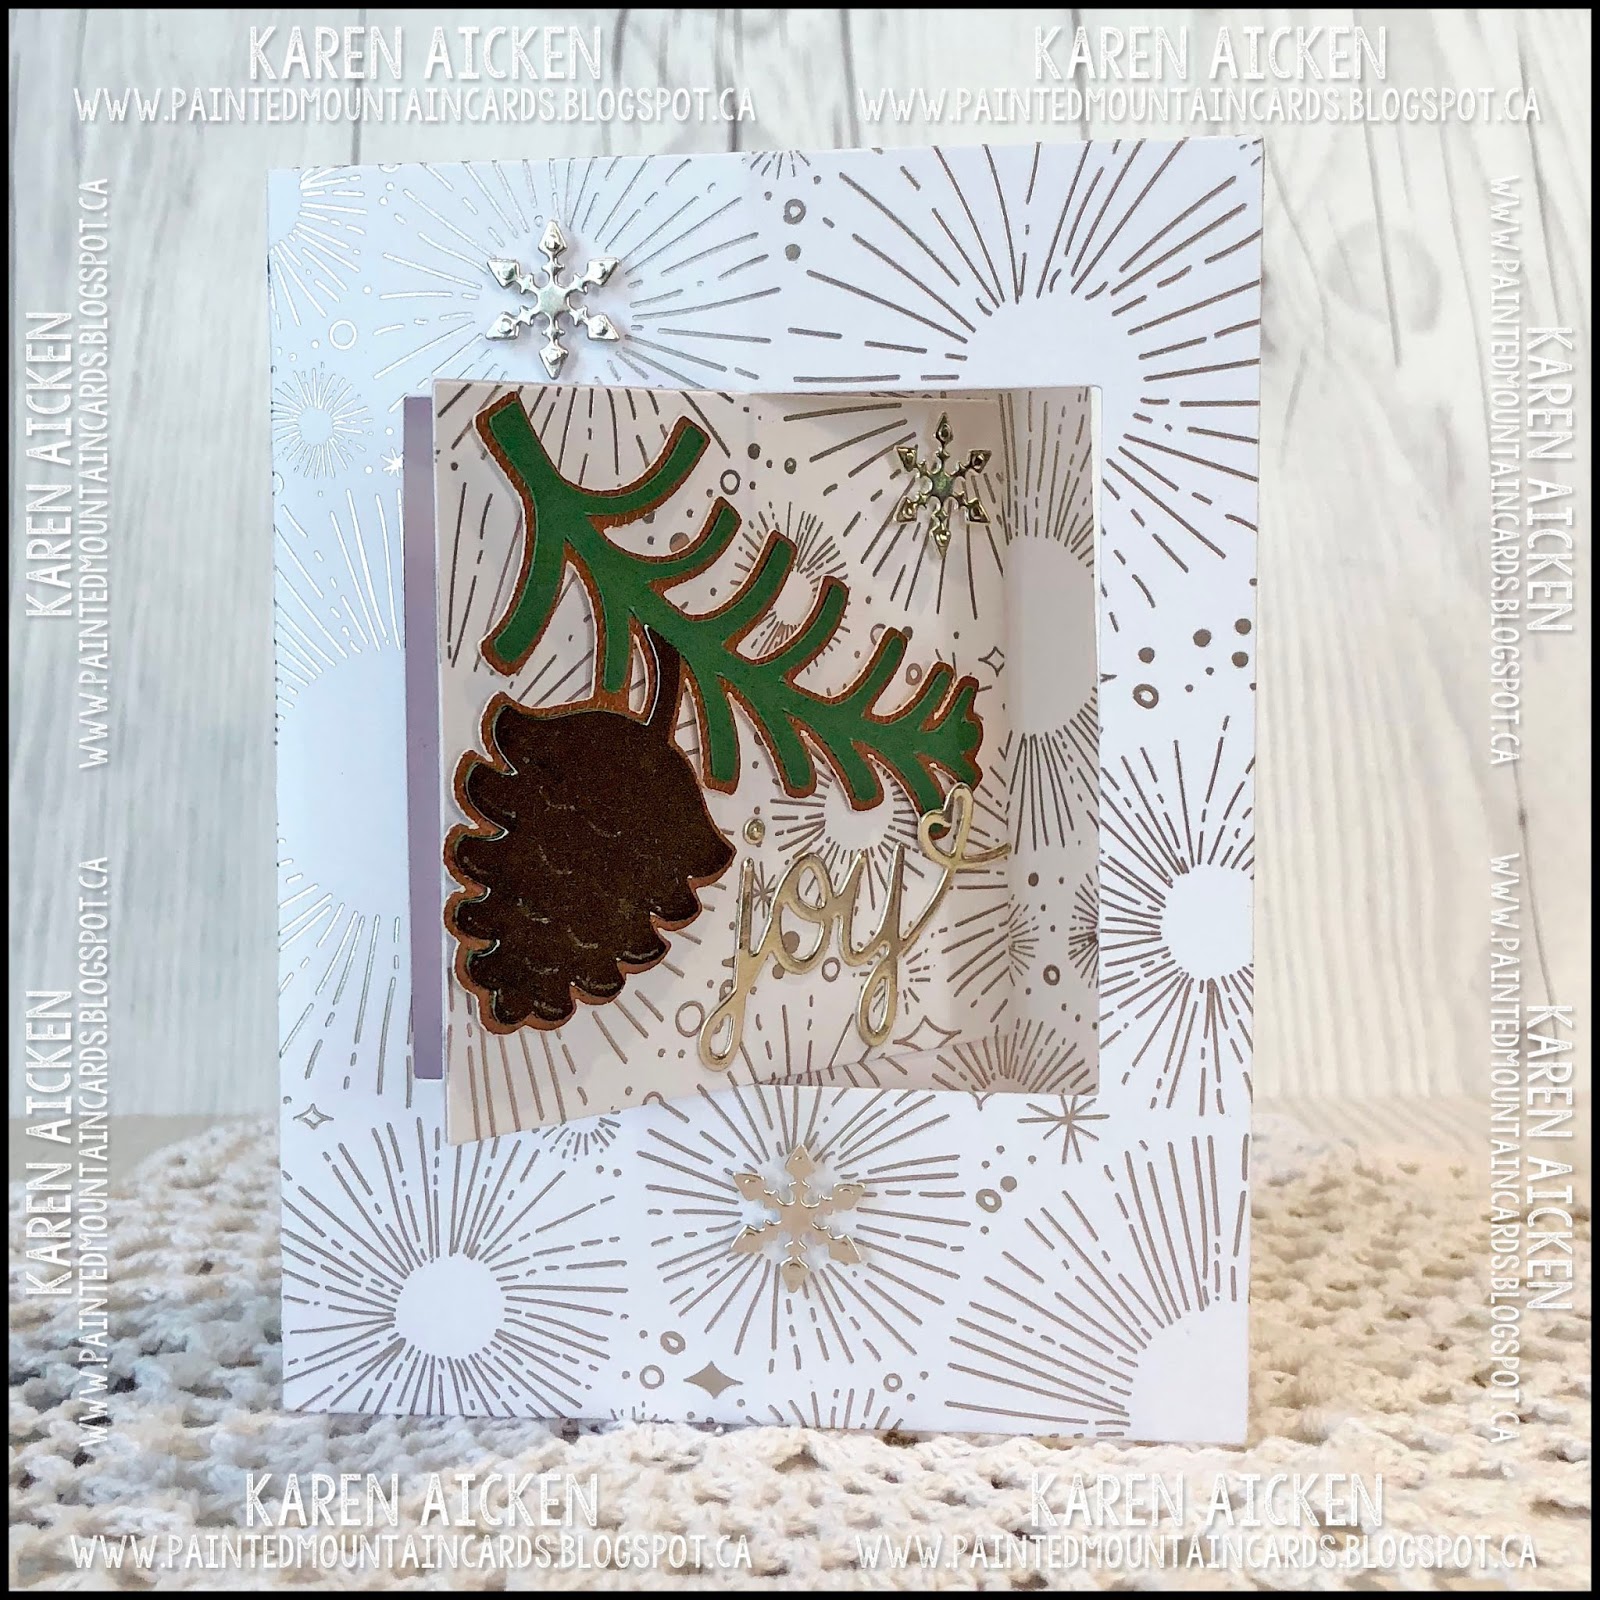
OMGoodness, I love this card. I can't even tell you how many times I picked it up and looked (ok, admired) it before I got the photos taken and the card put in the Christmas Card bin. The patterned paper is very subtle looking in the photos, but in real life is is bright white with champagne foil printing. It catches and shines in the light - it's just beautiful stuff!


This Cricut cut embellishment was in my bin - I have had them done for years - the shadow layer is a pretty copper foil card stock, and I cut the JOY from champagne card stock for even more glam.


I used the Lever Card die set from Our Daily Bread Designs, but wanted to try it without the coordinating Layer die set. It could have gone either way, looking too plain or looking too busy, OR even been too 'wussy' without the layers. But this patterned paper was just perfect - it's nice and sturdy but not bulky. It also went together in record time!


In the photo below you get a hint of all the sparkle and shine in this pretty patterned paper.


I have the remaining piece of this patterned paper and I'm very tempted to whip up another identical holiday Lever Card. On the other hand, it might be perfect to use with Karen Burniston's House Pivot Panels as well. Ahhh the decisions a crafter must make. Ha!

Supplies:
Patterned paper - Stampin' Up
Foil card stock - Stampin' Up
Lever Card base die set - Our Daily Bread Designs
Joy die - Taylored Expressions
Merry Christmas stamp - Simon Says Stamp
White card stock
Label punch - Stampin' Up
1062 House Pivot Panel (snowflakes) - Karen Burniston
Pine Sprig - Cricut cut, from my stash

Thanks for stopping by today

Wednesday, 5 December 2018

Pretty Poinsettia Card

Good morning friends

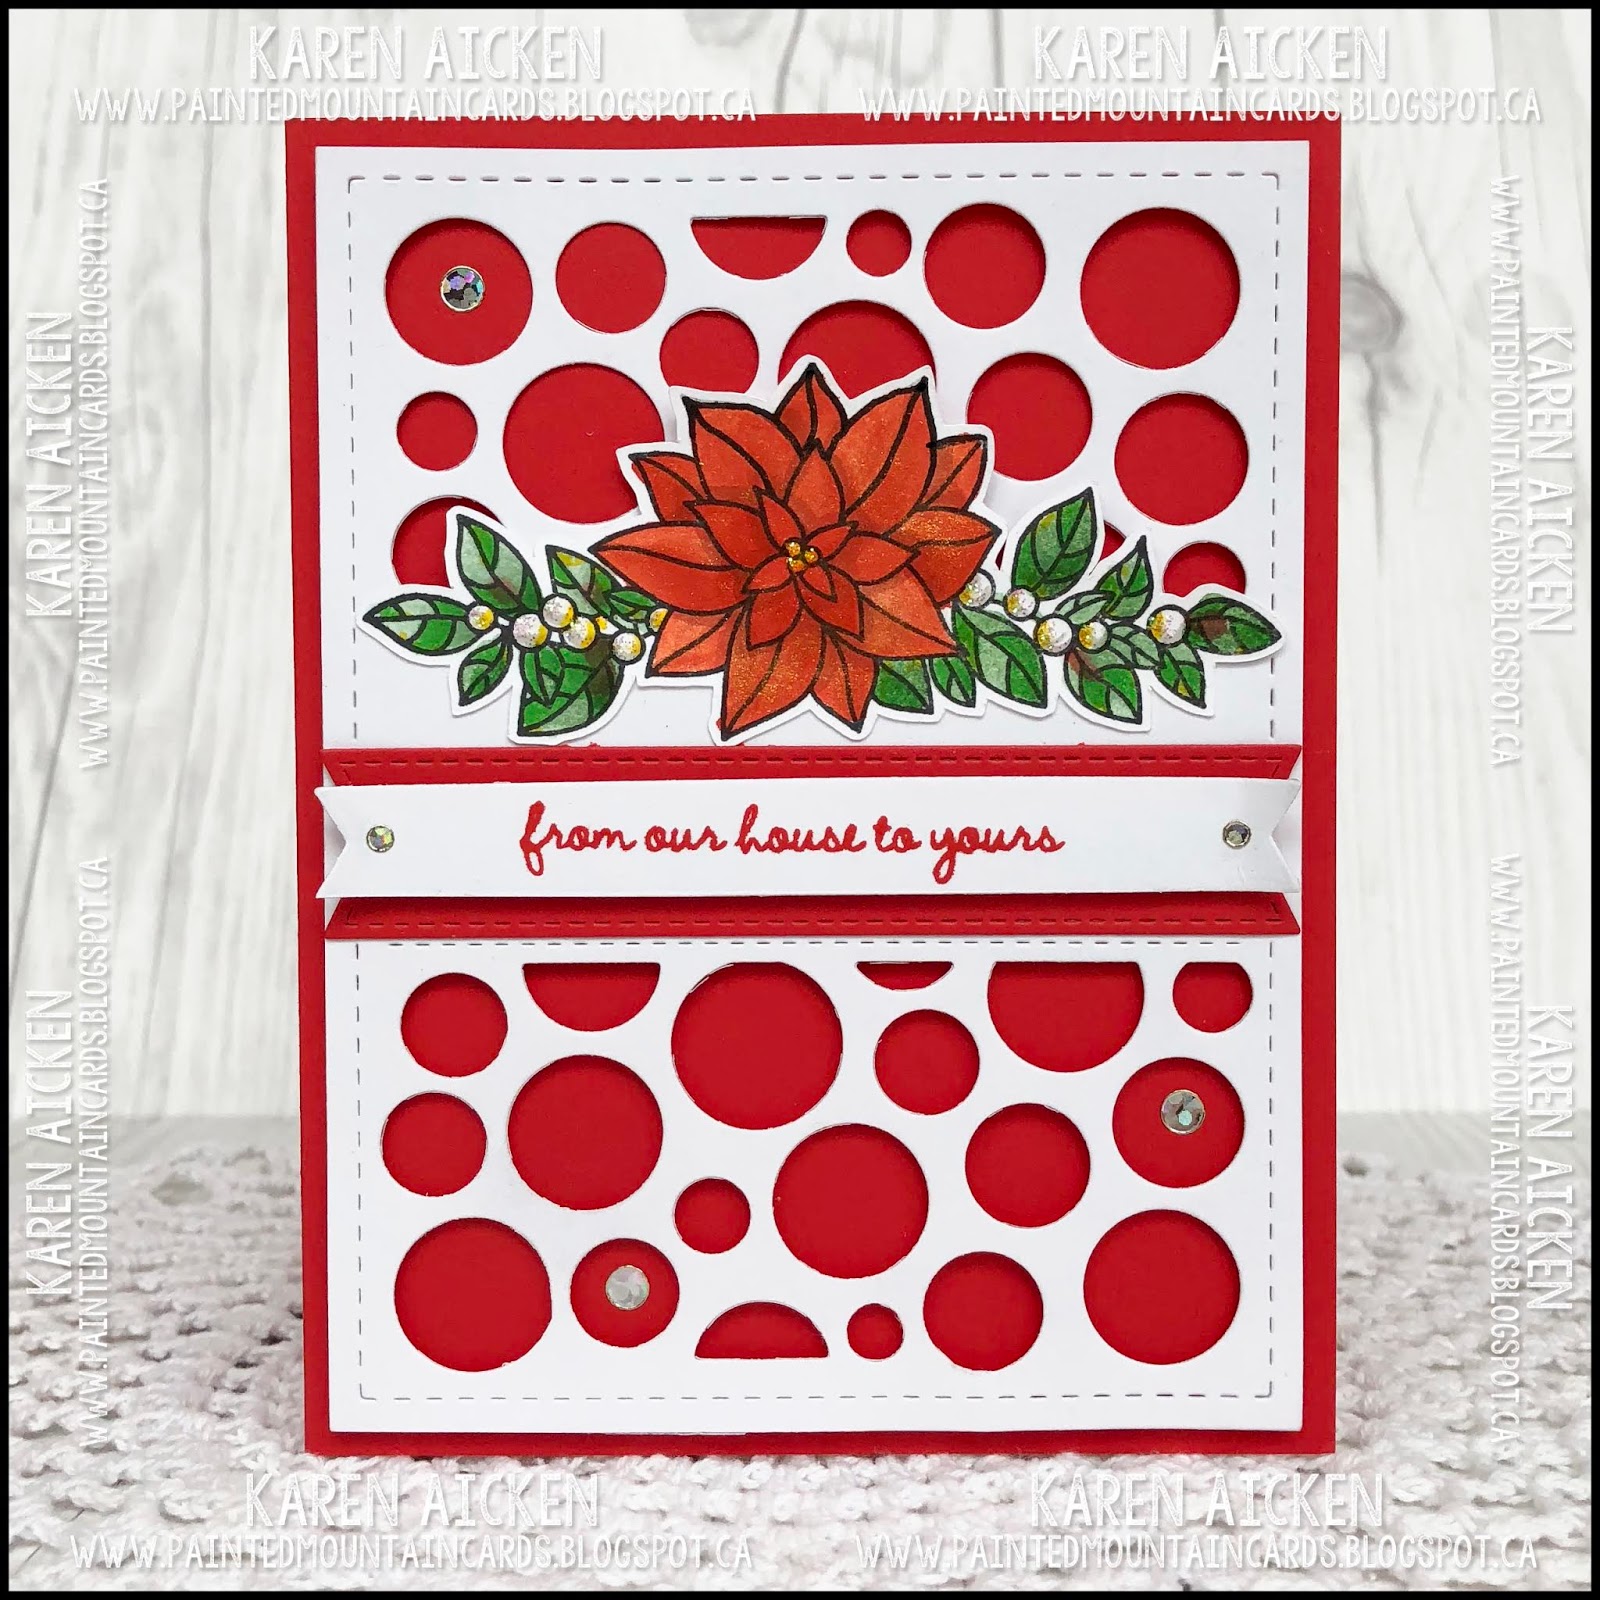
When the Stampin' Up Holiday catalogue arrived, the Peaceful Poinsettia bundle was the first thing I added to my shopping cart. Give me a pretty floral spray with coordinating dies and I'm sold. Never mind that this set comes with a lot more than just the spray I used here.


Yikes - the light really made this flower look gold in the photo below - in real life it is just a really pretty shimmer. I used a water brush and dye inks to paint the floral spray, then added some shimmer to the berries and bloom.

While the Circle Panel die is not a holiday die, I think it works well for many different seasons and occasions. The red card stock is a new shade by Stampin' Up called Poppy Parade and I am a fan!


Finally, here is a peek at the inside:


Supplies:
Red and white card stocks
From our house stamp - unknown
Stamps - Stampin' Up
Circle Panel Background die - Your Next Stamp
Stickles
Fishtail Banner dies - MFT Stamps
Metallic gem stickers - Stampendous
Nuvo gold glitter pen
Stitched rectangle dies - Elizabeth Craft Deisgns
Inside stamp - Stampin' Up
Crayola markers
Water Brush

Thanks for stopping by today

Tuesday, 4 December 2018

Holiday Sleigh Pop-Up Card for the Designer Challenge

Good morning friends

Welcome to Karen Burniston's December 2018 Designer Challenge, where the theme is: "INK IT!" - incorporate inks (or paints, or sprays, or pastes) into a card of any theme.

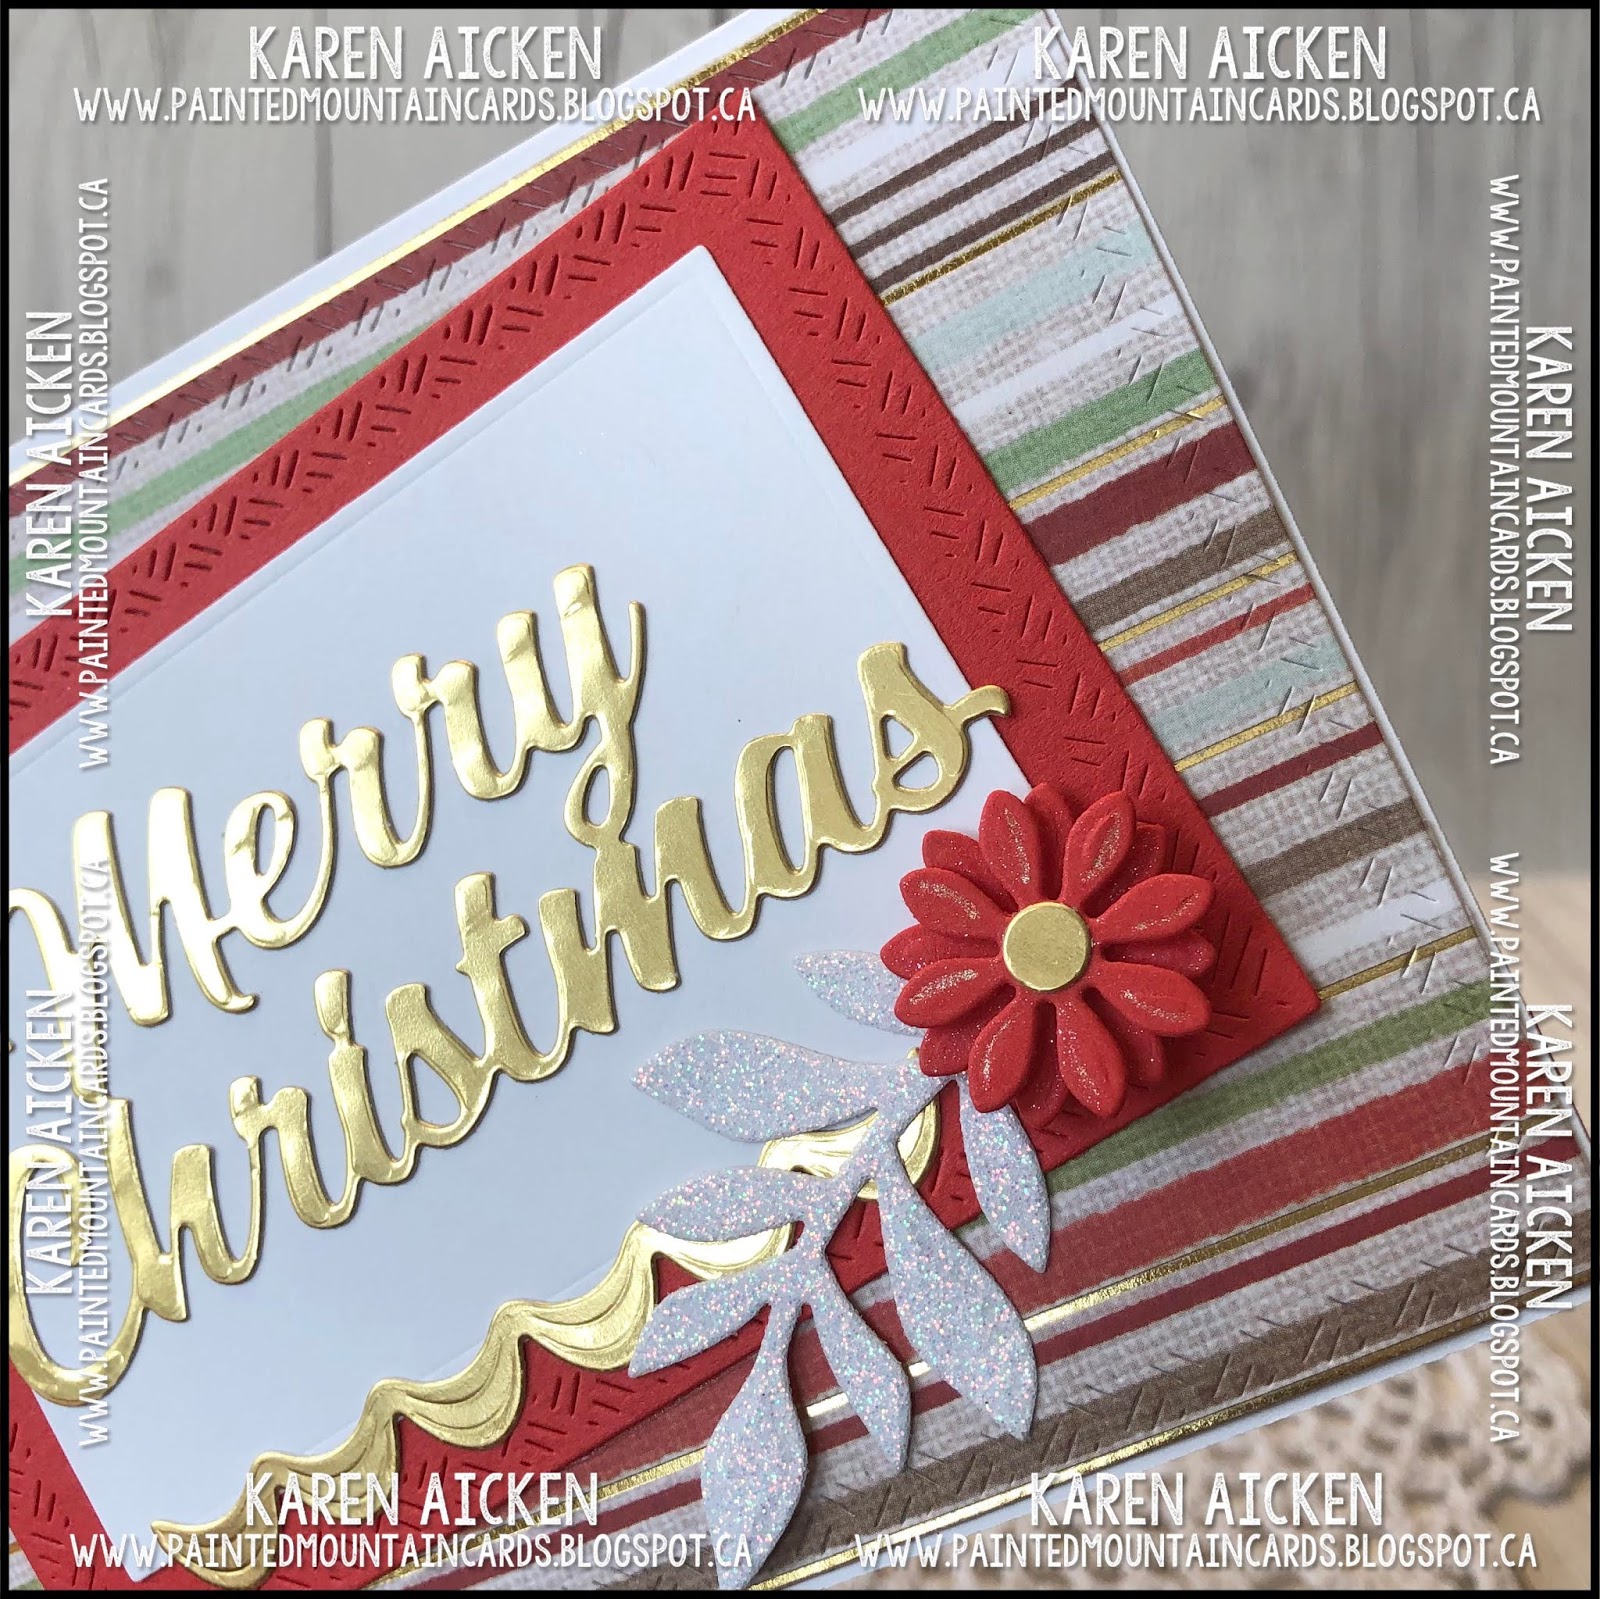
I didn't add any inking to the front of my card, instead using some of the same elements as I have inside the card to tie it all together.


Both the Sprig and the layered flower are from the Flower Pot Pop-Up die sets, and the pretty scalloped element is from the Cake Trims. I use those a lot for different borders etc - love getting more mileage from my dies by using them in different ways.


Inside I followed the assembly instructions Karen Burniston shared in her video to make the Sleigh into a 90º Pop-Up instead of a Pop-Stand. (Video linked at the end of the post).  For the INKING part of the challenge, I used a stencil by Pink & Main, with gold shimmer paint on the sleigh, and Distress Oxide ink on the inner card.


The sleigh is filled with sprigs, flowers and gifts! I used red card stock and the sparkle comes from the white glitter paper and gold foil card stock.


More Cake Trims inside (including the little bows) and the scalloped edge was cut with a die from the  Tropical Scene.


It's also fun to mix and match dies from all Karen Burniston's die sets - and my signing block was created using the scalloped rectangle from the Twist Panel Pop-Up with a cardinal from the Christmas Tree Pop-Up die sets.


You can check out what the rest of the design team came up with for the challenge - their blogs are linked on the right. Karen Burniston will have a group post and her project tomorrow (Wednesday) on HER BLOG.

Be sure to check out KB's assembly video for different ways to use the Sleigh Pop-Up to create a variety of looks!  As with all of Karen Burniston's Pop-Up dies, she has assembly video is right on the product page.  Sleigh Pop-Up & Assembly Video

Supplies:
Red, black and white card stock
Gold foil card stock - Stampin' Up
Stencil - Pink and Main
1021 Sleigh Pop-Up - Karen Burniston
1029 Cake Trims - Karen Burniston
1038 Tropical Scene (Stitched scalloped border) - Karen Burniston
Gold shimmer paint - Stampin' Up
Copic markers and Stampin' Up Blends
Sakura black glaze pen
Nuvo glitter brush pen
1010 Flower Pot Pop-Up - Karen Burniston
White glimmer paper - Stampin' Up
1059 Autumn Elements (Sprig) - Karen Burniston
1009 Twist Panel Pop-Up (rectangles) - Karen Burniston
Stamps - Stampin' Up
1020 Christmas Tree Pop-Up (Cardinal) - Karen Burniston
1054 Rectangles Crosshatch - Karen Burniston
1065 Merry Christmas - Karen Burniston
Black fine point marker
Sakura white gel pen
Sakura Stardust pen
Nuvo Glitter pen

Thanks for stopping by today

Monday, 3 December 2018

Metallic Deer Diorama Card

Good morning friends

Today's share is another Diorama card, made using dies from Our Daily Bread Designs and this pretty foiled patterned paper from Stampin' Up. I also used some dies by Karen Burniston for embellishing the layers.


I just love how the light catches on al the foil bits. Diorama cards are another fun way to use Karen Burniston's scene and border dies!


On the back side, I gold embossed the greeting and added another border from the Outdoor Edges die set along with a snowflake cut from foil card stock.


The card folds down completely flat for mailing in an A6 envelope. 


Supplies:
Diorama with Layers die set - Our Daily Bread Designs
Patterned paper - Stampin' Up
White card stock
Stamp - Hero Arts
Gold embossing powder
Champagne foil card stock - Stampin' Up
1045 Outdoor Scene - Karen Burniston
1065 Merry Christmas - Karen Burniston
1012 Snowman Twist Circle (snowflakes) - Karen Burniston
Card size - 6 x 4-1/2"


Thanks for stopping by today

Sunday, 2 December 2018

Hanukkuh Shaker Card

Good morning friends

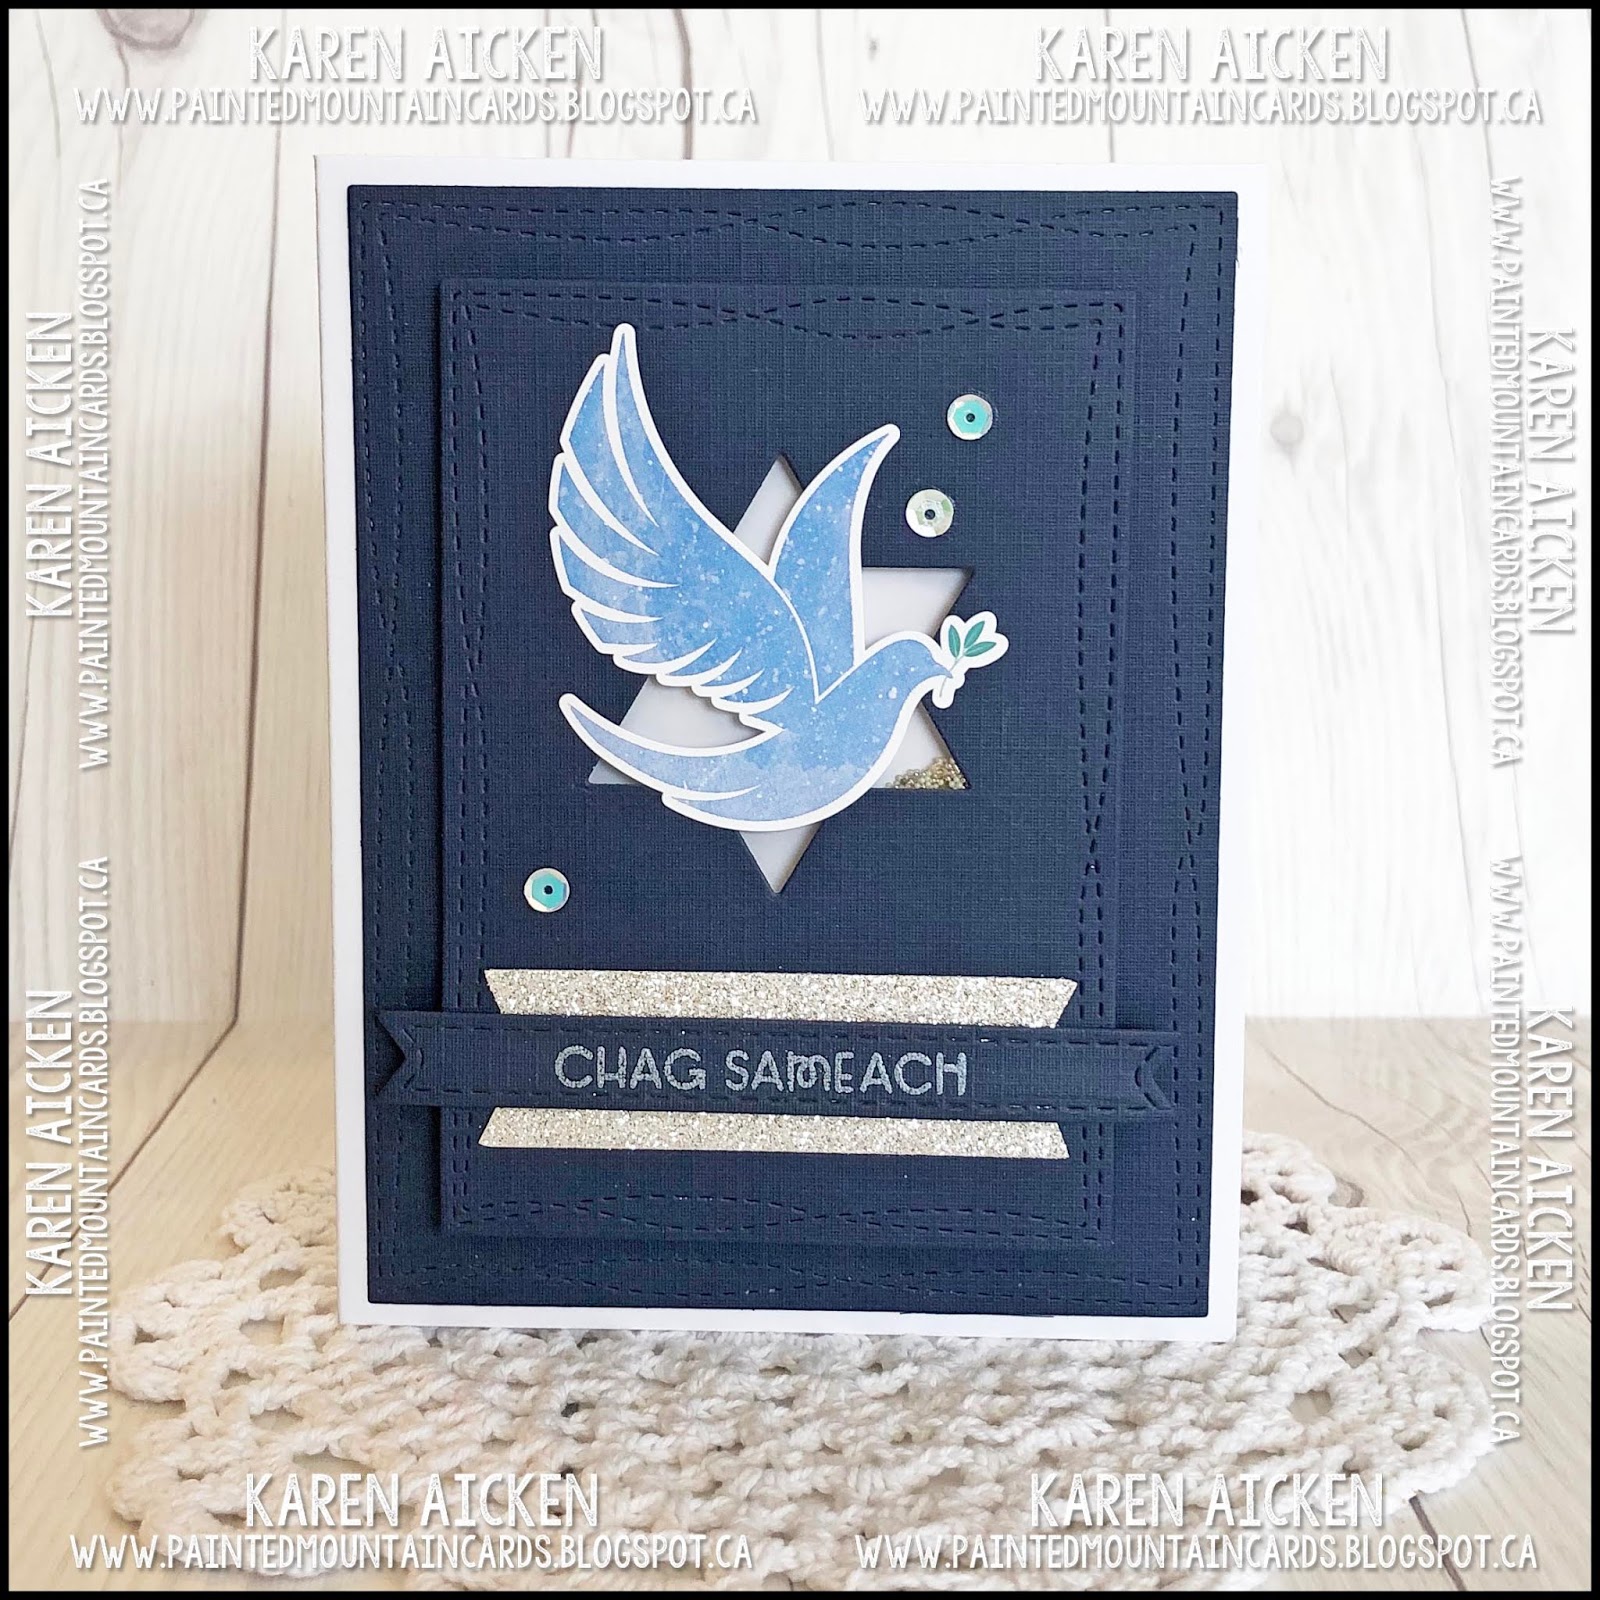
Today's card is a shaker card I made for our middle daughter and family, who celebrate Hanukkah.


I am enjoying making shaker cards these days so that is what is on the card front. I constructed it from a smaller piece of the navy card stock them adhered it to the card front. I do love dimension on my cards!


While there aren't a ton of Jewish themed stamps and dies around out there, I'm always happy to find some. This Star of David die has been in my collection for several years, and I love that Paper Smooches has some Hanukkah items too.


I lightly stamped the words 'shake me' inside the Star of David die cut inside, since the Dove sticker covers up a lot of the open space on the front shaker.

Supplies:
Navy and white card stocks
Transparency scrap
Wonky stitched rectangle die - MFT Stamps
Star of David die - MFT Stamps
Fun foam
Silver pearl embossing powder
Word stamps - Paper Smooches
Filler - various beads, sequins etc
Stitched fishtail banner die - Elizabeth Craft Designs
Sequins - Spiegelmom Scraps
Dreidel stamp - Lawn Fawn
'shake me' stamp - Lawn Fawn
Dove sticker - Photo Play

Thanks for stopping by today

Saturday, 1 December 2018

C4C463 Christmas Tree Pop-Up Card.

Good morning friends

It's Saturday and that means a new challenge at the Crazy4Challenges Blog. Our December hostess is Frances Byrne and this is her challenge:  

"It’s a Tremendous Time of the Year - It's December first and for me that means it is time to decorate the Christmas tree. For our challenge this week, create a card that features a tree. Your card can include a Christmas tree, pine branches of a Christmas tree or even a tree in a summer or winter setting."


Of course I had to make a Pop-Up card, and chose this patterned paper from my stash that has gold foiled bits printed on it. I loved this cheery bird section of the 12 x 12" sheet, so trimmed that down to fit on the front.


The Cake Trims is also a die set I get quite a lot of use out of - I cut a couple of them from gold foil card stock and added them to my card. The bow die is from the Sleigh Pop-Up, and I combined the 'hello' and 'Christmas' dies for the greeting on the front.


Inside I used the Christmas Tree Pop-UP and added the sweet deer from the new Christmas Animals.


This open holly die is by Stampin' Up and it makes such a nice embellishment for holiday cards. I inlay white glittered berries into the gold holly piece for even more sparkle and shine.


Check out the C4C blog to see how the Crazies have been inspired by the challenge. We'd  love to see your take on it, so be sure to stop by the Crazy 4 Challenges blog and link up your creations. If you are uploading to an online gallery, please use the keyword C4C463.


Supplies:

Patterned paper - DCWV
Green, Kraft, red and brown card stocks
Sakura white gel pen
1020 Christmas Tree Pop-Up - Karen Burniston
Wonky Circle die - Your Next Stamp
1061 Christmas Animals - Karen Burniston
Black fine point marker
1029 Cake Trims - Karen Burniston
Gold foil card stock - Stampin' Up
1021 Sleigh Pop-Up (gifts) - Karen Burniston
1022 Word Set 3 Holiday - Karen Burniston
1002 Word Set 1 Gretings - Karen Burniston
Copic markers
Merry little Christmas stamp & Holly die - Peaceful Poinsettia, Stampin' Up
Glimmer paper (scraps) - Stampin' Up
Card size - Standard A2


Thanks for stopping by today