Friday, 13 January 2023

Dog Themed Gatefold Card


It's Fun Fold Friday here on my blog! This card started out as a Gatefold, but I went off the rails a bit. 😂  After creating the teal gatefold card base, I grabbed a water coloured looking notecard from my stash. I cut the front away from the solid white back with a stitched rectangle and did the stamping. Then I realized the panel was going to be pretty big for my card base.


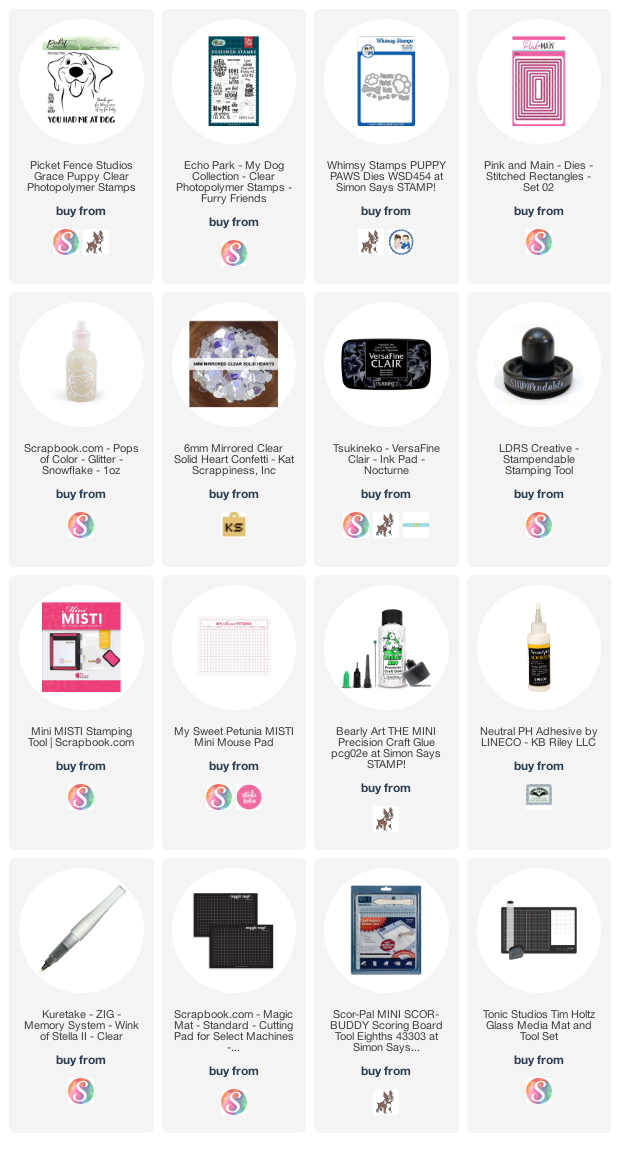
While I could have created a 5 x 7" gatefold card instead, I decided to persevere and this is what I came up with. I love the dog image from Picket Fence Studios, and the funny sentiment is from Riley & Company - their Funny Bones line. I had ordered several Funny Bones stamps back in early November. 


Inside is where you can see the teal gatefold. I also added a magnetic closure! One magnet is on the front and the bump is hidden with a heart sequin. The corresponding magnet is under the dog bone on the right flap.


The inside center panel was adhered with a cardstock spring - these are from Sam Calcott - she uses them in several of her videos. I used a long one down the centre of the panel so it has some movement.

I hadn't kept track of which of her many video's I got it from, so spent some time yesterday morning searching through them to find a link for you. Whew - here it is!  


A couple of times last year, I was asked how many cards I make but I didn't have a clear number. Since a lot of my posts include more than a single card or project, I thought it would be fun to keep track this year.
2023 Tally:  23 Cards

Additional Supplies:
White cardstock
Water coloured looking note card - Hobby Lobby
Small Magnets - K&J Magnetics
Teal cardstock
Paw Print - Dog Happiness, Frantic Stamper
Brush Markers

This blog uses affiliate links whenever possible. This means, if you make a purchase through one of my affiliate links that you pay the same amount but I may receive a small commission from your purchase. I only link products that I own, love and use for my card making and not every link below is an affiliate one! 😊


Thursday, 12 January 2023

Hello Butterfly Easel Card


Today's card is the first one in my series 'Throwback Fun Fold Dies'. As I mentioned in **THIS** post, I am going to start running several different monthly series this year. That will allow me to use a lot more of the stamps & dies already in my craft room and share even more ideas with you.

The die I used is called "Lively Stand Up" card, and I bought it many years ago from the Stamps of Life. Since it creates an A2 sized Easel Card I carefully lined up the die on a printed & foiled A2 notecard also from my stash. This card was truly a 'stash buster', as even the butterfly on the front is from an Ideology package I've had for years.
 

While the die cuts a small notch that you would normally tuck the front into to make it 'stand up', I prefer adding a bumper raised up with foam tape. That was cut from another one of the printed/foiled note cards in the same package. I added some brown patterned paper and a few gems as well as the die cut hello. That die was in the same package as the Lively Stand Up.


Inside you can see the remainder of that second note card panel and a stamped sentiment. 


... another look at the pretty foiling from the note cards ...

A couple of times last year, I was asked how many cards I make but I didn't have a clear number. Since a lot of my posts include more than a single card or project, I thought it would be fun to keep track this year. 
2023 Tally:  22 Cards

Additional Supplies
Lively Stand Up - the Stamps of Life (retired)
Printed Card Foiled - Hobby Lobby
Brown patterned paper - Natural Botanical, Hobby Lobby
Lively Frameless - Sizzix (retired)
Butterfly - Tim Holtz Ideology 93554

This blog uses affiliate links whenever possible. This means, if you make a purchase through one of my affiliate links that you pay the same amount but I may receive a small commission from your purchase. I only link products that I own, love and use for my card making and not every link below is an affiliate one! 😊

Wednesday, 11 January 2023

Winter Shaker & Pop Up Card


This fun card will be my last play with the "Magic of Winter' collection by Echo Park. This was sent to me by Scrap 'N Stamp Canada for our December 3rd Video Hop, which you can see HERE. I have used it a LOT - but I am finished with winter and snow and ready to move onto to brighter colours now. 

I have a walkthrough of my card on YouTube HERE   


My card started with the Full Front Shaker, layered with the patterned paper onto a top folding 7 x 5" card. While that could have been enough for the card, I couldn't help adding a pop up inside. 😊


I added the Little Labels Pop Up, cutting it from a piece of the patterned paper and adding ephemera and stickers from the collection. 


LOL - this sentiment is very true for me. I am NOT a fan of winter or being cold.


A couple of times recently, I was asked how many cards I make but I didn't have a clear number. Since a lot of my posts include more than a single card or project, I thought it would be fun to keep track this year. 
2023 Tally: 21 Cards


Additional Supplies:
5 x 7" card and envy
Sequins and filler - stash

This blog uses affiliate links whenever possible. This means, if you make a purchase through one of my affiliate links that you pay the same amount but I may receive a small commission from your purchase. I only link products that I own, love and use for my card making and not every link below is an affiliate one! 😊

Tuesday, 10 January 2023

Wintery Gift Card Holder


I haven't purchased many crafting supplies these past few months, but I did order this Gift Card Holder die set by Stampendous at the end of October. I love making Gift Card Holders and this die set is pretty cool. They call it a Mini Slimline but their Mini Slimline size is 3 x 6". If this had been just a card die it would have been a hard pass for me, but since it was for a Gift Card Holder I went for it. And I'm really enjoying it!

For the card base, you simply fold a 6 x 6" piece of patterned in half. Ha. I think I will start rounding the corners using a punch, which is a detail I thought of after I made up a couple of these to give out over the holidays.

The die set creates the layering pieces AND the little envelope as well as a pop up to hold the gift card. Since I'm still playing with the collection sent to me by Scrap 'n Stamp Canada, I used those papers, stickers and ephemera for this one. 


Below is what the front of the envelope looks like. 


You can see the pop up inside, that creates a pocket in the fold to hold a gift card.


I was asked how many cards I make but I didn't have a clear number. Since a lot of my posts include more than a single card or project, I thought it would be fun to keep track this year. 
2023 Tally: 20 Cards


Additional Supplies:
White cardstock

This blog uses affiliate links whenever possible. This means, if you make a purchase through one of my affiliate links that you pay the same amount but I may receive a small commission from your purchase. I only link products that I own, love and use for my card making and not every link below is an affiliate one! 😊

Monday, 9 January 2023

Pop Up Camping Easel Card


It's Masculine Card Monday here on my blog and today I'm sharing the Birthday card I made for my hubby. I just love the water coloured mountain/nature scenes in this patterned paper. The Happy Birthday and Happy Birthday Shadow (by Karen Burniston) are popped up with foam tape, and I added a die cut tree-line for even more trees.


Inside, the new Bam Box allows the camper to spring up and is also the bumper that keeps the card front in the easel position. I have had the camper die for over a year, and can't believe this is the first time I've used it. Sheesh ... 


Inside, I added another panel of the patterned paper - this one features a campfire in the foreground with mountains in the distance. I stamped an older Funny Bones sentiment from my stash. 

This card was very meaningful, since not only was it a milestone birthday for my hubby, we had just bought a camper!! So the sentiment, while funny and true - hit home as our bank account is still in shock. Ha.

The card started out as 5 x 6.5" - it was a card and envelope set I picked up at Michaels many years ago - but I trimmed it to 5 x 6.25" as that worked better with the 6 x 6" patterned paper.


I rooted through my embellishments looking for a small dog sticker, but most of the ones I had were too big for the camper. However - the Doodlebug Designs one fit and it was blue so matched the card!


... one more look ...   I gave the card to him on his birthday last month, and it is still out on display. He really liked it!


A couple of times recently, I was asked how many cards I make but I didn't have a clear number. Since a lot of my posts include more than a single card or project, I thought it would be fun to keep track this year. 
2023 Tally: 19 Cards

Additional Supplies:
5 x 6.5" Card and envelope - Michaels
White cardstock
Camping sentiment - Funny Bones R & Co
Treeline die - Tim Holtz/Sizzix 
Dog - Puppy Love, Shape Sprinkles, Doodlebug Designs
Black cardstock scrap

This blog uses affiliate links whenever possible. This means, if you make a purchase through one of my affiliate links that you pay the same amount but I may receive a small commission from your purchase. I only link products that I own, love and use for my card making and not every link below is an affiliate one! 😊

Friday, 6 January 2023

Platform Pop Up for the New Year


I have decided to change things up on my blog this year, and run several different monthly series. Today is my first share in my "Platform Pop Up" Series. I have more information on my plans later in the post. Since it's Friday, this card also works for Fun Fold Friday here on my blog!


The more I play with this die set, the more I enjoy it. I especially like how easily it goes together, and that you can really keep the bulk down while still having a dynamic pop up that fits in an envelope for mailing.

This patterned paper was from Stampin' Up and has a cool finish on it. It's not actually sparkly, but when it catches the light it does have a shine. The Happy New Year is one I have had for several years, originally it was from the Stamps of Life.


... one more look ...


Why choose to do several different monthly series? I spent some time over the holidays thinking about my blog, what I create and what I like and don't like about how I've been doing things. I'm mostly happy about everything, but I don't like having great supplies that don't get enough use! Our supplies - dies especially - are an investment, and I have certain criteria for most of my die purchases. 

First, I want dies that are versatile & timeless. I want to be able to use them for multiple occasions and for many years. I don't really care about trends, in fact I'm usually behind on purchases that others got as soon as they were released. I've never been one to follow companies, anxiously awaiting their newest release and I don't think I've ever hit the "BUY ALL" button with a new release as lots of crafters do. 

Whatever supplies I have purchased fit that criteria. The problem is, that I'm not getting to actually USE them as much as I thought I would when I purchased them. Health, Family and Design Team work will always come first, but when I really thought about it - there should also be enough time to use the dies that I loved enough to buy. All those fun, interactive dies that I have notebooks of ideas for! It doesn't matter that many have been retired or discontinued - I spent good money on them so I could use them over the years and now I am going to do just that.

I plan on running a series for the Platform Pop Up, the Magic Iris (both by Lawn Fawn), Shaped Cards, 12 Months of Christmas, Throwback Fun Fold Dies, New Fun Folds etc. I know that travel and life might throw a wrench into a post here or there, but hopefully at the end of 2023 I will have shared 12 different cards in each of those Series. I will be getting good use out of my dies, be able to share ideas (which I love to do), and still have time to do my Design Team work. 

While I won't have set days for when I will be publishing a new post for any of the Series, I will create labels on the right side of my blog to make it easy for searching. I am really excited about this, and I am already feeling more creative and inspired.

 I'll be back again next month with another platform pop up creation!

I am including a running tally on how many cards I make this year, not counting the ones I don't share here on my blog.  I donate 25 Birthday Cards each month to my Mom's old nursing home and don't often take photos or post the majority of those. A couple of times recently, I was asked how many cards I make but I didn't have a clear number. Since a lot of my posts include more than a single card or project, I thought it would be fun to keep track this year. 

2023 Tally: 18 cards

Additional Supplies:
Patterned paper - Metallic & Shimmer, 6" - Stampin' Up
White cardstock
Stitched Stars - the Stamps of Life
Happy New Year - the Stamps of Life

This blog uses affiliate links whenever possible. This means, if you make a purchase through one of my affiliate links that you pay the same amount but I may receive a small commission from your purchase. I only link products that I own, love and use for my card making and not every link below is an affiliate one! 😊

Thursday, 5 January 2023

Banner Dog Birthday Card


Using several dies by Karen Burniston, I created this birthday card for a friend. It fits perfectly in a standard A2 envelope and will mail for a single stamp. The Banners Crosshatch dies have alternating crosshatch and straight edges, and the cute dog is from the Doghouse Tiny House Add On. 


I made the dog a little more festive with a party hat and balloons from the Birthday Charms set. I chose soft colours and subtle prints for the card, which actually carries a punch inside! 


Back in November I had purchased several new Funny Bones stamps from Riley & Company and this is one of them. I thought it would be cute to have as a fun surprise inside a card. I used a 1 x 4" strip of white cardstock, scored at 1/2" as a hinge to connect the front and back banners.


I am going to include a running tally on how many cards I make this year, not counting the ones I don't share on my blog.  I donate 25 Birthday Cards each month to my Mom's old nursing home and don't often take photos or post the majority of those. A couple of times recently, I was asked how many cards I make but I didn't have a clear number. Since a lot of my posts include more than a single card or project, I thought it would be fun to keep track this year. 
2023 Tally: 17 cards            

Additional Supplies
Patterned paper - Day Dreamer, Dear Lizzy
White cardstock
Black marker
Funny Bones Stamp - Riley & Company

This blog uses affiliate links whenever possible. This means, if you make a purchase through one of my affiliate links that you pay the same amount but I may receive a small commission from your purchase. I only link products that I own, love and use for my card making and not every link below is an affiliate one! 😊

Wednesday, 4 January 2023

Cake & Balloons Birthday Card


Today I'm sharing the card I made for my Mother-in-law who celebrated a Birthday last month. Normally my cards start out with the patterned paper, but this one started with the decorative elements! Pinkfresh Studio had come out with a new release that included these beautiful balloons/cakes etc. My heart went pitter patter - I love balloons!  Of course, there is an entire collection - along with the Washi Tape, there is a die to cut out an entire repeat with a single pass through your die cutter, a stamp that stamps the whole repeat and layering stencils. Whew. 

I added them to my online cart. I emptied the cart. I added them to my cart. I emptied them. Multiple times. The issue was all me - I have been doing really good at stemming the flow of new crafty goodies into my craft room. Finally I realized I didn't need to buy it all. It was the Washi Tape that I loved so that is what I ended up buying. Just a single roll of the Washi Tape. It felt so good!

Over several evenings I added the Washi Tape to white cardstock panels, then fussy cut a few of the repeats so the elements would be ready for card making. The die would have made this process go faster and it's still tempting to go ahead and buy it. But so far I'm holding firm. 😳 I just adore the Washi Tape from Pinkfresh Studios - especially the ones with gold foil highlights. 


I chose the Label Charm Pop up die set by Karen Burniston for the card base, and added gold foiled sentiments, sequins and gold Glitter Dots.


The element on the front label pivots to the inside as the card opens. I love her Circle Charm Pop Up so was really happy when she came out with this one.


When I was adding the Washi Tape to cardstock, I added a few repeats to vellum so they are nice and sheer - just like a real balloon. ❤️


This card folds completely flat and mailed for a single stamp.

I am going to include a running tally on how many cards I make this year, not counting the ones I don't share on my blog.  I donate 25 Birthday Cards each month to my Mom's old nursing home and don't often take photos or post the majority of those. A couple of times recently, I was asked how many cards I make but I didn't have a clear number. Since a lot of my posts include more than a single card or project, I thought it would be fun to keep track this year. 
2023 Tally so far: 16 Cards

Additional Supplies:
Wide A2 card (5.5 x 4.25")
White cardstock
Sequins - stash
Patterned paper - Blank Canvas, First Edition Papers (old, from my stash)

This blog uses affiliate links whenever possible. This means, if you make a purchase through one of my affiliate links that you pay the same amount but I may receive a small commission from your purchase. I only link products that I own, love and use for my card making and not every link below is an affiliate one! 😊

Tuesday, 3 January 2023

Pop Up Wedding Card


Welcome to Karen Burniston's January 2023 Designer Challenge where she challenged her Design Team with the theme: "RUBBER BAND POP-UPS" - use any of the pop-up dies that require a rubber band for a card or project of any theme. (Ball dies, Surprise Cube, Bam Box)." I created a 'non traditional' wedding card for a couple who had a 'non traditional 'wedding last month!

Inside I used the Surprise Cube to animate the word CONGRATS, along with a pair of champagne glasses and hearts. My card is held closed with two magnets on the right flap, which is fun. I am going to have to order more of those magnets, as I know I will get a lot of use out of both the Surprise Cube and the new Bam Box in my card making.


My card started out as a 5 x 7" card, but I wanted to try this flap idea so the finished size is actually 4 x 7". I scored 1" from the inside right edge to form the flap, and trimmed 1-1/8" off the card front on the right edge.  I'm happy enough with the card, but next time I would just use one of Karen Burniston's flap dies. Now I know! 

You may notice my Surprise Cube looks a little different. I kept the sides folded to the OUTSIDE instead of tucking them in. Which of course meant they didn't fit inside without trimming a tiny bit off of those four outer corners. I thought I'd made a big mistake, but didn't realize it until after the card was in the mail. Karen B assured me it was fine, just another look for the Surprise Cube. Whew!


The cube folds down flat, then pops up when you open up the flap.

I am going to include a running tally on how many cards I make this year, not counting the ones I don't share here on my blog.  I donate 25 Birthday Cards each month to my Mom's old nursing home and don't often take photos or post the majority of those. A couple of times recently, I was asked how many cards I make but I didn't have a clear number. Since a lot of my posts include more than a single card or project, I thought it would be fun to keep track this year. 

2023 Tally: 15 Cards

Additional Supplies:
5 x 7" card and envelope
White cardstock
4 small magnets - K&J Magnetics
Gold Thread
Pink Copic marker

This blog uses affiliate links whenever possible. This means, if you make a purchase through one of my affiliate links that you pay the same amount but I may receive a small commission from your purchase. I only link products that I own, love and use for my card making and not every link below is an affiliate one! 😊

Monday, 2 January 2023

January 2023 Sheetload of Cards


It's the 2nd of the month, which means it's time for the Collaboration Team to share the new Sheetload of Cards!  This month we are making Mini Slimline cards, and by adding a third 12 x 12" sheet of patterned paper I was able to crate 12 cards instead of 8. 

I also used the leftover papers to create two bonus cards which are A2 inside. I have all the details on YouTube:   


I just took pictures of two of the three versions of my Sheetload of Cards.


The insides of the cards are all done the same, and I used my MISTI to make quick work of the stamping.

You can find out how to download your own Sheetload of Cards in the description area of my video!


I am going to include a running tally on how many cards I make this year, not counting the ones I don't share here on my blog.  I donate 25 Birthday Cards each month to my Mom's old nursing home and don't often take photos or post the majority of those. A couple of times recently, I was asked how many cards I make but I didn't have a clear number. Since a lot of my posts include more than a single card or project, I thought it would be fun to keep track this year. 
2023 Tally: 14 Cards (today's count includes the 12 shown in the top photo and the two bonus cards I shared in the video).

Additional Supplies:
Patterned paper - Lime Twist, My Minds Eye (retired)
Dark Green Cardstock
Stitched Star dies - the Stamps of Life
Sentiment -  Lots of Birthday2Stamp, the Stamps of Life
Star stamps - Seeing Stars, Paper Smooches
Bonanza Buddies - Stampin' Up (retired)
LJD Birthday Greetings - MFT Stamps (retired)
Orange fine point marker
White cardstock

This blog uses affiliate links whenever possible. This means, if you make a purchase through one of my affiliate links that you pay the same amount but I may receive a small commission from your purchase. I only link products that I own, love and use for my card making and not every link below is an affiliate one! 😊